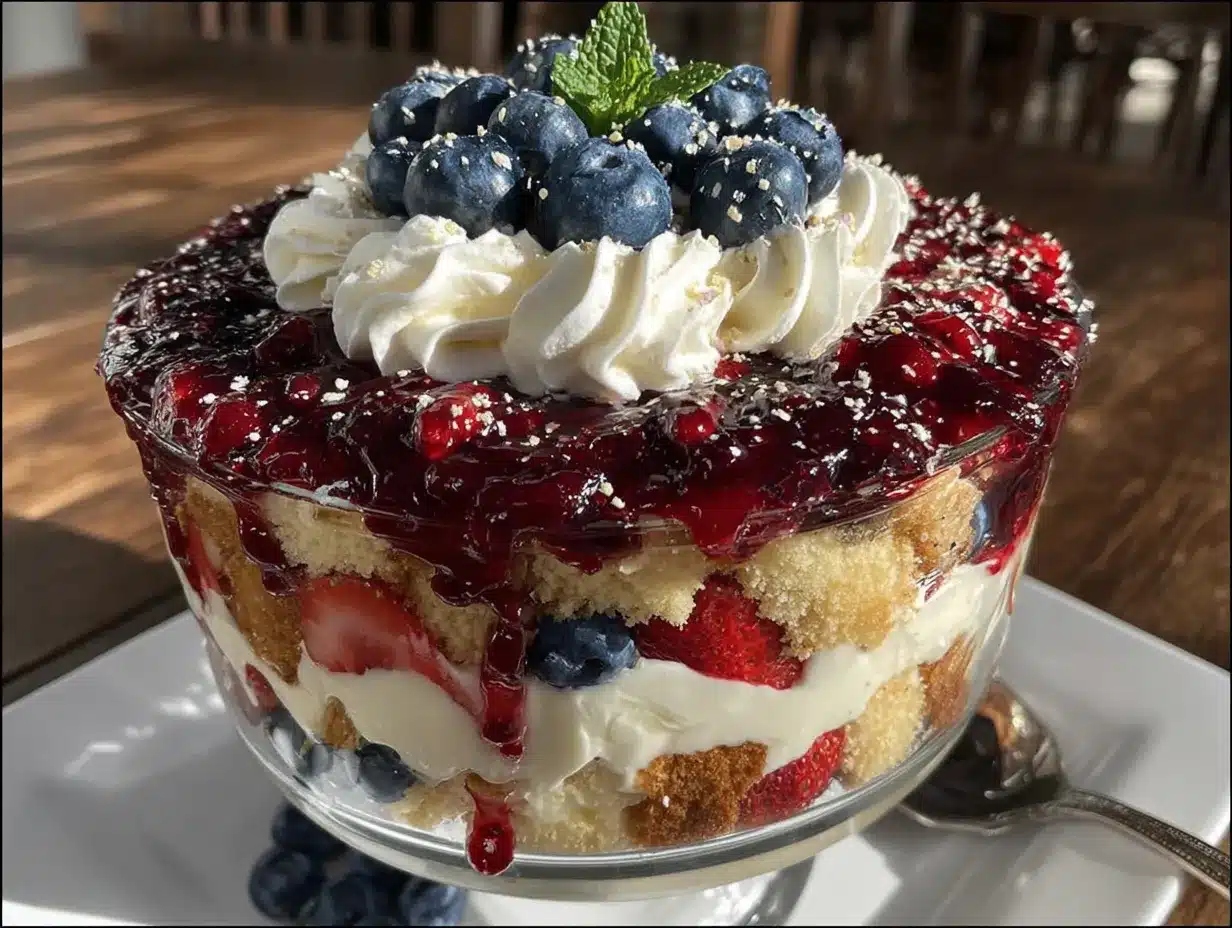
The last spoon scraped the bottom of the glass dish, and my sister-in-law looked up at me with that specific look — the one that says I need this recipe right now. I had brought this Red White and Blueberry Icebox Trifle to our Fourth of July barbecue mostly because I needed a dessert that wouldn’t wilt in the afternoon heat. No baking, no oven turning my kitchen into a sauna. Honestly, I wasn’t prepared for the reaction it got. People who swore they weren’t dessert people went back for seconds. Kids who usually just grabbed a popsicle stood in line with their little bowls, waiting for another scoop.
Here’s the thing about this particular trifle — it looks like you spent hours fussing over it, but the reality is much simpler. Layers of creamy vanilla pudding, juicy strawberries, and sweet blueberries stack up between soft cubes of pound cake, all held together with a cloud of whipped topping. It’s the kind of dessert that feels special without requiring a pastry degree or a stand mixer.
And honestly, that’s my favorite kind of recipe. The one that lets you show up to the party looking like a rockstar when all you did was layer things in a bowl and let the fridge do the work. This Red White and Blueberry Icebox Trifle has become my go-to for every summer gathering, from Memorial Day cookouts to lazy Sunday barbecues. It’s forgiving, it’s flexible, and it tastes even better the next day — which is rare for a no-bake dessert.
Why You’ll Love This Recipe
This isn’t just another pretty dessert. This trifle delivers on flavor, texture, and that satisfying feeling of pulling off something impressive with minimal effort.
- No-Bake & Stress-Free: No oven required. No standing over a hot stove. Just layer, chill, and serve. Perfect for those sweltering summer days when turning on the oven feels like a crime.
- Simple Ingredients: You can find everything at your regular grocery store. Pound cake, instant pudding mix, fresh berries, and whipped topping — that’s basically the whole list.
- Perfect for Patriotic Holidays: The red strawberries, white cream layers, and blueberries make this a natural fit for the Fourth of July, Memorial Day, or any celebration that calls for red, white, and blue.
- Crowd-Pleaser: I’ve served this to everyone from picky toddlers to my aunt who claims she doesn’t like sweets. Empty bowls every single time.
- Make-Ahead Friendly: This trifle actually improves overnight. The flavors meld together, the cake softens into pudding-soaked perfection, and you get to relax while your guests rave.
What sets this recipe apart from other berry trifles is the texture. Instead of using a homemade custard that can sometimes turn grainy or require constant stirring, we’re using instant vanilla pudding that sets up perfectly every time. The key is letting the pudding thicken slightly before layering — that little trick keeps the layers distinct instead of turning into a mushy mess.
This is the dessert that makes people close their eyes after the first bite. I’ve seen it happen more times than I can count.
What Ingredients You Will Need
This recipe uses simple, readily available ingredients to create something that tastes far more complex than it is. Here’s what you’ll need to gather:
For the Cream Layer
- 2 boxes (3.4 oz each) instant vanilla pudding mix — I prefer Jell-O brand for consistent results, but store brands work fine too. Do not use cook-and-serve pudding; it won’t set properly for this no-bake application.
- 3 cups cold whole milk — Whole milk gives the creamiest texture. You can use 2% in a pinch, but avoid skim milk as the pudding won’t set as firmly.
- 1 teaspoon vanilla extract — Pure vanilla extract adds warmth and depth. Imitation vanilla works, but pure is noticeably better here.
- 8 oz cream cheese, softened to room temperature — This is my secret weapon. It adds richness and stability to the cream layer, preventing the trifle from becoming too soupy.
- 1 cup powdered sugar — Just enough sweetness to balance the tang of the cream cheese.
- 8 oz frozen whipped topping, thawed — Cool Whip or any store brand works. You can also whip your own heavy cream if you prefer, but the stabilized whipped topping holds up better over time.
For the Fruit Layers
- 2 pounds fresh strawberries, hulled and sliced — Look for berries that are bright red and fragrant. If strawberries aren’t in season, you can use frozen sliced strawberries, but thaw and drain them well first.
- 2 cups fresh blueberries — Wild blueberries are smaller and sweeter, but regular blueberries work perfectly. Rinse and pat dry before using.
- 1 tablespoon granulated sugar — Optional, but tossing the berries with a little sugar helps draw out their natural juices and creates a light syrup.
- 1 tablespoon fresh lemon juice — Brightens the berries and balances the sweetness of the cream layers.
For the Cake Layer
- 1 store-bought pound cake (10.75 oz), cut into 1-inch cubes — Sara Lee or Entenmann’s are my go-to brands. You can use homemade pound cake if you have it, but the store-bought version holds up beautifully and saves time.
- Optional: 2 tablespoons berry liqueur or fruit syrup — For an adult version, brushing the cake cubes with Chambord or a simple berry syrup adds another layer of flavor. Skip this for a kid-friendly dessert.
For Garnish
- Fresh mint sprigs — Optional but adds a beautiful pop of green.
- Extra berries for the top layer — Reserve the prettiest strawberries and blueberries for the final garnish.
Ingredient Selection Tip: For the best texture, make sure your cream cheese is truly softened to room temperature. Cold cream cheese will leave lumps in your cream layer, and nobody wants that. Take it out of the fridge about 30 minutes before you start.
Equipment Needed
You don’t need fancy tools for this recipe, which is part of its charm. Here’s what you’ll want to have on hand:
- Large trifle dish or glass bowl (3-4 quart capacity) — A clear glass dish shows off those beautiful layers. If you don’t have a trifle dish, a large glass mixing bowl or even a 9×13 baking dish works fine. I’ve made this in a wide-mouth mason jar for individual servings too.
- Electric hand mixer or stand mixer — For beating the cream cheese and pudding mixture until smooth. A whisk works if you have strong arms, but the mixer makes it effortless.
- Large mixing bowls — You’ll need one for the cream layer and one for tossing the berries.
- Sharp knife and cutting board — For hulling strawberries and cubing the pound cake.
- Rubber spatula — For scraping every last bit of cream into the dish. Trust me, you won’t want to waste any.
- Measuring cups and spoons — Precision matters for the pudding to set correctly.
- Plastic wrap or lid — For covering the trifle while it chills.
If you don’t own a trifle dish, don’t run out and buy one just for this recipe. I actually prefer using a wide, shallow dish sometimes because it creates more surface area for the berries to shine. A glass pie plate works in a pinch for a smaller version.
Preparation Method
Let’s build this beautiful trifle together. Take your time with the layers — the visual payoff is worth it.
- Prepare the berries (10 minutes): Wash the strawberries and blueberries thoroughly. Hull the strawberries by cutting off the green tops, then slice them into even pieces — about quarter-inch thick. Place the sliced strawberries and blueberries in a medium bowl. Sprinkle with 1 tablespoon of granulated sugar and 1 tablespoon of lemon juice. Gently toss to combine. Set aside for 15-20 minutes to let the berries release their natural juices. You’ll notice a beautiful pink syrup forming at the bottom of the bowl.
- Make the cream cheese layer (10 minutes): In a large mixing bowl, beat the softened cream cheese with an electric mixer on medium speed until smooth and fluffy — about 2 minutes. Scrape down the sides of the bowl with a rubber spatula. Add the powdered sugar and beat until fully incorporated, another minute. The mixture should be silky with no lumps. Set this aside for a moment while you prepare the pudding.
- Prepare the vanilla pudding (5 minutes): In a separate large bowl, whisk together both boxes of instant vanilla pudding mix with 3 cups of cold whole milk. Whisk vigorously for about 2 minutes until the pudding begins to thicken. It will still be somewhat loose at this stage — that’s normal. Let it sit for 3-5 minutes to set up slightly. The pudding should be thick enough to hold its shape when you lift the whisk.
- Combine the cream elements (5 minutes): Add the prepared vanilla pudding to the cream cheese mixture. Beat on low speed until just combined, then increase to medium and beat for another minute until the mixture is smooth, creamy, and uniform in color. There should be no streaks of cream cheese remaining. Fold in the thawed whipped topping using a rubber spatula. Use a gentle hand — you want to keep the mixture light and airy, not deflate it.
- Cube the pound cake (5 minutes): Unwrap the pound cake and cut it into 1-inch cubes. If the cake seems very soft, pop it in the freezer for 10 minutes first — it will be much easier to cut clean cubes. You should have about 4-5 cups of cake cubes. If you’re using the optional berry liqueur, lightly brush or drizzle it over the cake cubes now and toss gently.
- Layer the trifle (15 minutes): This is the fun part. Start with a single layer of pound cake cubes covering the bottom of your trifle dish. Don’t pack them too tightly — you want space for the cream to seep in. Spoon about one-third of the cream mixture over the cake cubes and spread it evenly with a spatula. Add a layer of the macerated berries, including some of the juice. Repeat the layers: cake cubes, cream mixture, berries. For the final layer, end with the remaining cream mixture on top. Reserve a handful of the prettiest berries for the garnish.
- Chill (at least 4 hours, ideally overnight): Cover the trifle dish tightly with plastic wrap and refrigerate for at least 4 hours. Overnight is better — the flavors meld, the cake absorbs the cream and berry juices, and everything settles into perfect harmony. Do not skip this step. A trifle that hasn’t chilled long enough will be soupy and the layers won’t hold their shape when served.
- Garnish and serve (5 minutes): Just before serving, arrange the reserved strawberries and blueberries on top of the trifle in a decorative pattern. I like to create concentric rings of red and blue berries. Add a few fresh mint sprigs for a pop of green. Serve cold, using a large spoon to scoop all the way down through the layers.
Sensory cue: When you scoop into a properly chilled trifle, the spoon should glide through the layers with slight resistance. The cake cubes will be soft but not mushy, the cream layer should hold its shape, and the berries will be juicy but not watery. You’ll see distinct stripes of red, white, and blue in each serving.
Cooking Tips & Techniques
After making this trifle more times than I can count (including a few spectacular failures), I’ve learned a few things worth sharing.
The pudding panic is real — don’t overmix. The first time I made this, I whisked the instant pudding like I was making meringue. Big mistake. Instant pudding sets up quickly, and overmixing can actually break down the structure, leaving you with a soupy mess. Whisk just until it starts to thicken, then stop. Let it rest for those 3-5 minutes, and you’ll have perfect pudding every time.
Room temperature cream cheese is non-negotiable. I learned this the hard way when I was in a hurry and used cold cream cheese straight from the fridge. The result? Little white lumps floating in my otherwise smooth cream layer. Not cute. Set your cream cheese out 30-45 minutes before you start. If you forget, you can microwave it in 10-second bursts, but watch it carefully — you want it soft, not melted.
Drain your berries if they’re extra juicy. Some strawberries are just more watery than others. If your berries release a lot of liquid after macerating, use a slotted spoon to add them to the layers rather than dumping everything in. Too much liquid will make your trifle soggy instead of perfectly moist.
Let the trifle rest before serving. I know it’s tempting to dig in right away, but trust the process. A trifle that’s chilled for at least 4 hours (ideally overnight) has completely different texture than one that’s only been in the fridge for an hour. The cake absorbs the cream and berry juices, the flavors meld, and every bite becomes perfectly balanced. I once served a barely-chilled trifle at a potluck, and while it was still good, it was nowhere near as amazing as the overnight version.
Use a serrated knife for the pound cake. A serrated knife cuts through the soft cake without crushing it, giving you clean cubes that hold their shape during layering. A dull knife will smoosh the cake and create uneven pieces.
Variations & Adaptations
One of the best things about this trifle is how adaptable it is. Here are some variations I’ve tried and loved:
Berry Swap: Not a fan of blueberries? Use raspberries or blackberries instead. The red, white, and black color scheme works surprisingly well for non-patriotic occasions. In the fall, I’ve made this with sliced apples and pears that have been lightly sautéed in butter and cinnamon — it’s a completely different dessert but equally delicious.
Lemon Berry Twist: Replace the vanilla pudding with lemon instant pudding for a bright, citrusy version. The lemon pairs beautifully with the berries and adds a refreshing tang. I made this for a baby shower and it was gone in 20 minutes. You can also add a teaspoon of lemon zest to the cream cheese mixture for extra zing.
Gluten-Free Option: Use gluten-free pound cake or gluten-free vanilla cake cut into cubes. Most store-bought pound cakes are not gluten-free, but there are excellent gluten-free options available. You can also use gluten-free ladyfingers or even gluten-free angel food cake. The rest of the ingredients are naturally gluten-free.
Dairy-Free Version: Substitute the whole milk with unsweetened almond milk or oat milk. Use dairy-free cream cheese and coconut-based whipped topping. The texture will be slightly different — a bit less rich — but still delicious. I’ve tested this with oat milk and it works surprisingly well.
Individual Servings: Instead of one large trifle, layer the ingredients in individual mason jars or small glass cups. These are perfect for parties where people are mingling, and they make adorable take-home gifts. Plus, everyone gets their own perfect ratio of cake to cream to berries.
Chocolate Lover’s Version: Swap the vanilla pudding for chocolate instant pudding and use chocolate pound cake or brownie cubes. Add a layer of chocolate shavings between the cream and berries. This version is dangerously indulgent — consider yourself warned.
My personal favorite variation? The lemon berry twist with fresh raspberries instead of blueberries. It’s bright, refreshing, and somehow feels lighter than the original. Perfect for a summer bridal shower or brunch.
Serving & Storage Suggestions
This trifle is best served cold, straight from the refrigerator. The contrast between the cool, creamy layers and the juicy berries is part of what makes it so satisfying.
Serving Temperature: Remove the trifle from the fridge about 10-15 minutes before serving. This takes the slight chill off without letting it get warm. The cream layer should be firm but not icy.
Presentation: Use a large serving spoon or a clear glass ladle to scoop servings. Make sure to dig all the way to the bottom so each serving gets a bit of every layer. If you’re feeling fancy, you can serve individual portions on small dessert plates with a sprig of mint and a few extra berries on the side.
Complementary Dishes: This trifle pairs beautifully with a simple Greek yogurt parfait for a lighter dessert option. For a full summer spread, serve alongside grilled meats and fresh salads. A glass of iced tea or lemonade is the perfect beverage pairing.
Storage: Cover the trifle tightly with plastic wrap and store in the refrigerator for up to 3 days. The flavors actually improve over the first 24 hours, but after 48 hours the cake can become too soft and the berries may start to release more liquid. If you have leftovers after day 2, I recommend spooning them into individual cups and enjoying within 24 hours.
Freezing: I don’t recommend freezing this trifle. The cream layer and berries don’t thaw well, and the texture becomes watery and grainy. This is strictly a refrigerator dessert.
Reheating: Do not reheat. This is a cold dessert through and through. If you want a warm berry dessert, try a salted caramel apple blondie bar instead.
Nutritional Information & Benefits
While this is definitely a treat, it does offer some nutritional benefits thanks to the fresh berries.
Estimated Nutritional Values (per serving, based on 12 servings):
- Calories: 380
- Total Fat: 18g
- Saturated Fat: 11g
- Cholesterol: 45mg
- Sodium: 420mg
- Total Carbohydrates: 48g
- Dietary Fiber: 3g
- Sugars: 34g
- Protein: 6g
Health Benefits: Strawberries and blueberries are packed with antioxidants, vitamin C, and fiber. Berries are known for their anti-inflammatory properties and are linked to heart health and brain function. The cream cheese and milk provide calcium and protein, though this is still a dessert to enjoy in moderation.
Dietary Considerations: This recipe contains dairy (milk, cream cheese, whipped topping) and gluten (pound cake). It can be made gluten-free with substitutions as noted above. For a lower-sugar version, use sugar-free vanilla pudding and reduce the powdered sugar in the cream cheese mixture to 1/2 cup.
Potential Allergens: Dairy, gluten, and eggs (from the pound cake). Check your specific ingredients for allergen information.
I believe in enjoying dessert without guilt. This trifle is a celebration — enjoy it as such. A single serving won’t derail your healthy eating goals, and the fresh berries provide real nutritional value.
Conclusion
This Red White and Blueberry Icebox Trifle has become my signature summer dessert for good reason. It’s beautiful, it’s forgiving, and it tastes like something you’d find at a fancy bakery — except you made it yourself with ingredients from your regular grocery store.
What I love most about this recipe is how it brings people together. There’s something about that first scoop, when everyone sees the perfect layers and lets out a little gasp, that makes all the effort worthwhile. And honestly, the effort is minimal. A little chopping, some mixing, a bit of layering, and the fridge does the rest.
I encourage you to make this your own. Swap the berries based on what’s in season. Try the lemon version. Make individual jars for a party. The beauty of a trifle is that it’s endlessly adaptable and always impressive.
If you make this recipe — and I really hope you do — I’d love to hear about it. Leave a comment below and let me know how it turned out. Did you try a variation? Did your guests go back for thirds? Share your photos and tag me so I can see your beautiful creations.
Here’s to summer, to simple desserts that feel special, and to the joy of watching someone take that first bite and close their eyes. Happy cooking, friends.
FAQs
Can I make this trifle a day ahead?
Absolutely! In fact, I recommend it. Making this trifle a day ahead allows the flavors to meld and the cake to absorb the cream and berry juices. The texture improves significantly after 24 hours in the fridge. Just wait to add the garnish berries until right before serving so they stay fresh and bright.
Can I use frozen berries instead of fresh?
Yes, but with a caveat. Frozen berries release more liquid as they thaw, which can make your trifle watery. If using frozen strawberries and blueberries, thaw them completely in a colander set over a bowl, then drain off the excess liquid before using. You may want to skip the maceration step (tossing with sugar and lemon juice) since frozen berries are already quite juicy.
Why is my trifle soupy?
A soupy trifle usually means one of three things: the pudding wasn’t allowed to set properly before layering, the berries released too much liquid, or the trifle wasn’t chilled long enough. Make sure your pudding is thick before you start layering, drain any excess liquid from the berries, and give the assembled trifle at least 4 hours (preferably overnight) in the fridge.
Can I use homemade whipped cream instead of Cool Whip?
You can, but the texture will be different. Homemade whipped cream is less stable than frozen whipped topping and may deflate or weep over time. If you want to use homemade cream, whip 2 cups of heavy cream with 1/4 cup of powdered sugar until stiff peaks form, and use it immediately. The trifle will be lighter and less creamy, but still delicious. Just know it won’t hold up as well for leftovers.
How do I keep the layers distinct when serving?
The key to distinct layers is proper chilling. A well-chilled trifle (at least 4 hours) will hold its shape when scooped. Use a large spoon and cut straight down through all the layers, then scoop outward. For the cleanest servings, you can also assemble individual trifles in small glasses or jars — each person gets their own perfect portion with all the layers intact.
Pin This Recipe!
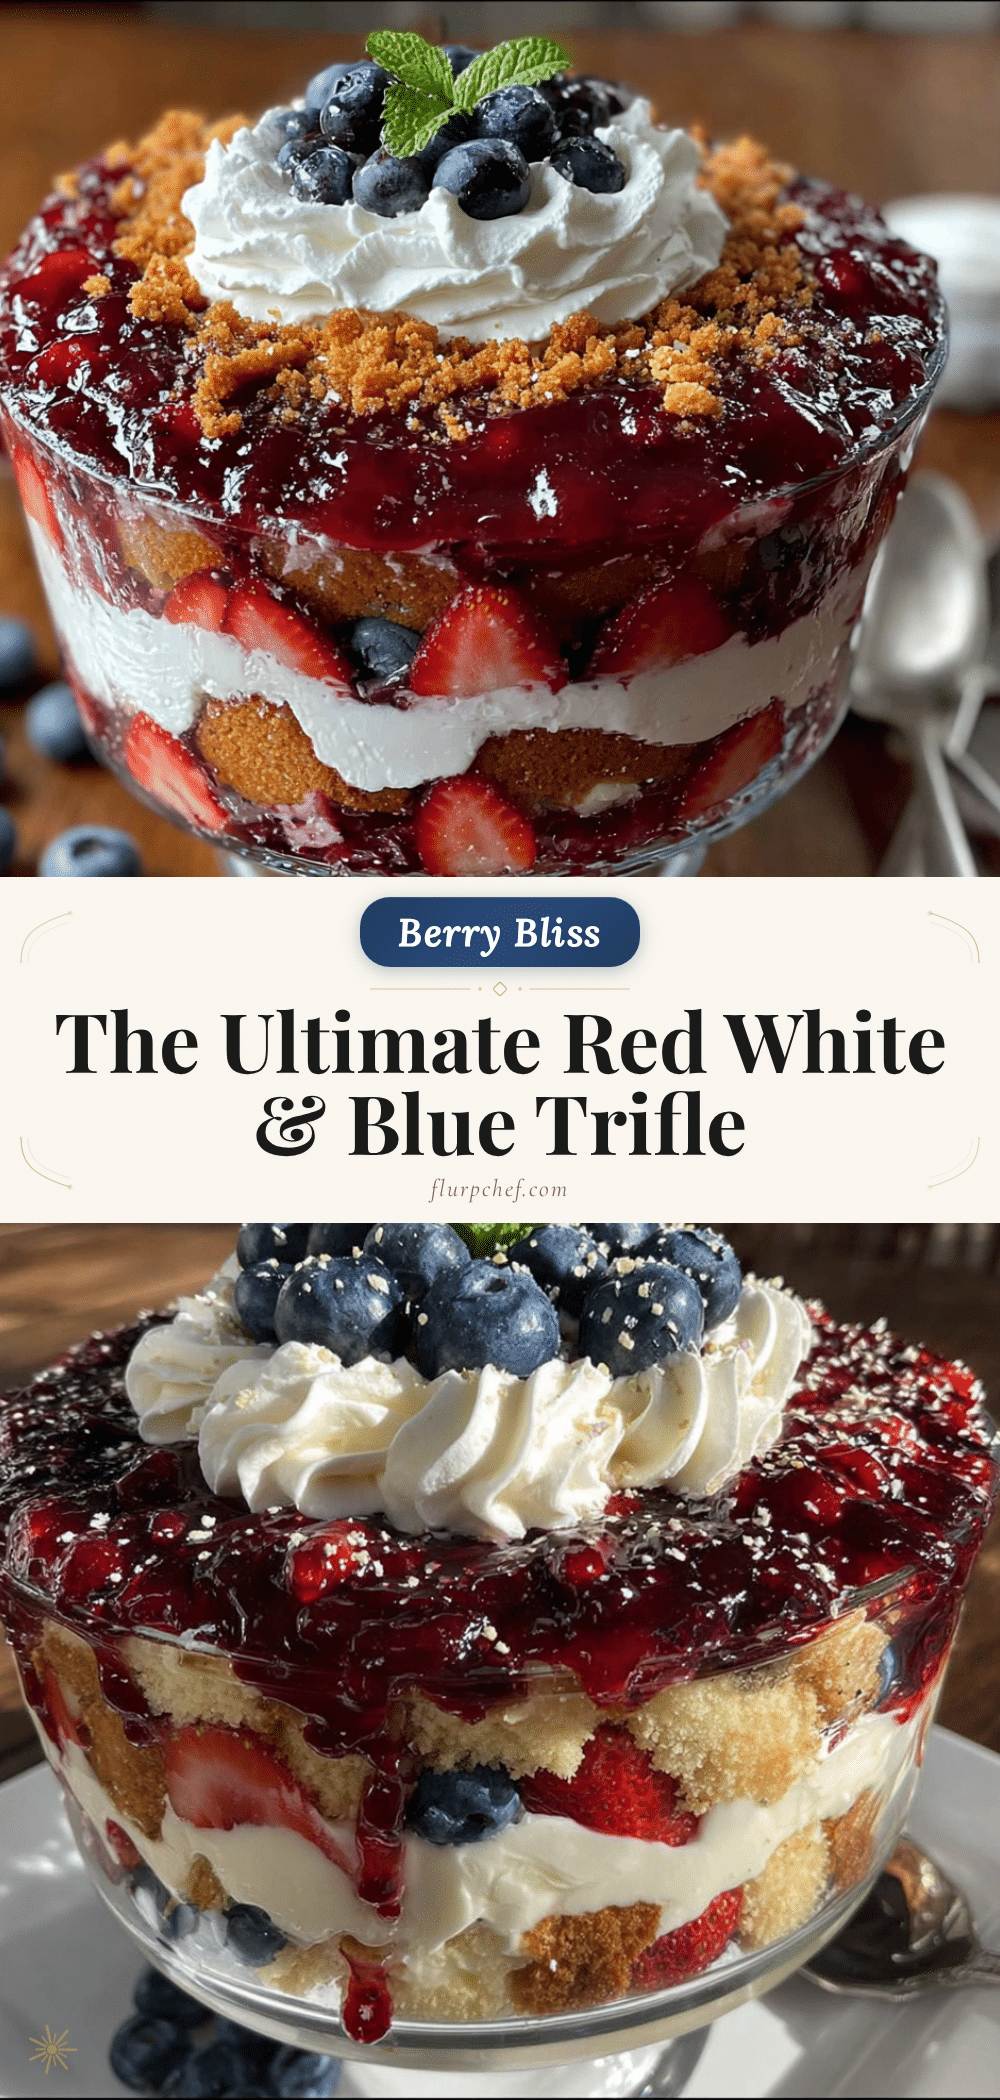
Perfect Red White and Blueberry Icebox Trifle Recipe

A no-bake, crowd-pleasing dessert featuring layers of creamy vanilla pudding, juicy strawberries, sweet blueberries, and soft pound cake cubes, all chilled to perfection. Perfect for patriotic holidays and summer gatherings.
- Prep Time: 30 minutes
- Cook Time: 0 minutes
- Total Time: 4 hours 30 minutes (includes chilling)
- Yield: 12 servings 1x
- Category: Dessert
- Cuisine: American
Ingredients
- 2 boxes (3.4 oz each) instant vanilla pudding mix
- 3 cups cold whole milk
- 1 teaspoon vanilla extract
- 8 oz cream cheese, softened to room temperature
- 1 cup powdered sugar
- 8 oz frozen whipped topping, thawed
- 2 pounds fresh strawberries, hulled and sliced
- 2 cups fresh blueberries
- 1 tablespoon granulated sugar
- 1 tablespoon fresh lemon juice
- 1 store-bought pound cake (10.75 oz), cut into 1-inch cubes
- Optional: 2 tablespoons berry liqueur or fruit syrup
- Fresh mint sprigs for garnish
- Extra berries for garnish
Instructions
- Prepare the berries: Wash strawberries and blueberries. Hull and slice strawberries into quarter-inch thick pieces. Place sliced strawberries and blueberries in a medium bowl. Sprinkle with 1 tablespoon granulated sugar and 1 tablespoon lemon juice. Gently toss and set aside for 15-20 minutes to release juices.
- Make the cream cheese layer: In a large mixing bowl, beat softened cream cheese with an electric mixer on medium speed until smooth and fluffy (about 2 minutes). Scrape down sides. Add powdered sugar and beat until fully incorporated (another minute). Set aside.
- Prepare the vanilla pudding: In a separate large bowl, whisk together both boxes of instant vanilla pudding mix with 3 cups cold whole milk. Whisk vigorously for about 2 minutes until pudding begins to thicken. Let sit for 3-5 minutes to set up slightly.
- Combine the cream elements: Add prepared vanilla pudding to cream cheese mixture. Beat on low speed until just combined, then increase to medium and beat for another minute until smooth and creamy. Fold in thawed whipped topping with a rubber spatula until light and airy.
- Cube the pound cake: Unwrap pound cake and cut into 1-inch cubes. If using optional berry liqueur, lightly brush or drizzle over cake cubes and toss gently.
- Layer the trifle: Start with a single layer of pound cake cubes covering the bottom of a trifle dish. Spoon about one-third of the cream mixture over the cake cubes and spread evenly. Add a layer of macerated berries, including some juice. Repeat layers: cake cubes, cream mixture, berries. End with remaining cream mixture on top. Reserve a handful of prettiest berries for garnish.
- Chill: Cover trifle dish tightly with plastic wrap and refrigerate for at least 4 hours, ideally overnight.
- Garnish and serve: Just before serving, arrange reserved strawberries and blueberries on top in a decorative pattern. Add fresh mint sprigs. Serve cold, scooping all the way down through layers.
Notes
For best results, use room temperature cream cheese and let the trifle chill overnight. Drain berries if they are extra juicy to prevent sogginess. Use a serrated knife for cutting pound cake to avoid crushing.
Nutrition
- Serving Size: 1 serving (1/12 of r
- Calories: 380
- Sugar: 34
- Sodium: 420
- Fat: 18
- Saturated Fat: 11
- Carbohydrates: 48
- Fiber: 3
- Protein: 6
Keywords: trifle, no-bake dessert, red white and blue, Fourth of July, Memorial Day, berry dessert, summer dessert, icebox cake