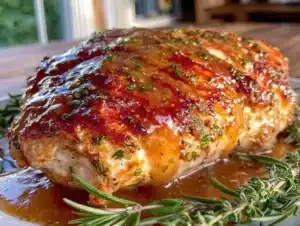
My husband looked at the baking sheet like I’d just insulted his entire culinary upbringing. “Baked chicken tenders?” he said, and I could hear the unspoken second half of that sentence: might as well be diet food. He grew up on the real deal—the kind that crackles in hot oil and leaves your fingers glistening. So when I told him I was working on a version that skipped the deep-fryer but promised the same crunch, he gave me that look. You know the one. The “I’ll try it but I’m not expecting much” face.
Honestly, I get it. Baked chicken tenders have a reputation problem. Too often they’re sad, pale things with breading that slides off like a bad toupee. Or they’re dry on the inside and somehow still soggy on the outside. I’ve made plenty of those batches myself, standing at the counter wondering why I bothered. But this version—the one with finely grated Parmesan folded into the breadcrumbs and a few tricks I picked up from years of trial and error—that one changed his mind. He ate six. Then he asked if there were more.
These crispy baked Parmesan chicken tenders aren’t pretending to be fried chicken. They’re their own thing—crunchy, cheesy, golden, and completely satisfying. The kind of recipe that makes you forget you’re eating baked chicken at all. And honestly? That’s the whole point.
Why You’ll Love This Recipe
Let me tell you why this recipe earns a permanent spot in my weekly rotation. I’ve tested it more times than I care to count, tweaking ratios and temperatures until everything clicked. Here’s what makes it special:
- Quick & Easy: From fridge to table in about 30 minutes. No marinating, no complicated steps. Perfect for those nights when you need dinner on the table fast.
- Simple Ingredients: You probably have most of this in your kitchen right now. Chicken breasts, breadcrumbs, Parmesan, eggs, and a few pantry staples. No specialty stores required.
- Perfect for Meal Prep: These reheat beautifully, which means you can make a big batch on Sunday and eat well all week. They’re great cold in salads too.
- Crowd-Pleaser: Kids love them. Adults love them. Even my skeptical husband loves them. They disappear fast at parties and family dinners.
- Unbelievably Delicious: The Parmesan adds this salty, nutty depth that regular breaded chicken just doesn’t have. And the texture—crispy on the outside, juicy on the inside—is exactly what you want.
What sets this recipe apart is the technique. I use a two-step breading process with a crucial resting period that helps the coating adhere. And I grate my Parmesan finely enough that it melts into the breadcrumbs rather than clumping. Small details, big difference.
What Ingredients You Will Need
This recipe uses simple, wholesome ingredients to deliver bold flavor and satisfying texture without the fuss. Most of these are pantry staples, which makes this recipe perfect for last-minute dinner decisions.
- Chicken breasts: About 1.5 pounds, boneless and skinless. Look for breasts that are relatively even in thickness so they cook evenly. I prefer organic when I can find it, but conventional works just fine.
- Panko breadcrumbs: 1 cup. Panko gives you that light, airy crunch that regular breadcrumbs just can’t replicate. They’re worth seeking out.
- Finely grated Parmesan cheese: ½ cup. And I mean finely grated, not the stuff in the green can. Freshly grated Parmigiano-Reggiano melts into the breadcrumbs beautifully and adds real flavor.
- All-purpose flour: ½ cup. This helps the egg wash stick to the chicken, which helps the breading stick to the egg wash. Every layer matters.
- Large eggs: 2, beaten. The glue that holds everything together.
- Garlic powder: 1 teaspoon. Adds savory depth without being overpowering.
- Paprika: 1 teaspoon. I use sweet paprika for color and mild warmth. Smoked paprika works too if you want a deeper flavor.
- Dried oregano: ½ teaspoon. Optional, but I love the little herbal note it adds.
- Salt and black pepper: To taste. Don’t skip the salt—it makes everything pop.
- Olive oil spray: For coating the baking sheet and spritzing the tenders. This is what helps them get golden and crispy without deep frying.
Ingredient tips from my kitchen: I’ve tried this with whole wheat panko and it works fine, though the texture is slightly denser. For a gluten-free version, use gluten-free panko and substitute almond flour for the all-purpose flour. Just know the coating won’t be quite as sturdy. And if you can find it, I really recommend using crispy garlic parmesan baked chicken thighs technique of letting the breaded chicken rest before baking—it makes a noticeable difference in how well the coating stays put.
Equipment Needed
You don’t need a fancy kitchen to make these. Here’s what you’ll need:
- Baking sheet: A half-sheet pan works perfectly. Line it with parchment paper or aluminum foil for easier cleanup.
- Wire rack: Optional but highly recommended. Placing a wire rack on your baking sheet allows air to circulate around the tenders, making them crispy on all sides instead of soggy on the bottom.
- Three shallow bowls: For the flour, egg wash, and breadcrumb mixture. Wide, shallow bowls make the dredging process much less messy.
- Sharp knife: For cutting the chicken breasts into even strips.
- Cutting board: Preferably one you can wash easily after handling raw chicken.
- Tongs: For transferring chicken between bowls and onto the baking sheet without making a mess.
- Meat thermometer: The most reliable way to know when your chicken is done. I use an instant-read digital thermometer.
If you don’t have a wire rack, don’t worry. You can still get good results by flipping the tenders halfway through baking. I’ve done it both ways, and while the wire rack gives slightly better results, the difference isn’t dramatic enough to skip the recipe over.
Preparation Method
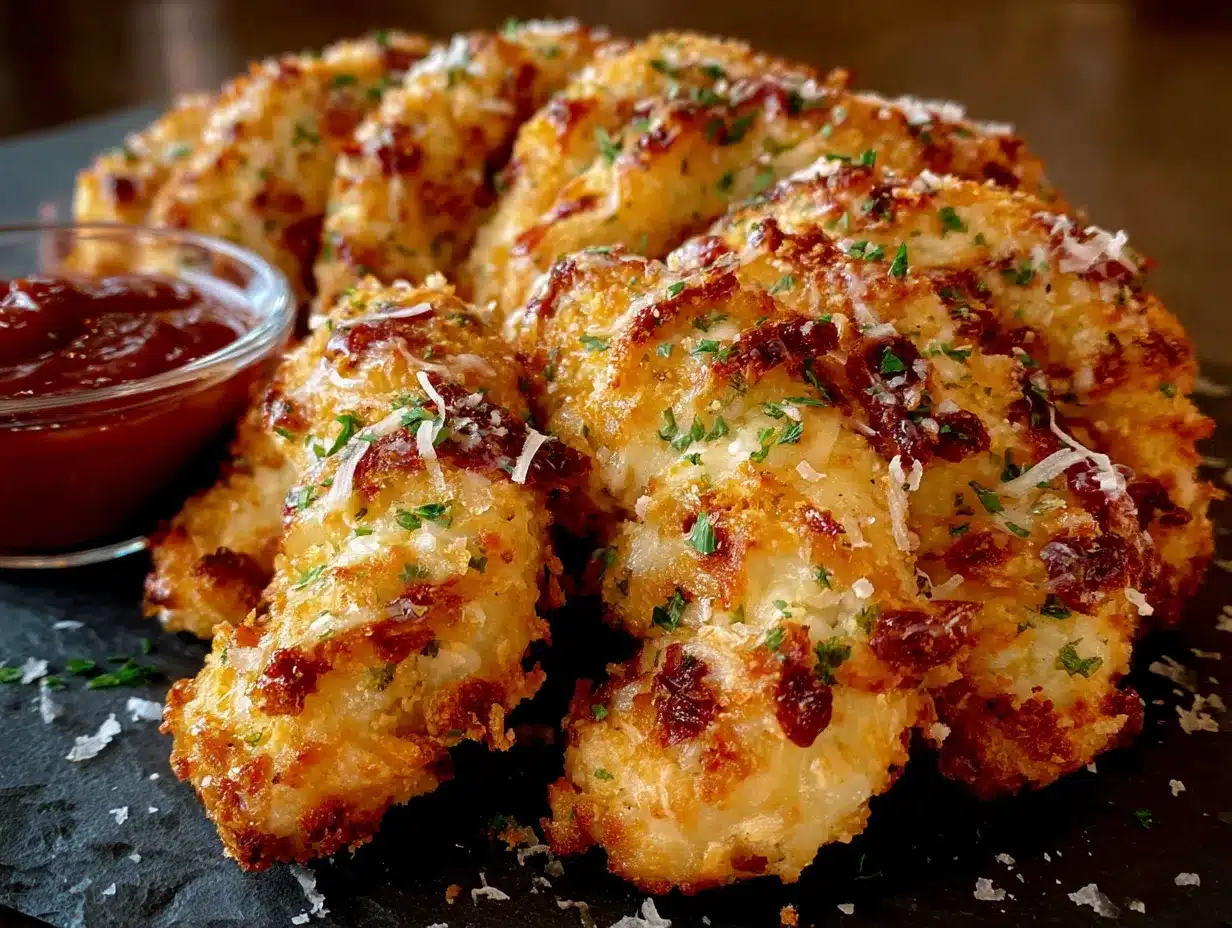
Let me walk you through this step by step. I’ve made these so many times I could do it in my sleep, but I’ll share all the little details that make the difference between good chicken tenders and great ones.
- Preheat your oven to 400°F (200°C). Place a wire rack on a baking sheet and spray it lightly with olive oil. If you’re not using a rack, line the baking sheet with parchment and spray that instead.
- Prepare the chicken. Trim any excess fat from 1.5 pounds of chicken breasts. Cut them lengthwise into strips about 1 inch wide and 3-4 inches long. Try to keep them similar in size so they cook evenly. Pat the strips dry with paper towels—this helps the flour stick better.
- Set up your breading station. In the first shallow bowl, combine ½ cup all-purpose flour with ½ teaspoon salt and ¼ teaspoon black pepper. In the second bowl, beat 2 large eggs with 1 tablespoon of water until smooth. In the third bowl, mix 1 cup panko breadcrumbs, ½ cup finely grated Parmesan, 1 teaspoon garlic powder, 1 teaspoon paprika, and ½ teaspoon dried oregano.
- Bread the chicken. Working with one strip at a time, dredge the chicken in the flour mixture, shaking off any excess. Dip it into the egg wash, letting the excess drip off. Then press it firmly into the breadcrumb mixture, making sure all sides are well coated. Place it on the prepared wire rack. Repeat with all the strips.
- Here’s the trick most recipes skip: Let the breaded tenders rest on the rack for 10 minutes before baking. This gives the coating time to adhere to the chicken. I learned this the hard way after too many batches where the breading slid off in the oven. It makes a real difference.
- Spray the tops of the tenders lightly with olive oil. This is what gives them that golden, crispy finish. Don’t soak them—just a light misting will do.
- Bake for 12 minutes, then carefully flip each tender using tongs. Spray the other side lightly with oil. Bake for another 8-10 minutes, until the coating is golden brown and crispy. The internal temperature should reach 165°F (74°C) when measured with a meat thermometer.
- Let them rest on the rack for 2-3 minutes before serving. This helps the juices redistribute and keeps the chicken tender.
Sensory cues to watch for: The kitchen should smell like garlic and Parmesan by the time you flip them. The coating should look evenly golden, with darker spots where the cheese has browned slightly. When you cut into one, the chicken should be white and opaque all the way through, with a slight sheen of moisture.
Cooking Tips & Techniques
I’ve made every mistake you can imagine with chicken tenders. Here’s what I’ve learned:
Don’t overcrowd the pan. Leave at least an inch between each tender on the baking sheet. If they’re too close together, they’ll steam instead of crisp. I learned this when I tried to make a double batch on one pan and ended up with soggy tenders. Now I use two racks if I need more space.
Grate your own Parmesan. I know it’s tempting to use pre-shredded, but it doesn’t melt the same way. Pre-shredded cheese has anti-caking agents that prevent it from blending smoothly into the breadcrumbs. Freshly grated Parmesan actually melts into the coating, creating this incredible crispy, cheesy crust.
Use a light hand with the egg wash. Too much egg makes the coating soggy. After dipping, let the excess drip off before pressing into the breadcrumbs. You want a thin, even layer of egg—just enough to make the breadcrumbs stick.
Season every layer. Don’t just season the breadcrumbs. Add salt and pepper to the flour too. Each layer of breading should have flavor, or you’ll end up with bland chicken hiding under seasoned coating.
Timing is everything. These cook fast. Start checking at the 18-minute mark. Every oven runs a little differently, and thinner strips will cook faster than thicker ones. A meat thermometer takes the guesswork out completely.
Variations & Adaptations
This recipe is endlessly adaptable. Here are some of my favorite variations:
Spicy version: Add ½ teaspoon cayenne pepper and 1 teaspoon chili powder to the breadcrumb mixture. Serve with ranch or blue cheese dressing for dipping. My husband loves this version with hot sauce drizzled on top.
Gluten-free option: Use gluten-free panko breadcrumbs and substitute almond flour or rice flour for the all-purpose flour. The texture will be slightly different, but still delicious. I’ve tested this for a friend with celiac disease and it passed the test.
Herb and lemon version: Add the zest of one lemon and 2 tablespoons of fresh chopped parsley to the breadcrumb mixture. Serve with lemon wedges for squeezing. This is my go-to version in spring and summer.
Air fryer adaptation: Cook at 375°F (190°C) for 10-12 minutes, flipping halfway through. No need for the wire rack. The air fryer gives an even crispier result, honestly. I’ve been making these in my air fryer more and more lately.
Cheese variations: Try substituting half the Parmesan with finely grated Pecorino Romano for a sharper flavor. Or add a tablespoon of nutritional yeast for a dairy-free cheesy taste. I’ve even used asiago with great results.
If you’re looking for more easy chicken ideas, you might enjoy this quick lemon herb pan-seared chicken breast recipe with zesty pan sauce for a completely different take on weeknight chicken.
Serving & Storage Suggestions
These tenders are best served hot and fresh, straight from the oven. The coating is at its crispiest within the first 15 minutes. But they’re still good at room temperature—I’ve been known to sneak a few while packing lunches.
Serving ideas: Serve with your favorite dipping sauces—honey mustard, ranch, barbecue sauce, or marinara. They’re great alongside a simple green salad, roasted vegetables, or easy sheet pan teriyaki chicken meal prep recipes for healthy lunchboxes for a complete meal prep session. For a lighter meal, slice them up and serve over a bed of mixed greens with cherry tomatoes and a lemon vinaigrette.
Storage: Let any leftovers cool completely, then store in an airtight container in the refrigerator for up to 4 days. The coating will soften slightly, but they’ll still be delicious.
Reheating: The oven is your best friend here. Reheat at 375°F (190°C) for 5-7 minutes, or until heated through and crispy again. The microwave will make them soggy, so avoid it if you can. An air fryer works wonderfully too—just 3-4 minutes at 350°F (175°C).
Freezing: These freeze beautifully. Place the baked and cooled tenders in a single layer on a baking sheet and freeze until solid. Transfer to a freezer bag and store for up to 3 months. Reheat directly from frozen at 375°F (190°C) for 10-12 minutes.
Nutritional Information & Benefits
Per serving (about 4-5 tenders, based on 4 servings):
- Calories: 385
- Protein: 38g
- Carbohydrates: 22g
- Fat: 14g
- Saturated Fat: 5g
- Cholesterol: 145mg
- Sodium: 580mg
- Fiber: 1g
- Sugar: 2g
These tenders are a great source of lean protein, which helps keep you full and satisfied. The Parmesan adds calcium and a little extra protein. Baking instead of frying significantly reduces the fat content compared to traditional chicken tenders—by about half, depending on the recipe.
If you’re watching your sodium, you can reduce the salt in the breading and use low-sodium Parmesan. The garlic powder and paprika add plenty of flavor even with less salt.
For a balanced meal, pair these with a vegetable side and a whole grain. They’re also excellent chopped up over a healthy high-protein cold pasta salad recipe for easy school lunches for a protein boost.
Conclusion
These crispy baked Parmesan chicken tenders have become a staple in my kitchen for good reason. They’re quick enough for a busy weeknight, impressive enough for company, and simple enough that you don’t need to be a chef to nail them. The combination of crunchy panko and salty Parmesan creates a coating that’s genuinely satisfying—no deep fryer required.
What I love most about this recipe is how forgiving it is. You can adjust the seasonings, swap the cheese, change up the dipping sauces. It works as written, but it also invites experimentation. That’s the mark of a great recipe, in my opinion.
I’d love to hear how these turn out for you. Did you try a variation? Find a new favorite dipping sauce? Leave a comment below and let me know. And if you share a photo on social media, tag me—I always love seeing your kitchen creations.
Happy cooking, friends. Here’s to crispy, cheesy, perfectly baked chicken that makes everyone at the table smile.
Frequently Asked Questions
Can I use chicken thighs instead of breasts?
Absolutely. Chicken thighs will be even more tender and juicy, though they may need an extra minute or two of baking time. Just make sure they reach 165°F (74°C) internally.
Why did my breading fall off?
This usually happens for one of three reasons: the chicken wasn’t patted dry before breading, the egg wash was too thick, or you skipped the resting step. Letting the breaded tenders rest for 10 minutes before baking makes a huge difference in how well the coating sticks.
Can I make these dairy-free?
Yes! Substitute the Parmesan with nutritional yeast (use about ¼ cup) or a dairy-free Parmesan alternative. The flavor will be different, but still delicious. You can also use dairy-free milk in place of the egg wash if needed.
How do I know when the chicken is done without a thermometer?
Cut into the thickest tender and check that the meat is white all the way through with no pink remaining. The juices should run clear. A meat thermometer is more reliable, but this method works in a pinch.
Can I prep these ahead of time?
You can bread the chicken up to 24 hours in advance and keep it covered in the refrigerator. Let it come to room temperature for about 15 minutes before baking. You may need to add a minute or two to the baking time since the chicken will be cold.
Pin This Recipe!

Easy Crispy Baked Parmesan Chicken Tenders Recipe
These crispy baked Parmesan chicken tenders are crunchy, cheesy, golden, and completely satisfying. Quick and easy to make with simple ingredients, they’re a crowd-pleaser that even skeptics will love.
- Prep Time: 15 minutes
- Cook Time: 20 minutes
- Total Time: 35 minutes
- Yield: 4 servings 1x
- Category: Main Course
- Cuisine: American
Ingredients
- 1.5 pounds boneless, skinless chicken breasts
- 1 cup panko breadcrumbs
- ½ cup finely grated Parmesan cheese
- ½ cup all-purpose flour
- 2 large eggs
- 1 teaspoon garlic powder
- 1 teaspoon paprika
- ½ teaspoon dried oregano
- Salt and black pepper to taste
- Olive oil spray
Instructions
- Preheat your oven to 400°F (200°C). Place a wire rack on a baking sheet and spray it lightly with olive oil. If not using a rack, line the baking sheet with parchment and spray that instead.
- Trim any excess fat from 1.5 pounds of chicken breasts. Cut them lengthwise into strips about 1 inch wide and 3-4 inches long. Pat the strips dry with paper towels.
- Set up your breading station. In the first shallow bowl, combine ½ cup all-purpose flour with ½ teaspoon salt and ¼ teaspoon black pepper. In the second bowl, beat 2 large eggs with 1 tablespoon of water until smooth. In the third bowl, mix 1 cup panko breadcrumbs, ½ cup finely grated Parmesan, 1 teaspoon garlic powder, 1 teaspoon paprika, and ½ teaspoon dried oregano.
- Working with one strip at a time, dredge the chicken in the flour mixture, shaking off any excess. Dip it into the egg wash, letting the excess drip off. Then press it firmly into the breadcrumb mixture, making sure all sides are well coated. Place it on the prepared wire rack. Repeat with all the strips.
- Let the breaded tenders rest on the rack for 10 minutes before baking.
- Spray the tops of the tenders lightly with olive oil.
- Bake for 12 minutes, then carefully flip each tender using tongs. Spray the other side lightly with oil. Bake for another 8-10 minutes, until the coating is golden brown and crispy. The internal temperature should reach 165°F (74°C) when measured with a meat thermometer.
- Let them rest on the rack for 2-3 minutes before serving.
Notes
Let the breaded tenders rest for 10 minutes before baking to help the coating adhere. Grate your own Parmesan for best results. Don’t overcrowd the pan; leave at least an inch between tenders. For extra crispiness, use a wire rack on the baking sheet.
Nutrition
- Serving Size: 4-5 tenders
- Calories: 385
- Sugar: 2
- Sodium: 580
- Fat: 14
- Saturated Fat: 5
- Carbohydrates: 22
- Fiber: 1
- Protein: 38
Keywords: baked chicken tenders, crispy chicken, Parmesan chicken, easy chicken recipe, healthy chicken tenders