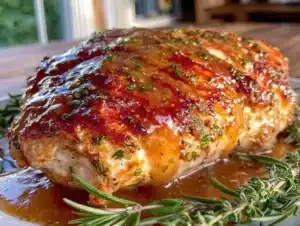
I want crispy chicken skin right now—like, the kind that shatters when you bite into it—but I don’t want to deal with a splattering pan of hot oil on the stove. That’s the exact thought I had last Tuesday at 5:47 PM, standing in my kitchen staring at a pack of bone-in chicken thighs I’d defrosted that morning. And honestly? That moment of lazy craving turned into one of my best kitchen discoveries yet.
Let me tell you something about air fryer chicken thighs. They’re not just a convenient weeknight dinner—they’re the answer to that deep, almost primal need for juicy dark meat wrapped in a crackling, golden crust. No deep frying, no hovering over a skillet, no smoke alarm going off at the worst possible moment. Just you, your air fryer, and the most satisfying crunch you’ll get from a piece of chicken without deep-frying it.
I’ve tested this recipe about seven times now (my neighbors have become very enthusiastic taste testers), and I’ve finally cracked the code. The secret isn’t complicated—it’s actually embarrassingly simple—but it makes all the difference between sad, soggy skin and the kind of crispy air fryer chicken thighs that make you close your eyes and forget what you were doing. This is that recipe.
Why You’ll Love This Recipe
These aren’t just good air fryer chicken thighs. They’re the kind of chicken that makes people ask if you secretly deep-fried them and lied about it. Here’s why this recipe works so well:
- Perfectly Crispy Every Time: That golden crackling skin isn’t luck—it’s a specific technique I figured out after some very disappointing batches of rubbery skin. No more chewy, flabby texture.
- Juicy, Never Dry: Chicken thighs are naturally forgiving, but this method locks in moisture while the skin gets ridiculously crisp. The meat stays tender and flavorful right through the bone.
- Ready in Under 30 Minutes: From fridge to plate in about 25 minutes. That’s faster than delivery and way more satisfying.
- Simple Pantry Ingredients: You probably have everything you need right now. No weird specialty items, no crazy marinades—just good seasoning and a little patience.
- Less Mess, Less Stress: No oil splatter on your stovetop, no greasy kitchen, no hovering over a hot pan. The air fryer does all the heavy lifting.
- Meal Prep Champion: These crispy air fryer chicken thighs reheat beautifully (I’ll show you how), making them perfect for busy weeks.
I’ve tested this with boneless thighs, skinless thighs, and even drumsticks, but this specific method for bone-in, skin-on thighs is where the magic happens. It’s the texture contrast that gets me every time—that shatteringly crisp exterior giving way to tender, juicy meat underneath. If you’ve ever been disappointed by air fryer chicken that came out dry or sad, this recipe will change your mind completely.
What Ingredients You Will Need
This recipe keeps things simple—just a handful of ingredients that work together to create that perfect golden crackling skin. No complicated marinades, no overnight brining (though you can if you want), just smart seasoning and technique.
- Bone-in, skin-on chicken thighs (4-6 thighs, about 2 pounds total): This is non-negotiable for the crispiest results. The bone keeps the meat moist during cooking, and the skin is what we’re here for. Look for thighs with the skin still attached and intact—avoid pieces where the skin has torn or been removed.
- 1½ teaspoons kosher salt: Don’t skimp here. Salt is what draws out moisture from the skin, helping it crisp up. I use Diamond Crystal kosher salt—if you’re using table salt, reduce to 1 teaspoon.
- 1 teaspoon garlic powder: Not garlic salt. Garlic powder distributes evenly and doesn’t add extra sodium. It gives that savory depth without burning.
- 1 teaspoon onion powder: Adds a subtle sweetness that balances the savory notes. Trust me, you’ll miss it if you skip it.
- ½ teaspoon smoked paprika: This is my secret weapon. It adds color and a hint of smokiness that makes these taste like they came off a grill.
- ½ teaspoon black pepper, freshly ground: Freshly ground makes a difference here—it’s more aromatic and less harsh than pre-ground.
- ¼ teaspoon cayenne pepper (optional): Just a tiny pinch for warmth, not heat. Leave it out if you’re sensitive to spice.
- 1 tablespoon baking powder (aluminum-free): This is the game-changer. Baking powder raises the skin’s pH, helping it brown faster and get incredibly crispy. Make sure it’s aluminum-free or you’ll get a metallic aftertaste.
- Olive oil spray or avocado oil spray: A light mist helps the seasoning stick and encourages browning. Don’t use cooking spray with propellants—get a pump spray bottle or an oil mister.
I recommend buying chicken thighs from a butcher counter if possible—they tend to have better skin integrity and more even thickness. If you’re using frozen thighs, thaw them completely in the refrigerator overnight and pat them very dry before seasoning. Wet skin is the enemy of crispiness, and I learned that the hard way after a particularly sad batch of steamed-looking chicken.
Equipment Needed
You don’t need much for this recipe, which is part of why I love it. Here’s what you’ll want to have on hand:
- Air fryer (any size, but 5-6 quart works best): I use a Cosori 5.8-quart, but any brand works. The key is not overcrowding, so if yours is smaller, cook in batches.
- Paper towels: For patting the chicken bone-dry. This step is crucial—don’t skip it.
- Mixing bowl: For combining the seasoning blend. A medium bowl works fine.
- Tongs: For flipping the chicken without piercing the skin. I prefer silicone-tipped tongs to avoid scratching the air fryer basket.
- Instant-read thermometer: This isn’t optional. Chicken thighs need to reach 175°F for the best texture (yes, higher than breasts), and guessing isn’t worth the risk.
- Oil sprayer or mister: A pump-style oil sprayer gives you better control than aerosol cans. I use a Misto brand one, but any works.
- Wire rack (optional but helpful): If you’re resting the chicken after cooking, a wire rack keeps the bottom from getting soggy.
If you don’t have an air fryer yet, honestly, this recipe is worth getting one for. But if you’re determined to use a conventional oven, you can adapt this—just bake at 425°F on a wire rack set over a baking sheet for about 35-40 minutes. The skin won’t be quite as crackling, but it’ll still be good.
Preparation Method
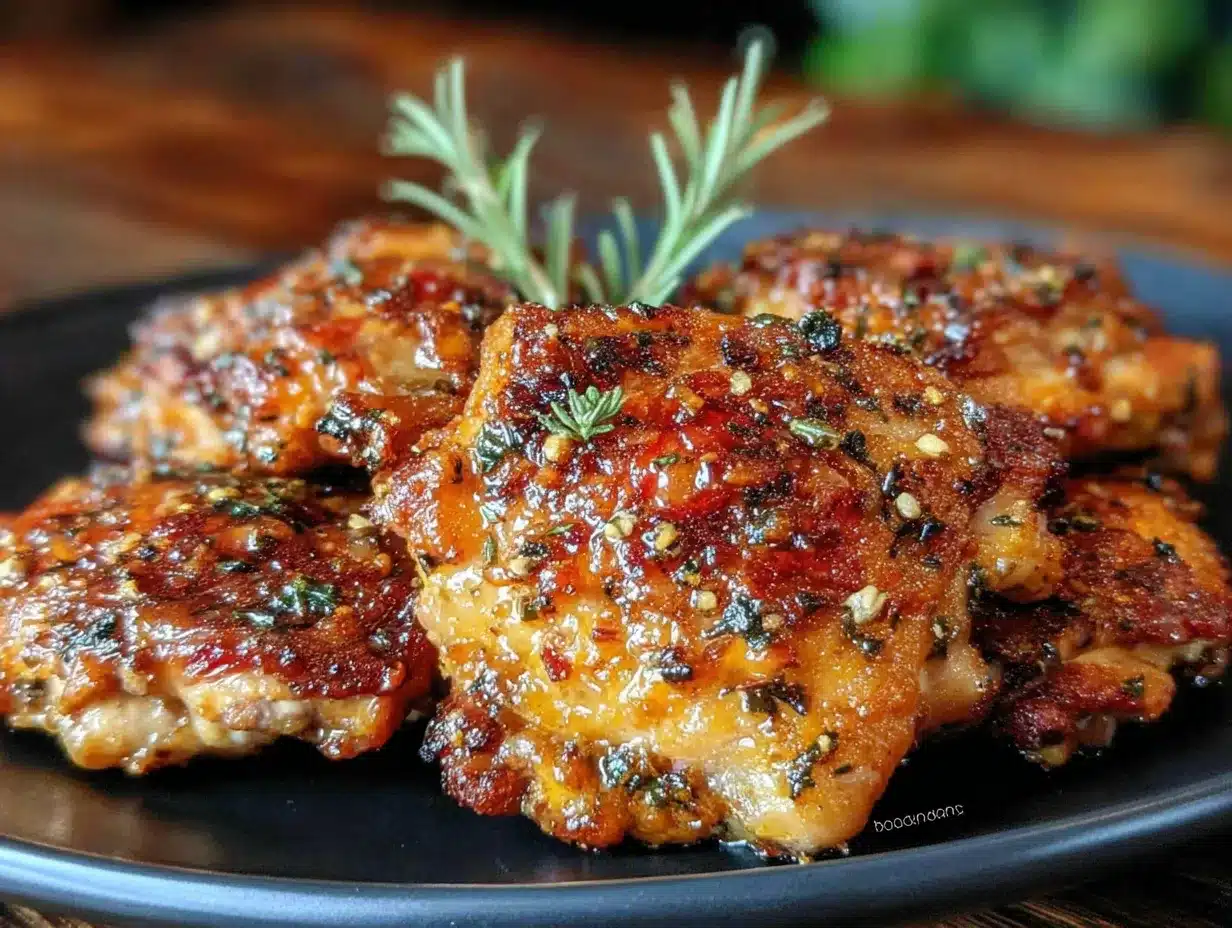
Alright, let’s get to the good part. Here’s how to make these crispy air fryer chicken thighs step by step.
- Pat the chicken completely dry. This is the most important step, and I cannot stress this enough. Take your chicken thighs out of the package and pat them dry with paper towels on both sides. Get into all the crevices. If the skin feels even slightly damp, keep patting. Moisture is the enemy of crispiness, and I’ve ruined enough batches to know this firsthand. Let the chicken sit on a plate uncovered for 10 minutes after patting—this lets any remaining surface moisture evaporate.
- Mix the dry seasoning. In a small bowl, combine the kosher salt, garlic powder, onion powder, smoked paprika, black pepper, cayenne (if using), and baking powder. Whisk them together until evenly distributed. The baking powder should be completely incorporated—you don’t want clumps sticking to one piece of chicken.
- Season the chicken. Sprinkle the seasoning mixture evenly over both sides of the chicken thighs. Use your hands to rub it in gently, making sure to get the seasoning under the skin if possible (lift the skin gently and rub some underneath—this flavors the meat directly). Don’t oversaturate any one spot—even distribution is key.
- Preheat your air fryer to 380°F. Most air fryers recommend a 3-5 minute preheat. I do 5 minutes to make sure the basket is hot when the chicken goes in. This initial blast of heat helps the skin start crisping immediately.
- Lightly spray the air fryer basket. A quick mist of oil spray prevents sticking without adding too much extra fat. You don’t need much—just a light coating.
- Arrange the chicken in a single layer. Place the thighs skin-side down in the basket, making sure they’re not touching. Overcrowding steams the chicken instead of crisping it. If you have to cook in batches, do it—it’s worth the extra few minutes. I can fit 4 thighs comfortably in my 5.8-quart air fryer.
- Spray the tops lightly with oil. A quick mist over the exposed side helps the seasoning adhere and promotes even browning. Don’t drench it—just a light spritz.
- Cook at 380°F for 12 minutes. Set your timer and resist the urge to open the basket. Let the air fryer do its thing. During this time, the skin starts rendering fat and beginning the crisping process.
- Flip the chicken. After 12 minutes, carefully flip each thigh using tongs. The skin side should be starting to look golden and rendered. Spray the newly exposed side lightly with oil.
- Cook for another 10-12 minutes. Continue cooking at 380°F. The exact time depends on the thickness of your thighs and your air fryer model. Start checking at 10 minutes.
- Check internal temperature. Insert an instant-read thermometer into the thickest part of a thigh, avoiding the bone. You’re looking for 175-185°F. Chicken thighs are best at a higher temperature than breasts—the extra heat breaks down connective tissue and keeps the meat juicy. If it’s not there yet, cook in 2-minute increments.
- Optional: Crisp the skin further. If the skin isn’t as crackling as you’d like, increase the temperature to 400°F and cook for an additional 2-3 minutes, watching closely so it doesn’t burn. This gives that extra shatter factor.
- Rest before serving. Transfer the chicken to a wire rack or plate and let it rest for 5 minutes. This lets the juices redistribute and the skin set. Don’t skip this—cutting into it immediately will release all those precious juices.
You’ll know the chicken is perfect when you tap the skin and hear a hollow, crackling sound. The meat should pull away from the bone easily but still be moist and tender. If the skin looks dark golden brown with some darker spots, you’ve nailed it.
Cooking Tips & Techniques
After testing this recipe more times than I care to admit, here’s what I’ve learned about getting perfect results every time:
Don’t skip the drying step. I know I said it already, but I’m saying it again because this is where most people go wrong. Wet skin steams instead of crisps. I once rushed through this step and ended up with chicken that had pale, rubbery skin—it was edible but deeply disappointing. Take the extra 10 minutes.
Baking powder is your best friend. It sounds weird, I know. But a thin coating of aluminum-free baking powder on the skin creates tiny bubbles during cooking that increase surface area and promote browning. It’s the same science behind crispy oven-baked wings. Just make sure it’s evenly distributed—clumps can leave white spots on the finished chicken.
Flip only once. Every time you open the air fryer, you lose heat and extend cooking time. Flipping once at the halfway point gives you even cooking without constant interruption. Trust the process.
Watch your air fryer’s hot spots. Every air fryer has them—areas that cook faster than others. If you notice one side of your chicken browning faster, rotate the pieces when you flip them. I keep a mental note of where my air fryer runs hot and adjust accordingly.
Don’t crowd the basket. This is the second most common mistake after wet skin. If the chicken pieces are touching, the steam gets trapped between them and prevents crisping. Cook in batches if you need to—the extra 10 minutes is worth the texture payoff.
Let the chicken come to room temperature. If you have time, let the seasoned chicken sit on the counter for 15-20 minutes before cooking. This helps it cook more evenly and reduces the temperature shock when it hits the hot basket. Just don’t leave it out longer than 30 minutes for food safety reasons.
I’ve had my share of failures with this recipe—a batch that came out chewy because I forgot the baking powder, another that burned on the edges because I didn’t flip them carefully enough. But every mistake taught me something, and now this method is foolproof. You’ve got this.
Variations & Adaptations
Once you’ve mastered the basic crispy air fryer chicken thighs, here are some ways to switch things up:
- Lemon Herb Version: Add 1 teaspoon dried oregano, 1 teaspoon dried thyme, and the zest of one lemon to the seasoning mix. Squeeze fresh lemon juice over the finished chicken for brightness. This is my go-to spring variation.
- Spicy Buffalo Style: Increase the cayenne to ½ teaspoon and add 1 teaspoon of your favorite hot sauce to the seasoning mix (it’ll be a paste—just rub it on). Serve with ranch or blue cheese dip. My husband requests this version weekly.
- Garlic Lovers’ Dream: Skip the garlic powder and instead rub 3-4 minced fresh garlic cloves under the skin of each thigh. The garlic infuses the meat directly and gets sweet and aromatic during cooking.
- No-Skin Option: If you’re watching calories or just don’t love chicken skin (I’m not judging), use boneless, skinless thighs. Reduce cooking time to 8 minutes per side at 375°F, and skip the baking powder—it’s only needed for crisping skin.
- Oven Method: No air fryer? No problem. Place the seasoned thighs on a wire rack over a baking sheet and bake at 425°F for 35-40 minutes, flipping once halfway. The skin won’t be quite as crackling, but it’ll still be delicious.
I’ve tried all of these variations and they each bring something different to the table. The lemon herb version is perfect for spring dinners, while the buffalo style is my game-day go-to. Don’t be afraid to experiment—chicken thighs are forgiving and take well to most flavor profiles.
Serving & Storage Suggestions
These crispy air fryer chicken thighs are incredibly versatile. Here’s how to serve them and store any leftovers (if there are any).
Serving Suggestions: Serve these hot, right after resting. The skin is at its crispiest within the first 15 minutes of cooking. Pair them with simple sides that let the chicken shine—a crisp green salad, roasted vegetables, or fluffy rice. I love serving them alongside a batch of easy sheet pan teriyaki chicken bento box components for a fun dinner spread. For a cozy meal, they’re perfect with creamy one-pot butternut squash and sage pasta on the side—the richness balances beautifully.
Storage Instructions: Store leftover chicken in an airtight container in the refrigerator for up to 4 days. The skin will soften during storage, but don’t worry—you can revive it. I don’t recommend freezing cooked chicken thighs with the skin on, as the texture suffers significantly upon thawing.
Reheating for Maximum Crispiness: The air fryer is your best friend here too. Reheat at 375°F for 3-4 minutes, flipping once. This brings back most of the original crunch. Avoid the microwave at all costs—it turns the skin into sad, rubbery leather. If you’re in a hurry, a hot skillet with a tiny bit of oil works too, but the air fryer is superior.
Meal Prep Tips: These are excellent for meal prep. Cook a batch on Sunday, store them in the fridge, and reheat in the air fryer for quick lunches or dinners throughout the week. They’re also great chopped up over salads or in grain bowls for easy work lunches.
Nutritional Information & Benefits
Here’s the nutritional breakdown per serving (1 thigh, based on 4 servings):
- Calories: 285
- Protein: 24g
- Fat: 20g (5g saturated)
- Carbohydrates: 1g
- Fiber: 0g
- Sugar: 0g
- Sodium: 680mg
Chicken thighs are often overlooked in favor of breasts, but they’re actually more nutrient-dense in some ways. They contain more iron, zinc, and B vitamins than chicken breasts, plus they’re naturally higher in healthy monounsaturated fats. The skin does add fat and calories, but it also provides collagen and adds significant flavor—I think it’s worth it for the texture alone.
This recipe is naturally gluten-free, low-carb, and keto-friendly. If you’re watching your sodium, reduce the salt to 1 teaspoon and skip the baking powder (though the skin won’t be quite as crispy). For a dairy-free option, this recipe is already dairy-free—just make sure your seasoning blends don’t contain any hidden dairy ingredients.
I personally love that these crispy air fryer chicken thighs fit into a balanced diet without feeling like “diet food.” They’re satisfying, flavorful, and don’t leave you feeling deprived. That’s the kind of cooking I can get behind.
Conclusion
These crispy air fryer chicken thighs with golden crackling skin are proof that you don’t need deep fryers, complicated techniques, or hours of prep to get restaurant-quality results at home. With just a few simple ingredients and about 25 minutes, you can have chicken that’s juicy on the inside, shatteringly crisp on the outside, and packed with flavor in every bite.
I’ve made this recipe for weeknight dinners, lazy Sunday lunches, and even for company (they were impressed and had no idea it came from an air fryer). It’s become my go-to when I want something satisfying without spending hours in the kitchen. The best part? It’s completely adaptable—once you master the basic technique, you can experiment with different seasonings and variations to make it your own.
I’d love to hear how these turn out for you. Did you try a different seasoning blend? Did your family go back for seconds? Drop a comment below and let me know—I read every single one, and your feedback helps me create better recipes. And if you’re looking for more easy, delicious meals, check out this crispy garlic parmesan baked chicken thighs recipe for another take on crispy chicken. Happy cooking, friends!
Frequently Asked Questions
Can I use boneless chicken thighs for this recipe?
Yes, but adjust the cooking time. Boneless thighs cook faster—try 8 minutes per side at 375°F. The skin may not get quite as crispy since there’s less fat rendering, but it’ll still be good. Just make sure to check the internal temperature reaches 175°F.
Why is my air fryer chicken skin not getting crispy?
Most likely, the skin wasn’t dry enough before cooking, or the air fryer basket was overcrowded. Pat the chicken very dry with paper towels, let it air-dry for 10 minutes, and make sure the pieces aren’t touching in the basket. Also, check that your air fryer is preheated properly—a cold start won’t give you that initial blast of heat needed for crisping.
Can I use skinless chicken thighs?
Absolutely. Skip the baking powder (it’s only needed for crisping skin) and reduce cooking time to 8 minutes per side at 375°F. The meat will still be juicy and flavorful, just without the crackling skin. I’ve made this for friends who don’t eat skin and they loved it.
How do I reheat leftovers without losing crispiness?
The air fryer is your best bet. Reheat at 375°F for 3-4 minutes, flipping once. This brings back most of the original crunch. Avoid the microwave—it turns the skin rubbery. If you don’t have an air fryer, a hot skillet with a tiny bit of oil works, but it’s not quite as good.
Can I marinate the chicken overnight?
You can, but I don’t recommend it for this recipe. Marinades add moisture to the skin, which works against crispiness. If you want more flavor, dry brine the chicken instead—season it with salt and let it sit uncovered in the fridge for 4-24 hours. The salt penetrates the meat and the skin dries out, giving you even crispier results.
Pin This Recipe!

Crispy Air Fryer Chicken Thighs: Best Golden Crackling Skin

These air fryer chicken thighs deliver perfectly crispy, golden crackling skin with juicy, tender meat inside—ready in under 30 minutes with simple pantry ingredients.
- Prep Time: 15 minutes
- Cook Time: 22-24 minutes
- Total Time: 37-39 minutes
- Yield: 4 servings 1x
- Category: Main Course
- Cuisine: American
Ingredients
- 4–6 bone-in, skin-on chicken thighs (about 2 pounds total)
- 1½ teaspoons kosher salt (or 1 teaspoon table salt)
- 1 teaspoon garlic powder
- 1 teaspoon onion powder
- ½ teaspoon smoked paprika
- ½ teaspoon freshly ground black pepper
- ¼ teaspoon cayenne pepper (optional)
- 1 tablespoon aluminum-free baking powder
- Olive oil or avocado oil spray
Instructions
- Pat the chicken thighs completely dry with paper towels, including all crevices. Let sit uncovered for 10 minutes to allow surface moisture to evaporate.
- In a small bowl, mix together kosher salt, garlic powder, onion powder, smoked paprika, black pepper, cayenne (if using), and baking powder until evenly combined.
- Sprinkle the seasoning mixture evenly over both sides of the chicken thighs, rubbing it in gently. Lift the skin and rub some seasoning underneath for extra flavor.
- Preheat the air fryer to 380°F for 5 minutes.
- Lightly spray the air fryer basket with oil spray.
- Arrange the chicken thighs skin-side down in a single layer in the basket, ensuring they are not touching. Cook in batches if necessary.
- Lightly spray the tops of the chicken with oil spray.
- Cook at 380°F for 12 minutes without opening the basket.
- Carefully flip each thigh using tongs. Spray the newly exposed side lightly with oil.
- Cook for another 10-12 minutes at 380°F, until the internal temperature reaches 175-185°F in the thickest part (avoiding the bone).
- If desired, increase temperature to 400°F and cook for an additional 2-3 minutes for extra crispiness, watching closely to prevent burning.
- Transfer chicken to a wire rack or plate and let rest for 5 minutes before serving.
Notes
Patting the chicken completely dry is crucial for crispy skin. Do not overcrowd the air fryer basket—cook in batches if needed. Baking powder (aluminum-free) helps the skin brown and crisp. Let chicken rest 5 minutes after cooking to retain juices. For meal prep, store leftovers in an airtight container in the refrigerator for up to 4 days; reheat in the air fryer at 375°F for 3-4 minutes to restore crispiness.
Nutrition
- Serving Size: 1 thigh
- Calories: 285
- Sodium: 680
- Fat: 20
- Saturated Fat: 5
- Carbohydrates: 1
- Protein: 24
Keywords: air fryer chicken thighs, crispy chicken thighs, golden crackling skin, bone-in chicken thighs, easy chicken recipe, weeknight dinner, keto, low-carb, gluten-free