Let me tell you, the scent of sizzling chili mingling with melted cheese and crispy fries wafting from my kitchen is enough to make anyone’s mouth water. The first time I made these crispy loaded chili cheese fries, I was instantly hooked—the kind of moment where you pause, take a deep breath, and just smile because you know you’re onto something truly special. I remember being knee-high to a grasshopper when my grandma would whip up a similar dish for family game nights, and honestly, nothing beats that pure, nostalgic comfort.
Years ago, I stumbled upon this recipe during a rainy weekend when I was craving something hearty but easy. My family couldn’t stop sneaking them off the cooling rack (and I can’t really blame them). You know what? These fries are dangerously easy to make and perfect for potlucks, movie nights, or a sweet treat for your kids after school. Honestly, if you’re looking to brighten up your Pinterest snack board, this crispy loaded chili cheese fries recipe is the one you’re going to want to bookmark.
After testing this recipe multiple times in the name of research, of course, it’s become a staple for family gatherings and casual hangouts alike. Every bite feels like a warm hug, and once you try it, you’ll be making it again and again. Let’s face it—crispy loaded chili cheese fries perfection is exactly what your snack time has been missing.
Why You’ll Love This Recipe
Here’s the deal: this crispy loaded chili cheese fries recipe isn’t just another snack. I’ve put it through its paces, tweaking and tasting until it hit that sweet spot. It’s family-approved and chef-tested right in my own kitchen, so you can trust it to deliver. Here’s why you’re going to love it:
- Quick & Easy: Comes together in under 30 minutes, perfect for busy weeknights or last-minute cravings.
- Simple Ingredients: No fancy grocery trips needed; you likely already have everything in your kitchen pantry.
- Perfect for Entertaining: Great for game days, casual parties, or even a cozy solo snack session.
- Crowd-Pleaser: Always gets rave reviews from kids, adults, and even picky eaters.
- Unbelievably Delicious: The crispy fries, savory chili, and gooey cheese combo is next-level comfort food.
What sets this recipe apart? It’s the crispy fry base that holds up under the chili without getting soggy, plus a perfectly balanced chili with just the right kick—not too spicy but full of flavor. Oh, and the cheese sauce? It’s rich, creamy, and melts like a dream. Honestly, this is comfort food reimagined—fast, flavorful, and totally satisfying. Whether you’re impressing guests or craving a solo snack, this recipe delivers every single time.
What Ingredients You Will Need
This recipe uses simple, wholesome ingredients to deliver bold flavor and satisfying texture without the fuss. Most are pantry staples, and you can easily swap ingredients to fit what you have on hand.
- For the Fries:
- Frozen shoestring or crinkle-cut fries (about 1 lb / 450 g) – I recommend Ore-Ida for best crispiness
- Vegetable oil or avocado oil for frying (or use olive oil if baking)
- Salt and black pepper to taste
- For the Chili:
- 1/2 lb (225 g) ground beef (or turkey for a leaner option)
- 1 small onion, finely chopped
- 2 cloves garlic, minced
- 1 cup (240 ml) canned crushed tomatoes
- 1/2 cup (120 ml) kidney beans, drained and rinsed
- 1 tablespoon chili powder (adjust to taste)
- 1 teaspoon cumin
- 1/2 teaspoon smoked paprika
- Salt and pepper
- For the Cheese Sauce:
- 1 cup (240 ml) whole milk
- 2 tablespoons unsalted butter
- 2 tablespoons all-purpose flour (use gluten-free flour for GF option)
- 1 1/2 cups (170 g) sharp cheddar cheese, shredded (I love Cabot brand for melt and flavor)
- Salt and pepper to taste
- Toppings (optional but recommended):
- 1/4 cup sliced jalapeños
- 2 tablespoons chopped green onions
- Sour cream or plain Greek yogurt for serving
Feel free to swap in ground turkey or plant-based meat for the chili, and if you want to add a little twist, some diced bell peppers in the chili add a nice sweetness. For dairy-free, use your favorite non-dairy milk and vegan cheese.
Equipment Needed
- Deep fryer or large heavy-bottomed pot for frying (if you don’t have a fryer, a Dutch oven works great)
- Slotted spoon or spider strainer for removing fries from hot oil
- Large skillet or frying pan for cooking chili
- Medium saucepan to make the cheese sauce
- Mixing bowls
- Whisk for smooth cheese sauce
- Oven-safe dish or platter for assembling fries
- Optional: baking sheet and wire rack if baking fries instead of frying
If you’re on a budget, baking the fries is a solid alternative—just remember to flip halfway through for crispiness. A non-stick skillet makes cleanup easier, especially when cooking the chili. I’ve found that a good whisk really helps get the cheese sauce silky smooth without lumps.
Preparation Method
- Prepare the Fries: Heat your oil in a deep fryer or heavy pot to 350°F (175°C). Fry the frozen fries in batches for about 3-5 minutes until golden and crispy. Remove with a slotted spoon and drain on paper towels. Season immediately with salt and pepper. (If baking, preheat oven to 425°F / 220°C and bake fries on a wire rack over a baking sheet for 25-30 minutes.)
- Make the Chili: While fries cook, heat a tablespoon of oil in a skillet over medium heat. Add chopped onions and sauté until translucent, about 3 minutes. Add garlic and cook for 30 seconds until fragrant.
- Add ground beef, breaking it apart with a wooden spoon. Cook until browned and no longer pink, about 7-8 minutes. Drain excess fat if desired.
- Stir in crushed tomatoes, kidney beans, chili powder, cumin, smoked paprika, salt, and pepper. Simmer uncovered for 10-15 minutes, stirring occasionally until slightly thickened. Adjust seasoning to your taste.
- Prepare the Cheese Sauce: In a medium saucepan, melt butter over medium heat. Whisk in flour and cook for 1-2 minutes to form a roux (should smell nutty but not burnt).
- Slowly whisk in milk, making sure no lumps form. Continue whisking until mixture thickens and coats the back of a spoon, about 5 minutes.
- Remove from heat and stir in shredded cheddar cheese until melted and smooth. Season with salt and pepper if needed.
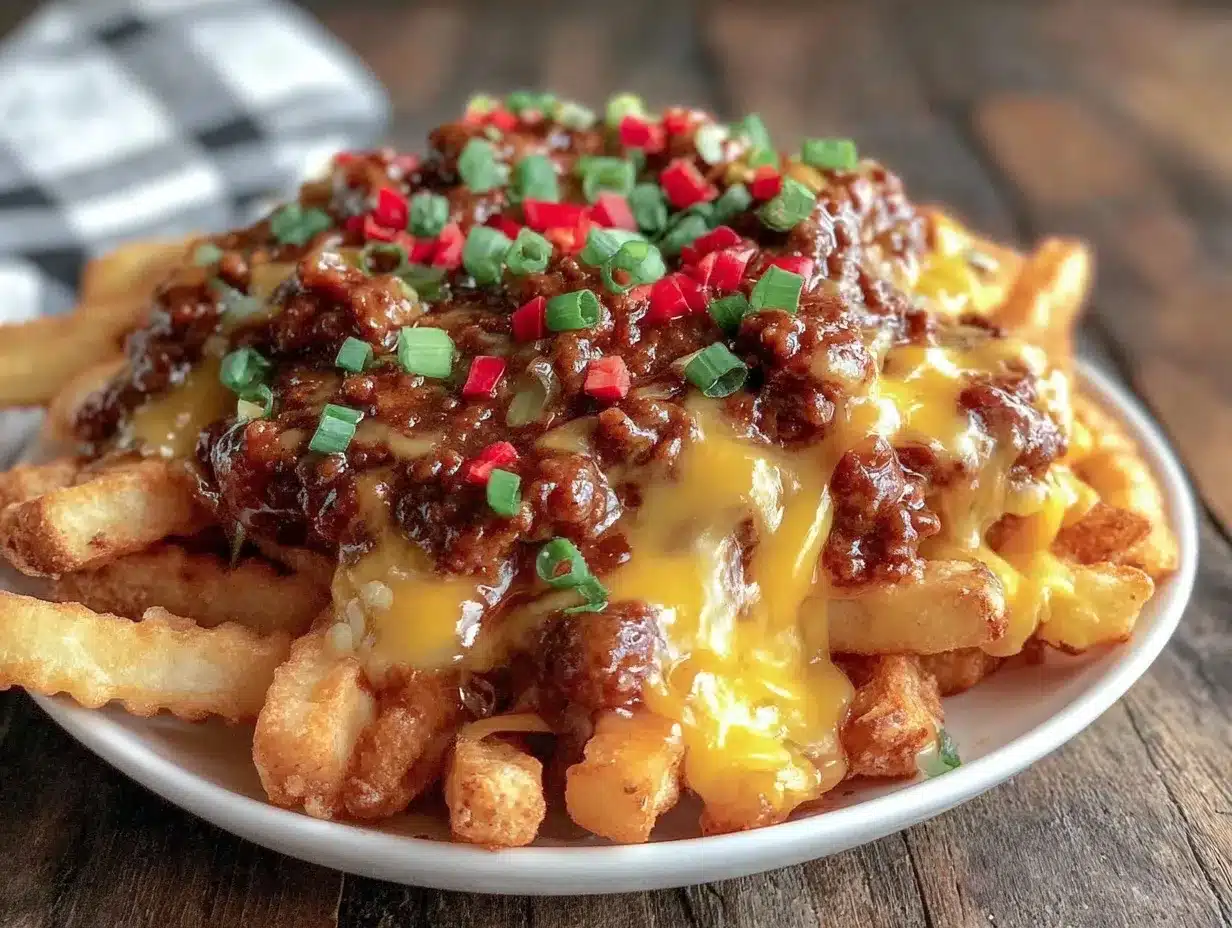
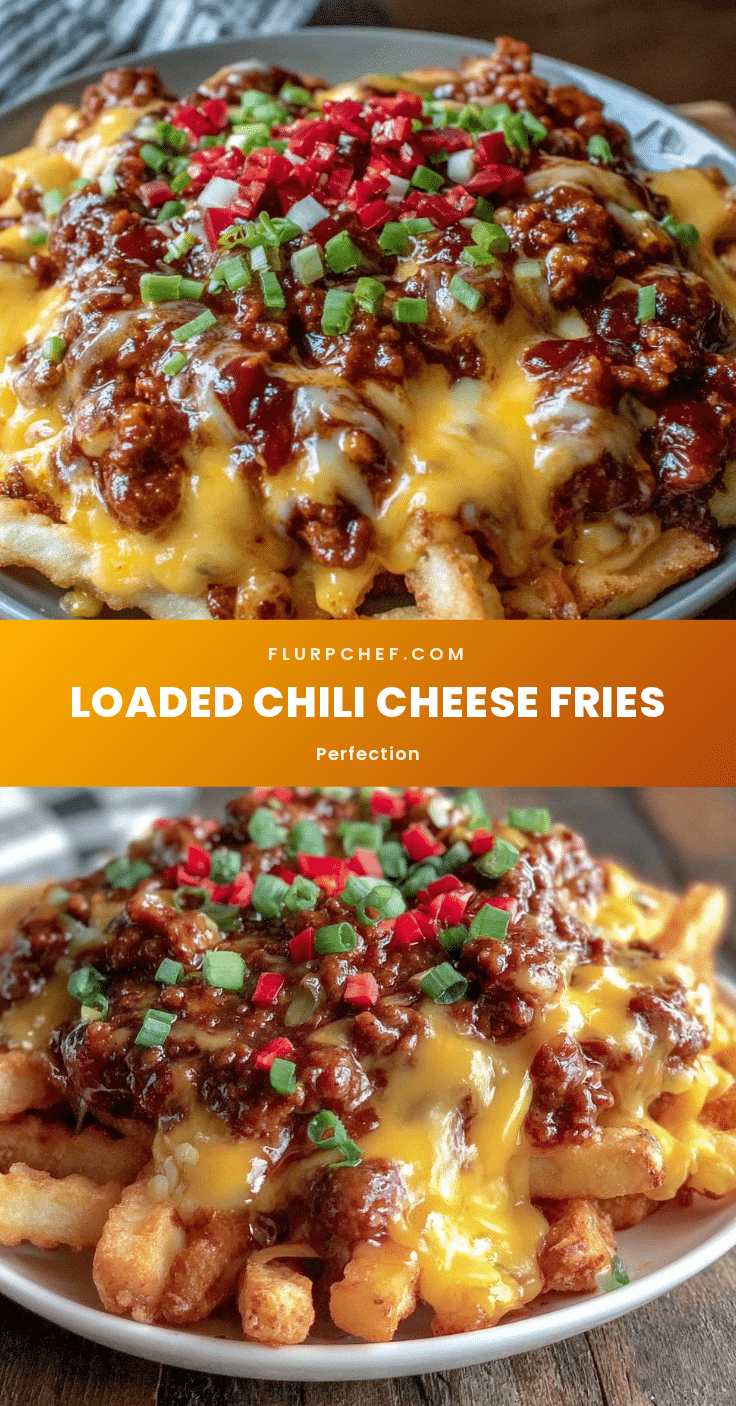
- Assemble the Fries: Arrange the crispy fries on an oven-safe dish or platter. Spoon generous amounts of chili over the fries, then drizzle the cheese sauce on top.
- Add Toppings: Scatter sliced jalapeños and chopped green onions over the loaded fries. Add sour cream or Greek yogurt on the side, if you like.
- Serve Immediately: This is best enjoyed hot so the fries stay crispy and the cheese sauce is gooey. Grab a fork and dig in!
Pro tip: if your cheese sauce gets too thick, stir in a splash of milk to loosen it right before serving. And don’t skimp on the seasoning—it really makes the chili pop.
Cooking Tips & Techniques
Here’s what I’ve learned after making these crispy loaded chili cheese fries a dozen times (or more):
- Fry in Small Batches: To keep the oil temperature steady and fries crispy, don’t overcrowd your fryer or pot.
- Use Frozen Fries: Fresh cut fries can be great but require more prep. Frozen fries save time and yield consistent crispiness.
- Simmer Chili Low and Slow: Letting chili simmer gently lets flavors meld without drying it out. Stir occasionally to prevent sticking.
- Make Cheese Sauce Last: Cheese sauce can seize or thicken if kept warm too long. Make it just before assembling.
- Season Each Layer: Salt the fries, season the chili well, and taste your cheese sauce. Layering flavors is key.
- Multitask Wisely: Cook chili while fries fry to save time. Cheese sauce takes just minutes at the end.
- Watch Your Cheese: Use sharp cheddar for flavor and good melting. Avoid pre-shredded cheese with anti-caking agents that can affect smoothness.
Honestly, mistakes happen—like overcooking chili or soggy fries—but with these tips, your loaded chili cheese fries will come out crispy and flavorful every time.
Variations & Adaptations
Feel free to customize this crispy loaded chili cheese fries recipe to suit your taste, dietary needs, or what you have on hand:
- Vegetarian Version: Swap ground beef for plant-based crumbles or extra beans. Use vegetable broth in chili for depth.
- Spicy Kick: Add hot sauce to your chili or sprinkle crushed red pepper flakes over the cheese sauce before serving.
- Seasonal Twist: In summer, top with fresh diced tomatoes and avocado for a fresher vibe.
- Different Cheese: Try pepper jack for a little heat or mozzarella for a gooey stretch.
- Healthier Option: Bake fries with a light spray of oil instead of frying, and use lean turkey meat for chili.
I once tried swapping cheddar for a smoky gouda and it was a game changer—adds a subtle smoky richness that’s outstanding. Don’t hesitate to experiment and make this your own!
Serving & Storage Suggestions
Serve these crispy loaded chili cheese fries piping hot, straight from the oven or fryer, so you get that perfect crispy-cheesy experience. They pair beautifully with a cold beer or a tangy iced tea, and a simple green salad on the side helps balance the richness.
If you have leftovers (though it’s rare!), store them in an airtight container in the fridge for up to 2 days. Reheat in the oven at 375°F (190°C) for 10-15 minutes to restore crispiness—microwaving tends to make fries soggy, and we want to avoid that at all costs.
Flavors actually deepen the next day, especially the chili, so making it a day ahead can save time and boost tastiness. Just reheat and top with fresh cheese sauce and garnishes for that just-made feel.
Nutritional Information & Benefits
Here’s a rough estimate per serving (serves 4): approximately 550 calories, 30 g fat, 45 g carbs, and 25 g protein. The recipe packs a punch of protein from ground beef and beans, plus calcium and vitamins from cheese.
Using lean meat or turkey cuts down on saturated fat, and adding beans boosts fiber, making this indulgent snack a bit more balanced. For gluten-free fans, swap flour in cheese sauce with cornstarch or gluten-free flour.
This recipe is a comfort food treat that, with mindful portioning, fits into a balanced diet. Plus, homemade beats takeout any day—you know exactly what’s going in.
Conclusion
So there you have it—crispy loaded chili cheese fries perfection that’s easy, satisfying, and downright delicious. This recipe is definitely worth trying if you want a snack that feels like a celebration but doesn’t take hours in the kitchen. Customize it your way, play with spices, and make it your own comfort classic.
I love this recipe because it brings back warm memories and makes everyone feel at home. If you give it a shot, drop a comment below and let me know how you made it yours! Share it with friends who need a snack upgrade, and don’t forget to tag me if you post your creation.
Happy cooking—and remember, sometimes the best meals are the ones you share with loved ones over crispy, cheesy fries!
FAQs About Crispy Loaded Chili Cheese Fries
Can I make these fries ahead of time?
You can prep the chili and cheese sauce a day ahead, but fry or bake the fries just before serving for the crispiest texture.
What’s the best cheese to use for the sauce?
Sharp cheddar melts beautifully and gives great flavor, but you can also try pepper jack or mozzarella for different tastes.
Can I bake the fries instead of frying?
Absolutely! Baking at 425°F (220°C) on a wire rack for 25-30 minutes works well and reduces oil usage.
How can I make this recipe vegetarian?
Swap the ground beef for plant-based crumbles or add extra beans, and use vegetable broth in the chili.
What toppings go well with loaded chili cheese fries?
Try jalapeños, green onions, diced tomatoes, avocado, or a dollop of sour cream or Greek yogurt for extra flavor and texture.
Pin This Recipe!
Crispy Loaded Chili Cheese Fries

A quick and easy snack featuring crispy fries topped with savory chili and creamy cheese sauce, perfect for family gatherings and casual hangouts.
- Prep Time: 10 minutes
- Cook Time: 20 minutes
- Total Time: 30 minutes
- Yield: 4 servings 1x
- Category: Snack
- Cuisine: American
Ingredients
- 1 lb frozen shoestring or crinkle-cut fries
- Vegetable oil or avocado oil for frying (or olive oil if baking)
- Salt and black pepper to taste
- 1/2 lb ground beef (or turkey for a leaner option)
- 1 small onion, finely chopped
- 2 cloves garlic, minced
- 1 cup canned crushed tomatoes
- 1/2 cup kidney beans, drained and rinsed
- 1 tablespoon chili powder (adjust to taste)
- 1 teaspoon cumin
- 1/2 teaspoon smoked paprika
- Salt and pepper
- 1 cup whole milk
- 2 tablespoons unsalted butter
- 2 tablespoons all-purpose flour (use gluten-free flour for GF option)
- 1 1/2 cups sharp cheddar cheese, shredded
- Salt and pepper to taste
- 1/4 cup sliced jalapeños (optional)
- 2 tablespoons chopped green onions (optional)
- Sour cream or plain Greek yogurt for serving (optional)
Instructions
- Heat oil in a deep fryer or heavy pot to 350°F (175°C). Fry frozen fries in batches for 3-5 minutes until golden and crispy. Remove with a slotted spoon and drain on paper towels. Season immediately with salt and pepper. (If baking, preheat oven to 425°F (220°C) and bake fries on a wire rack over a baking sheet for 25-30 minutes.)
- While fries cook, heat a tablespoon of oil in a skillet over medium heat. Add chopped onions and sauté until translucent, about 3 minutes. Add garlic and cook for 30 seconds until fragrant.
- Add ground beef, breaking it apart with a wooden spoon. Cook until browned and no longer pink, about 7-8 minutes. Drain excess fat if desired.
- Stir in crushed tomatoes, kidney beans, chili powder, cumin, smoked paprika, salt, and pepper. Simmer uncovered for 10-15 minutes, stirring occasionally until slightly thickened. Adjust seasoning to taste.
- In a medium saucepan, melt butter over medium heat. Whisk in flour and cook for 1-2 minutes to form a roux.
- Slowly whisk in milk, making sure no lumps form. Continue whisking until mixture thickens and coats the back of a spoon, about 5 minutes.
- Remove from heat and stir in shredded cheddar cheese until melted and smooth. Season with salt and pepper if needed.
- Arrange crispy fries on an oven-safe dish or platter. Spoon generous amounts of chili over the fries, then drizzle the cheese sauce on top.
- Scatter sliced jalapeños and chopped green onions over the loaded fries. Add sour cream or Greek yogurt on the side, if desired.
- Serve immediately while hot to keep fries crispy and cheese sauce gooey.
Notes
If cheese sauce gets too thick, stir in a splash of milk to loosen before serving. Fry fries in small batches to maintain oil temperature and crispiness. Baking fries is a healthier alternative; flip halfway through baking. Season each layer well for best flavor. Use sharp cheddar cheese for best melt and flavor. Leftovers can be stored in an airtight container in the fridge for up to 2 days and reheated in the oven to restore crispiness.
Nutrition
- Serving Size: 1/4 of the recipe
- Calories: 550
- Sugar: 5
- Sodium: 700
- Fat: 30
- Saturated Fat: 12
- Carbohydrates: 45
- Fiber: 6
- Protein: 25
Keywords: crispy fries, chili cheese fries, loaded fries, snack recipe, easy snack, comfort food, cheesy fries


