Let me tell you, the scent of sizzling lumpia rolls wafting from my kitchen instantly brings back childhood memories of bustling family gatherings and festive celebrations. The first time I rolled my own batch of crispy Filipino lumpia, I was instantly hooked—the kind of moment where you pause, take a deep breath, and just smile because you know you’re onto something truly special. When I was knee-high to a grasshopper, my Lola (grandma) would make these golden, crunchy rolls filled with a savory mix of meat and vegetables, and oh, how my cousins and I would sneak them off the platter before the adults even had a chance to sit down.
Honestly, lumpia rolls are dangerously easy to make at home, and nothing beats the satisfying crunch followed by that burst of savory flavor. You know what? I wish I had discovered how simple this recipe was years ago—it would have saved me from those late-night takeout runs! My family couldn’t stop sneaking them off the cooling rack (and I can’t really blame them). Whether it’s a potluck, a sweet treat for your kids after school, or just a way to brighten up your Pinterest cookie board with something savory, these lumpia rolls fit the bill perfectly.
I’ve tested this recipe multiple times— in the name of research, of course— and now it’s a staple for our family gatherings, gifting, and even lazy weekend snacks. Making lumpia feels like a warm hug wrapped in a crispy shell, and you’re going to want to bookmark this one.
Why You’ll Love This Recipe
Having cooked and perfected this Filipino lumpia rolls recipe over several years, I can confidently say it’s a crowd-pleaser that balances tradition and ease. Here’s what makes it stand out:
- Quick & Easy: Comes together in under 45 minutes, perfect for busy weeknights or last-minute cravings.
- Simple Ingredients: No fancy grocery trips needed; you likely already have everything in your kitchen pantry.
- Perfect for Any Occasion: Great for family dinners, parties, potlucks, or even as finger food for movie nights.
- Crowd-Pleaser: Always gets rave reviews from kids and adults alike—trust me, they’ll be asking for seconds.
- Unbelievably Delicious: The crispy exterior combined with the savory veggie and meat filling creates an irresistible texture and flavor combo.
What sets this recipe apart is the balance of textures—the filling is juicy yet not soggy, and the lumpia wrapper crisps up just right without burning. I’ve tweaked the seasoning to hit that perfect savory note with just a hint of sweetness, reminiscent of authentic Filipino street food. Plus, using a mix of pork and fresh veggies keeps it hearty and wholesome. Honestly, this lumpia recipe isn’t just good—it’s the kind that makes you close your eyes after the first bite. It’s comfort food with soul, but without the fuss.
What Ingredients You Will Need
This recipe uses simple, wholesome ingredients to deliver bold flavor and satisfying texture without the fuss. Most are pantry staples or fresh produce you can find year-round.
- For the Filling:
- 1/2 pound ground pork (or ground beef, if you prefer)
- 1 cup finely shredded green cabbage (adds crunch and freshness)
- 1/2 cup grated carrots (for sweetness and color)
- 1/2 cup diced onions (yellow or white, adds depth of flavor)
- 2 cloves garlic, minced (for that aromatic kick)
- 1/4 cup chopped green onions (adds a mild oniony freshness)
- 1/4 cup water chestnuts, finely chopped (optional, for extra crunch)
- 1 tablespoon soy sauce (I recommend Kikkoman for consistent flavor)
- 1 teaspoon fish sauce (adds authentic umami; optional if you want milder taste)
- 1/2 teaspoon ground black pepper
- 1/2 teaspoon salt (adjust to taste)
- 1 teaspoon sugar (balances the savory, but optional)
- 1 tablespoon vegetable oil (for cooking the filling)
- For Wrapping:
- 20-25 lumpia wrappers (fresh or frozen, thawed; rice paper wrappers not recommended here)
- 1 egg, beaten (for sealing the wrappers)
- For Frying:
- Vegetable oil or canola oil (enough for deep frying, about 3-4 cups)
If you want to swap out pork for chicken or turkey, that works well too. For a vegetarian option, replace meat with chopped mushrooms and tofu. Fresh produce like cabbage and carrots keep the filling light and balanced. When buying lumpia wrappers, look for brands like “Eng Bee Tin” or local Asian markets—they’re thin yet sturdy enough to hold the filling without tearing.
Equipment Needed
- Large mixing bowl (for combining the filling ingredients)
- Non-stick skillet or frying pan (to cook the filling before wrapping)
- Large deep frying pan or wok (for frying the lumpia rolls)
- Slotted spoon or spider strainer (to safely remove lumpia from hot oil)
- Paper towels or wire rack (to drain excess oil)
- Sharp knife and cutting board (for chopping veggies and meat)
- Pastry brush or small bowl (for brushing beaten egg on wrappers)
If you don’t have a deep fryer, a heavy-bottomed wok or large frying pan works just fine. I personally use a cast iron skillet for frying because it holds temperature well and gives that perfect crisp. For smaller budgets, any sturdy non-stick pan with at least 3 inches of depth will do. Maintenance tip: clean your frying pan promptly after use to avoid oil buildup and keep it ready for the next batch.
Preparation Method
- Prepare the Filling (15 minutes): Heat 1 tablespoon vegetable oil in a non-stick skillet over medium heat. Add minced garlic and diced onions, sauté for 2-3 minutes until fragrant and translucent. Add ground pork and cook, breaking it apart with a spatula, until no longer pink (about 5-6 minutes).
Tip: Make sure to cook the meat thoroughly as it will be inside the lumpia wrapper later. - Add Veggies and Seasoning (5 minutes): Stir in shredded cabbage, grated carrots, chopped water chestnuts (if using), soy sauce, fish sauce, black pepper, salt, and sugar. Cook for another 3-4 minutes until veggies are slightly softened but still have a bit of crunch.
Note: Don’t overcook the veggies; you want a nice texture contrast in your lumpia. - Cool the Filling (10 minutes): Transfer the cooked filling to a bowl and let it cool to room temperature. This step prevents the lumpia wrapper from getting soggy.
Pro tip: You can refrigerate the filling for 30 minutes if you want to prep ahead—makes rolling easier. - Prepare Wrappers and Egg Wash: Lay out lumpia wrappers on a clean surface. Keep them covered with a damp towel to prevent drying out. Beat the egg in a small bowl; this will act as glue to seal the rolls.
- Roll the Lumpia (20 minutes): Place about 2 tablespoons of filling near the bottom edge of a wrapper. Fold the bottom up over the filling, fold in the sides snugly, then roll tightly toward the top. Brush a little beaten egg on the top edge to seal.
Tip: Don’t overfill to avoid tearing and difficulty sealing. - Heat Oil for Frying: In a large deep pan or wok, heat 3-4 cups of vegetable oil to 350°F (175°C). Use a kitchen thermometer for accuracy.
Warning: Be careful with hot oil—never leave it unattended. - Fry the Lumpia (5-7 minutes per batch): Fry the rolls in batches, turning occasionally, until golden brown and crispy all over.
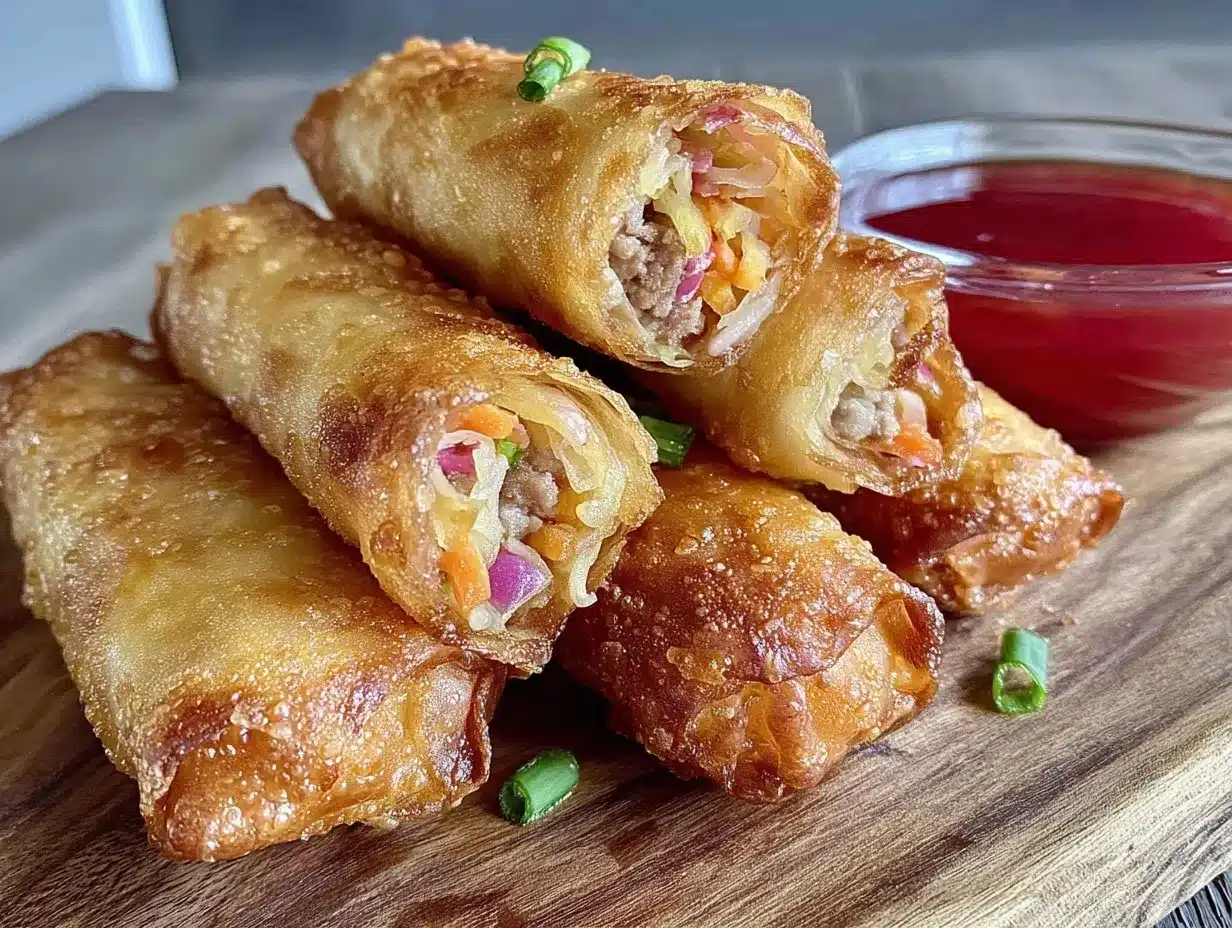
Tip: Don’t overcrowd the pan; it lowers the oil temperature and makes lumpia greasy. - Drain and Serve: Remove lumpia with a slotted spoon, drain on paper towels or wire rack. Serve hot with your favorite dipping sauce like sweet chili or vinegar with garlic.
Personal note: Freshly fried lumpia is best enjoyed immediately for that signature crunch.
Cooking Tips & Techniques
Cooking lumpia can seem straightforward, but a few tricks make all the difference. First, thoroughly cook and cool the filling before rolling. This prevents soggy lumpia and helps maintain that satisfying crunch. When rolling, keep the wrapper taut but gentle—too tight and it might tear; too loose and the filling could spill out.
Maintaining proper oil temperature is key—too hot and the lumpia burns on the outside but stays raw inside, too cool and they soak up oil and become greasy. I’ve learned to use a kitchen thermometer faithfully, but if you don’t have one, test the oil by dropping a small piece of wrapper in; it should sizzle and float immediately.
Multitasking tip: While one batch fries, prepare the next set of rolls to keep the momentum going. And don’t rush the frying; patience means less oily, crispier lumpia. Finally, don’t skip draining on paper towels or a wire rack to keep them from getting soggy after frying.
Variations & Adaptations
There’s plenty of room to customize lumpia rolls to your taste or dietary needs. Here are a few ideas I’ve tried and loved:
- Vegetarian Lumpia: Swap ground meat with finely chopped mushrooms, tofu, or a medley of grated veggies. Add some soy sauce and sesame oil for flavor.
- Seafood Twist: Use cooked shrimp or crab meat mixed with the veggies for a lighter variation.
- Gluten-Free Option: Use rice paper wrappers (though the texture will be a bit different) or look for gluten-free lumpia wrappers at specialty stores.
- Spicy Lumpia: Add chopped chili peppers or a dash of cayenne powder to the filling for a kick.
- Oven-Baked Lumpia: For a lighter version, brush rolls with oil and bake at 400°F (200°C) for 20-25 minutes until golden, turning halfway.
One personal favorite variation is adding finely chopped jicama for extra crunch and a subtle sweetness that pairs beautifully with the savory pork filling.
Serving & Storage Suggestions
Serve lumpia hot and crispy with your go-to dipping sauces—traditional vinegar with crushed garlic and chili is a classic, but sweet chili sauce or even a spicy mayo works beautifully too. Lumpia also pairs well with steamed rice and a side of pickled vegetables for a full meal.
If you have leftovers (rare, I know!), store them in an airtight container in the refrigerator for up to 2 days. To reheat and keep them crispy, pop them in a 350°F (175°C) oven or toaster oven for about 10 minutes instead of microwaving.
For longer storage, lumpia rolls freeze well before frying. Freeze them in a single layer on a baking sheet, then transfer to a freezer bag. When ready, fry them straight from frozen (add a couple of extra minutes to the cooking time). Flavors develop nicely overnight, so if you prep ahead, your lumpia might taste even better the next day!
Nutritional Information & Benefits
Each lumpia roll (approximate) contains about 150-180 calories, with a good balance of protein from the pork and fiber from the vegetables. The cabbage and carrots add vitamins A and C, while garlic and onions provide antioxidants and immune-boosting benefits.
This recipe can be adapted to be lower in fat by baking instead of frying or using lean ground meat. It’s naturally gluten-free if you choose the right wrappers, and offers a satisfying way to include more vegetables in your diet.
From a wellness standpoint, it’s a tasty comfort food that doesn’t feel heavy or greasy when made right—a nice change from usual fried snacks.
Conclusion
If you’re after a recipe that’s crispy, flavorful, and full of heart, these Filipino lumpia rolls with savory veggie and meat filling are a must-try. You can customize the filling and cooking method to suit your preferences, but the core of this recipe—the crispy wrapper and juicy, balanced filling—always shines through.
I love this recipe because it brings back fond memories and brings people together over delicious food. Give it a go, and I bet you’ll find yourself rolling lumpia like a pro in no time.
Don’t forget to leave a comment sharing your experience or any tweaks you’ve made—I love hearing from you all! And if you enjoyed this recipe, please share it with friends who appreciate a good homemade treat. Happy cooking!
FAQs About Crispy Filipino Lumpia Rolls
Can I make lumpia ahead of time?
Absolutely! You can prepare and roll lumpia a day ahead, keep them refrigerated, and fry just before serving. For longer storage, freeze them before frying.
What’s the best way to keep lumpia crispy after frying?
Drain on paper towels or a wire rack immediately after frying to remove excess oil. Serve hot or reheat in the oven for best crispiness.
Can I bake lumpia instead of frying?
Yes! Brush the rolls with oil and bake at 400°F (200°C) for 20-25 minutes, turning halfway. The texture will be slightly less crispy but still delicious.
Are lumpia wrappers the same as spring roll wrappers?
Not quite. Lumpia wrappers are thinner and more delicate than typical spring roll wrappers. Using lumpia wrappers gives you that authentic Filipino crispiness.
What dipping sauces go well with lumpia?
Classic vinegar with garlic and chili, sweet chili sauce, or even a simple soy sauce-based dip are all great choices. Pick one that suits your taste!
Pin This Recipe!
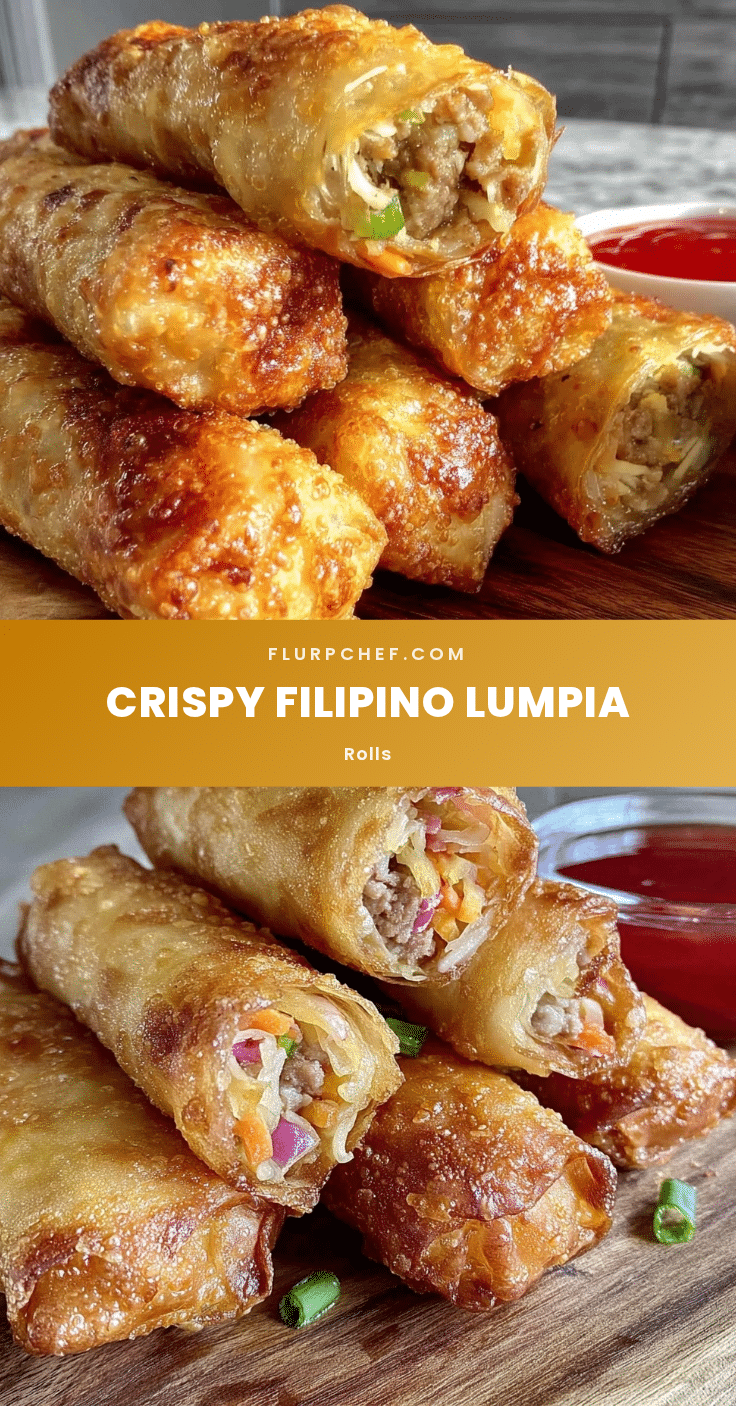
Crispy Filipino Lumpia Rolls Recipe Easy Homemade Savory Veggie Meat Filling

A crowd-pleasing Filipino lumpia recipe featuring crispy wrappers filled with a savory mix of ground pork and fresh vegetables. Perfect for family gatherings, potlucks, or snacks.
- Prep Time: 20 minutes
- Cook Time: 25 minutes
- Total Time: 45 minutes
- Yield: 20-25 lumpia rolls 1x
- Category: Appetizer, Snack
- Cuisine: Filipino
Ingredients
- 1/2 pound ground pork (or ground beef, if you prefer)
- 1 cup finely shredded green cabbage
- 1/2 cup grated carrots
- 1/2 cup diced onions (yellow or white)
- 2 cloves garlic, minced
- 1/4 cup chopped green onions
- 1/4 cup water chestnuts, finely chopped (optional)
- 1 tablespoon soy sauce
- 1 teaspoon fish sauce (optional)
- 1/2 teaspoon ground black pepper
- 1/2 teaspoon salt (adjust to taste)
- 1 teaspoon sugar (optional)
- 1 tablespoon vegetable oil (for cooking the filling)
- 20–25 lumpia wrappers (fresh or frozen, thawed)
- 1 egg, beaten (for sealing the wrappers)
- Vegetable oil or canola oil (about 3-4 cups for deep frying)
Instructions
- Heat 1 tablespoon vegetable oil in a non-stick skillet over medium heat. Add minced garlic and diced onions, sauté for 2-3 minutes until fragrant and translucent.
- Add ground pork and cook, breaking it apart with a spatula, until no longer pink, about 5-6 minutes.
- Stir in shredded cabbage, grated carrots, chopped water chestnuts (if using), soy sauce, fish sauce, black pepper, salt, and sugar. Cook for another 3-4 minutes until veggies are slightly softened but still have a bit of crunch.
- Transfer the cooked filling to a bowl and let it cool to room temperature. Refrigerate for 30 minutes if prepping ahead.
- Lay out lumpia wrappers on a clean surface and keep covered with a damp towel to prevent drying out. Beat the egg in a small bowl for sealing.
- Place about 2 tablespoons of filling near the bottom edge of a wrapper. Fold the bottom up over the filling, fold in the sides snugly, then roll tightly toward the top. Brush a little beaten egg on the top edge to seal.
- Heat 3-4 cups of vegetable oil in a large deep pan or wok to 350°F (175°C).
- Fry the lumpia rolls in batches, turning occasionally, until golden brown and crispy all over, about 5-7 minutes per batch.
- Remove lumpia with a slotted spoon and drain on paper towels or a wire rack. Serve hot with your favorite dipping sauce.
Notes
Cook and cool the filling thoroughly before rolling to prevent soggy lumpia. Maintain oil temperature at 350°F for best crispiness. Drain lumpia on paper towels or wire rack immediately after frying. Can be baked at 400°F for 20-25 minutes as a lighter alternative.
Nutrition
- Serving Size: 1 lumpia roll
- Calories: 165
- Sugar: 2
- Sodium: 350
- Fat: 9
- Saturated Fat: 2.5
- Carbohydrates: 12
- Fiber: 1
- Protein: 8
Keywords: Filipino lumpia, lumpia rolls, crispy lumpia, Filipino appetizer, savory lumpia, homemade lumpia, lumpia recipe, Filipino snack


