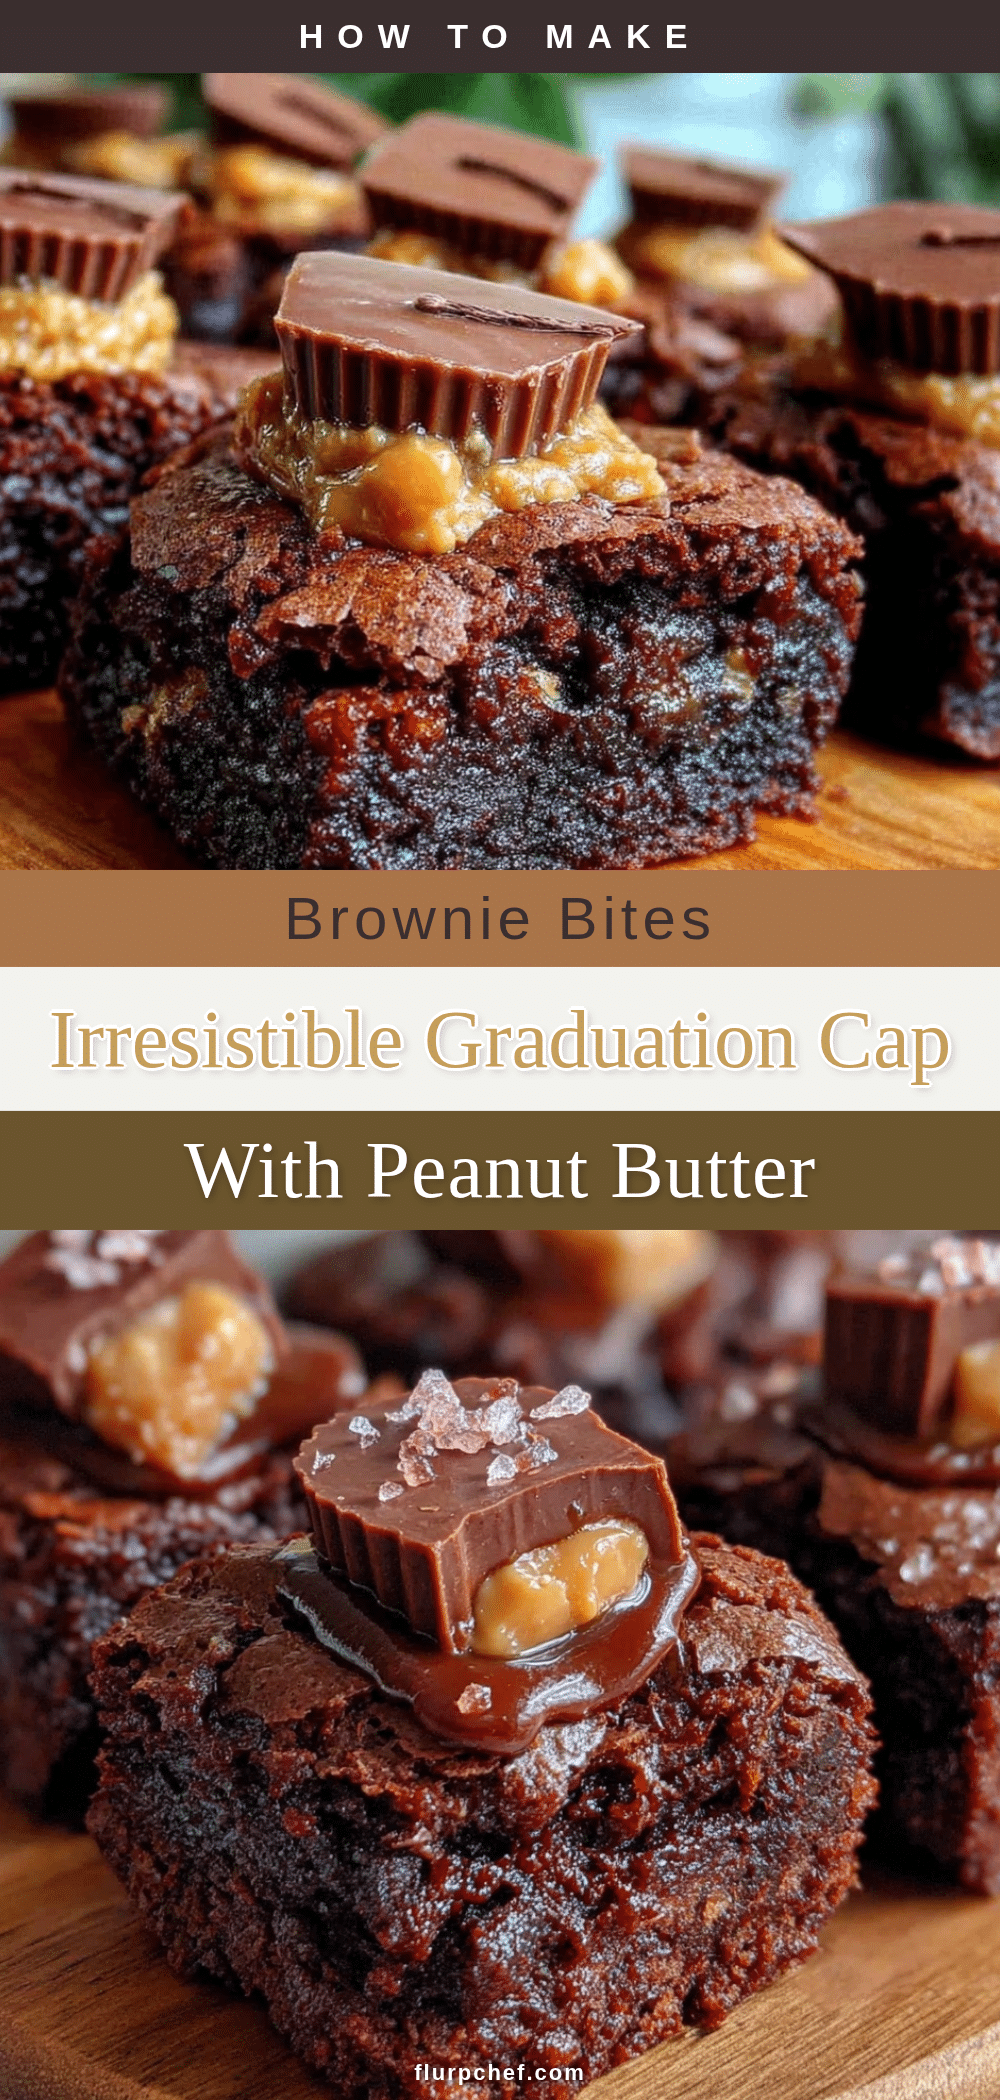
“Hey, did you bring the graduation treats?” My friend’s text popped up just as I was wrestling with a last-minute party prep meltdown. Honestly, I hadn’t planned on making anything fancy—just some snacks to throw on the table. But then, staring at a lonely bag of peanut butter cups and a box of brownie mix, an idea nudged its way in. What if I turned those simple ingredients into something festive, fun, and a little bit clever? The result? Perfect Graduation Cap Brownie Bites with Peanut Butter Cups.
At first, I was skeptical. Could something this easy actually look impressive? Spoiler alert: yes. The little brownie bites, topped with peanut butter cups and a tiny tassel of icing, had everyone asking for the recipe. It felt like a sweet little celebration wrapped into a bite-sized treat—just the kind of thing that turns a rushed, chaotic afternoon into a moment you remember. Honestly, these bites became my go-to for graduation parties, and I found myself making them over and over that season.
What stuck with me wasn’t just the taste (though, wow, that peanut butter and chocolate combo hits the spot), but the way these treats brought a little smile to everyone’s face. They’re simple, playful, and just a bit nostalgic—the perfect nod to proud graduates stepping into a new chapter. So if you want something that’s quick, cute, and crowd-pleasing, these Perfect Graduation Cap Brownie Bites with Peanut Butter Cups are ready to charm your guests and make your celebration a little sweeter.
Why You’ll Love This Recipe
After trying and tweaking this recipe a few times, I can say with confidence that these brownie bites aren’t just your average party dessert. Here’s why they stand out:
- Quick & Easy: From mixing to decorating, you can have these ready in under 45 minutes—perfect when the clock’s ticking before the party starts.
- Simple Ingredients: You probably already have all the ingredients in your pantry or fridge—no special trips needed!
- Perfect for Graduation Celebrations: The cap design makes them an instant hit for end-of-school-year parties, but honestly, they’re fun any time you want a cute chocolate-peanut butter treat.
- Crowd-Pleaser: Adults and kids alike love the fudgy brownie base paired with the peanut butter cup surprise on top.
- Unbelievably Delicious: The rich brownie texture with creamy peanut butter cups and a touch of icing for the tassel? Seriously, it’s like a party in your mouth.
What makes these bites really special is the simple technique of turning a classic peanut butter cup into a graduation cap with just a dab of frosting to create the tassel. It’s such a clever little twist that looks way fancier than it feels to make. Plus, the brownies themselves are fudgy and moist thanks to using melted butter and brown sugar in the batter, which I learned after a few experiments.
This recipe isn’t just about dessert—it’s about making memories that are easy to create and sweet to savor. Whether you’re hosting a big bash or just celebrating quietly at home, these bites bring a little extra joy to the table.
What Ingredients You Will Need
This recipe uses simple, wholesome ingredients to deliver bold chocolate and peanut butter flavor with a playful twist. Most items are pantry staples, and substitutions are easy if needed.
- For the Brownie Bites:
- 1/2 cup (115g) unsalted butter, melted (I like using Kerrygold for its rich flavor)
- 1 cup (200g) granulated sugar
- 2 large eggs, room temperature
- 1 teaspoon pure vanilla extract
- 1/3 cup (40g) unsweetened cocoa powder (use Dutch-processed if you can)
- 1/2 cup (65g) all-purpose flour
- 1/4 teaspoon salt
- 1/4 teaspoon baking powder
- For the Graduation Cap Topping:
- Mini peanut butter cups, unwrapped (about 24 pieces)
- Black or dark chocolate frosting (store-bought or homemade)
- White or yellow frosting for tassels (I recommend a piping bag with a small round tip for precision)
Ingredient notes: If you prefer gluten-free, you can swap the flour for a gluten-free all-purpose blend. For dairy-free, use coconut oil instead of butter and a dairy-free peanut butter cup alternative. In summer, adding a pinch of cinnamon to the brownie mix adds a warm depth that pairs nicely with the peanut butter.
Equipment Needed
- Mixing bowls (medium and small)
- Electric mixer or whisk (a hand whisk works fine, but the mixer saves time)
- 9×9-inch (23×23 cm) square baking pan or mini muffin tin if you want bite-sized portions
- Parchment paper or non-stick spray (to line the pan for easy removal)
- Cooling rack
- Offset spatula or butter knife (for spreading frosting)
- Piping bag with a small round tip (for the tassel details)
- Toothpick or small skewer (optional, for fine decorating control)
If you don’t have a piping bag, you can use a zip-top bag with a tiny corner snipped off for tassels. I’ve done it that way plenty of times with great results. For frosting, store-bought tubs work well for ease, but homemade buttercream gives a smoother texture that sticks better to the peanut butter cups.
Preparation Method
- Preheat your oven to 350°F (175°C). Line a 9×9-inch baking pan with parchment paper, leaving some overhang for easy brownie removal later.
- Make the brownie batter: In a medium bowl, whisk together the melted butter and sugar until combined (about 1-2 minutes). Add eggs one at a time, whisking well after each. Stir in vanilla extract.
- Mix dry ingredients: In a separate bowl, sift together cocoa powder, flour, salt, and baking powder. Gradually add the dry mix to the wet ingredients, folding gently with a spatula until just combined. Don’t overmix—some streaks of flour are okay. The batter should be thick and fudgy.
- Pour batter into the prepared pan: Spread it evenly using an offset spatula. Bake for 20-25 minutes. Use a toothpick to check doneness; it should come out with a few moist crumbs but not wet batter. (Overbaking will dry out the brownies—trust me, I’ve learned the hard way.)
- Cool completely: Let the brownies cool in the pan for at least 30 minutes on a wire rack. This helps with clean cutting and frosting adhesion.
- Cut brownies into squares: For bite-sized pieces, aim for about 1.5-inch (4 cm) squares. Carefully lift them out using the parchment overhang.
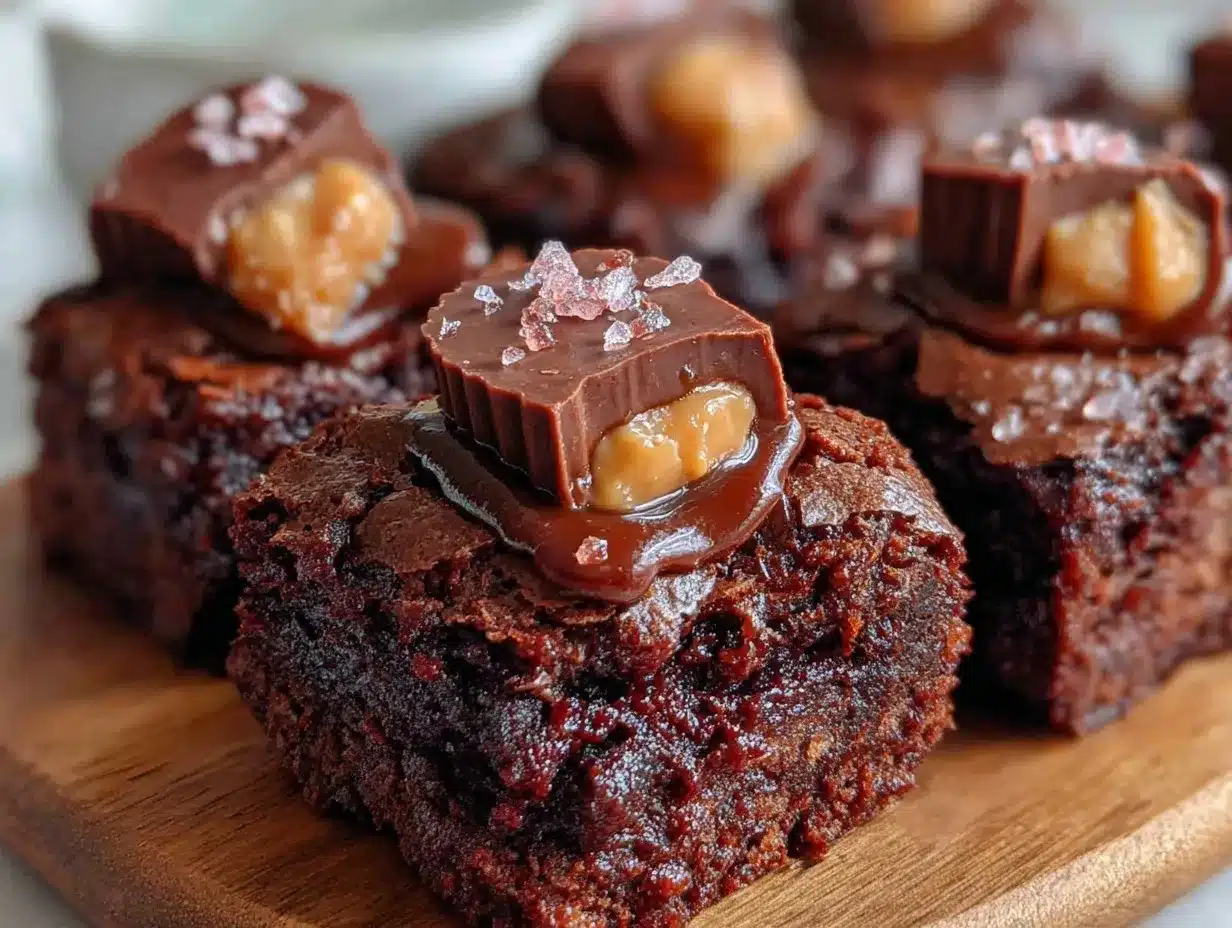
- Add the peanut butter cups: Place one mini peanut butter cup on top of each brownie square, pressing gently so it sticks but doesn’t squish the base.
- Create the graduation caps: Using black or dark chocolate frosting, pipe a thin square border around the peanut butter cup to mimic the mortarboard. Then, use white or yellow frosting to pipe a small tassel coming off one corner.
- Let the frosting set: Place the decorated bites in the fridge for 15 minutes to allow the frosting to firm up.
- Serve and enjoy! These bites can be served chilled or at room temperature.
Pro tip: If you want to speed up the cooling, pop the brownies in the fridge after they’ve cooled a bit on the counter. Also, for neater frosting lines, keep your piping bag steady and practice a few tassels on parchment paper first.
Cooking Tips & Techniques
Here’s what I’ve learned making these graduation cap brownie bites multiple times:
- Don’t skip cooling: Warm brownies will cause the peanut butter cups to melt and the frosting to slide off. Patience here pays off.
- Use room temperature eggs: This helps the batter blend smoothly, avoiding grainy texture.
- Fudgy is key: If you want cakey brownies, add a little extra flour (about 2 tablespoons), but I prefer the fudgy, dense bite for this recipe—it holds up better under the peanut butter cup topping.
- Keep frosting consistency just right: If it’s too thick, it’s hard to pipe tassels; too thin and it runs everywhere. Add a tiny splash of milk or water to thin, or more powdered sugar to thicken.
- Multitasking tip: While brownies bake, prep your frosting and unwrap peanut butter cups. This saves time and keeps your workspace organized.
- Cleaning tip: Clean your piping tip frequently by dipping it in warm water, especially if frosting starts to clog it.
One mishap I had was accidentally using salted butter—turned out it gave the brownies a nice salty-sweet balance, so feel free to experiment! Also, I once tried using peanut butter chips instead of peanut butter cups, but it wasn’t quite the same festive look. The cups really complete the graduation cap effect.
Variations & Adaptations
You can tailor these brownie bites to fit different tastes or dietary needs:
- Nut-Free Version: Swap peanut butter cups for mini chocolate cups filled with caramel or plain chocolate to avoid nuts altogether.
- Seasonal Twist: Add a sprinkle of edible gold dust or colored sugar crystals on the frosting tassel for extra sparkle during spring graduation parties.
- Flavor Twist: Mix a teaspoon of instant espresso powder into the brownie batter to deepen the chocolate flavor—coffee and chocolate are best friends!
- Vegan Adaptation: Use flax eggs (1 tablespoon flaxseed meal + 3 tablespoons water per egg) and dairy-free butter, plus vegan peanut butter cups.
- Mini Muffin Tin Approach: Bake brownie batter in mini muffin tins and top with half peanut butter cups for perfectly portioned bites without cutting.
My favorite personal variation was using a rich dark chocolate ganache instead of frosting for the caps—super decadent and impressive for a smaller crowd. If you want other sweet ideas for celebrations, you might enjoy the fluffy Strawberry Champagne Poke Cake or the Graduation Cap and Diploma Sugar Cookie Kit for more themed treats.
Serving & Storage Suggestions
These brownie bites are best served at room temperature so the frosting softens slightly, but they also taste great chilled if you prefer a firmer texture. Arrange them on a festive platter or tiered stand for an eye-catching dessert table centerpiece.
Pair with a light sparkling beverage or classic iced tea for a well-rounded party spread. They also complement savory finger foods like the Ham and Cream Cheese Pinwheel Roll-Ups beautifully, balancing salty and sweet flavors.
For storage, keep the bites in an airtight container in the fridge for up to 4 days. To freeze, place them in a single layer on a baking sheet until firm, then transfer to a freezer bag for up to 2 months. Thaw overnight in the fridge before serving. The flavors actually mellow wonderfully after a day, making them more decadent.
Nutritional Information & Benefits
Each Perfect Graduation Cap Brownie Bite with Peanut Butter Cups contains approximately:
| Calories | Fat | Carbohydrates | Protein | Sugar |
|---|---|---|---|---|
| 160 kcal | 9g | 18g | 2g | 14g |
While these bites are definitely a treat, the peanut butter cups add a bit of protein and healthy fats, and the cocoa powder is rich in antioxidants. Choosing good-quality dark chocolate can offer a slight health boost compared to milk chocolate alternatives. For those mindful of allergens, the recipe contains gluten, dairy, and peanuts, but substitutions can make it friendly for many diets.
From a wellness perspective, I see these brownies as a celebration food—something to enjoy mindfully during special moments, which is just as important as everyday nutrition.
Conclusion
The Perfect Graduation Cap Brownie Bites with Peanut Butter Cups recipe is proof that simple ingredients and a little creativity can turn a rushed afternoon into a memorable celebration. They’re easy to make, playful to look at, and incredibly tasty—the kind of treat that makes you smile every time you take a bite.
Feel free to tweak the flavors or decorations to match your grad’s style or party theme. I love how this recipe lends itself to so many fun adaptations, making it a staple for every graduation season in my kitchen. If you give these a try, I’d love to hear how you decorated your caps or what variations you discovered!
Don’t hesitate to share your photos and thoughts below—there’s nothing better than swapping ideas and recipes that bring joy to the table. Here’s to sweet celebrations and proud moments ahead!
FAQs about Perfect Graduation Cap Brownie Bites with Peanut Butter Cups
Can I make these brownie bites ahead of time?
Absolutely! You can bake and decorate them a day ahead. Store them in an airtight container in the fridge and bring them to room temperature before serving.
What if I don’t have mini peanut butter cups?
You can use regular peanut butter cups cut into quarters or swap with other mini candies like chocolate-covered caramels for a different twist.
How do I keep the frosting from melting on warm days?
Keep the decorated bites refrigerated until just before serving. Using a thicker frosting or chilled frosting helps it hold up better.
Can I use boxed brownie mix instead of making from scratch?
Yes, boxed mix works fine for convenience. Just follow package instructions and adjust baking time as needed for your pan size.
Is there a way to make this recipe gluten-free?
Definitely! Use a gluten-free all-purpose flour blend in place of regular flour, and double-check your peanut butter cups are gluten-free.
Pin This Recipe!
Perfect Graduation Cap Brownie Bites with Peanut Butter Cups
These bite-sized brownie treats topped with mini peanut butter cups and decorated with frosting tassels are quick, easy, and perfect for graduation celebrations. They combine rich chocolate and creamy peanut butter flavors in a playful, crowd-pleasing dessert.
- Prep Time: 15 minutes
- Cook Time: 25 minutes
- Total Time: 45 minutes
- Yield: 24 servings 1x
- Category: Dessert
- Cuisine: American
Ingredients
- 1/2 cup (115g) unsalted butter, melted
- 1 cup (200g) granulated sugar
- 2 large eggs, room temperature
- 1 teaspoon pure vanilla extract
- 1/3 cup (40g) unsweetened cocoa powder (preferably Dutch-processed)
- 1/2 cup (65g) all-purpose flour
- 1/4 teaspoon salt
- 1/4 teaspoon baking powder
- Mini peanut butter cups, unwrapped (about 24 pieces)
- Black or dark chocolate frosting (store-bought or homemade)
- White or yellow frosting for tassels (use a piping bag with a small round tip)
Instructions
- Preheat your oven to 350°F (175°C). Line a 9×9-inch baking pan with parchment paper, leaving some overhang for easy brownie removal.
- In a medium bowl, whisk together the melted butter and sugar until combined (about 1-2 minutes). Add eggs one at a time, whisking well after each. Stir in vanilla extract.
- In a separate bowl, sift together cocoa powder, flour, salt, and baking powder. Gradually add the dry mix to the wet ingredients, folding gently with a spatula until just combined. Do not overmix.
- Pour batter into the prepared pan and spread evenly using an offset spatula. Bake for 20-25 minutes. Use a toothpick to check doneness; it should come out with a few moist crumbs but not wet batter.
- Let the brownies cool completely in the pan on a wire rack for at least 30 minutes.
- Cut brownies into approximately 1.5-inch squares using the parchment overhang to lift them out.
- Place one mini peanut butter cup on top of each brownie square, pressing gently to adhere without squishing the base.
- Using black or dark chocolate frosting, pipe a thin square border around each peanut butter cup to mimic a graduation cap mortarboard.
- Pipe a small tassel on one corner of the cap using white or yellow frosting with a piping bag fitted with a small round tip.
- Place the decorated bites in the refrigerator for 15 minutes to allow the frosting to set.
- Serve chilled or at room temperature and enjoy.
Notes
Use room temperature eggs for smooth batter. Do not overbake to keep brownies fudgy. Cool brownies completely before decorating to prevent melting. If frosting is too thick or thin, adjust with milk/water or powdered sugar. For gluten-free, substitute flour with gluten-free blend. For dairy-free, use coconut oil and dairy-free peanut butter cups. Mini muffin tins can be used for bite-sized portions without cutting. Practice piping tassels on parchment paper first for neat decoration.
Nutrition
- Serving Size: 1 brownie bite with
- Calories: 160
- Sugar: 14
- Fat: 9
- Carbohydrates: 18
- Protein: 2
Keywords: graduation treats, brownie bites, peanut butter cups, easy dessert, party snacks, chocolate peanut butter, graduation party dessert


