“You sure this will work?” my sister asked, eyebrows raised as I poked holes all over the bright red cake, a little skeptical herself. Honestly, I wasn’t 100% convinced either when I first tried this poke cake idea for a Fourth of July barbecue a few summers ago. It started as a last-minute attempt to bring something quick and colorful—because, let’s face it, there’s nothing worse than scrambling to whip up a dessert that looks fun and tastes good during a chaotic holiday cookout.
The kitchen was buzzing, the sun was setting, and the smell of grilled chicken filled the air, but what caught everyone’s attention was this simple cake, bursting with patriotic red, white, and blue hues, layered with creamy fillings that felt like a gentle hug after a long, hot day. I remember sneaking a slice before the party even started, the smooth creaminess contrasting perfectly with the moist cake, and thinking, “Yeah, this is going to be a hit.”
Since then, this festive red white and blue poke cake with creamy layers has become my go-to for any summer gathering or whenever I want something both nostalgic and fresh. It’s not fancy, but it carries a kind of easy charm that wins over even the pickiest eaters — plus, it’s a throwback to those classic poke cakes you might remember from potlucks, but with a fresh twist that feels homemade and heartfelt. It’s the kind of dessert that makes you smile quietly to yourself, knowing you nailed something simple but special. And honestly, isn’t that the best kind of cooking?
Why You’ll Love This Recipe
This festive red white and blue poke cake with creamy layers isn’t just another dessert. It’s something I’ve made over and over, tweaking little things until it felt just right. Here’s why it stands out:
- Quick & Easy: The entire cake comes together in under an hour, including baking and layering — perfect for those last-minute celebrations or when you just don’t want to fuss too much.
- Simple Ingredients: You probably have everything in your pantry and fridge already — no need for specialty stores or weird add-ins.
- Perfect for Summer Gatherings: Whether it’s a backyard barbecue, a picnic, or a casual potluck, this cake brings the festive spirit effortlessly.
- Crowd-Pleaser: Kids love the bright colors and creamy layers, and adults appreciate how it isn’t overly sweet or heavy.
- Unbelievably Delicious: The moist texture of the cake combined with the luscious creamy filling and a hint of berry flavor is a comforting delight that keeps people coming back for seconds.
- A Unique Twist on a Classic: Instead of just poking holes and pouring jello, this recipe uses a homemade creamy layer that blends cream cheese and whipped topping for an ultra-smooth texture that sets it apart.
Honestly, it’s the kind of dessert that makes you pause and savor the moment — a little indulgent, a little nostalgic, and entirely satisfying. If you’ve ever enjoyed classic poke cakes, you’ll appreciate the care and flavor packed into this version.
What Ingredients You Will Need
This recipe uses straightforward, wholesome ingredients to build layers of flavor and texture without any fuss. Most are pantry staples, and a few fresh or frozen additions bring the colors and creaminess alive.
- For the Cake Base:
- 1 box white cake mix (about 15.25 oz / 432 g) — I prefer Duncan Hines for consistent results
- Ingredients called for on the cake mix box (usually eggs, oil, water)
- For the Red Layer:
- 1 package (3 oz / 85 g) strawberry or cherry gelatin (red color)
- 1 cup boiling water (for dissolving the gelatin)
- For the Creamy White Layer:
- 8 oz (226 g) cream cheese, softened
- 1 cup powdered sugar (confectioners’ sugar)
- 1 tsp vanilla extract
- 1 cup heavy whipping cream, whipped to soft peaks
- For the Blue Layer:
- 1 package (3 oz / 85 g) blueberry or mixed berry gelatin (blue color)
- 1 cup boiling water (for dissolving the gelatin)
- Optional Garnishes:
- Fresh blueberries and strawberries for topping
- Whipped cream dollops
Look for small-curd cream cheese to avoid lumps and make sure the gelatin flavors are vibrant for the best visual pop. If you want a gluten-free version, you can swap the cake mix with a gluten-free white cake mix — it works surprisingly well here. For a dairy-free twist, almond or coconut-based cream cheese alternatives can be whipped in place of traditional cream cheese, though the texture will be slightly different.
Equipment Needed
- 9×13 inch (23×33 cm) baking dish — glass or metal works fine, but glass gives a more even bake
- Mixing bowls (large and medium)
- Electric mixer or stand mixer — for whipping cream and cream cheese smoothly
- Measuring cups and spoons — precise measurements help keep the layers balanced
- Wooden spoon or spatula — for folding whipped cream gently into the cream cheese mixture
- Toothpick or skewer — for poking holes in the cake
- Whisk — to dissolve gelatin evenly
I’ve tried mixing the creamy layers by hand, but honestly, an electric mixer saves so much time and gives that fluffy texture effortlessly. If you don’t have a 9×13 pan, an 8×8 pan will work but expect thicker layers and a slightly longer baking time. Also, keep your electric mixer’s beaters clean and dry when whipping cream—it helps build volume better.
Preparation Method
- Prepare and Bake the Cake: Preheat your oven to 350°F (175°C). Mix the white cake mix according to the package instructions, usually combining the cake mix with eggs, oil, and water. Pour the batter evenly into the greased 9×13 inch baking dish. Bake for 28-32 minutes or until a toothpick inserted in the center comes out clean. Let the cake cool completely in the pan on a wire rack — about 45 minutes to 1 hour.
- Make the Gelatin Layers: While the cake cools, dissolve the red gelatin powder in 1 cup boiling water. Stir well for about 2 minutes until fully dissolved. Repeat the process with the blue gelatin powder in a separate bowl. Set both aside to cool but not set — you want them just lukewarm.
- Poke the Cake: Using a toothpick or skewer, poke holes all over the cooled cake about 1 inch (2.5 cm) apart. The holes should go deep but not all the way through the bottom. This is where the gelatin will seep in, so take your time and cover the surface evenly.
- Add the Red Gelatin: Slowly pour the cooled red gelatin over the cake, making sure it seeps into the holes. Let the cake absorb the gelatin for 15-20 minutes in the fridge.
- Prepare the Creamy White Layer: Beat the softened cream cheese with powdered sugar and vanilla extract until smooth and creamy using an electric mixer. In a separate bowl, whip the heavy cream to soft peaks. Gently fold the whipped cream into the cream cheese mixture to keep it light and airy.
- Spread the Creamy Layer: Once the red gelatin has set a bit, evenly spread the creamy white mixture over the cake’s surface. Cover and chill in the refrigerator for at least 30 minutes to let it firm up.
- Add the Blue Gelatin Layer: Pour the cooled blue gelatin over the creamy layer carefully. It should create a neat top layer without mixing. Chill the cake for 2-3 hours or until fully set.
- Garnish and Serve: Before serving, decorate with fresh blueberries and strawberries and add dollops of whipped cream if you like. Slice with a sharp knife warmed under hot water for clean cuts.
If the gelatin isn’t setting properly, double-check that it’s not too hot when pouring. Also, chilling times are crucial — rushing this part can lead to mixing of layers or sogginess. I’ve found that prepping the creamy layer while the cake chills keeps things moving efficiently in the kitchen.
Cooking Tips & Techniques
Getting the perfect poke cake texture takes a few small tricks. First, don’t skip cooling the cake completely — a warm cake will cause the gelatin to run all over and create a soggy mess. Patience here pays off.
When poking holes, be consistent but gentle. You want enough holes so the gelatin seeps in evenly, but not so many that the cake crumbles apart. I usually count about 12-15 holes lengthwise and widthwise, spacing them about an inch apart.
For the creamy layer, using softened cream cheese is key. If it’s too cold, lumps sneak in, and it won’t blend smoothly with whipped cream. Whip the cream separately and fold carefully to keep air in — this is what makes the layer light instead of dense.
Don’t pour the blue gelatin too hot! Let it cool to lukewarm or it’ll melt the creamy layer beneath. I’ve learned this the hard way during one rushed party prep.
Lastly, chilling time is your friend. The cake needs at least a few hours in the fridge for the layers to set properly and for flavors to meld. Multi-task by prepping other dishes, like an easy honey mustard glazed chicken breast — it pairs nicely with a summery dessert like this honey mustard glazed chicken breast.
Variations & Adaptations
- Dietary Adaptation: Swap the white cake mix for a gluten-free or almond flour-based mix to suit gluten sensitivities. Use dairy-free cream cheese and whipped coconut cream for a vegan-friendly version.
- Flavor Twists: Try swapping the strawberry gelatin for raspberry or cherry for a bit of tartness. Blueberry gelatin can be replaced with blackberry or grape for a different blue hue and flavor.
- Seasonal Adaptation: In warm months, fresh fruit layers like diced strawberries or blueberries can be folded into the creamy layer for extra freshness and texture.
- Cooking Method Variation: For a no-bake alternative, use a prepared angel food cake or pound cake base instead of baking your own. The creamy and gelatin layers remain the same.
- Personal Twist: I’ve tried adding a thin layer of lemon curd underneath the creamy layer for a zesty surprise that cuts through the sweetness beautifully.
Serving & Storage Suggestions
This festive poke cake is best served chilled, straight from the fridge, allowing the creamy layers to hold firm and the gelatin to have that pleasant, slightly jiggly texture. Serve slices on simple white plates to let the red, white, and blue colors pop.
It pairs wonderfully with light beverages like iced tea or sparkling lemonade — something refreshing and not too sweet. For a full patriotic meal, consider complementing it with classic dishes like savory meatloaf or cozy casseroles that keep the comfort food vibe going.
Store leftovers tightly covered in the refrigerator for up to 3 days. The flavors actually meld nicely overnight, so the next day’s slice is often even better. Avoid freezing as gelatin texture changes drastically when thawed.
When reheating, I don’t recommend warming because this cake is meant to be enjoyed cold, but if you want softer creaminess, let the slice sit at room temperature for 10-15 minutes before eating.
Nutritional Information & Benefits
A typical serving (about 1/12th of the cake) contains approximately 320 calories, 14 grams of fat, 45 grams of carbohydrates, and 3 grams of protein. The cream cheese provides richness and a touch of calcium, while the gelatin adds color and flavor with minimal calories.
While this is definitely a treat, the recipe’s moderate sweetness and use of cream cheese with whipped cream keep it from feeling overly heavy. You can lighten it further by using light cream cheese and sugar substitutes if desired.
Note that this recipe contains gluten and dairy, so it’s not suitable for those with allergies unless substitutions are made. It’s a dessert that fits well into an occasional indulgence framework rather than daily eating, but hey, celebrating with a slice or two is part of the fun.
Conclusion
This festive red white and blue poke cake with creamy layers holds a special place in my recipe box — not because it’s complicated or fancy, but because it’s honest, colorful, and exactly what you want on a hot summer day with friends and family gathered around. It’s a versatile dessert that invites you to make it your own, whether you tweak the flavors or keep it classic.
Try it for your next celebration, and don’t be shy about experimenting with the layers or garnishes to match your style. I love how every time I make this cake, it brings a little joy and a quiet moment to savor something sweet and simple. If you give it a go, I’d love to hear how you put your spin on it — sharing kitchen stories is half the fun!
FAQs About Festive Red White and Blue Poke Cake
Can I make this cake ahead of time?
Yes! You can prepare the cake and layers a day ahead. Just keep it tightly covered in the fridge and add fresh fruit toppings before serving.
What if I don’t have an electric mixer?
You can mix the cream cheese by hand with a whisk or wooden spoon, but whipping the cream will be trickier. A hand whisk will work if you’re patient, but it won’t be as fluffy.
Can I use homemade cake instead of box mix?
Absolutely! A simple white or yellow cake recipe works great here. Just ensure it’s not too dense so the gelatin can soak in properly.
How do I prevent the blue gelatin from mixing into the creamy layer?
Make sure the creamy layer is fully chilled and firm before pouring the blue gelatin slowly and gently over it. Use the back of a spoon to help distribute the gelatin evenly if needed.
Is this cake suitable for kids?
Definitely! Kids love the bright colors and creamy texture. Just be mindful of gelatin allergies if applicable.
Pin This Recipe!

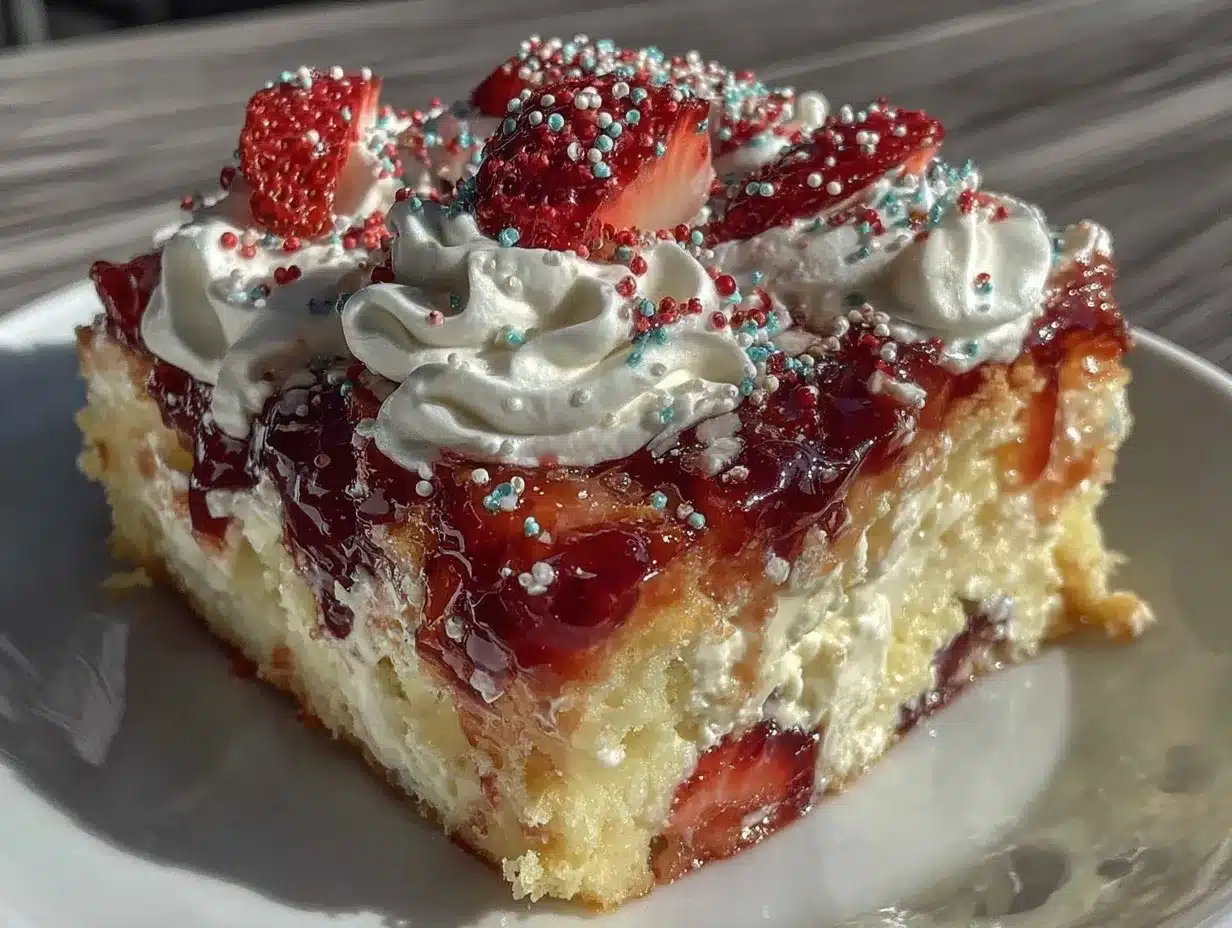
Festive Red White and Blue Poke Cake Easy Homemade Creamy Layers Recipe

A quick and easy patriotic poke cake featuring moist white cake, vibrant red and blue gelatin layers, and a smooth creamy white layer made from cream cheese and whipped cream. Perfect for summer gatherings and Fourth of July celebrations.
- Prep Time: 15 minutes
- Cook Time: 30 minutes
- Total Time: 3 hours 45 minutes
- Yield: 12 servings 1x
- Category: Dessert
- Cuisine: American
Ingredients
- 1 box white cake mix (about 15.25 oz / 432 g), plus ingredients called for on the box (usually eggs, oil, water)
- 1 package (3 oz / 85 g) strawberry or cherry gelatin (red color)
- 1 cup boiling water (for dissolving the red gelatin)
- 8 oz (226 g) cream cheese, softened
- 1 cup powdered sugar (confectioners’ sugar)
- 1 tsp vanilla extract
- 1 cup heavy whipping cream, whipped to soft peaks
- 1 package (3 oz / 85 g) blueberry or mixed berry gelatin (blue color)
- 1 cup boiling water (for dissolving the blue gelatin)
- Optional garnishes: fresh blueberries and strawberries, whipped cream dollops
Instructions
- Preheat oven to 350°F (175°C). Mix the white cake mix according to package instructions, combining cake mix with eggs, oil, and water.
- Pour batter evenly into a greased 9×13 inch baking dish. Bake for 28-32 minutes or until a toothpick inserted in the center comes out clean.
- Let the cake cool completely in the pan on a wire rack for about 45 minutes to 1 hour.
- Dissolve the red gelatin powder in 1 cup boiling water, stirring for about 2 minutes until fully dissolved. Repeat with the blue gelatin in a separate bowl. Set both aside to cool but not set, lukewarm.
- Using a toothpick or skewer, poke holes all over the cooled cake about 1 inch apart, deep but not through the bottom.
- Slowly pour the cooled red gelatin over the cake, allowing it to seep into the holes. Refrigerate for 15-20 minutes to absorb.
- Beat softened cream cheese with powdered sugar and vanilla extract until smooth using an electric mixer.
- Whip heavy cream to soft peaks in a separate bowl. Gently fold whipped cream into the cream cheese mixture.
- Once the red gelatin has set slightly, spread the creamy white mixture evenly over the cake surface. Cover and chill for at least 30 minutes.
- Pour the cooled blue gelatin carefully over the creamy layer to form the top layer. Chill the cake for 2-3 hours or until fully set.
- Before serving, garnish with fresh blueberries, strawberries, and dollops of whipped cream if desired. Slice with a sharp knife warmed under hot water for clean cuts.
Notes
Cool the cake completely before poking holes to prevent gelatin from running. Use softened cream cheese for a smooth creamy layer. Let gelatin cool to lukewarm before pouring to avoid melting the creamy layer. Chill the cake for several hours to set layers properly. For gluten-free, use gluten-free cake mix; for dairy-free, substitute cream cheese and whipped cream with plant-based alternatives.
Nutrition
- Serving Size: 1 slice (1/12th of c
- Calories: 320
- Fat: 14
- Carbohydrates: 45
- Protein: 3
Keywords: poke cake, patriotic dessert, red white and blue cake, Fourth of July dessert, creamy poke cake, summer dessert, easy cake recipe


