“Can you believe the Class of 2026 is almost here?” my neighbor asked over the fence while I was stirring a batch of brownie batter in my kitchen. Honestly, I wasn’t sure if I was ready for all the celebrations and last-minute party prep, but that moment sparked an idea. I wanted to make something fun and festive but quick enough to throw together after a hectic day. That’s how these Perfect Class of 2026 Brownie Pops with Metallic Sprinkles came to life—almost by accident, between juggling emails and trying to keep my sanity.
At first, I was skeptical about brownies on sticks. Would they hold up? Would the metallic sprinkles feel too over-the-top? Turns out, this recipe hits that sweet spot where ease meets wow factor. The rich, fudgy brownies are perfectly bite-sized and the sprinkles add just the right touch of celebration sparkle. Every time I bring these to a gathering, people ask for the recipe—and honestly, I understand why.
There’s a quiet joy in watching friends and family light up over a simple, homemade treat that feels special without fuss. These brownie pops have become my go-to for marking milestones, especially when I’m pressed for time but want to show a little extra love. I guess it’s the little things, like a dash of metallic shimmer, that turn an ordinary moment into a memory. And that’s why this recipe stuck with me—because it’s not just dessert, it’s a tiny party on a stick.
Why You’ll Love This Recipe
From my many experiments in the kitchen (and the inevitable taste tests), this recipe for Perfect Class of 2026 Brownie Pops with Metallic Sprinkles stands out for several reasons. Here’s what makes it a winner in my book:
- Quick & Easy: These brownie pops come together in under 30 minutes of active prep, making them perfect for last-minute celebrations or busy weekday treats.
- Simple Ingredients: You probably already have everything on hand—basic pantry staples like cocoa powder, butter, and eggs. No special trips needed!
- Perfect for Celebrations: Whether it’s a graduation party, birthday, or just a sweet pick-me-up, these pops add a festive vibe that’s hard to match.
- Crowd-Pleaser: Kids, teens, and adults all love them. The metallic sprinkles add a little sparkle that makes everyone smile.
- Unbelievably Delicious: The fudgy texture with a slight crisp on the edges is honestly addictive. Plus, the pops are perfectly portioned so you don’t overdo it.
What sets this recipe apart is the balance between texture and presentation. I perfected the baking time so the brownies are moist inside but sturdy enough to hold on a stick without crumbling. The metallic sprinkles are not just decoration—they add a slight crunch and a glam touch that’s surprisingly fun to bite into. It’s a recipe I trust for impressing guests without sweating the details, and that’s why it keeps making repeat appearances at our family gatherings.
If you’re curious about easy crowd-pleasers that shine, you might also appreciate the crispy chicken fried rice or the creamy chicken and rice casserole recipes I’ve shared before. But for those moments when you want something sweet and celebratory, these brownie pops are a fun twist that fits the bill.
What Ingredients You Will Need
This recipe uses simple, wholesome ingredients to deliver bold chocolate flavor and a satisfying fudgy texture without the fuss. Most of these are pantry staples, and a couple can be swapped out if needed.
- For the Brownie Base:
- 1/2 cup (115g) unsalted butter, melted (I like using Kerrygold for richness)
- 1 cup (200g) granulated sugar
- 2 large eggs, room temperature (helps with better mixing and rise)
- 1 teaspoon pure vanilla extract
- 1/3 cup (35g) unsweetened cocoa powder (Dutch-processed if you want a smoother taste)
- 1/2 cup (65g) all-purpose flour (or substitute almond flour for gluten-free)
- 1/4 teaspoon salt
- 1/4 teaspoon baking powder (helps the pops hold shape)
- For Decoration:
- Metallic sprinkles (I prefer the gold and silver mix from Wilton for that festive pop)
- Brownie pop sticks or sturdy lollipop sticks
- Optional: 4 oz (115g) semi-sweet chocolate or white chocolate for dipping (adds a shiny coating and helps sprinkles stick better)
Pro tip: If you can find small-curd cocoa powder, it intensifies the chocolate flavor without bitterness. Also, for a dairy-free version, swapping butter for coconut oil works surprisingly well. And if metallic sprinkles aren’t your thing, colored sugar crystals or edible glitter are great alternatives to keep that celebratory vibe.
Equipment Needed
For this recipe, you don’t need anything fancy, but a few tools make the process smoother:
- Mixing bowls (preferably one large and one medium)
- Whisk or electric hand mixer (for better batter texture)
- Measuring cups and spoons (precision counts for brownie success)
- Square baking pan, 8×8 inches (20×20 cm) works best
- Brownie pop sticks or lollipop sticks (available online or at party stores)
- Microwave-safe bowl if melting chocolate for dipping
- Cooling rack (helps brownies cool evenly and prevents sogginess)
If you don’t have a hand mixer, a sturdy whisk and a bit of elbow grease will do just fine. For budget-friendly sticks, wooden skewers trimmed to size can work in a pinch. Keeping your baking pan well-greased or lined with parchment paper is a small step that makes removing the brownies less of a hassle.
Preparation Method

- Preheat and prep: Heat your oven to 350°F (175°C). Grease an 8×8 inch (20×20 cm) baking pan or line it with parchment paper for easy removal. This ensures the brownies come out cleanly without crumbling apart.
- Mix wet ingredients: In a large bowl, combine the melted butter and sugar. Stir with a whisk until glossy and smooth, about 1-2 minutes. Add the eggs one at a time, beating well after each addition. Stir in the vanilla extract. The batter should look rich and slightly thick.
- Add dry ingredients: Sift together the cocoa powder, flour, salt, and baking powder in a separate bowl. Slowly fold these into the wet mixture, careful not to overmix—just until combined. Overmixing can make the brownies tough, so gentle folding is key.
- Bake: Pour the batter into the prepared pan and spread evenly. Bake for 20–25 minutes. You want the brownies to be just set—when a toothpick comes out with a few moist crumbs, not wet batter. This timing gives a fudgy center with slightly crisp edges, perfect for pops.
- Cool completely: Let the brownies cool fully in the pan on a cooling rack (about 1 hour). This step is crucial because warm brownies will crumble when you try to insert the sticks.
- Cut and insert sticks: Using a sharp knife, cut the brownies into squares about 1.5 inches (4 cm) wide. Gently push a brownie pop stick halfway into each square. If you’re worried about stability, you can dip the tip of each stick in melted chocolate before inserting—it acts like edible glue.
- Optional chocolate dip: Melt the chocolate in a microwave-safe bowl, stirring every 20 seconds until smooth. Dip each brownie pop halfway into the chocolate, then immediately sprinkle with metallic sprinkles to catch the chocolate before it sets.
- Set and serve: Place the dipped pops upright in a styrofoam block or a lined tray to dry and harden (about 15-20 minutes). Once set, they’re ready to dazzle at your party or celebration.
Quick tip: If you’re short on time, you can skip the chocolate dip and just sprinkle directly on the brownies before baking, but the dipped version holds the sprinkles better and looks extra polished.
Cooking Tips & Techniques
Making perfect brownie pops is easier than it looks, but a couple of tricks can really make a difference. From my experience, here’s what helps:
- Don’t overbake: Brownies continue to cook slightly after you pull them from the oven. The key to fudgy brownie pops is to take them out when the center still jiggles just a bit. Overbaking leads to dry, crumbly pops that won’t hold the stick well.
- Cool fully: I can’t stress this enough. Warm brownies are fragile and will break when you insert the sticks. Patience here saves you a lot of frustration.
- Stick stability: If you’ve ever had a pop fall apart mid-party, dipping the stick tips in melted chocolate before inserting helps anchor it firmly in place.
- Sprinkle application: Applying metallic sprinkles while the chocolate is still wet ensures they stick well. If you skip the dip, try pressing the sprinkles gently onto the cut brownie tops immediately after baking.
- Multitasking tip: While your brownies are baking or cooling, prep your sprinkles and sticks so you’re ready to assemble quickly and avoid rushed mistakes.
When I first made these pops, I underestimated the cooling time and ended up with crumbly sticks. Learning to wait paid off big time. Also, using a sharp knife heated briefly under hot water made clean cuts easier and less crumbly. These small details make the process smoother and the results prettier.
Variations & Adaptations
There’s plenty of room to personalize these brownie pops depending on your occasion or dietary needs:
- Flavor twists: Add a teaspoon of espresso powder to the batter for a mocha kick, or swirl in peanut butter before baking for a nutty surprise.
- Dietary adjustments: Use almond flour and dairy-free butter alternatives to make gluten-free and vegan versions. Coconut sugar can replace granulated sugar for a less refined option.
- Seasonal changes: Swap metallic sprinkles with crushed peppermint candies for winter holidays or colorful nonpareils for birthday parties.
- Chocolate coatings: Try white chocolate with a dash of food coloring to match school colors or dark chocolate with sea salt flakes for a grown-up touch.
- Personal favorite: I once dipped the pops in salted caramel sauce before sprinkling gold flakes—it was a hit with friends who like a sweet-salty combo!
Adjusting the size is easy too—make mini brownie pops for bite-sized party snacks or larger ones for a more indulgent treat. If you want to experiment with baking methods, these brownies can also be made in a muffin tin for a slightly different shape but similar ease.
Serving & Storage Suggestions
These brownie pops are best served at room temperature, where their fudgy texture shines. I like arranging them in a decorative jar or standing them upright in a block of floral foam for an eye-catching dessert table centerpiece.
They pair wonderfully with fresh berries or a scoop of vanilla ice cream for a simple but satisfying dessert plate. A cold glass of milk or sparkling lemonade also complements the rich chocolate flavor nicely.
For storage, keep the pops in an airtight container at room temperature for up to 3 days. If you want to keep them longer, refrigeration is fine but might firm up the texture slightly. To reheat, pop them in the microwave for 10-15 seconds to soften before serving.
Flavors actually mellow and deepen if you make them a day ahead. Just be sure to add the metallic sprinkles after chilling so they stay shiny and fresh-looking.
Nutritional Information & Benefits
Each brownie pop has approximately 150-180 calories, depending on size and chocolate coating. They offer a modest source of energy from the sugar and fat, making them a treat best enjoyed in moderation.
The cocoa powder provides antioxidants that support heart health, while using quality butter and eggs adds protein and essential fats. You can make this recipe a bit lighter by reducing sugar slightly or using dark chocolate with higher cocoa content for dipping.
If you’re mindful of allergens, remember these contain gluten, dairy, and eggs. However, with simple substitutions like almond flour and dairy-free margarine, you can make them suitable for many diets.
From a wellness perspective, the joy and connection these pops bring at celebrations are just as nourishing as the ingredients—sometimes, you know, that’s what counts most.
Conclusion
The Perfect Class of 2026 Brownie Pops with Metallic Sprinkles are a sweet little celebration in every bite. They’ve earned a permanent spot in my recipe lineup because they’re easy, festive, and just plain fun to make and share. You can tweak the flavors, sizes, or decorations to fit your style, but the core fudgy goodness and sparkle remain the star.
I love how these pops bring a bit of magic to casual gatherings and milestone moments alike. They’re simple enough that even if you’re juggling a million things, you can still create something memorable. If you try them, I’d love to hear how you put your own spin on the recipe or what occasion you baked them for—drop a comment below and share your story!
Here’s to sweet moments and shiny memories made easy.
FAQs
- Can I make these brownie pops ahead of time?
Yes! Bake and cool the brownies a day ahead, then assemble the pops and add sprinkles just before serving for the best look. - What if I don’t have brownie pop sticks?
Wooden skewers trimmed to size or sturdy lollipop sticks work well as substitutes. - How do I keep the metallic sprinkles from falling off?
Dip the pops in melted chocolate before sprinkling; the chocolate acts like glue to hold them in place. - Can I freeze the brownie pops?
Yes, wrap them individually in plastic wrap and freeze up to 2 months. Thaw at room temperature before serving. - What’s the best way to cut the brownies without crumbling?
Use a sharp knife warmed under hot water and wiped dry between cuts for smooth edges.
Pin This Recipe!
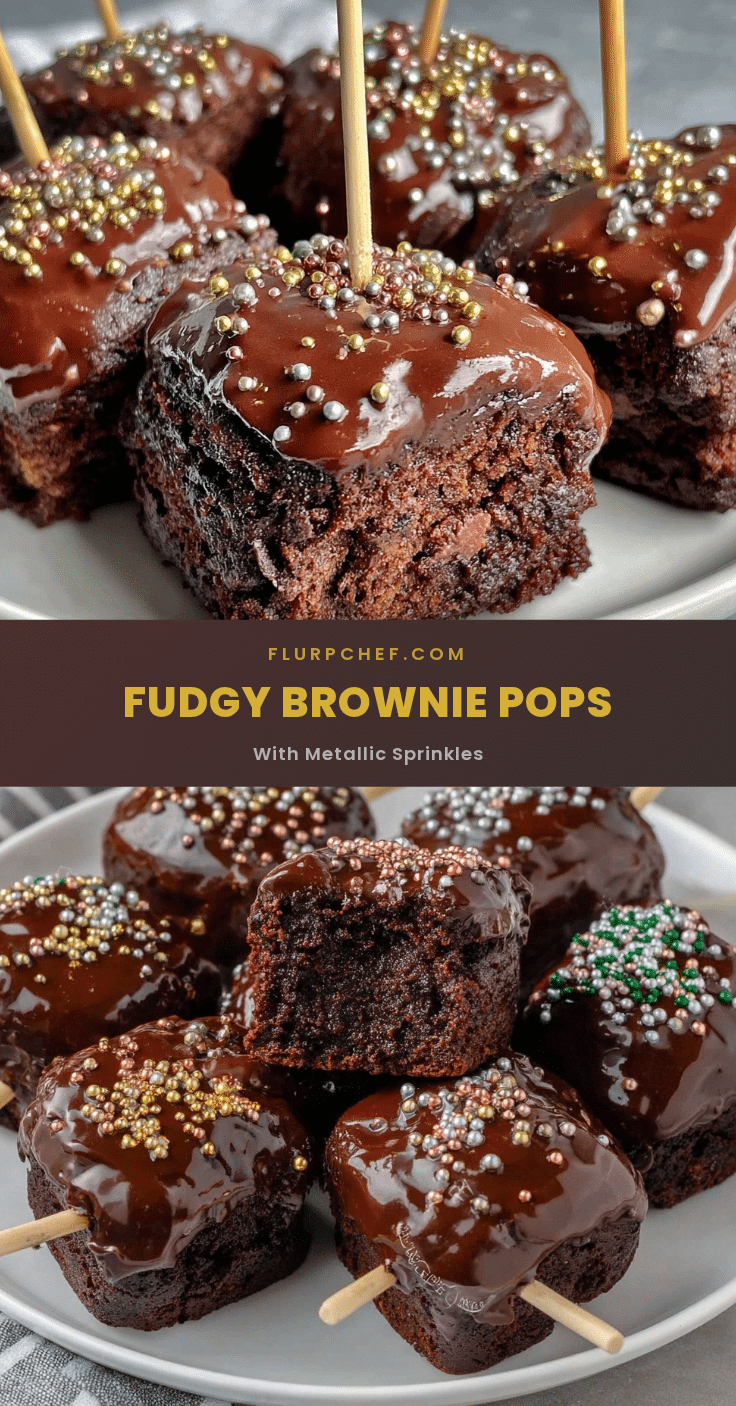
Perfect Class of 2026 Brownie Pops with Metallic Sprinkles

These fudgy, bite-sized brownie pops with metallic sprinkles are a quick and festive homemade dessert perfect for celebrations and last-minute parties.
- Prep Time: 15 minutes
- Cook Time: 25 minutes
- Total Time: 1 hour 40 minutes
- Yield: 16 brownie pops 1x
- Category: Dessert
- Cuisine: American
Ingredients
- 1/2 cup (115g) unsalted butter, melted
- 1 cup (200g) granulated sugar
- 2 large eggs, room temperature
- 1 teaspoon pure vanilla extract
- 1/3 cup (35g) unsweetened cocoa powder
- 1/2 cup (65g) all-purpose flour (or almond flour for gluten-free)
- 1/4 teaspoon salt
- 1/4 teaspoon baking powder
- Metallic sprinkles (gold and silver mix preferred)
- Brownie pop sticks or sturdy lollipop sticks
- Optional: 4 oz (115g) semi-sweet or white chocolate for dipping
Instructions
- Preheat oven to 350°F (175°C). Grease an 8×8 inch baking pan or line with parchment paper.
- In a large bowl, combine melted butter and sugar. Whisk until glossy and smooth, about 1-2 minutes.
- Add eggs one at a time, beating well after each addition. Stir in vanilla extract.
- Sift together cocoa powder, flour, salt, and baking powder in a separate bowl.
- Fold dry ingredients into wet mixture gently until just combined; avoid overmixing.
- Pour batter into prepared pan and spread evenly.
- Bake for 20–25 minutes until a toothpick comes out with a few moist crumbs.
- Cool brownies completely on a cooling rack, about 1 hour.
- Cut brownies into 1.5 inch squares. Insert brownie pop sticks halfway into each square. For stability, dip stick tips in melted chocolate before inserting.
- Optional: Melt chocolate in microwave-safe bowl, dip each pop halfway, then immediately sprinkle with metallic sprinkles.
- Place dipped pops upright in a styrofoam block or lined tray to dry and harden for 15-20 minutes.
- Serve at room temperature.
Notes
Do not overbake to keep brownies fudgy and able to hold the sticks. Cool brownies completely before inserting sticks to prevent crumbling. Dip stick tips in melted chocolate for better stability. Metallic sprinkles can be replaced with colored sugar crystals or edible glitter. Use a sharp knife warmed under hot water for clean cuts.
Nutrition
- Serving Size: 1 brownie pop (appro
- Calories: 150180
- Sugar: 16
- Sodium: 80
- Fat: 8
- Saturated Fat: 5
- Carbohydrates: 22
- Fiber: 2
- Protein: 2
Keywords: brownie pops, metallic sprinkles, easy dessert, celebration dessert, fudgy brownies, party treats, homemade brownies