“Hey, can you make a cake for the game day? Something with our school colors?” That text popped up on my phone just as I was wrapping up a hectic workday. Honestly, I wasn’t in the mood for anything complicated. But, you know how it goes—when it’s for a beloved team, you want it to feel special. So, I grabbed my trusty sheet cake recipe and decided to give it a festive twist with buttercream rosettes in those unmistakable school colors.
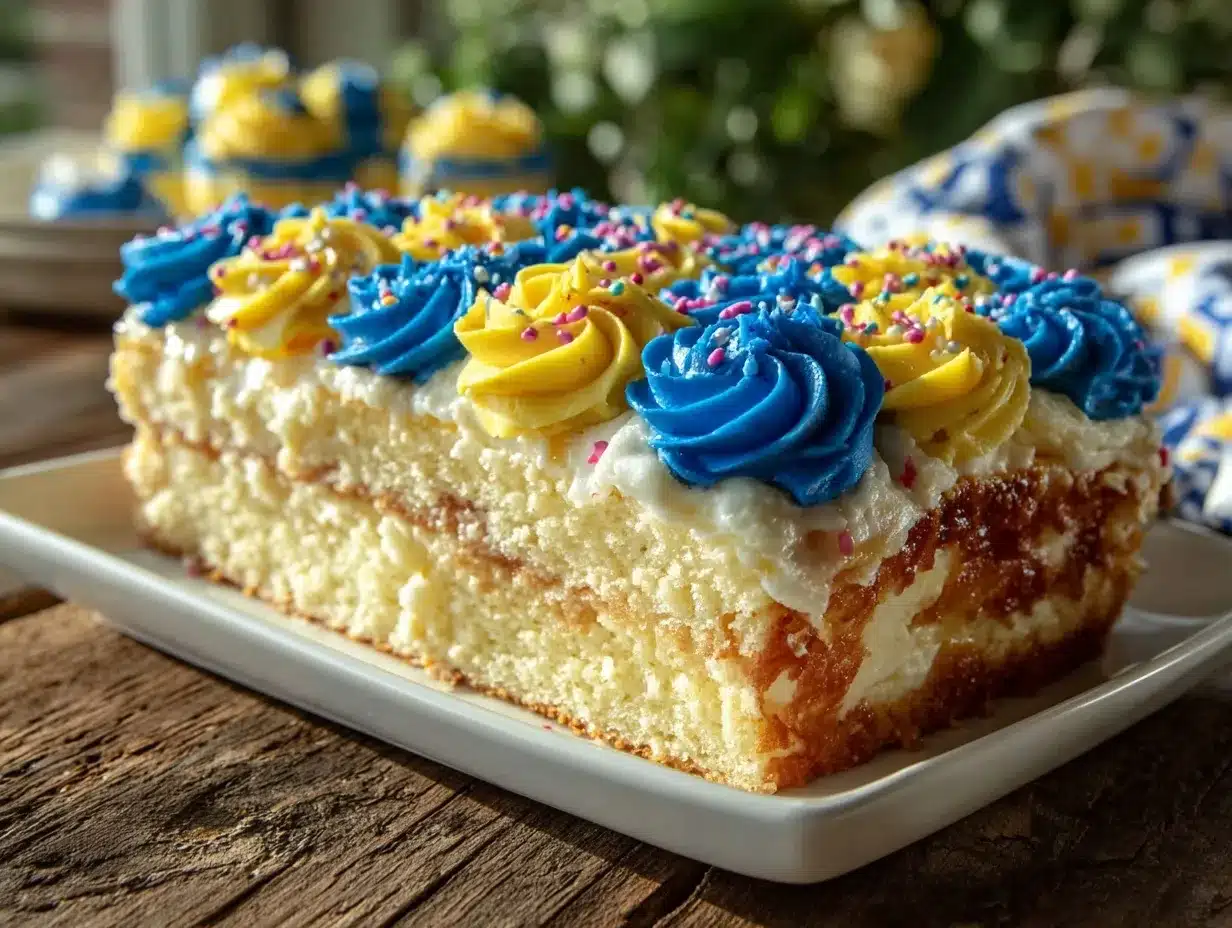
I wasn’t sure at first if the buttercream rosettes would turn out as neat as I imagined. I’d played around with frosting techniques before, but this was the first time I’d try to get those perfect, swirled flowers in two distinct colors that really pop against the cake’s rich base. The kitchen got a little messy (okay, a lot messy), but the final result was worth every butter-smeared fingertip.
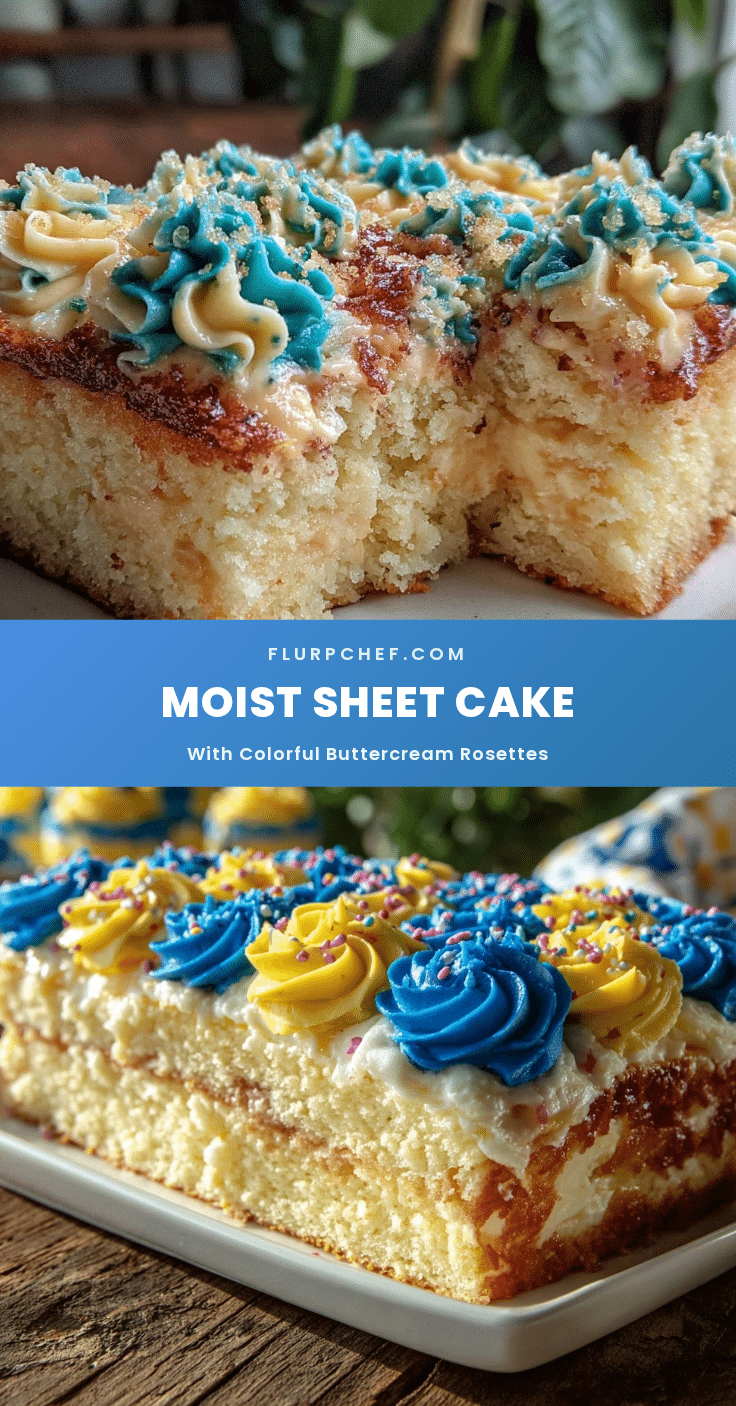
That cake disappeared fast at the tailgate party, with compliments flying left and right. It struck me then—this “perfect sheet cake with school colors buttercream rosettes” isn’t just a dessert; it’s a little celebration on a plate. It’s the kind of recipe you keep coming back to, whether it’s for a big game, a school event, or just to impress friends with some colorful finesse. Plus, it’s straightforward enough that you don’t need to be a frosting pro to get it right.
So, here it is—my go-to sheet cake that’s become a crowd favorite, topped with buttercream rosettes that bring a burst of school spirit to any occasion. Let’s just say, this recipe stuck with me because it’s as much about the joy of gathering as it is about the cake itself.
Why You’ll Love This Recipe
After testing and tweaking this recipe through several game days and celebrations, I can say it’s genuinely one of those dependable favorites. Here’s why this perfect sheet cake with school colors buttercream rosettes has earned its spot in my baking arsenal:
- Quick & Easy: The cake mixes up in under 30 minutes, making it perfect for those last-minute party invites or spontaneous cravings.
- Simple Ingredients: No need for fancy pantry hunts. You probably have everything on hand already, from all-purpose flour to basic butter.
- Perfect for Celebrations: Whether it’s a school event, birthday, or casual get-together, the colorful rosettes add an eye-catching touch that feels festive without extra fuss.
- Crowd-Pleaser: This cake pleases all ages. I’ve seen kids and adults alike go for seconds (and thirds) without hesitation.
- Unbelievably Delicious: The moist, tender crumb pairs beautifully with the creamy, buttery frosting—comfort food with a cheerful twist.
What sets this recipe apart is the buttercream rosette technique. Instead of just slapping on frosting, the rosettes create a textured, vibrant top that looks professionally done but requires only a few tools and a bit of practice. I recommend using a high-quality unsalted butter like Kerrygold—it makes a noticeable difference in flavor and frosting consistency.
This isn’t just another sheet cake; it’s a way to bring a little more personality and pride to your dessert table. Honestly, after making this a few times, I started experimenting with other buttercream frostings to mix things up. But this version? It’s the one that everyone keeps asking me to bring back.
What Ingredients You Will Need
This recipe uses simple, wholesome ingredients to deliver bold flavor and a satisfying texture without any fuss. Most are pantry staples, and you can swap a few items based on what you have or dietary needs.
- For the Cake:
- 2 ½ cups (312g) all-purpose flour
- 2 ½ tsp baking powder
- ½ tsp baking soda
- ½ tsp salt
- 1 cup (226g) unsalted butter, softened (Kerrygold recommended for best flavor)
- 1 ¾ cups (350g) granulated sugar
- 4 large eggs, room temperature
- 1 tbsp pure vanilla extract
- 1 cup (240ml) buttermilk, room temperature (can substitute with milk + 1 tbsp lemon juice)
- For the Buttercream Frosting:
- 1 ½ cups (340g) unsalted butter, softened
- 5 cups (600g) powdered sugar, sifted
- 2 tsp pure vanilla extract
- 3–4 tbsp heavy cream or whole milk
- Gel food coloring in your school colors (gel works best for vibrant hues without thinning the frosting)
Some quick tips: For the buttermilk, if you’re out, mixing regular milk with a splash of lemon juice or vinegar helps mimic that tang and tender crumb. When picking your food coloring, I prefer AmeriColor gels—they give vibrant colors without making the frosting runny. If you want to go dairy-free, swap the butter and milk for plant-based alternatives, though the texture may shift slightly.
For a softer crumb, I’ve sometimes folded in a couple of tablespoons of sour cream—makes the cake extra moist but still holds up well under the frosting. And if you want to try a gluten-free version, using a 1:1 gluten-free flour blend works nicely, though expect a little difference in texture.
Equipment Needed
- 9×13 inch (23×33 cm) sheet cake pan – a classic size for easy serving and perfect for decorating with rosettes.
- Electric mixer (stand or hand) – essential for creaming butter and sugar well, and for whipping the buttercream smooth.
- Mixing bowls – one large for the batter, one for the frosting.
- Rubber spatula – great for scraping down bowls and folding in ingredients gently.
- Offset spatula or butter knife – for spreading the base layer of frosting evenly.
- Piping bags and a large star piping tip (Wilton 1M or similar) – for creating those classic buttercream rosettes. If you don’t have a piping bag, a sturdy zip-top bag with a corner snipped off does the trick.
- Cooling rack – to let the cake cool completely before frosting.
Personally, I find a stand mixer best for ease and consistency, but a hand mixer works fine if you’re careful about mixing times. For the piping tip, Wilton 1M is my go-to; it creates those beautiful swirls effortlessly. If you’re just starting with decorating, don’t stress—practice a few rosettes on parchment paper before tackling the cake. Also, keeping your frosting at room temperature helps it pipe smoothly without breaking.
Preparation Method
- Preheat and Prep: Preheat your oven to 350°F (175°C). Grease your 9×13 inch sheet pan generously with butter or non-stick spray, then lightly flour it to prevent sticking.
- Mix Dry Ingredients: In a medium bowl, whisk together 2 ½ cups (312g) flour, 2 ½ tsp baking powder, ½ tsp baking soda, and ½ tsp salt. Set aside.
- Cream Butter and Sugar: In a large bowl, beat 1 cup (226g) softened unsalted butter with 1 ¾ cups (350g) sugar on medium speed until light and fluffy, about 3–5 minutes. This step is crucial for a tender crumb.
- Add Eggs and Vanilla: Beat in 4 large eggs, one at a time, mixing well after each. Stir in 1 tbsp vanilla extract.
- Combine Wet and Dry: Alternately add the dry ingredients and 1 cup (240ml) buttermilk to the butter mixture, starting and ending with dry ingredients. Mix on low speed until just combined. Avoid overmixing to keep the cake tender.
- Pour and Bake: Pour batter evenly into the prepared pan. Smooth the top with a spatula. Bake for 35-40 minutes, or until a toothpick inserted in the center comes out clean. Keep an eye after 30 minutes to prevent overbaking.
- Cool Thoroughly: Let the cake cool in the pan for 15 minutes, then transfer to a wire rack to cool completely before frosting. Patience here is key—frosting a warm cake makes a mess.
- Prepare Buttercream: In a large bowl, beat 1 ½ cups (340g) softened butter until creamy. Gradually add 5 cups (600g) powdered sugar, one cup at a time, mixing on low. Add 2 tsp vanilla and 3–4 tbsp cream, beating on high until light and fluffy, about 3 minutes.
- Color Your Frosting: Divide buttercream into separate bowls for each school color. Add gel food coloring a little at a time, mixing well until you reach your desired shade.
- Frost the Cake: Spread a thin, even crumb coat over the cooled cake with an offset spatula. Chill for 15 minutes to set.
- Pipe the Rosettes: Fill piping bags fitted with a large star tip with each color of buttercream. Pipe rosettes by starting from the center of each swirl and circling outward in a spiral. Alternate colors or cluster by color for a visually striking effect. Cover the entire cake surface with rosettes.
Quick tip: If your buttercream feels too stiff for piping, add a teaspoon of cream to loosen it up. If too soft, chill it for 10 minutes. Also, piping on a chilled cake helps the rosettes hold their shape better.
Cooking Tips & Techniques
Creating a beautiful buttercream-rosetted sheet cake isn’t rocket science, but a few tips go a long way:
- Butter at Room Temperature: Both your cake butter and frosting butter should be soft but not melted. This balance helps the buttercream whip to the perfect fluffy texture without being runny.
- Measuring Flour Correctly: Too much flour can make the cake dense. Spoon flour into your measuring cup and level it off rather than scooping directly from the bag.
- Don’t Overmix Batter: Once dry ingredients go in, mix just until combined to avoid a tough cake.
- Practice Rosettes First: Grab some parchment paper and try a few swirls before committing to the cake. Get a feel for pressure and speed.
- Chill Between Steps: After crumb coating, a quick chill firm up the base, preventing crumbs from mixing into your rosettes.
- Keep the Piping Bag Upright: Hold the bag perpendicular to the cake surface and pipe with steady pressure to get even rosettes.
- Color Gradation Trick: If you want a subtle ombre effect, try blending two shades in the same bag.
I’ve had my share of frosting disasters—too stiff, too runny, or rosettes that look more like blobs. What helped me was slowing down and remembering that imperfections add character. Also, multitasking by prepping frosting while the cake bakes saves time and keeps the kitchen workflow smooth.
Variations & Adaptations
This sheet cake recipe is a fantastic base to customize, so don’t hesitate to put your spin on it.
- Flavor Variations: Add ½ cup (45g) cocoa powder to the dry ingredients for a chocolate twist. Or fold in ½ cup (120ml) orange juice with zest for a citrus zing.
- Dietary Adjustments: Substitute all-purpose flour with a gluten-free blend for a gluten-free cake. Use vegan butter and plant-based milk to make it dairy-free.
- Color and Design: Instead of rosettes, try piping stars or simple swirls. Or, for a more minimalist look, spread a smooth layer of buttercream and add edible glitter or sprinkles in school colors.
- Seasonal Touch: In summer, top the cake with fresh berries arranged in the school colors for a fresh take.
- Personal Experiment: I once added a layer of raspberry jam between two sheet cakes and frosted with this buttercream. It was a hit at a spring party—reminded me of the strawberry champagne poke cake I tried last year.
Serving & Storage Suggestions
This cake is best served at room temperature to enjoy the buttercream’s silky texture. Remove it from the fridge about 30 minutes before serving.
For presentation, add a scattering of edible glitter or sprinkle tiny candies in matching colors around the edges. Pair it with a cold glass of milk or a cup of coffee for an afternoon pick-me-up.
Store leftover cake in an airtight container in the refrigerator for up to 4 days. To keep the rosettes intact, avoid stacking anything on top. Before serving leftovers, let the cake sit at room temperature for about 30 minutes to soften the frosting.
If you want to freeze the cake, wrap it tightly in plastic wrap and then foil. Thaw overnight in the fridge and bring to room temperature before serving.
Flavor-wise, the cake tastes even better the next day as the frosting and crumb meld together. I often make this a day ahead when hosting, which helps reduce party-day stress.
Nutritional Information & Benefits
Per serving (assuming 12 servings): approximately 420 calories, 22g fat, 55g carbohydrates, 3g protein.
This cake is a treat, rich in butter and sugar, so moderation is key. The use of real butter provides some fat-soluble vitamins, and buttermilk adds a slight tang and tenderness.
For those watching dietary needs, swapping in almond flour or plant-based alternatives can reduce gluten or dairy content respectively. Be mindful of food coloring allergies or sensitivities; natural colorings like beet powder or spirulina can be used instead of gels.
From a wellness perspective, this cake shines as a joyful indulgence—perfect for celebrating milestones or sharing with loved ones, making memories sweeter beyond just taste.
Conclusion
This perfect sheet cake with school colors buttercream rosettes has become my go-to for any occasion calling for a little flair and a lot of flavor. It’s approachable for beginners, yet impressive enough to earn compliments from seasoned bakers and dessert lovers alike.
Feel free to tweak the colors, flavors, or frosting style to fit your event or mood. I love that this recipe encourages creativity while delivering a reliably delicious cake every time.
Honestly, it’s the kind of recipe I return to because it brings people together—whether cheering on a team or celebrating small victories around the kitchen table. If you give it a try, I’d love to hear how your rosettes turn out or what unique twists you add!
Happy baking and cheering!
FAQs
- Can I make the cake gluten-free? Yes! Substitute all-purpose flour with a 1:1 gluten-free baking flour blend for best results.
- How do I keep buttercream rosettes from melting? Keep the cake cool before piping and serve at room temperature. Avoid storing in warm environments.
- Can I prepare the cake and frosting ahead of time? Absolutely! Bake the cake a day ahead and refrigerate. Make the buttercream the same day you plan to decorate for best texture.
- What if I don’t have a piping bag or star tip? Use a sturdy zip-top bag and snip a small corner for piping. While the rosettes won’t be as defined, you can still create pretty swirls.
- How do I achieve vibrant school colors in frosting? Use gel food coloring rather than liquid to avoid thinning the buttercream, and add color gradually until you get the shade you want.
Pin This Recipe!
Perfect Sheet Cake with School Colors Buttercream Rosettes

A quick and easy sheet cake recipe topped with vibrant buttercream rosettes in school colors, perfect for celebrations and game day events.
- Prep Time: 20 minutes
- Cook Time: 35-40 minutes
- Total Time: 1 hour
- Yield: 12 servings 1x
- Category: Dessert
- Cuisine: American
Ingredients
- 2 ½ cups (312g) all-purpose flour
- 2 ½ tsp baking powder
- ½ tsp baking soda
- ½ tsp salt
- 1 cup (226g) unsalted butter, softened (Kerrygold recommended)
- 1 ¾ cups (350g) granulated sugar
- 4 large eggs, room temperature
- 1 tbsp pure vanilla extract
- 1 cup (240ml) buttermilk, room temperature (or milk + 1 tbsp lemon juice)
- 1 ½ cups (340g) unsalted butter, softened (for frosting)
- 5 cups (600g) powdered sugar, sifted
- 2 tsp pure vanilla extract (for frosting)
- 3–4 tbsp heavy cream or whole milk
- Gel food coloring in school colors
Instructions
- Preheat oven to 350°F (175°C). Grease a 9×13 inch sheet pan with butter or non-stick spray and lightly flour it.
- In a medium bowl, whisk together flour, baking powder, baking soda, and salt. Set aside.
- In a large bowl, beat softened butter and sugar on medium speed until light and fluffy, about 3–5 minutes.
- Beat in eggs one at a time, mixing well after each. Stir in vanilla extract.
- Alternately add dry ingredients and buttermilk to the butter mixture, starting and ending with dry ingredients. Mix on low speed until just combined.
- Pour batter evenly into prepared pan and smooth the top. Bake for 35-40 minutes or until a toothpick inserted in the center comes out clean.
- Let cake cool in pan for 15 minutes, then transfer to a wire rack to cool completely.
- For frosting, beat softened butter until creamy. Gradually add powdered sugar, mixing on low. Add vanilla and cream, then beat on high until light and fluffy, about 3 minutes.
- Divide buttercream into bowls and add gel food coloring to each to achieve desired school colors.
- Spread a thin crumb coat over cooled cake with an offset spatula and chill for 15 minutes.
- Fill piping bags fitted with a large star tip with colored buttercream. Pipe rosettes by swirling from center outward, covering entire cake surface.
- If buttercream is too stiff, add a teaspoon of cream to loosen; if too soft, chill for 10 minutes. Pipe on a chilled cake for best shape retention.
Notes
Use high-quality unsalted butter like Kerrygold for best flavor and frosting consistency. Practice piping rosettes on parchment paper before decorating the cake. Keep butter and frosting butter at room temperature but not melted. For dairy-free or gluten-free versions, substitute ingredients accordingly. Chill cake before piping rosettes to help them hold shape.
Nutrition
- Serving Size: 1 slice (1/12 of cak
- Calories: 420
- Fat: 22
- Carbohydrates: 55
- Protein: 3
Keywords: sheet cake, buttercream rosettes, school colors cake, easy cake recipe, celebration cake, game day dessert