“Hey, do you think we can pull off a graduation cake that’s actually fun to serve?” my sister asked me over a hurried text one evening when the party plans were spiraling out of control. Honestly, I was exhausted and not exactly in the mood for complicated baking. But a Perfect Pull-Apart Graduation Cap Cupcake Cake sounded like a clever shortcut to me—something that looked impressive but didn’t demand a degree in cake decorating.
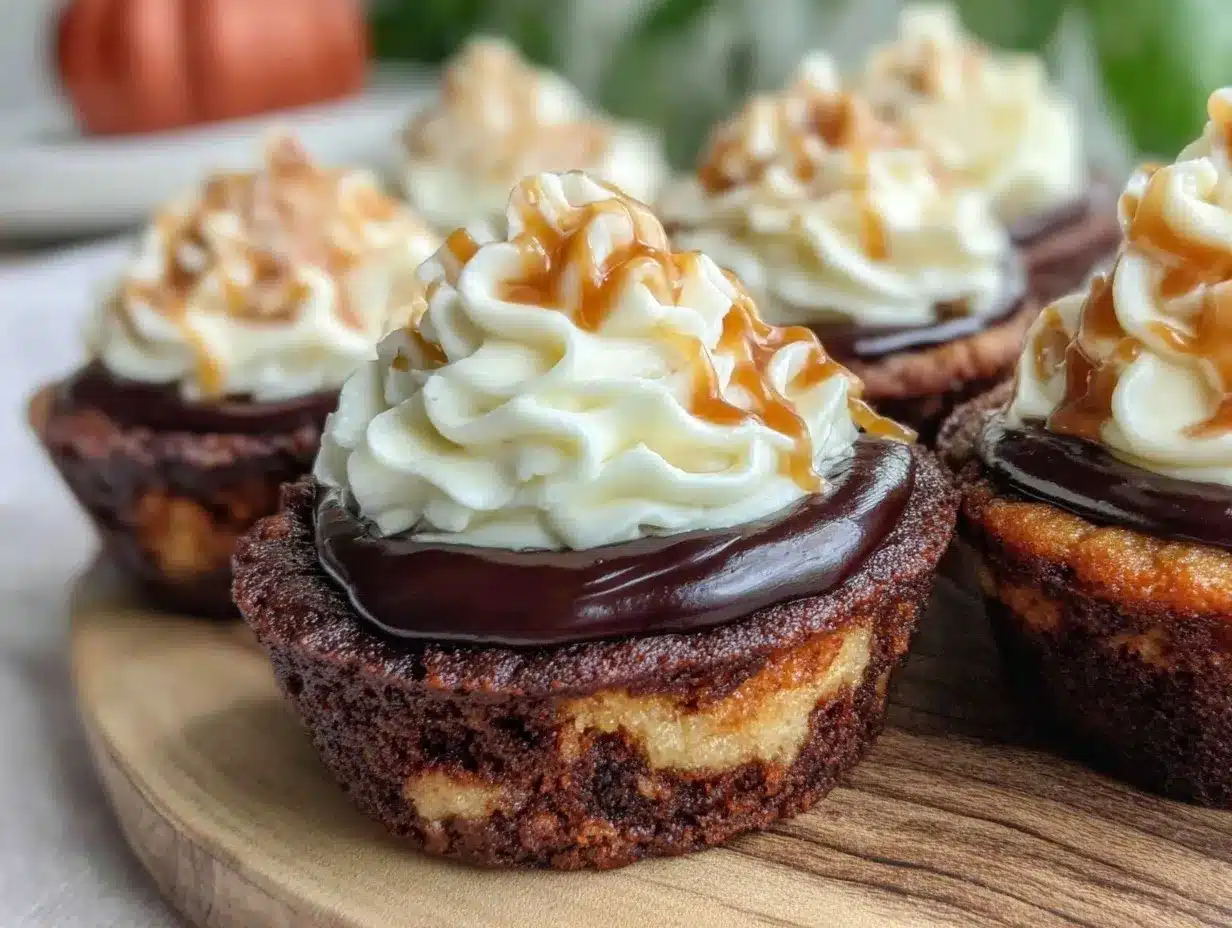
So, with a bit of skepticism (and a lot of leftover frosting), I started assembling cupcakes into a giant graduation cap shape. I wasn’t expecting much—just something easy to grab and share, perfect for a casual celebration. But as the cupcakes came together, topped with a little black fondant square and a tassel made from piped icing, it hit me: this was not just a cake, but a memory-maker. Everyone loved how simple it was to tear off a piece, and the smiles when the “cap” was finally pulled apart? Priceless.
That night, between laughter and crumbs, I realized this recipe stuck because it’s not just about fancy frosting or perfect layers—it’s about making celebrations easy, joyful, and a little bit playful. If you’re tired of the usual cakes that need slicing, this pull-apart cupcake cake could be your new go-to for marking those milestone moments.
Why You’ll Love This Recipe
From someone who’s baked enough birthday cakes to fill a shelf, I can tell you this pull-apart graduation cap cupcake cake is a lifesaver for celebrations. It’s tested, family-approved, and honestly, kind of addictive once you get the hang of it. Here’s why it stands out:
- Quick & Easy: You can get this cake ready in under two hours, which is perfect when you’re juggling party prep with, well, life.
- Simple Ingredients: No need for specialty stores—basic cupcake ingredients and a few decorating touches are all you need.
- Perfect for Celebrations: Whether it’s a graduation party, a casual gathering, or a last-minute surprise, this cake fits right in.
- Crowd-Pleaser: Kids and adults alike love the fun of pulling apart cupcakes, and the classic vanilla-chocolate combo never disappoints.
- Unbelievably Delicious: The cupcakes stay moist and flavorful, and the frosting has just the right balance of sweetness without being cloying.
This recipe isn’t just another cupcake arrangement. The secret is in the layering technique and the way the frosting is piped to mimic a real graduation cap, creating a festive centerpiece that invites everyone to dig in. It’s like comfort food with a clever twist—fun, approachable, and totally crowd-friendly.
Honestly, after making this a few times during graduation season, I find myself craving it even when there’s no special occasion. It’s that kind of recipe that brings a little extra joy to the table without the fuss.
What Ingredients You Will Need
This recipe uses simple, wholesome ingredients to deliver bold flavor and a satisfying texture without fuss or fancy shopping trips. Most are pantry staples, and substitutions are easy if you need them.
- For the Cupcakes:
- All-purpose flour – 2 ½ cups (315g), sifted for lightness
- Granulated sugar – 1 ¾ cups (350g), for sweet balance
- Baking powder – 2 ½ teaspoons, to give the cupcakes a nice rise
- Salt – ½ teaspoon, to enhance flavors
- Unsalted butter – ¾ cup (170g), softened (I prefer Land O Lakes for consistency)
- Whole milk – 1 cup (240ml), room temperature (can swap with almond milk for dairy-free)
- Large eggs – 3, room temperature for better mixing
- Pure vanilla extract – 2 teaspoons, for that classic warmth
- Unsweetened cocoa powder – ½ cup (50g), sifted (preferably Dutch-processed for richer flavor)
- For the Frosting:
- Unsalted butter – 1 cup (225g), softened
- Powdered sugar – 4 cups (480g), sifted to avoid lumps
- Heavy cream – 2-3 tablespoons (30-45ml), to smooth texture
- Pure vanilla extract – 1 teaspoon
- Black gel food coloring – a few drops for the cap color (use a trusted brand like AmeriColor)
- Yellow or gold gel food coloring – for the tassel
- For Decoration:
- Fondant – black, rolled and cut into squares for the caps (optional but adds a neat finish)
- Edible pearls or sprinkles – optional for extra flair
If you want to keep it gluten-free, try swapping all-purpose flour with a 1-to-1 gluten-free baking flour. For a lighter frosting, Greek yogurt can replace some butter (though it changes the texture). And if fresh berries are in season, adding a few between cupcakes can be a delightful surprise.
Equipment Needed
- Standard 12-cup muffin pan(s) – I usually use two pans to bake 24 cupcakes at once
- Mixing bowls – one large for batter, one medium for frosting
- Electric mixer or stand mixer – makes beating the batter and frosting much easier
- Rubber spatula – for scraping bowls clean
- Piping bags and round/petal tips – useful for the tassel and frosting details
- Offset spatula – helps spread frosting evenly
- Cooling rack – cupcakes cool down faster and stay moist
- Rolling pin and sharp knife – if working with fondant for caps
If you don’t have a stand mixer, a hand mixer will do just fine. For budget-friendly options, silicone cupcake liners work wonders and make cleanup easier. I once tried piping frosting without a bag (just a zip-top bag with a corner snipped) and it worked like a charm when I was in a pinch.
Preparation Method
- Preheat your oven to 350°F (175°C). Line muffin pans with paper liners or grease well. This helps cupcakes release easily.
- Mix dry ingredients: In a large bowl, sift together the flour, baking powder, salt, and cocoa powder. Set aside.
- Cream butter and sugar: Using your mixer, beat the softened butter and granulated sugar on medium speed until fluffy and pale, about 3-5 minutes. This step is key for light cupcakes.
- Add eggs one at a time: Beat in eggs, one by one, mixing well after each addition. Then mix in vanilla extract. If batter looks curdled, don’t panic—it will smooth out once dry ingredients are added.
- Alternate adding dry ingredients and milk: Add dry ingredients in three parts, alternating with milk in two parts. Start and end with dry. Mix gently after each addition to avoid overworking the batter.
- Fill cupcake liners: Spoon batter evenly into liners, about ⅔ full to allow room for rising. Using a scoop helps keep them uniform.
- Bake for 18-22 minutes: Test doneness by inserting a toothpick—it should come out clean or with a few moist crumbs. Don’t overbake or cupcakes will be dry.
- Cool completely: Transfer cupcakes to a wire rack after 5 minutes in the pan. Frosting warm cupcakes can cause melting.
- Prepare frosting: Beat softened butter until smooth, then gradually add powdered sugar, alternating with heavy cream. Add vanilla and black gel coloring until you achieve a rich, deep black shade. Adjust cream for spreadable but firm icing.
- Assemble the cake: Arrange cupcakes in a square formation—typically 5 x 5 for 25 cupcakes works well for a large cap. Frost the tops smoothly to create a flat surface.
- Create the cap top: Roll out black fondant and cut into squares matching cupcake tops. Place on the frosted cupcakes for a clean look. Otherwise, pipe a smooth layer of black frosting across the top.
- Pipe the tassel: Use yellow or gold frosting to pipe a tassel hanging off one corner of the “cap.” A small edible pearl can anchor the tassel’s knot.
- Final touches: Add sprinkles or edible decorations as desired. Chill briefly to set frosting before serving.
Pro tip: If you’re short on time, the cupcakes can be made a day ahead and refrigerated. Just bring them back to room temperature before frosting for best results. Also, when mixing the frosting, start with less color—you can always add more, but it’s hard to fix if it gets too dark.
Cooking Tips & Techniques
Making a pull-apart cupcake cake sounds straightforward, but a few tricks make all the difference:
- Don’t skip sifting dry ingredients. It’s a small step that prevents lumps and ensures even mixing for tender cupcakes.
- Room temperature ingredients mix more evenly. Cold eggs or milk can cause the batter to separate or be lumpy.
- Use gel coloring, not liquid. It gives you vibrant color without thinning the frosting.
- Frost cupcakes while they’re totally cool. Otherwise, you’ll end up with melted, runny icing.
- Arrange cupcakes tightly. The closer they are, the better the finished cake holds shape when pulled apart.
- Use an offset spatula for frosting. It helps smooth frosting evenly without tearing cupcake tops.
- Practice piping tassels on parchment paper first. It takes a couple of tries to get the right flow and pressure with the bag.
One time, I forgot to cool the cupcakes fully and the frosting just slid off like a bad joke. Lesson learned: patience is a virtue in cake decorating! Also, multitasking helps—while cupcakes bake, you can whip up the frosting or prep decorating tools, saving precious party prep time.
Variations & Adaptations
This Perfect Pull-Apart Graduation Cap Cupcake Cake can be customized in so many ways to fit your celebration vibe or dietary needs:
- Flavor swaps: Chocolate cupcakes can be swapped for lemon, red velvet, or even funfetti to match school colors or personal taste.
- Dairy-free or vegan: Use plant-based milk and vegan butter substitutes. Aquafaba can replace eggs for the batter.
- Decor changes: Instead of a tassel, pipe a school mascot or add edible glitter for extra sparkle.
- Mini versions: Make mini cupcakes and arrange them in a smaller cap shape for bite-sized fun.
- Gluten-free: Sub all-purpose flour with your favorite gluten-free blend. Just watch the baking time as it may vary.
Once, I swapped the black fondant for a deep navy blue and added silver sprinkles because the graduate’s school colors were blue and silver—it was a hit and felt so personalized. If you want to try a different recipe for your party’s main dish, pairing this cake with something like the creamy chicken and rice casserole makes for a crowd-pleasing combo that balances comfort and festivity.
Serving & Storage Suggestions
This cupcake cake is best served at room temperature, allowing the frosting to be soft and the flavors to shine. Arrange it on a large platter or cake board, so guests can pull apart the cupcakes easily without making a mess.
Pair it with light beverages like iced tea or sparkling lemonade for a refreshing contrast. If you want something heartier, a side salad like the fresh Greek salad balances the sweetness and keeps the meal lively.
For storage, cover the cake loosely with plastic wrap and refrigerate for up to 3 days. Bringing cupcakes back to room temperature before serving ensures the frosting isn’t too firm or hard. You can also freeze individual unfrosted cupcakes wrapped in foil for up to 2 months; thaw and frost fresh before the celebration.
Flavors tend to mellow as the cake rests, making it even more enjoyable the next day. Just don’t wait too long—these cupcakes are too good to keep hidden in the fridge!
Nutritional Information & Benefits
Each cupcake (without frosting) has approximately 210 calories, 8 grams of fat, 30 grams of carbohydrates, and 3 grams of protein. The frosting adds sweetness and richness, so moderation is key.
Key ingredients like eggs provide protein and essential nutrients, while the butter and milk add calcium and vitamin D. Using quality cocoa powder adds antioxidants, which is a little bonus in your celebration treat.
This recipe can be adapted for gluten-free or dairy-free diets, making it accessible for many guests. Just be mindful of common allergens such as eggs and dairy when serving a diverse crowd.
From a wellness perspective, this cake fits best as an occasional indulgence—perfect for special moments like graduations where joy and community take center stage.
Conclusion
There’s something wonderfully satisfying about a Perfect Pull-Apart Graduation Cap Cupcake Cake that’s both playful and practical. It takes the pressure off complicated cake cutting and invites everyone to join in the fun. Whether you’re a seasoned baker or someone who wants a no-fuss dessert that still wows, this recipe offers a reliable crowd-pleaser that’s easy to customize and enjoy.
I love this recipe because it turns a simple idea into a centerpiece that sparks smiles and conversations. Plus, the easy cleanup means you’ll have more time to celebrate and less time stressing.
Give it a try, tweak it to your taste, and don’t forget to share how your graduation celebration went. I’d love to hear your versions and see your photos!
Frequently Asked Questions
Can I make the cupcakes a day ahead?
Yes! Bake the cupcakes a day in advance and store them in an airtight container at room temperature. Frost them the day of the event for the freshest look and taste.
What if I don’t have black gel food coloring?
You can mix blue, red, and green gel colors to create black, but it’s easier to buy black gel from the baking aisle. Avoid liquid food coloring as it thins the frosting.
How do I keep cupcakes moist?
Don’t overbake and use room temperature ingredients. Also, adding a small amount of sour cream or yogurt to the batter can help retain moisture.
Can I use boxed cake mix instead of scratch?
Absolutely! A high-quality boxed mix works well for this cake. Just follow package instructions and use good-quality frosting for the best results.
How do I store leftover cupcakes?
Store leftovers in an airtight container in the fridge for up to 3 days. Bring them to room temperature before eating for the best flavor and texture.
Pin This Recipe!
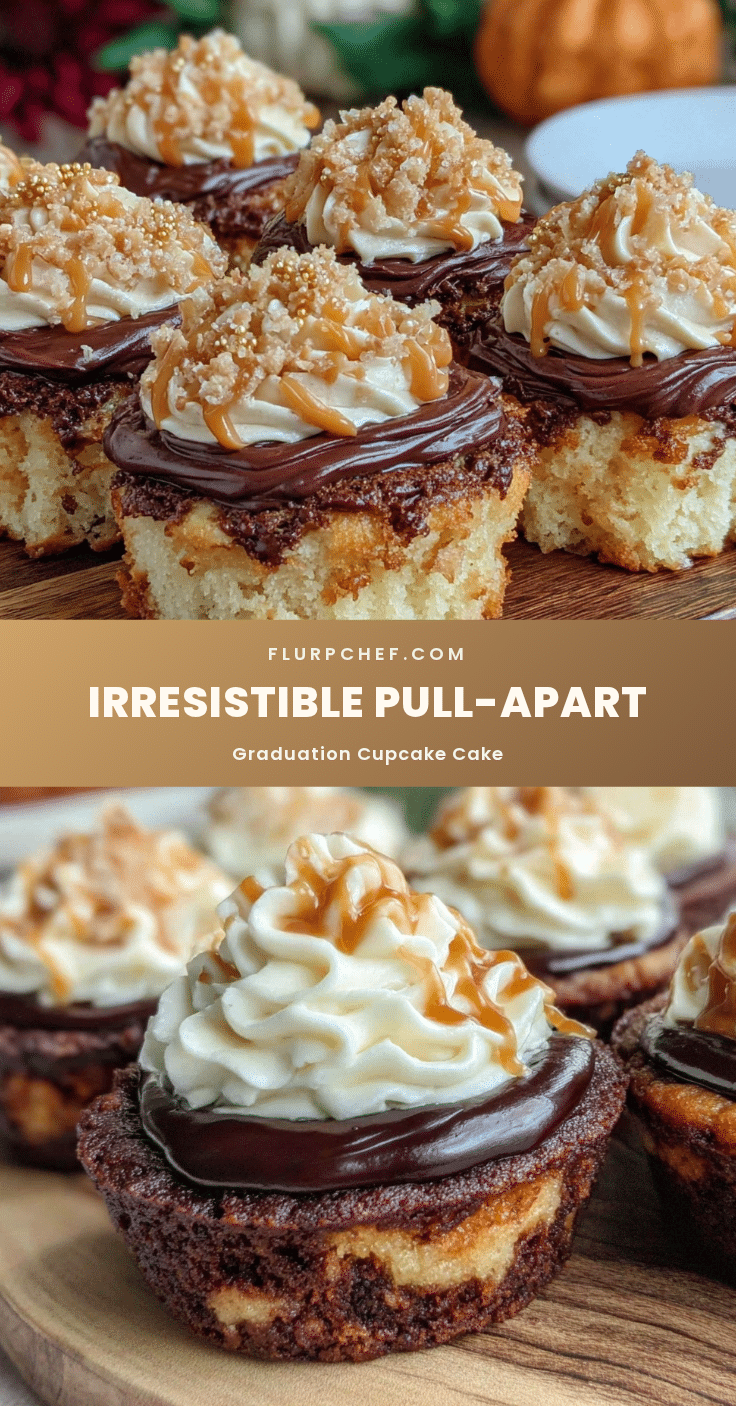
Perfect Pull-Apart Graduation Cap Cupcake Cake
A fun and easy-to-serve pull-apart cupcake cake shaped like a graduation cap, perfect for celebrations and casual gatherings. This recipe combines classic vanilla and chocolate flavors with simple decorating techniques for a memorable centerpiece.
- Prep Time: 30 minutes
- Cook Time: 22 minutes
- Total Time: 52 minutes
- Yield: 25 servings 1x
- Category: Dessert
- Cuisine: American
Ingredients
- 2 ½ cups (315g) all-purpose flour, sifted
- 1 ¾ cups (350g) granulated sugar
- 2 ½ teaspoons baking powder
- ½ teaspoon salt
- ¾ cup (170g) unsalted butter, softened
- 1 cup (240ml) whole milk, room temperature (can substitute almond milk for dairy-free)
- 3 large eggs, room temperature
- 2 teaspoons pure vanilla extract
- ½ cup (50g) unsweetened cocoa powder, sifted (preferably Dutch-processed)
- 1 cup (225g) unsalted butter, softened (for frosting)
- 4 cups (480g) powdered sugar, sifted
- 2–3 tablespoons (30-45ml) heavy cream
- 1 teaspoon pure vanilla extract (for frosting)
- Black gel food coloring, a few drops
- Yellow or gold gel food coloring (for tassel)
- Black fondant, rolled and cut into squares for caps (optional)
- Edible pearls or sprinkles (optional)
Instructions
- Preheat your oven to 350°F (175°C). Line muffin pans with paper liners or grease well.
- In a large bowl, sift together the flour, baking powder, salt, and cocoa powder. Set aside.
- Using a mixer, beat the softened butter and granulated sugar on medium speed until fluffy and pale, about 3-5 minutes.
- Beat in eggs one at a time, mixing well after each addition. Then mix in vanilla extract.
- Add dry ingredients in three parts, alternating with milk in two parts, starting and ending with dry ingredients. Mix gently after each addition.
- Spoon batter evenly into liners, about ⅔ full.
- Bake for 18-22 minutes or until a toothpick inserted comes out clean or with a few moist crumbs.
- Cool cupcakes completely on a wire rack.
- For frosting, beat softened butter until smooth, then gradually add powdered sugar, alternating with heavy cream. Add vanilla and black gel coloring until a rich black shade is achieved.
- Arrange cupcakes in a square formation (5 x 5 for 25 cupcakes). Frost the tops smoothly to create a flat surface.
- Roll out black fondant and cut into squares matching cupcake tops. Place on frosted cupcakes or pipe a smooth layer of black frosting across the top.
- Pipe a tassel using yellow or gold frosting hanging off one corner of the cap. Anchor the tassel’s knot with a small edible pearl.
- Add sprinkles or edible decorations as desired. Chill briefly to set frosting before serving.
Notes
Cupcakes can be baked a day ahead and refrigerated; bring to room temperature before frosting. Use gel food coloring for vibrant colors without thinning frosting. Cool cupcakes completely before frosting to prevent melting. Arrange cupcakes tightly for better cake shape. Practice piping tassels on parchment paper first.
Nutrition
- Serving Size: 1 cupcake
- Calories: 280
- Sugar: 28
- Sodium: 150
- Fat: 12
- Saturated Fat: 7
- Carbohydrates: 38
- Fiber: 1
- Protein: 4
Keywords: pull-apart cupcake cake, graduation cake, easy celebration cake, cupcake cake, vanilla chocolate cupcakes, fun party dessert


