Introduction
“You know when you’re halfway through a hectic Saturday and suddenly remember you promised dessert for the family dinner? Yeah, that was me, staring at an empty fridge and a dwindling clock. Honestly, I was skeptical — could you really whip up a dessert without turning on the oven or spending ages in the kitchen? Well, that’s how these Creamy No-Bake Key Lime Pie Bars with Graham Cracker Crust came into my life. I grabbed a box of graham crackers, some zesty key limes, and a few staples I always keep handy. The result? This bright, tangy, and silky-smooth treat that felt like a tiny tropical vacation in every bite.
What surprised me most was how this recipe, born out of a rushed moment, quickly became a go-to whenever I want something fuss-free but impressive. The crust is buttery and crunchy, perfectly balancing the luscious, creamy lime filling. And the best part? It sets in the fridge, so you can relax while it chills, no oven heat adding to the kitchen chaos. It’s funny how a last-minute save turned into a dessert I find myself craving on quiet Sunday afternoons or sharing at impromptu get-togethers.
After making these bars a few times (okay, maybe every week for a while), I realized this recipe isn’t just easy — it’s downright addictive. It’s a reminder that sometimes, the simplest ideas become the most unforgettable dishes. And if you’re like me, juggling busy days but still wanting that homemade touch, these bars might just become your favorite shortcut to sweet satisfaction.
Why You’ll Love This Recipe
Having tested and tasted this recipe over several weeks, I can confidently say it’s a keeper. Here’s why this no-bake key lime pie bars recipe deserves a spot in your dessert rotation:
- Quick & Easy: Ready in under 30 minutes, making it perfect for last-minute dessert cravings or relaxed weekend treats.
- Simple Ingredients: No need for fancy or hard-to-find items — just staples you probably already have in your pantry and fridge.
- Perfect for Summer Gatherings: Its refreshing, citrusy flavor is ideal for barbecues, potlucks, or sunny brunches.
- Crowd-Pleaser: Kids and adults alike can’t get enough of the creamy, tangy filling combined with the crunchy, buttery crust.
- Unbelievably Delicious: The texture is just right — silky smooth filling with a slight graham cracker crunch that keeps you coming back for more.
This isn’t just another key lime pie bar recipe. What sets it apart is the perfectly balanced filling — not too tart, not too sweet — thanks to the fresh key lime juice and a hint of zest that really wakes up your taste buds. Plus, blending cream cheese into the filling adds a subtle richness that makes it feel indulgent without being heavy. It’s a recipe I trust to impress without stress, whether I’m pairing it with a cup of coffee for a quiet afternoon or serving it up after a hearty meal like creamy chicken and rice casserole.
What Ingredients You Will Need
This recipe uses simple, wholesome ingredients to deliver bright, bold flavor and a satisfying texture without the fuss. Most of these are pantry staples, and the fresh key lime juice is what truly makes it pop.
- For the Graham Cracker Crust:
- 1 ½ cups graham cracker crumbs (about 10 full sheets, crushed finely) — I like the honey-flavored ones for extra depth
- 6 tablespoons unsalted butter, melted (adds richness and helps bind the crust)
- 2 tablespoons granulated sugar (balances the tartness)
- For the Key Lime Filling:
- 8 ounces cream cheese, softened (full-fat for the creamiest texture)
- 1 cup sweetened condensed milk (the magic ingredient for sweetness and creamy body)
- ½ cup fresh key lime juice (about 10-12 key limes; regular limes can be used but key limes have that special zing)
- 1 tablespoon key lime zest (freshly grated for aromatic lift)
- 1 teaspoon vanilla extract (rounds out the flavors)
- Optional Topping:
- Whipped cream or a dollop of sour cream (for a silky, tangy finish)
- Extra lime zest or thin lime slices for garnish
If you’re looking for substitutions, almond flour can replace graham crackers for a gluten-free crust, and coconut yogurt works well instead of cream cheese for a dairy-free twist. In summer, fresh key limes are easier to find, but if they’re out of season, bottled key lime juice (look for 100% juice) works in a pinch — just adjust sweetness accordingly.
Equipment Needed
- Baking pan (an 8×8-inch square pan works perfectly; glass or metal both do the job)
- Mixing bowls — at least two, one for crust and one for filling
- Hand mixer or stand mixer (for smooth cream cheese blending; a sturdy whisk can work but takes more effort)
- Measuring cups and spoons (accuracy is key for balance in flavor)
- Citrus juicer or reamer (fresh lime juice makes a huge flavor difference)
- Spatula (for scraping and smoothing the filling)
If you don’t have a mixer, letting the cream cheese soften fully before mixing by hand can save you some elbow grease. Also, a food processor is great if you want perfectly fine graham cracker crumbs, but a zip-top bag and rolling pin work just as well if you’re in a pinch. This recipe keeps equipment simple and accessible, so you don’t need fancy tools cluttering your kitchen.
Preparation Method
- Prepare the crust: In a medium bowl, combine the graham cracker crumbs, melted butter, and sugar. Stir until the mixture resembles wet sand. This usually takes about 2 minutes. Press the mixture evenly into the bottom of your 8×8-inch pan, making sure to pack it firmly — this helps the crust hold together once chilled. You want a nice, even layer about ½ inch thick. Place the pan in the fridge to chill while you make the filling (about 10 minutes).
- Make the filling: In a large bowl, beat the softened cream cheese with a hand mixer on medium speed until smooth and creamy, roughly 2-3 minutes. This step is important — lumps will ruin the silky texture. Slowly add the sweetened condensed milk and continue mixing until fully combined, around 1-2 minutes.
- Add the lime: Stir in the fresh key lime juice, lime zest, and vanilla extract. Mix on low speed just until everything is incorporated and the mixture thickens slightly. You’ll notice the filling start to firm up — it’s a good sign that the lime juice is working its magic to set the bars.
- Assemble: Pour the filling over the chilled crust. Use a spatula to smooth the surface evenly. Cover the pan with plastic wrap or foil and refrigerate for at least 3 hours, preferably overnight. This chilling time allows the bars to fully set and develop that luscious, creamy texture.
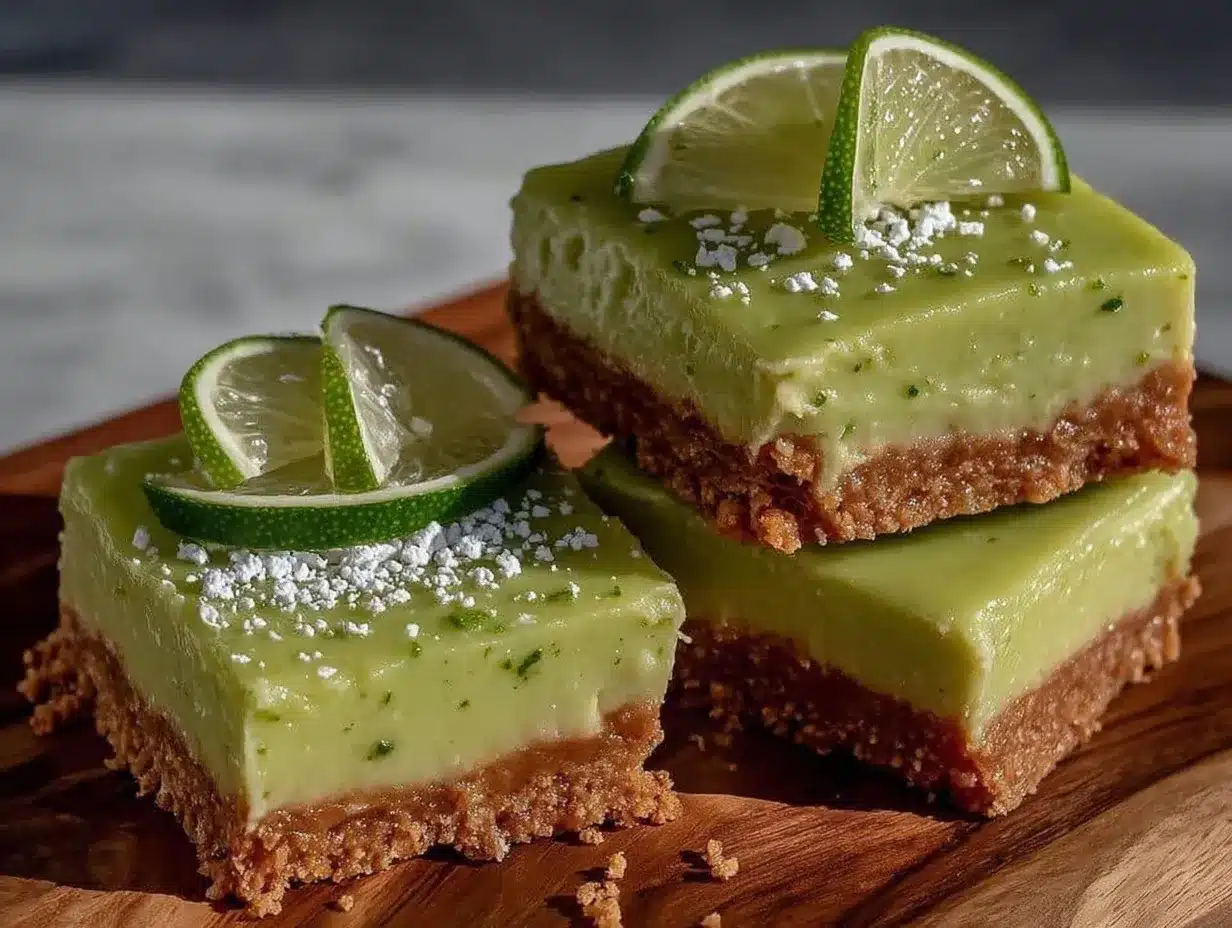
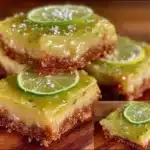
- Serve: Once set, cut into squares using a sharp knife (dip the knife in hot water and wipe dry between cuts for clean edges). Garnish with whipped cream and a sprinkle of lime zest or thin lime slices if you like.
If you find the filling too tart, a tiny sprinkle of powdered sugar before serving can balance it out without overwhelming the lime flavor. Also, don’t rush the chilling step — patience here means bars that hold their shape and taste just right.
Cooking Tips & Techniques
Making no-bake desserts is all about balance and patience, and these key lime pie bars are no exception. Here are some tips I’ve picked up from a few trial runs (and a couple of mishaps):
- Softening cream cheese: Let it sit out at room temperature for at least 30 minutes before mixing. Cold cream cheese makes lumps and uneven texture.
- Fresh lime juice matters: Bottled lime juice can sometimes be too harsh or bitter. Squeezing fresh key limes ensures a bright, clean flavor. (If you don’t have key limes, regular limes are okay, but key limes have that special tang.)
- Firm crust: Don’t skip chilling the crust before adding the filling. This helps prevent sogginess and keeps the texture crisp.
- Even pressing: When packing the crust, use the bottom of a glass or measuring cup to press firmly and evenly — it’s worth the extra effort.
- Chilling time: Don’t cut the bars too soon. The filling needs time to set; otherwise, you’ll end up with a messy, runny dessert.
One time, I tried speeding up the process by putting the bars straight into the freezer. Bad idea — the texture became icy and unpleasant. Slow and steady in the fridge wins every time. Also, I like to make these bars after a heavier meal, like the savory meatloaf with brown sugar glaze, because the refreshing lime cleanses your palate beautifully.
Variations & Adaptations
Personalizing these key lime pie bars is easy and fun. Here are some variations to try:
- Dietary swaps: Use coconut cream and dairy-free cream cheese to make it vegan and dairy-free. Substitute almond or gluten-free graham crackers for the crust to accommodate gluten sensitivities.
- Seasonal twists: Add a handful of fresh raspberries or blueberries on top before chilling for a pop of color and tartness. In winter, a sprinkle of toasted coconut flakes adds a tropical warmth.
- Texture upgrade: Mix in crushed pistachios or toasted nuts into the crust for an extra crunch. I once added a thin layer of melted white chocolate over the crust before pouring the filling — it created a delightful surprise.
If you want to change up the technique, try making mini bars in a muffin tin lined with paper cups. They’re perfect for parties or easy portion control. Just reduce chilling time slightly, but keep an eye so they don’t get too soft.
Serving & Storage Suggestions
These bars are best served chilled straight from the fridge, which keeps the filling firm and refreshing. For presentation, a dollop of freshly whipped cream and a zest of lime on top add a lovely finishing touch that feels fancy but is so simple.
They pair wonderfully with a cup of coffee or iced tea on a warm day, or alongside fresh berries for a colorful contrast. If you’re planning a meal, they make a light, bright finale after a hearty entree like crispy baked mac and cheese.
To store, cover the bars tightly and keep refrigerated for up to 4 days. They can also be frozen for up to 1 month — thaw overnight in the fridge before serving. Keep in mind, the crust might soften slightly after freezing, but the flavor remains spot-on. Flavors tend to deepen after a day in the fridge, so sometimes I make them a day ahead and find the taste even better.
Nutritional Information & Benefits
Each bar offers a satisfying balance of creamy richness and fresh citrus zing without being overly sweet. Here’s an approximate breakdown per serving (makes 16 bars):
| Calories | 180 |
|---|---|
| Fat | 9g |
| Carbohydrates | 22g |
| Protein | 3g |
Key limes are a great source of vitamin C and antioxidants, which support the immune system and skin health. The graham cracker crust provides whole grain goodness if you choose whole wheat options. While this dessert isn’t necessarily low-calorie, its portion-controlled bars help keep indulgence in check. It’s a nice sweet treat that doesn’t rely on artificial flavors or preservatives.
If you’re mindful of allergens, this recipe contains dairy and gluten but offers easy swaps to make it suitable for dairy-free or gluten-free diets.
Conclusion
Honestly, these Creamy No-Bake Key Lime Pie Bars with Graham Cracker Crust have become one of those recipes I turn to when I want something fuss-free yet truly satisfying. They strike that perfect chord between tangy and sweet, creamy and crunchy, all without firing up the oven. Whether you’re pressed for time or just craving a cool, refreshing dessert, these bars deliver every time.
Feel free to make this recipe your own — experiment with toppings, crusts, or add-ins that speak to your taste buds. I love that it’s so adaptable and forgiving, which is why it’s stuck around in my repertoire. And if you appreciate simple, comforting dishes with a splash of brightness, you might enjoy pairing this with a hearty meal like slow cooker beef stew to balance the flavors.
Give these bars a try — I’d love to hear how you make them your own or what little tweaks you discover. Happy cooking!
FAQs About Creamy No-Bake Key Lime Pie Bars
Can I use regular limes instead of key limes?
Yes, regular limes work fine if key limes aren’t available. The flavor will be slightly less tart and aromatic, but still delicious.
How long do these bars last in the fridge?
They keep well for up to 4 days refrigerated when stored in an airtight container.
Can I freeze these key lime pie bars?
Absolutely! Freeze them for up to 1 month, then thaw overnight in the fridge before serving.
Is it necessary to use sweetened condensed milk?
Yes, it’s important for the creamy texture and sweetness. There’s no good substitute for it in this recipe.
Can I make these bars without cream cheese?
You can try using coconut cream or dairy-free cream cheese for a vegan version, but the texture and flavor will be slightly different.
Pin This Recipe!
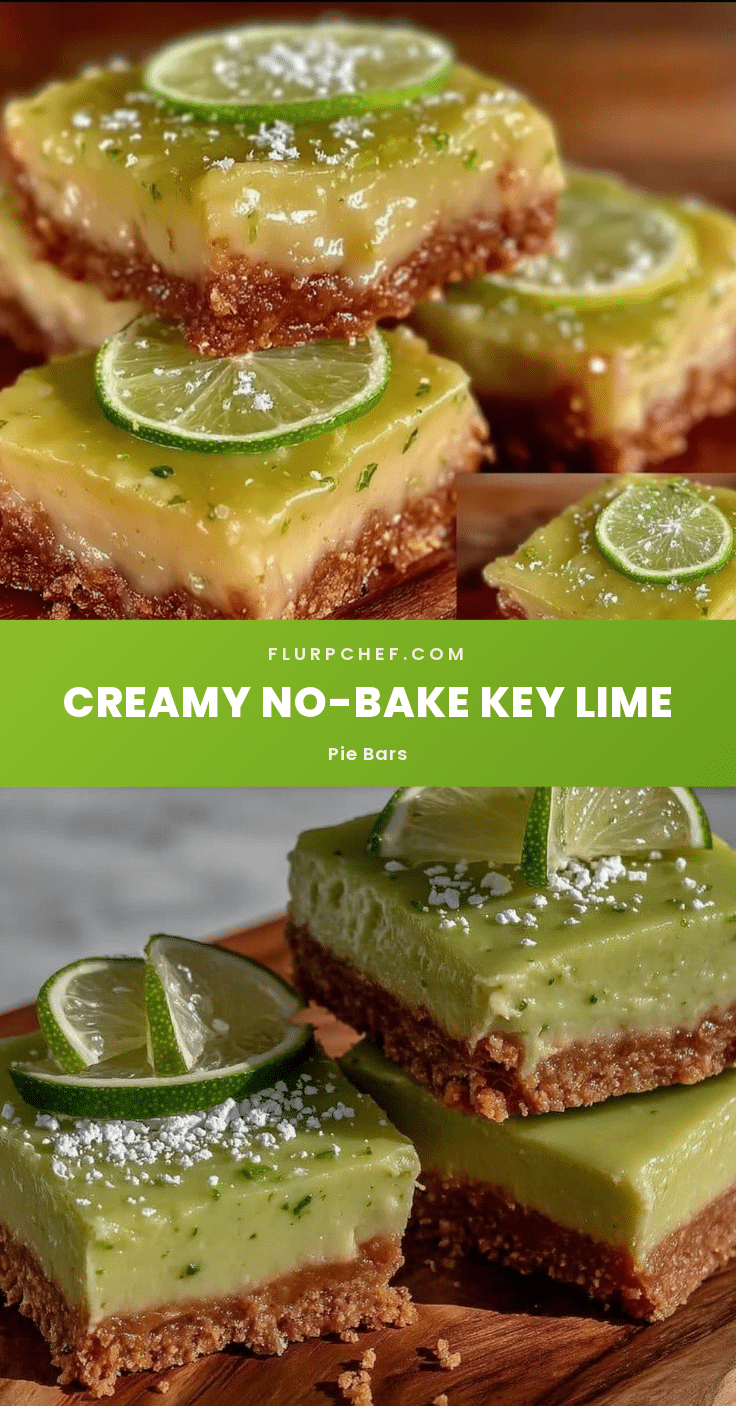
Creamy No-Bake Key Lime Pie Bars
A quick and easy no-bake dessert featuring a buttery graham cracker crust and a silky, tangy key lime filling that sets in the fridge for a refreshing treat.
- Prep Time: 15 minutes
- Cook Time: 0 minutes
- Total Time: 3 hours 15 minutes
- Yield: 16 bars 1x
- Category: Dessert
- Cuisine: American
Ingredients
- 1 ½ cups graham cracker crumbs (about 10 full sheets, crushed finely)
- 6 tablespoons unsalted butter, melted
- 2 tablespoons granulated sugar
- 8 ounces cream cheese, softened (full-fat)
- 1 cup sweetened condensed milk
- ½ cup fresh key lime juice (about 10–12 key limes)
- 1 tablespoon key lime zest
- 1 teaspoon vanilla extract
- Optional: whipped cream or sour cream for topping
- Optional: extra lime zest or thin lime slices for garnish
Instructions
- Prepare the crust: In a medium bowl, combine graham cracker crumbs, melted butter, and sugar. Stir until mixture resembles wet sand. Press evenly into the bottom of an 8×8-inch pan to form a ½ inch thick layer. Chill in fridge for about 10 minutes.
- Make the filling: Beat softened cream cheese with a hand mixer on medium speed until smooth and creamy, about 2-3 minutes. Slowly add sweetened condensed milk and mix until fully combined, about 1-2 minutes.
- Add lime: Stir in fresh key lime juice, lime zest, and vanilla extract. Mix on low speed until incorporated and mixture thickens slightly.
- Assemble: Pour filling over chilled crust and smooth surface with a spatula. Cover with plastic wrap or foil and refrigerate for at least 3 hours or overnight to set.
- Serve: Cut into squares using a sharp knife dipped in hot water and wiped dry between cuts. Garnish with whipped cream and lime zest or slices if desired.
Notes
Let cream cheese soften at room temperature for at least 30 minutes to avoid lumps. Use fresh key lime juice for best flavor. Chill crust before adding filling to prevent sogginess. Do not rush chilling time to ensure bars set properly. For gluten-free, substitute almond flour for graham crackers; for dairy-free, use coconut cream and dairy-free cream cheese.
Nutrition
- Serving Size: 1 bar
- Calories: 180
- Fat: 9
- Carbohydrates: 22
- Protein: 3
Keywords: no-bake, key lime pie bars, easy dessert, creamy, graham cracker crust, summer dessert, quick dessert


