That sound—the sharp snap of Rice Krispies hitting the bottom of a metal bowl, followed by the soft, buttery hiss of marshmallows melting into a sticky, sweet pool—still takes me straight to my Aunt Carol’s tiny kitchen in 2005. She was the kind of cook who never measured anything, just dumped and stirred by feel. I was maybe twelve, standing on a step stool, watching her pull a pan of these ghost-shaped treats out of the fridge. She didn’t call them anything fancy. She just handed me one and said, “Careful, the chocolate eyes melt if you squeeze too hard.” I bit into it—that signature crunch giving way to a chewy, marshmallowy center—and honestly, I’ve been chasing that exact texture ever since. These aren’t just a Halloween party trick. They’re a memory you can hold in your hand (and eat).
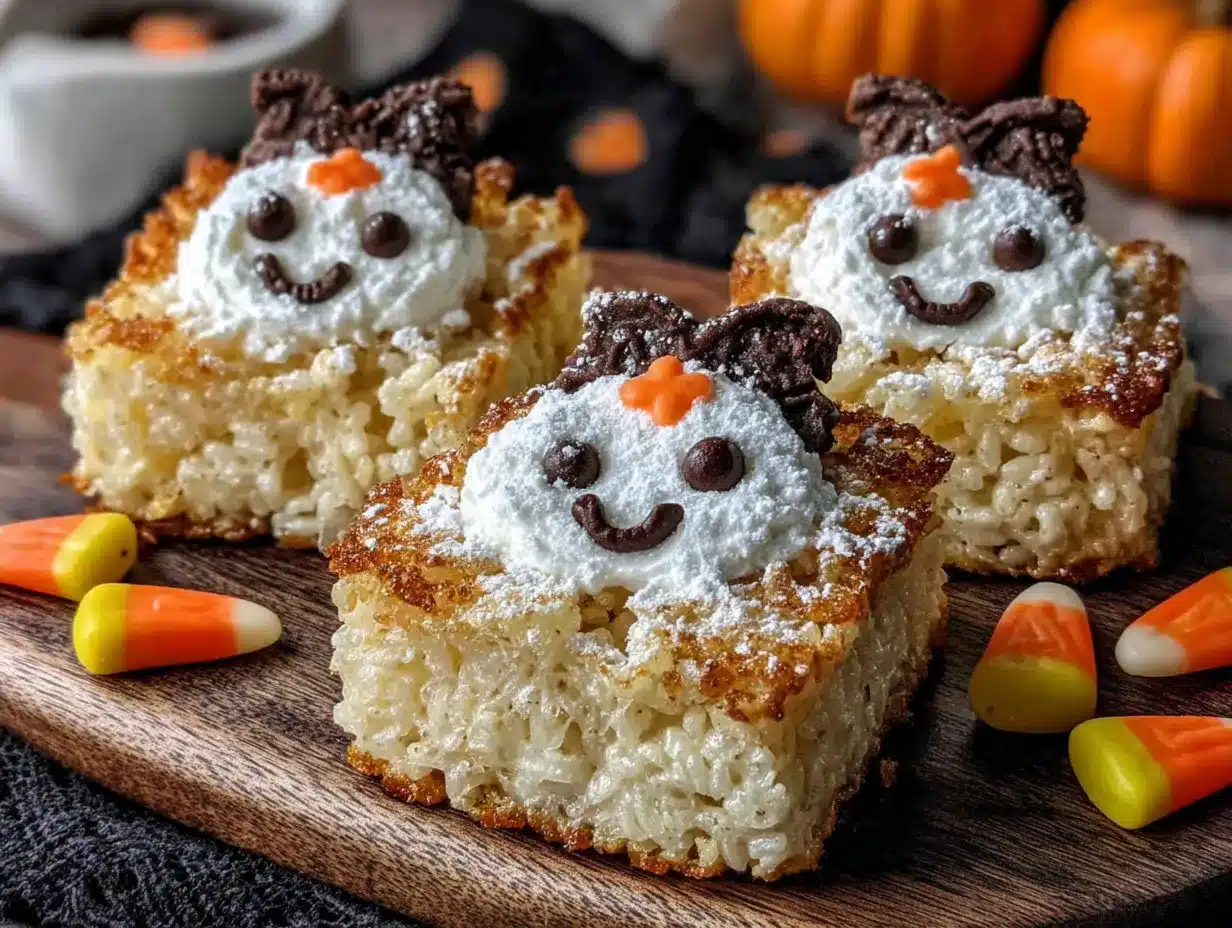
What I love most about this Easy Halloween Rice Krispie Ghost Treats recipe is that it doesn’t require any special molds or fancy piping bags. You just make the classic marshmallow-cereal base, shape them by hand while they’re still warm, and add a couple of chocolate chip eyes. That’s it. No baking, no weird ingredients, no stress. They’re perfect for a last-minute classroom treat, a spooky movie night snack, or just something fun to do with the kids on a crisp October afternoon. And the best part? They’re ready in about twenty minutes—faster than you can say “trick or treat.”
So if you’re looking for a Halloween dessert that’s actually doable on a busy weeknight, this is it. These little ghosts are proof that you don’t need a lot of time or skill to make something that feels special.
Why You’ll Love This Recipe
I’ve made these ghosts at least a dozen times over the years, for Halloween parties, school bake sales, and even a themed birthday party. And every single time, someone asks for the recipe. That’s not bragging—it’s just that this version is genuinely foolproof. Here’s why I keep coming back to it:
- Quick & Easy: From start to finish, you’re looking at about 20 minutes of active work. The hardest part is waiting for the marshmallows to cool enough to shape.
- Simple Ingredients: You probably already have butter, marshmallows, and Rice Krispies in your pantry. The only “special” thing you need is a bag of chocolate chips for the eyes.
- Perfect for Halloween Parties: These little guys are a total crowd-pleaser. Kids love the ghost shape, and adults appreciate the nostalgic flavor.
- Kid-Friendly: This is one of those recipes where little hands can actually help. My niece loves pressing the chocolate chips into the faces—just make sure the treats aren’t too hot!
- Unbelievably Delicious: The combination of the buttery, marshmallowy base with the slight snap of the cereal is just pure comfort food. It’s the kind of treat that makes you close your eyes after the first bite.
What makes this recipe different from the hundreds of other Rice Krispie treat variations out there? Honestly, it’s the shaping technique. I’ve tried rolling them into balls, using cookie cutters—nothing works quite like hand-shaping them while they’re still warm. You get that organic, slightly irregular ghost shape that looks way more charming than a perfect mold. Plus, using a little butter on your hands keeps the mixture from sticking, so you don’t end up with a sticky mess.
This isn’t just another Halloween dessert. It’s the one that makes you feel like you actually accomplished something in the kitchen—without breaking a sweat.
What Ingredients You Will Need
This recipe uses simple, pantry-friendly ingredients to deliver that classic marshmallow-cereal flavor we all grew up loving. Nothing fancy, nothing hard to find. Here’s what you’ll need to grab:
For the Ghost Treats
- 3 tablespoons unsalted butter (plus a little extra for greasing your hands and the pan)
- 1 package (10 ounces) mini marshmallows (I prefer the name brand for consistent melting, but generic works fine too)
- 6 cups Rice Krispies cereal (or any crisp rice cereal—just make sure it’s not stale)
- 1/4 teaspoon vanilla extract (optional, but it adds a lovely warmth to the flavor)
- 1/2 cup semi-sweet chocolate chips (for the ghost eyes; you can also use milk chocolate or dark chocolate chips)
Ingredient Selection Tips & Substitutions
- Butter: I always use unsalted butter so I can control the salt level. If you only have salted butter on hand, just skip adding any extra salt to the mixture.
- Marshmallows: Mini marshmallows melt faster and more evenly than the large ones. If you only have large marshmallows, chop them into smaller pieces before melting.
- Cereal: Rice Krispies are the classic choice, but you can totally swap in a generic brand. Just make sure it’s fresh—stale cereal will give you a less crunchy texture. For a fun twist, try using cocoa-flavored rice cereal for chocolate ghosts!
- Chocolate Chips: You can use any type of chocolate chip you like. Mini chocolate chips work especially well for smaller ghost faces. If you’re feeling fancy, try using candy eyes from the baking aisle—they give the ghosts a more cartoonish look.
- Dairy-Free Option: Use a plant-based butter substitute and dairy-free chocolate chips. The texture will be slightly different, but still delicious.
That’s it. Six ingredients, and you’re ready to make something that looks like it took way more effort. I love how forgiving this recipe is—you can swap things out based on what you have in your pantry, and it still turns out great.
Equipment Needed
You don’t need any fancy gadgets for this recipe. Here’s what you’ll want to have on hand:
- Large pot or Dutch oven: You need something big enough to hold all the cereal and marshmallows without spilling over. A 5-quart pot works perfectly.
- Wooden spoon or silicone spatula: For stirring the marshmallow mixture. A silicone spatula is my go-to because it doesn’t scratch the pot and it’s easy to scrape every last bit of marshmallow goo.
- 9×13-inch baking pan: This is what you’ll press the treats into before cutting. If you don’t have a 9×13, a large rimmed baking sheet works too.
- Parchment paper or wax paper: Lining your pan with parchment makes cleanup a breeze. You can also use a light coating of cooking spray.
- Small bowl or plate: For holding the chocolate chips while you press them into the ghosts.
- Sharp knife or bench scraper: For cutting the treats into ghost shapes (or just cutting them into squares if you prefer).
- Optional: Cookie cutter in a ghost shape: If you want perfectly uniform ghosts, a ghost-shaped cookie cutter is fun. But honestly, hand-shaping gives them more personality.
I’ve made these treats with just a pot and a spoon more times than I can count. Don’t let the lack of special equipment stop you—this recipe is as low-maintenance as it gets.
Preparation Method
Alright, let’s get to the fun part. Here’s how to make these little ghosts step by step. I’ll include all my little tricks so you don’t end up with a sticky mess like I did the first time.
- Prep your pan and workspace. Line a 9×13-inch baking pan with parchment paper, leaving a little overhang on the sides so you can lift the treats out later. Lightly grease the parchment with a thin layer of butter or cooking spray. Set aside.
- Melt the butter. Place the 3 tablespoons of butter in a large pot over medium-low heat. Let it melt slowly—don’t rush this. You want it fully melted but not bubbling or browning. Swirl the pot occasionally to help it melt evenly.
- Add the marshmallows. Once the butter is melted, pour in the entire bag of mini marshmallows. Stir constantly with your wooden spoon or silicone spatula until the marshmallows are completely melted and smooth. This usually takes about 3-4 minutes. The mixture will look glossy and stretchy when it’s ready.
- Add the vanilla (optional). If you’re using vanilla extract, stir it in now. It adds a subtle warmth that complements the marshmallow sweetness perfectly.
- Add the cereal. Remove the pot from the heat. Pour in the 6 cups of Rice Krispies cereal all at once. Stir gently but thoroughly, folding the cereal into the marshmallow mixture until every piece is coated. Don’t overmix, or the cereal will start to break apart.
- Transfer to the pan. Scrape the mixture into your prepared pan. Use a piece of wax paper or a greased spatula to press it down evenly. Don’t press too hard—you want the treats to hold together, but you also want them to stay light and airy.
- Let it cool slightly. Allow the treats to cool in the pan for about 10-15 minutes. You want them to be firm enough to hold their shape but still warm enough to be pliable. If they cool completely, they’ll be too hard to shape.
- Cut into ghost shapes. Use a sharp knife or a bench scraper to cut the treats into rectangles or squares. I usually aim for about 12-15 pieces, depending on how big I want the ghosts to be. If you’re using a ghost-shaped cookie cutter, now is the time to press it into the treats. (Pro tip: Dip the cutter in a little butter to prevent sticking.)
- Shape the ghosts (optional but recommended). If you want more organic, hand-shaped ghosts, take each piece and gently round the top while pinching the bottom to create a slight taper. This gives them that classic ghost silhouette. It’s not necessary, but it makes them look way cuter.
- Add the eyes. While the treats are still slightly warm, press two chocolate chips into each ghost for eyes. Position them close together near the top of the ghost shape. If the treats have cooled too much, the chocolate chips won’t stick—just press them in gently.
- Let them set completely. Place the finished ghosts on a wire rack or a parchment-lined tray to cool completely. This takes about 30 minutes. Once they’re fully set, they’ll be firm and easy to handle.
And that’s it. You’ve just made a batch of adorable, delicious Halloween ghosts. The whole process takes about 20 minutes of active work, plus some cooling time. Not bad for a treat that looks like it came from a bakery!
Cooking Tips & Techniques
I’ve made these treats enough times to learn a few hard lessons. Here are my best tips to save you from the same sticky situations:
- Don’t overheat the marshmallows. This is the number one mistake I see people make. If you cook the marshmallows on too high heat or for too long, they’ll become hard and brittle once they cool. Keep the heat on medium-low and stir constantly. The moment the marshmallows are melted and smooth, take the pot off the heat.
- Grease your hands. Before you shape the ghosts, rub a little butter or cooking spray on your hands. This prevents the marshmallow mixture from sticking to your skin. Trust me, trying to peel sticky marshmallow goo off your fingers is not fun.
- Work quickly but gently. The marshmallow mixture sets fast. Once you add the cereal, you have about 5-7 minutes to shape everything before it becomes too firm. But don’t rush so much that you crush the cereal—gentle pressure is all you need.
- Use a sharp knife for clean cuts. A dull knife will squish the treats instead of cutting them cleanly. A bench scraper works even better for getting straight edges.
- Add the eyes at the right time. If you add the chocolate chips when the treats are too hot, the chocolate will melt and turn into a puddle. If you add them when the treats are too cold, they won’t stick. Aim for “warm but not hot”—about 10 minutes after they come out of the pan.
- Don’t skip the parchment paper. I know it’s tempting to just spray the pan and call it a day, but parchment paper makes lifting the treats out so much easier. Plus, it makes cleanup a breeze.
One time, I tried to rush the process and used high heat to melt the marshmallows. The resulting treats were so hard they could have been used as hockey pucks. Learn from my mistakes—low and slow is the way to go.
Variations & Adaptations
One of the best things about this recipe is how easy it is to customize. Here are some of my favorite variations:
- Spooky Spider Ghosts: After adding the eyes, use black frosting or melted dark chocolate to draw little spider legs on the sides of the ghosts. It’s a fun twist that takes just an extra minute.
- Chocolate Ghosts: Swap 1/2 cup of the Rice Krispies for cocoa-flavored rice cereal. The ghosts will be a dark, chocolatey brown—perfect for a more ghoulish look.
- Peanut Butter Ghosts: Add 1/4 cup of creamy peanut butter to the marshmallow mixture after it’s melted. Stir until smooth before adding the cereal. The peanut butter adds a savory-sweet depth that’s irresistible. If you’re looking for more peanut butter inspiration, you might also enjoy these Easy 3-Ingredient Peanut Butter Energy Balls.
- Vegan Ghosts: Use a plant-based butter substitute and vegan marshmallows (yes, they exist!). Most crisp rice cereals are already vegan, so just double-check the chocolate chips.
- Gluten-Free Ghosts: Rice Krispies are naturally gluten-free, but some brands may have cross-contamination warnings. Look for certified gluten-free crisp rice cereal if you have celiac disease or a severe sensitivity.
- Mini Ghost Bites: Instead of cutting the treats into large pieces, use a small cookie cutter or shape them into bite-sized balls. They’re perfect for snack tables or lunchboxes.
I once made a batch with white chocolate chips instead of semi-sweet for the eyes, and they looked like little snow ghosts. Totally accidental, but they were a hit at a winter-themed party.
Serving & Storage Suggestions
These ghosts are best served at room temperature, right after they’ve set. Here’s how to keep them fresh and present them nicely:
- Serving: Arrange the ghosts on a platter lined with black or orange tissue paper for a festive look. You can also stick them on lollipop sticks for a fun, handheld treat—just insert the stick while the treats are still warm.
- Storage: Store the ghosts in an airtight container at room temperature for up to 5 days. They’ll stay soft and chewy for the first 2-3 days, then start to get a little harder. If you live in a humid climate, they might get sticky—just separate layers with wax paper.
- Freezing: You can freeze these treats for up to 3 months. Wrap each ghost individually in plastic wrap, then place them in a freezer-safe bag. Thaw at room temperature for about 30 minutes before serving.
- Reheating: If your ghosts have gotten a little stale, pop them in the microwave for 5-10 seconds. They’ll soften right up—just don’t overdo it, or the chocolate eyes will melt.
- Flavor development: Honestly, these treats taste best the day they’re made. The cereal is at its crunchiest, and the marshmallow is perfectly chewy. But they’re still pretty darn good on day two.
If you’re planning a Halloween party, I’d recommend making these the morning of or the night before. They hold up well, and the chocolate eyes stay firmly in place once set.
Nutritional Information & Benefits
Let’s be real—these are a treat, not a health food. But here’s a rough idea of what you’re working with per ghost (based on 12 servings):
- Calories: Approximately 180-220
- Total Fat: 6-8g
- Saturated Fat: 3-4g
- Carbohydrates: 32-38g
- Sugar: 18-22g
- Protein: 2-3g
- Fiber: Less than 1g
Health benefits? Well, Rice Krispies are fortified with iron and B vitamins, so there’s that. And the butter provides a small amount of vitamin A. But honestly, these are about joy, not nutrition. They’re a once-in-a-while treat that’s perfect for a holiday celebration.
Dietary considerations: As mentioned, this recipe can be made vegan and gluten-free with simple substitutions. It contains dairy (butter) and may contain traces of gluten depending on the cereal brand. The chocolate chips may contain dairy and soy.
My personal philosophy? Life’s too short to skip dessert. Enjoy these ghosts guilt-free, and maybe pair them with a crunchy veggie platter to balance things out. If you’re looking for a healthier Halloween snack option, these Easy 3-Ingredient Peanut Butter Energy Balls are a great alternative.
Conclusion
These Easy Halloween Rice Krispie Ghost Treats are proof that you don’t need a ton of time, skill, or fancy ingredients to make something that feels special. They’re quick, they’re fun, and they taste like the best part of childhood—all wrapped up in a cute little ghost shape. Whether you’re making them for a classroom party, a Halloween movie night, or just because you want to eat something that looks like a ghost, this recipe delivers every single time.
I love how forgiving this recipe is. You can make them big or small, add different flavors, or keep them classic. The first time I made these, I was nervous about the shaping part. But after one batch, I realized how easy it is. And honestly, the slightly imperfect ones are always the cutest.
So go ahead—grab your ingredients, put on your favorite Halloween playlist, and get ready to make something that’ll disappear faster than a ghost in the morning light. And when you do, I’d love to hear about it. Drop a comment below and tell me how your ghosts turned out, or share a photo on social media. Happy Halloween, friends!
Frequently Asked Questions
Can I use a different cereal instead of Rice Krispies?
Absolutely! You can use any crisp rice cereal, or even try cornflakes for a different texture. Just keep in mind that the flavor and crunch will vary slightly.
How do I keep the marshmallow mixture from sticking to my hands?
Rub a little butter or cooking spray on your hands before shaping the treats. You can also use a piece of wax paper to press the mixture into the pan.
Can I make these ghosts ahead of time?
Yes! You can make them up to 2 days in advance. Store them in an airtight container at room temperature. They’re best within the first 48 hours.
Why did my treats turn out hard?
This usually happens when the marshmallows are overheated. Make sure to cook them on medium-low heat and remove them from the stove as soon as they’re melted. Also, don’t press the mixture too hard into the pan—gentle pressure is key.
Can I freeze these ghost treats?
Yes! Wrap each ghost individually in plastic wrap, then place them in a freezer-safe bag. They’ll keep for up to 3 months. Thaw at room temperature for about 30 minutes before serving.
If you’re looking for more Halloween-inspired treats, you might also enjoy these Cozy Pumpkin Cream Cheese Swirl Muffins or these Brown Butter Pumpkin Chocolate Chip Cookies for a full fall spread. Happy haunting!
Pin This Recipe!
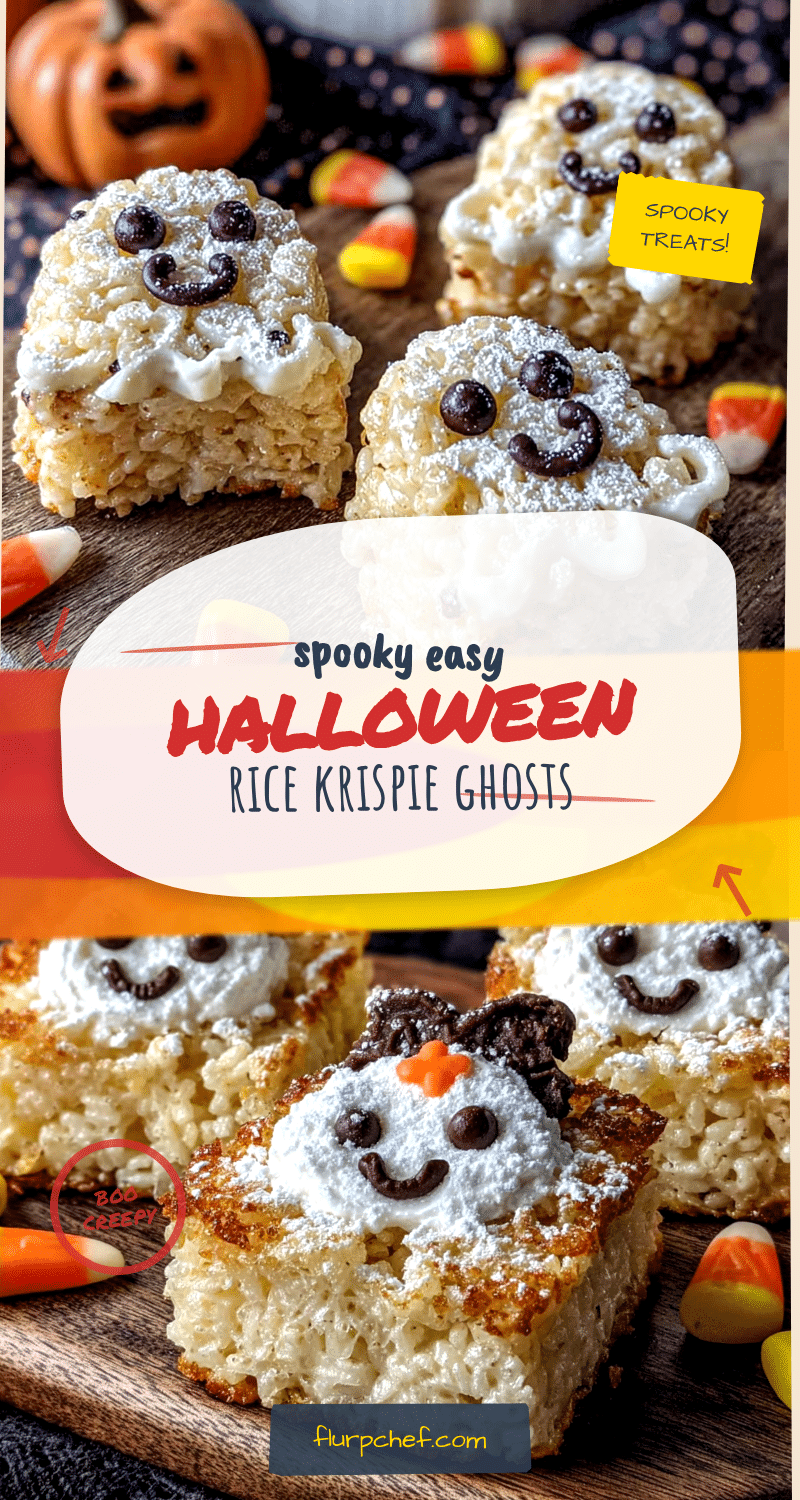
Easy Halloween Rice Krispie Ghost Treats
These adorable ghost-shaped Rice Krispie treats are made with just 6 ingredients and ready in 20 minutes. Perfect for Halloween parties, classroom treats, or a fun activity with kids.
- Prep Time: 10 minutes
- Cook Time: 10 minutes
- Total Time: 20 minutes
- Yield: 12-15 servings 1x
- Category: Dessert
- Cuisine: American
Ingredients
- 3 tablespoons unsalted butter (plus extra for greasing)
- 1 package (10 ounces) mini marshmallows
- 6 cups Rice Krispies cereal
- 1/4 teaspoon vanilla extract (optional)
- 1/2 cup semi-sweet chocolate chips
Instructions
- Line a 9×13-inch baking pan with parchment paper, leaving overhang on sides. Lightly grease parchment with butter or cooking spray. Set aside.
- Place 3 tablespoons butter in a large pot over medium-low heat. Melt slowly, swirling occasionally, until fully melted but not bubbling.
- Add entire bag of mini marshmallows to the melted butter. Stir constantly with a wooden spoon or silicone spatula until completely melted and smooth, about 3-4 minutes.
- If using, stir in vanilla extract.
- Remove pot from heat. Pour in 6 cups Rice Krispies cereal all at once. Stir gently but thoroughly until every piece is coated. Do not overmix.
- Scrape mixture into prepared pan. Use wax paper or greased spatula to press down evenly. Do not press too hard.
- Let cool in pan for 10-15 minutes until firm enough to hold shape but still warm and pliable.
- Use a sharp knife or bench scraper to cut into rectangles or squares (about 12-15 pieces). For ghost shapes, use a ghost-shaped cookie cutter dipped in butter.
- Optional: For hand-shaped ghosts, gently round the top of each piece and pinch the bottom to create a slight taper.
- While treats are still slightly warm, press two chocolate chips into each ghost for eyes, positioned close together near the top.
- Place finished ghosts on a wire rack or parchment-lined tray to cool completely, about 30 minutes.
Notes
Don’t overheat marshmallows or they’ll become hard. Grease hands with butter before shaping to prevent sticking. Work quickly as mixture sets fast. Add chocolate eyes when treats are warm but not hot to prevent melting. Store in airtight container at room temperature for up to 5 days. Can be frozen for up to 3 months.
Nutrition
- Serving Size: 1 ghost treat
- Calories: 200
- Sugar: 20
- Sodium: 150
- Fat: 7
- Saturated Fat: 3.5
- Carbohydrates: 35
- Fiber: 0.5
- Protein: 2.5
Keywords: Halloween treats, Rice Krispie treats, ghost treats, no-bake dessert, easy Halloween recipe, kid-friendly dessert, 20-minute recipe


