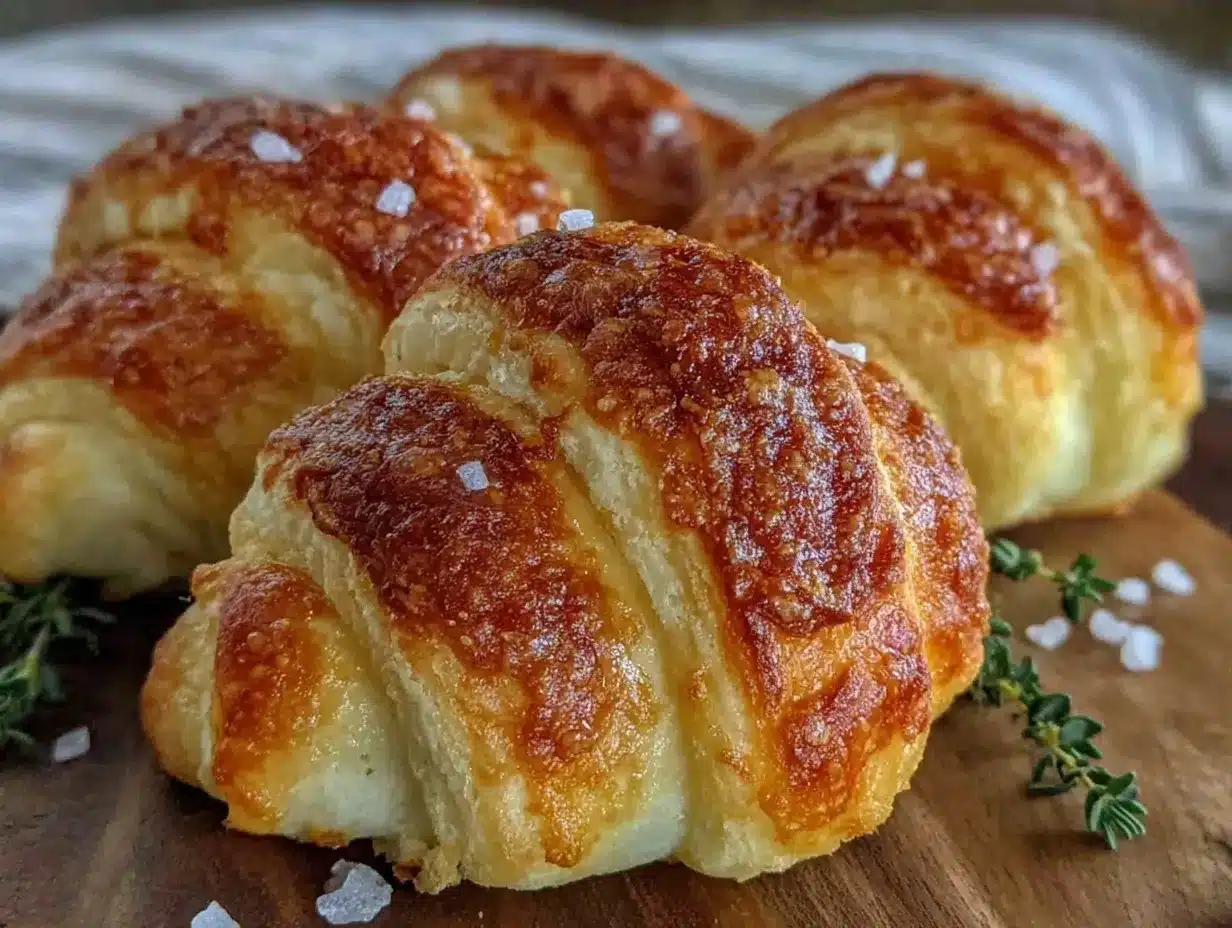
“You’re kidding me, these are homemade?” my friend asked, eyeing the perfectly golden crescent rolls cooling on my kitchen counter. Honestly, I didn’t expect much the first time I tried to make these easy classic crescent rolls with flaky, buttery layers. It started as a last-minute plan to whip up something quick for a casual brunch, and, well, I had zero faith that a simple dough could turn out so tender and flaky without hours of fuss. But there I was, pulling tray after tray of warm, pillowy crescents from the oven, the buttery aroma filling every corner of the house.
What really sealed the deal wasn’t just their flaky texture, but how these rolls had the magic to transform a simple meal into something comforting and a little special. The layers, oh those layers—thin, buttery, and tender, breaking apart with the slightest touch. It wasn’t just luck; this recipe stuck with me because it’s approachable, forgiving, and surprisingly quick to make. Plus, it pairs beautifully with everything from scrambled eggs to hearty soups (trust me, it changed my weeknight dinners).
It’s funny how the smell of freshly baked crescent rolls can pull you back to small, quiet mornings or spontaneous gatherings with friends. This recipe isn’t about fancy techniques or rare ingredients—it’s about a simple, reliable way to bring flaky, buttery goodness to your table without stress. If you ever doubted homemade rolls could be this effortless and satisfying, this one’s for you.
Why You’ll Love This Recipe
After testing this easy classic crescent rolls recipe multiple times, I’m confident it’s one you’ll turn to over and over. Here’s why it stands apart:
- Quick & Easy: Ready in under 2 hours, including rising time. Perfect for busy mornings or last-minute dinner plans.
- Simple Ingredients: Uses pantry staples like flour, butter, yeast, and milk—no need for specialty items or hard-to-find spices.
- Perfect for Any Occasion: Whether it’s a cozy weekend brunch or an impromptu dinner party, these rolls fit right in.
- Crowd-Pleaser: Kids, adults, your picky aunt—everyone falls for these flaky, buttery layers.
- Unbelievably Delicious: The buttery layering technique creates a tender crumb with a subtle crispness that feels indulgent without being heavy.
This recipe isn’t just another crescent roll. The secret lies in how the butter is incorporated into the dough, creating those signature flaky layers that remind me a little of a croissant but without all the complicated folding. I’ve also tweaked the yeast amount to give a perfect rise without a sourdough tang, keeping the flavor classic and comforting. Honestly, it’s the kind of roll that makes you close your eyes with the first bite, savoring that warm, buttery goodness.
For those who appreciate a reliable recipe that delivers every time, this one is a keeper. It’s become a staple in my kitchen, especially on mornings when I crave something homemade but don’t have hours to spend baking. Plus, it pairs beautifully with just about anything, from a simple smear of jam to rich soups and stews.
What Ingredients You Will Need
This easy classic crescent rolls recipe uses simple, wholesome ingredients to achieve those flaky, buttery layers without fuss. Most are everyday kitchen staples, and substitutions are straightforward if needed.
- All-purpose flour (3 ½ cups / 440g): The base for our dough. I recommend King Arthur for consistent texture.
- Active dry yeast (2 ¼ tsp / 1 packet): Provides the rise and lightness. Make sure it’s fresh for best results.
- Granulated sugar (2 tbsp / 25g): Just enough to feed the yeast and add a hint of sweetness.
- Warm whole milk (1 cup / 240ml): Helps activate the yeast and keeps the dough tender. Use dairy-free milk like almond if you prefer.
- Unsalted butter (8 tbsp / 115g), softened: Half is mixed into the dough, half is layered in for that flaky texture (use real butter for the best flavor).
- Large egg (1), room temperature: Adds richness and structure.
- Salt (1 tsp): Balances the sweetness and enhances flavor.
- Optional: Melted butter for brushing: Adds extra shine and flavor after baking.
If you want to switch things up, you can swap half the flour with whole wheat for a nuttier taste or use a dairy-free butter alternative. For a slightly sweeter roll, add a teaspoon of honey or maple syrup. In warmer months, these rolls are fantastic served alongside a fresh cucumber watermelon feta salad for a refreshing contrast.
Equipment Needed
- Mixing bowls: One large for dough mixing and another small for proofing the yeast. Glass or stainless steel work best.
- Kitchen scale or measuring cups and spoons: Accuracy matters when working with yeast dough.
- Stand mixer with dough hook attachment (optional): Makes kneading easier but hand-kneading works fine if you have the time.
- Rolling pin: Essential for rolling out the dough evenly to create those flaky layers.
- Baking sheet lined with parchment paper: Prevents sticking and makes cleanup a breeze.
- Pastry brush: For brushing melted butter on top (optional but recommended).
For budget-friendly options, you can substitute a wooden spoon for a stand mixer and a clean wine bottle for a rolling pin in a pinch. Just make sure to flour your surface well to prevent sticking. Keeping your tools clean and dry, especially the yeast, will help your dough rise beautifully every time.
Preparation Method
- Activate the yeast: In a small bowl, combine 1 cup (240ml) of warm whole milk (about 110°F/43°C), 2 ¼ tsp active dry yeast, and 2 tbsp granulated sugar. Stir gently and let sit for 5–10 minutes until foamy. If it doesn’t foam, your yeast might be old—start fresh.
- Mix the dough: In a large bowl or stand mixer, combine 3 ½ cups (440g) all-purpose flour and 1 tsp salt. Add the softened 4 tbsp (57g) butter and the beaten egg. Pour in the yeast mixture once it’s bubbly. Mix until a shaggy dough forms.
- Knead the dough: Knead by hand on a lightly floured surface or with a stand mixer fitted with a dough hook for about 8–10 minutes until smooth and elastic. The dough should be soft but not sticky—add more flour if it feels too wet, a tablespoon at a time.
- First rise: Place the dough in a lightly greased bowl, cover with a clean towel or plastic wrap, and let it rise in a warm spot for 1 to 1 ½ hours or until doubled in size.
- Prepare butter layer: While the dough rises, soften the remaining 4 tbsp (57g) butter. You’ll use this to create those buttery layers.
- Roll and layer: Punch down the dough and roll it out on a floured surface into a 12-inch (30 cm) circle. Spread the softened butter evenly over the dough, almost to the edges.
- Cut and shape: Using a sharp knife or pizza cutter, cut the dough into 12 equal wedges (like slicing a pizza). Starting at the wide end, roll each wedge tightly toward the tip, forming crescent shapes.
- Second rise: Place the rolls on a parchment-lined baking sheet, spaced an inch apart. Cover loosely and let rise for 30 minutes until puffy.
- Bake: Preheat your oven to 375°F (190°C). Brush the rolls lightly with melted butter if you like a golden shine. Bake for 18–22 minutes, rotating the tray halfway through, until golden brown and flaky.
- Cool and serve: Let the rolls rest for 5 minutes before serving warm. The smell alone will have you reaching for another!
Pro tip: When rolling the dough, don’t press too hard—you want to keep those layers intact for maximum flakiness. If the dough springs back a bit, let it rest for a couple of minutes before trying again. That’s normal!
Cooking Tips & Techniques
Working with yeast dough might feel intimidating, but a few tricks can make all the difference. First, always check your yeast’s freshness. I learned the hard way that expired yeast means flat, dense rolls—no one wants that! Warm milk should be comfortably warm, not hot; too much heat kills the yeast.
When mixing, resist the urge to add too much flour. The dough should be soft and slightly tacky – this helps create those tender, flaky layers after baking. Kneading builds gluten, giving the dough structure, but over-kneading can make rolls tough. I usually knead until the dough feels smooth and springs back gently.
Rolling out the dough evenly is key. Thick spots can lead to uneven baking and doughy centers. Use a light dusting of flour to prevent sticking, but not so much that the dough dries out. When you spread the butter, don’t skimp—it’s the secret to those layers. If your butter is too cold, it will tear the dough; too soft, and it’ll soak in. Room temperature is just right.
Finally, timing matters. Don’t rush the rises. If your kitchen is cold, find a warm spot like near a radiator or inside an off oven with just the light on. The second rise is especially important for that fluffy, pillowy texture.
In my early attempts, I sometimes overbaked the rolls, making them dry. Keep an eye on the color and smell—the rolls should be golden, lightly crisp on the outside, but soft inside.
Variations & Adaptations
These easy classic crescent rolls are a perfect base for tweaking to your taste or dietary needs. Here are some ideas I’ve tried or recommend:
- Herb & Garlic: Mix finely chopped fresh herbs like rosemary or thyme into the butter before spreading it on the dough. Add a sprinkle of garlic powder for savory layers.
- Sweet Cinnamon Sugar: Brush with melted butter, then sprinkle a mix of cinnamon and sugar before rolling. These make fantastic breakfast rolls or snacks.
- Gluten-Free: Use a gluten-free all-purpose flour blend, but note the texture will be slightly denser. Adding a teaspoon of xanthan gum can help with elasticity.
- Dairy-Free: Swap butter with vegan margarine and milk with almond or oat milk. The results are still rich and flaky.
- Cheese-Filled: Before rolling, place a small piece of sharp cheddar or cream cheese on the wide end of each wedge for a gooey surprise inside.
For a quick variation, serve these rolls alongside a creamy BLT ranch pasta salad to balance out the buttery richness with some fresh, zesty flavors. Or pair with a cozy crockpot honey garlic meatballs dinner for a comforting combo.
Serving & Storage Suggestions
These crescent rolls are best served warm, fresh out of the oven. A light brush of melted butter right after baking boosts their shine and flavor. They’re lovely on their own or paired with butter, jam, or honey for breakfast. You can also serve them alongside soups, stews, or salads for an easy side (I often bring them to potlucks with a fresh Mediterranean cucumber chickpea salad).
To store, place cooled rolls in an airtight container at room temperature for up to 2 days. For longer storage, freeze in a zip-top bag for up to 3 months. When ready to eat, thaw at room temperature and warm in a 350°F (175°C) oven for about 5-7 minutes to refresh their flaky texture.
Leftover rolls make fantastic bread pudding or breakfast strata too. Flavors develop subtly if you let the rolls sit overnight, becoming even more tender and flavorful.
Nutritional Information & Benefits
Each crescent roll (based on 12 rolls) contains approximately:
| Calories | 180 kcal |
|---|---|
| Fat | 9 g (mostly from butter) |
| Carbohydrates | 22 g |
| Protein | 4 g |
| Fiber | 1 g |
Butter adds richness and fat-soluble vitamins like A and E, while yeast fermentation improves digestibility. Using whole milk adds calcium and protein. These rolls are gluten-containing and dairy-rich, so they’re not suitable for those with allergies or intolerances unless adapted.
From a wellness perspective, these rolls offer comforting energy with familiar ingredients, making them a satisfying choice for breakfast or alongside nutrient-packed meals like a creamy overnight oats breakfast or fresh Thai mango crunch salad to balance indulgence with freshness.
Conclusion
This easy classic crescent rolls recipe delivers flaky, buttery layers with minimal effort, making it a go-to when you want bakery-quality rolls without the fuss. The simple ingredients and straightforward method mean you can customize to your heart’s content—whether that’s sweet, savory, or allergy-conscious.
Personally, these rolls remind me that homemade bread doesn’t have to be complicated or intimidating. They’ve become my quiet kitchen win, a way to add warmth and comfort to any meal. Give it a try, tweak it for your taste, and savor the buttery layers that make every bite a little moment of joy.
If you try this recipe, I’d love to hear how your rolls turn out or what variations you’ve experimented with—drop a comment and let’s share the love for simple, delicious baking!
FAQs
Can I make these crescent rolls ahead of time?
Absolutely! You can prepare the dough, shape the rolls, and refrigerate them overnight. Let them come to room temperature and rise before baking.
What if I don’t have a rolling pin?
A clean wine bottle or smooth glass bottle works well as a substitute for rolling out the dough evenly.
Can I freeze the crescent rolls before baking?
Yes, shape the rolls and freeze them on a baking sheet. Once frozen, transfer to a bag. Bake directly from frozen, adding a few extra minutes to the baking time.
How do I keep the layers flaky?
Keep your butter softened but not melted and roll the dough gently without pressing too hard. Proper chilling and not overworking the dough helps maintain flakiness.
Can I use instant yeast instead of active dry yeast?
Yes, use the same amount but mix it directly with the dry ingredients. You might reduce the rising time slightly since instant yeast acts faster.
Pin This Recipe!

Easy Classic Crescent Rolls Recipe with Flaky Buttery Layers Made Perfect

This recipe delivers flaky, buttery crescent rolls with minimal effort, perfect for quick brunches or cozy dinners. Made with simple pantry staples, these rolls feature tender, flaky layers reminiscent of croissants without complicated folding.
- Prep Time: 20 minutes
- Cook Time: 20 minutes
- Total Time: 1 hour 50 minutes
- Yield: 12 rolls 1x
- Category: Bread
- Cuisine: American
Ingredients
- 3 ½ cups (440g) all-purpose flour
- 2 ¼ tsp (1 packet) active dry yeast
- 2 tbsp (25g) granulated sugar
- 1 cup (240ml) warm whole milk
- 8 tbsp (115g) unsalted butter, softened (half mixed into dough, half for layering)
- 1 large egg, room temperature
- 1 tsp salt
- Optional: melted butter for brushing
Instructions
- Activate the yeast: In a small bowl, combine 1 cup (240ml) warm whole milk (about 110°F/43°C), 2 ¼ tsp active dry yeast, and 2 tbsp granulated sugar. Stir gently and let sit for 5–10 minutes until foamy.
- Mix the dough: In a large bowl or stand mixer, combine 3 ½ cups (440g) all-purpose flour and 1 tsp salt. Add 4 tbsp (57g) softened butter and the beaten egg. Pour in the yeast mixture once bubbly. Mix until a shaggy dough forms.
- Knead the dough: Knead by hand on a lightly floured surface or with a stand mixer dough hook for 8–10 minutes until smooth and elastic. Add flour if dough is too wet, a tablespoon at a time.
- First rise: Place dough in a lightly greased bowl, cover, and let rise in a warm spot for 1 to 1 ½ hours until doubled in size.
- Prepare butter layer: Soften remaining 4 tbsp (57g) butter for layering.
- Roll and layer: Punch down dough and roll out on floured surface into a 12-inch (30 cm) circle. Spread softened butter evenly over dough almost to edges.
- Cut and shape: Cut dough into 12 equal wedges. Starting at wide end, roll each wedge tightly toward tip to form crescents.
- Second rise: Place rolls on parchment-lined baking sheet spaced 1 inch apart. Cover loosely and let rise 30 minutes until puffy.
- Bake: Preheat oven to 375°F (190°C). Brush rolls lightly with melted butter if desired. Bake 18–22 minutes, rotating halfway, until golden brown and flaky.
- Cool and serve: Let rolls rest 5 minutes before serving warm.
Notes
Use room temperature butter for layering to avoid tearing the dough. Let dough rest if it springs back when rolling. Ensure yeast is fresh and milk is warm but not hot. Do not over-knead to keep rolls tender. Rolls can be prepared ahead and refrigerated or frozen before baking.
Nutrition
- Serving Size: 1 crescent roll
- Calories: 180
- Fat: 9
- Carbohydrates: 22
- Fiber: 1
- Protein: 4
Keywords: crescent rolls, homemade rolls, flaky rolls, buttery rolls, easy bread recipe, yeast rolls, brunch rolls


