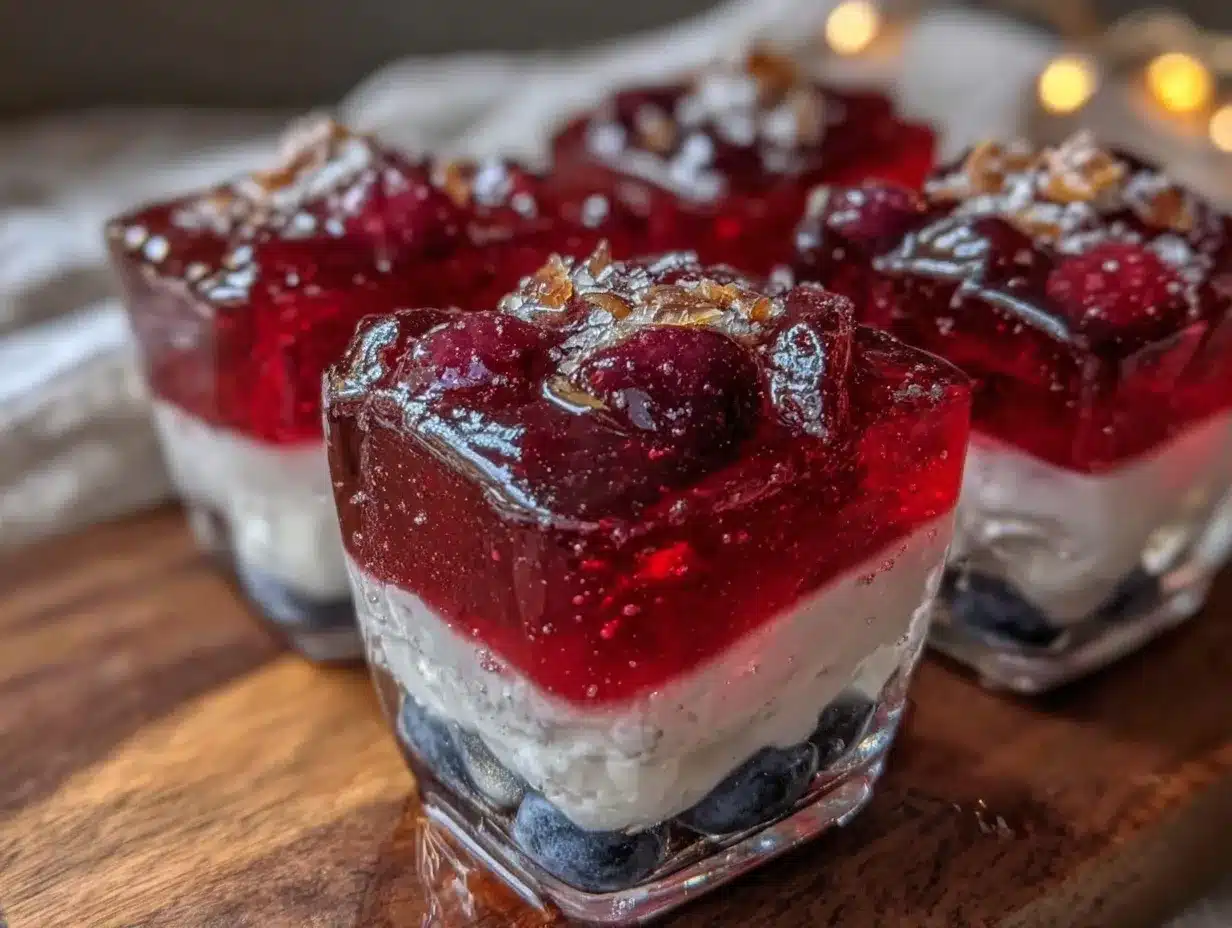
“Hey, are you bringing that jello thing again?” my friend texted me last Fourth of July, half-teasing, half-hopeful. Honestly, I wasn’t sure if I wanted to own the reputation of “that jello person” at our summer parties, but then I remembered how these Festive Red White and Blue Jello Cups always do the trick. They’re bright, fun, and just the right kind of nostalgic—plus, they’re ridiculously easy to make. I first stumbled upon this recipe after a rushed grocery run the day before a big family barbecue. I needed a quick dessert that screamed celebration without stress or fuss.
I had been skeptical at first. Jello feels kind of retro, and I wasn’t sure if it would impress the crowd—or if it’d just be a sugary, artificial blob. But layering the red, white, and blue with a creamy twist brought an unexpected wow factor. The first time I served these cups, people kept asking for the recipe. It became a little tradition, especially for summer gatherings or any patriotic holiday. What really stuck with me is how this simple dessert can brighten up a table and spark conversations—kids love the colors, adults enjoy the subtle creaminess, and it all comes together without much effort.
There’s something quietly satisfying about setting these jello cups out, knowing you’ve got a no-fail, crowd-pleasing treat that’s as cheerful as it is delicious. They remind me that sometimes the easiest recipes hold the most magic, especially when they bring people together.
Why You’ll Love This Recipe
I’ve made these Festive Red White and Blue Jello Cups more times than I can count, and there are a few reasons they keep coming back to my summer menu:
- Quick & Easy: Ready in under an hour, including chilling time, so perfect for last-minute party prep or casual get-togethers.
- Simple Ingredients: No fancy or hard-to-find items needed; most of these are pantry staples or supermarket basics.
- Perfect for Any Celebration: Whether it’s the Fourth of July, Memorial Day, Labor Day, or even a fun birthday bash, these cups bring festive vibes to the table.
- Crowd-Pleaser: Kids and adults alike can’t get enough of the vibrant layers and creamy middle—always a hit.
- Unbelievably Delicious: The combination of fruity jello and a smooth cream layer is unexpectedly comforting, making it more than just a colorful snack.
What makes this recipe stand out from other jello desserts is the creamy white layer that balances the sweetness and adds a silky texture. It’s not just gelatin and sugar; it’s a well-thought-out trio of flavors and textures that I’ve tweaked over time. Unlike those overly sweet, one-note gelatin treats, this recipe feels fresh and fun without being overwhelming.
Honestly, these jello cups make me feel like I’m serving a little edible celebration in every bite. They’re the kind of dessert that makes you pause and smile—and isn’t that what good food should do?
What Ingredients You Will Need
This recipe uses simple, wholesome ingredients to deliver bold flavor and satisfying texture without the fuss. Most of these are easy to find year-round, and you can swap a few things without losing any of the festive charm.
- For the Red Layer:
- 1 package (3 oz / 85 g) red fruit-flavored gelatin (strawberry or cherry work best)
- 1 cup (240 ml) boiling water
- For the White Creamy Layer:
- 1 package (3 oz / 85 g) unflavored gelatin powder
- ½ cup (120 ml) cold water
- 1 cup (240 ml) milk or half-and-half (for creamier texture)
- 1 can (14 oz / 397 g) sweetened condensed milk
- For the Blue Layer:
- 1 package (3 oz / 85 g) blue fruit-flavored gelatin (blue raspberry or blueberry)
- 1 cup (240 ml) boiling water
- Optional Garnishes:
- Fresh berries (blueberries, strawberries)
- Whipped cream
- Mint leaves
I usually go with well-known brands like Jell-O for consistent flavor and color, but feel free to try store-brand gelatin to keep it budget-friendly. When it comes to milk, half-and-half gives a richer white layer, but regular milk works just fine too. For a dairy-free twist, coconut milk is surprisingly good here.
Note: If you’re making this during summer, fresh berries on top make a lovely seasonal touch. I often swap the blue gelatin for a blueberry mix in late summer when the fruit is ripe and abundant. If you need to keep things gluten-free, all these ingredients are naturally without gluten, so no worries there.
Equipment Needed
- Medium mixing bowls (at least 3) – For preparing each jello layer separately
- Measuring cups and spoons – Accuracy helps with texture
- Whisk or spoon – For dissolving gelatin and mixing layers
- Clear plastic or glass cups (about 8-12 oz / 240-350 ml) – to show off those vibrant layers
- Refrigerator space – To chill and set each layer properly
- Optional: small saucepan – if you prefer to bloom gelatin on the stove for better control
I usually use sturdy plastic cups because they’re easy to serve and clean up, but glass dessert cups add a nice touch for fancier gatherings. If you don’t have a whisk, a fork works fine for mixing gelatin powders. One tip: don’t rush the chilling between layers—having patience here keeps those layers neat and defined, which is the whole point of this recipe!
Preparation Method
- Prepare the Red Layer: In a medium bowl, pour 1 cup (240 ml) boiling water over the red gelatin powder. Stir for about 2 minutes until completely dissolved. Pour the mixture into your serving cups, filling each about one-third full (roughly 3-4 oz / 90-120 ml). Refrigerate for 20-30 minutes, or until firm but still slightly tacky to the touch. This helps the next layer stick better.
- Prepare the White Creamy Layer: In a small bowl, sprinkle the unflavored gelatin over ½ cup (120 ml) cold water and let it bloom for 5 minutes. Meanwhile, warm 1 cup (240 ml) milk or half-and-half in a saucepan over low heat until it’s hot but not boiling (about 3-4 minutes). Stir the bloomed gelatin into the warm milk until fully dissolved. Remove from heat and whisk in 1 can (14 oz / 397 g) sweetened condensed milk thoroughly. Let this mixture cool for about 10 minutes (it should be cool but not set). Carefully spoon or pour the white mixture over the red layer in your cups. Return to the fridge and chill for 30-40 minutes until set.
- Prepare the Blue Layer: Repeat the gelatin preparation method from step one with the blue gelatin and 1 cup (240 ml) boiling water. Stir until dissolved. Once the white layer is firm, gently pour the blue gelatin on top, filling each cup to the brim. Chill for another 1-2 hours, or until completely set.
- Final Touches: Before serving, garnish with fresh berries, a dollop of whipped cream, or a sprig of mint for a fresh finish. Serve chilled for best taste and texture.
Pro tip: Pour each new layer slowly over the back of a spoon to avoid breaking the set layer beneath. And if you notice any bubbles, a quick tap on the counter smooths things out nicely. The layering might take a little patience, but trust me—it’s worth it when you see those perfect red, white, and blue stripes in every cup.
Cooking Tips & Techniques
Getting the layers just right can feel tricky at first, but here are some tips I’ve learned from trial and error:
- Bloom your gelatin: Always let unflavored gelatin bloom in cold water before mixing it into hot liquids. This avoids clumps and ensures smooth texture.
- Don’t rush chilling: Each layer needs to be firm but tacky before adding the next. If the gelatin isn’t set enough, the layers will mix, ruining the look.
- Pour gently: Use a spoon to slow the flow of the next layer and keep the edges neat. It’s a small step that makes a big difference.
- Use clear cups: The whole point is showing off those vibrant layers, so clear plastic or glass cups are your best bet.
- Keep it cool: If you’re prepping on a hot day, chill your cups before layering to prevent melting or sticking.
One time, I got impatient and poured the blue layer too soon—it sank right through the white and looked like a mess. Lesson learned the hard way! Now, I always set a kitchen timer and check the firmness by lightly pressing the surface with a fingertip. It should feel firm but still slightly sticky, like a soft gel.
Multitasking helps too—while one layer chills, you can prep the next gelatin mix. This way, the whole process feels smoother and faster (especially useful when juggling other party prep, like I do when making a quick dinner like honey mustard glazed chicken breast).
Variations & Adaptations
Feel free to change things up depending on your taste or dietary needs. Here are some fun ways I’ve customized these jello cups:
- Dietary Alternatives: Use sugar-free or natural gelatin mixes for a lighter version, or swap condensed milk with coconut cream to make it dairy-free.
- Seasonal Flavors: Swap out the red and blue gelatin flavors depending on season or preference—raspberry and blueberry work great in summer, while cherry and grape can be nice in winter.
- Different Cooking Methods: For a no-mess option, make a big layered jello mold instead of individual cups, then slice into festive squares to serve.
- Flavor Boost: Add a splash of vanilla or almond extract to the white creamy layer for a subtle twist.
- Personal Favorite: I’ve tried adding crushed graham crackers between layers for a crunchy surprise that kids adore.
If you’re looking for something a little heartier to pair with these cups, a dish like crispy bang bang shrimp tacos balances the light sweetness perfectly for an all-around festive meal.
Serving & Storage Suggestions
These jello cups are best served chilled, straight from the fridge. The texture is refreshingly cool, and the colors really pop when cold. I love arranging them on a platter with fresh berries scattered around for a bright, inviting display.
If you’re hosting a party, these cups hold up well for several hours refrigerated—just keep them covered with plastic wrap to avoid any fridge odors or condensation messing with the glossy surface. Leftovers store nicely for up to 3 days in the fridge.
Reheating is a no-go here—heat will melt the gelatin. But if you want to refresh the firmness after a long day, just pop them back in the fridge for an hour or so before serving again. The flavors often taste even better the next day once they’ve had time to meld.
For a festive brunch or potluck, these jello cups pair nicely with light, savory options like a single-serving cheese casserole, balancing sweet and savory on the table.
Nutritional Information & Benefits
Each serving of these Festive Red White and Blue Jello Cups contains approximately:
| Calories | 150-180 kcal |
|---|---|
| Carbohydrates | 30-35 g |
| Protein | 3-4 g |
| Fat | 2-3 g |
| Sugar | 25-30 g |
The key ingredients like gelatin provide collagen, which supports joint and skin health. Using milk or half-and-half adds a bit of calcium and protein, making this dessert a little more substantial than your typical sugary treat. For those watching sugar intake, using sugar-free gelatin and reduced-fat dairy can lighten it up while keeping the fun.
Keep in mind, this recipe contains dairy and is not suitable for those with milk allergies. However, the flexibility to swap ingredients makes it adaptable for many dietary preferences.
Conclusion
These Festive Red White and Blue Jello Cups have become my go-to for adding a splash of color and joy to any celebration. They’re easy to make, visually impressive, and bring a playful, nostalgic charm that’s hard to beat. Whether you’re throwing a big party or just want a cheerful treat to brighten your day, this recipe adapts well to your needs.
I love how simple ingredients come together to create something memorable—and how this dessert manages to be both fun and comforting without any stress. Don’t hesitate to make it your own and share it with friends and family. I’d be thrilled to hear your twists or stories about these jello cups, so drop a comment or share your photos!
Here’s to sweet moments and colorful celebrations!
FAQs about Festive Red White and Blue Jello Cups
Can I make these jello cups ahead of time?
Yes! You can prepare them a day in advance and keep them refrigerated. Just cover them well to prevent drying out or absorbing fridge odors.
What if I don’t have unflavored gelatin for the white layer?
The unflavored gelatin is essential for setting the creamy layer. If you don’t have any, try substituting with instant pudding mix for a different but tasty creamy middle.
Can I use fresh fruit instead of gelatin flavors?
Fresh fruit is a great garnish, but it won’t replace the gelatin’s structure or vibrant color. You could make a fruit puree layer, but it won’t set like gelatin.
How do I prevent the layers from mixing?
Make sure each layer is semi-firm before adding the next. Pour the new layer slowly over a spoon to avoid breaking the set layer underneath.
Are these jello cups kid-friendly?
Absolutely! Kids love the bright colors and creamy middle. Plus, they’re easy to hold and eat, making them perfect for summer parties or picnic treats.
Pin This Recipe!
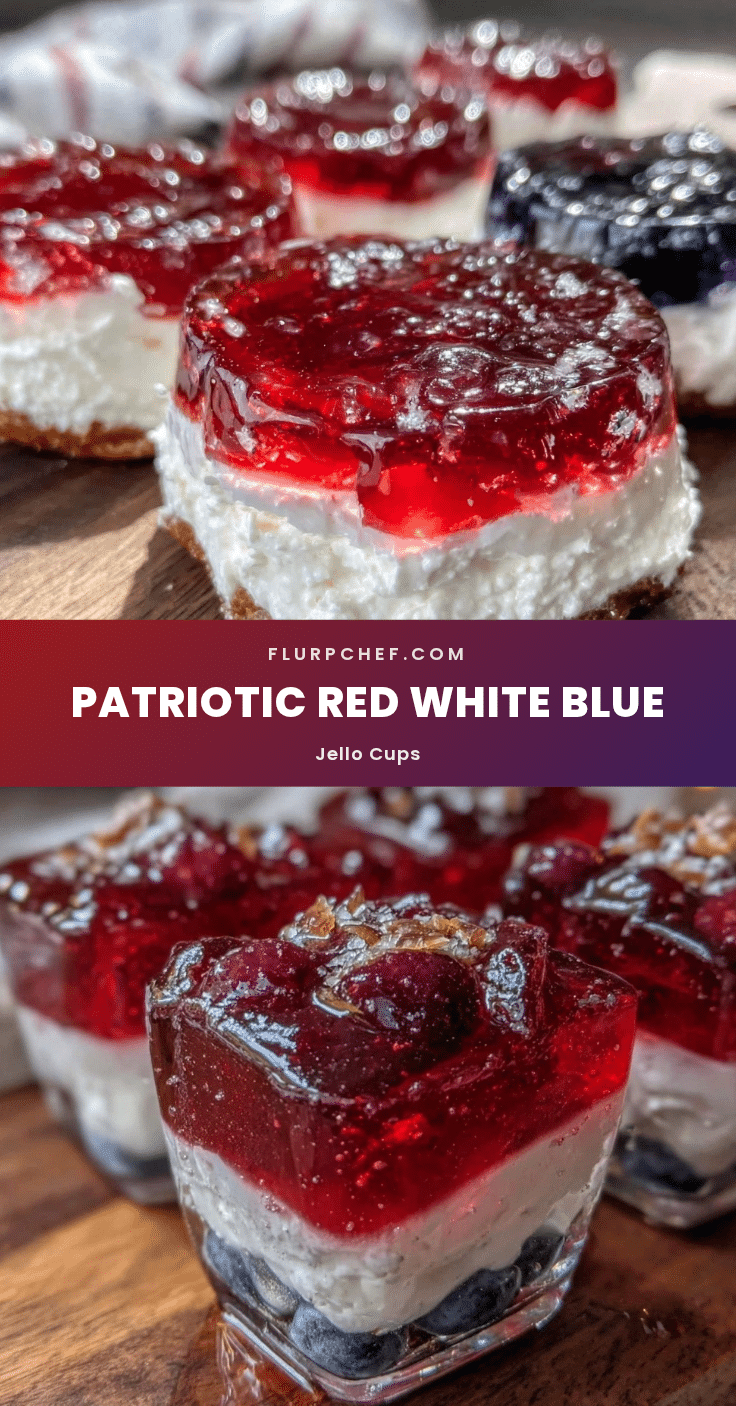
Festive Red White and Blue Jello Cups
Bright, fun, and nostalgic layered jello cups with a creamy white middle, perfect for summer parties and patriotic celebrations. Easy to make and loved by kids and adults alike.
- Prep Time: 15 minutes
- Cook Time: 5 minutes
- Total Time: 2 hours 30 minutes
- Yield: 8 servings 1x
- Category: Dessert
- Cuisine: American
Ingredients
- 1 package (3 oz / 85 g) red fruit-flavored gelatin (strawberry or cherry)
- 1 cup (240 ml) boiling water
- 1 package (3 oz / 85 g) unflavored gelatin powder
- ½ cup (120 ml) cold water
- 1 cup (240 ml) milk or half-and-half
- 1 can (14 oz / 397 g) sweetened condensed milk
- 1 package (3 oz / 85 g) blue fruit-flavored gelatin (blue raspberry or blueberry)
- 1 cup (240 ml) boiling water
- Optional garnishes: fresh berries (blueberries, strawberries), whipped cream, mint leaves
Instructions
- Prepare the Red Layer: In a medium bowl, pour 1 cup boiling water over the red gelatin powder. Stir for about 2 minutes until completely dissolved. Pour the mixture into serving cups, filling each about one-third full (3-4 oz). Refrigerate for 20-30 minutes until firm but slightly tacky.
- Prepare the White Creamy Layer: Sprinkle unflavored gelatin over ½ cup cold water and let bloom for 5 minutes. Warm 1 cup milk or half-and-half over low heat until hot but not boiling. Stir bloomed gelatin into warm milk until dissolved. Remove from heat and whisk in sweetened condensed milk. Let cool about 10 minutes. Spoon or pour over red layer. Chill for 30-40 minutes until set.
- Prepare the Blue Layer: Repeat gelatin preparation with blue gelatin and 1 cup boiling water. Stir until dissolved. Once white layer is firm, gently pour blue gelatin on top, filling cups to the brim. Chill for 1-2 hours until completely set.
- Final Touches: Garnish with fresh berries, whipped cream, or mint leaves before serving. Serve chilled.
Notes
Pour each new layer slowly over the back of a spoon to avoid breaking the set layer beneath. Chill each layer until firm but tacky before adding the next to keep layers neat. Use clear cups to show off vibrant layers. For dairy-free, substitute milk with coconut milk or coconut cream. Use sugar-free gelatin for a lighter version.
Nutrition
- Serving Size: 1 cup (about 8 oz)
- Calories: 165
- Sugar: 27.5
- Sodium: 70
- Fat: 2.5
- Saturated Fat: 1.5
- Carbohydrates: 32.5
- Protein: 3.5
Keywords: jello cups, layered dessert, patriotic dessert, summer party dessert, easy jello recipe, red white and blue dessert


