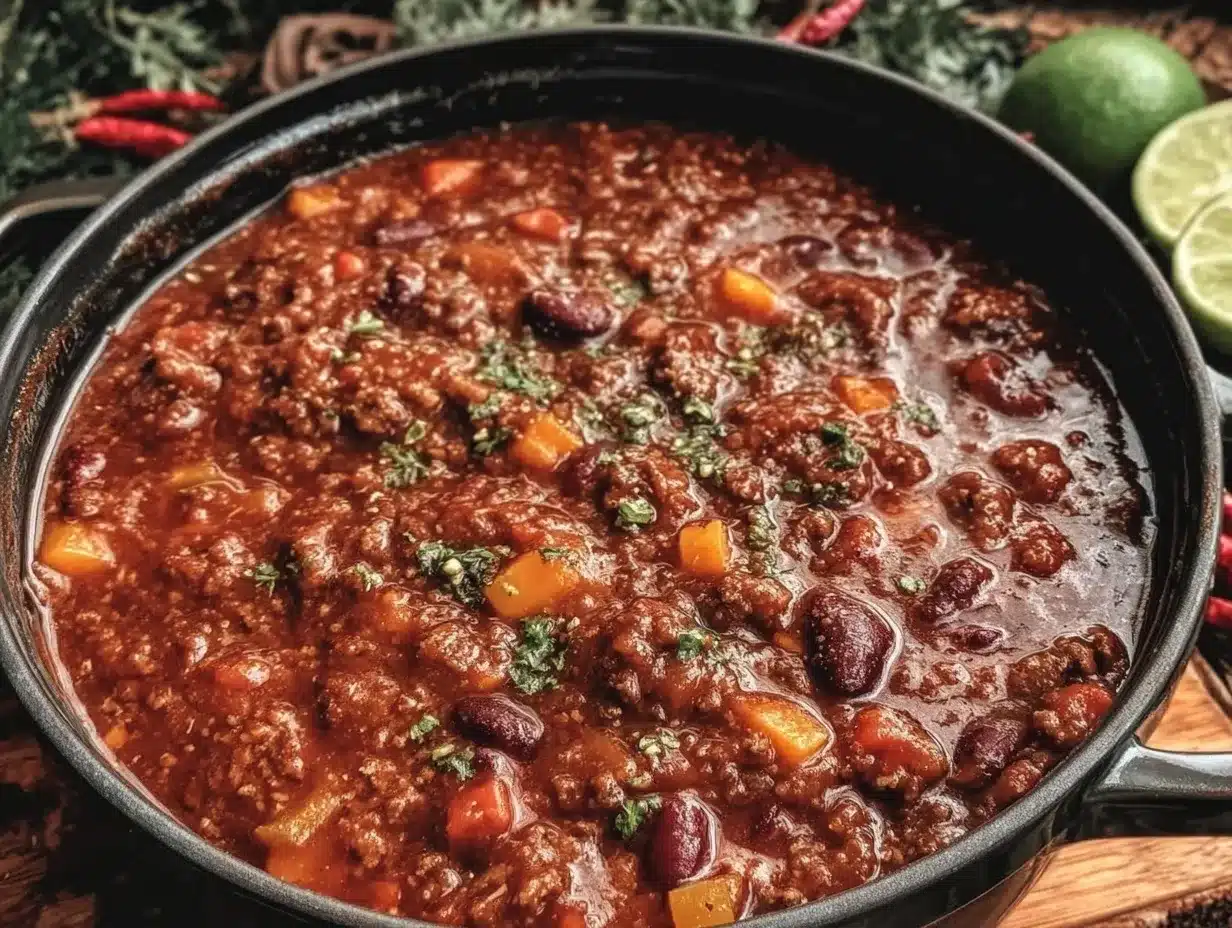
“You sure you can make chili over an open fire without it turning into a smoky mess?” my buddy chuckled as I unpacked my trusty Dutch oven at the campsite. Honestly, I wasn’t entirely confident either. I’d always admired those effortless campfire meals people threw together, but I figured, why not take a crack at making a hearty Dutch oven campfire chili from scratch? No canned shortcuts, just pure, honest cooking.
That night, as the fire crackled and the stars peeked out, the aroma of simmering chili wrapped around our little circle like a warm blanket. The deep, smoky scent of the spices mingled with the campfire smoke—it was like magic, turning a simple recipe into something unforgettable. And honestly, the best part? Watching the skepticism on my friend’s face slowly melt away with every spoonful he took.
This chili isn’t just a recipe; it’s the kind of dish that brings people together, makes the chill of the night fade, and turns a rough day outside into a shared comfort. I’ve made it over and over—whether camping solo or with friends—and each time, it feels like a small victory over the wilderness. The slow simmer in the Dutch oven gives it that perfect balance of bold flavors and tender textures you just can’t get from a quick pot on the stove.
So if you’re looking for a campfire meal that’s more than just beans and heat, one that’s satisfying and made from scratch with a little elbow grease and a lot of love, this Hearty Dutch Oven Campfire Chili is your new go-to. It’s hearty, warming, and honestly, a little messy—but isn’t that part of the charm? The recipe stuck with me because it’s comfort in a bowl, cooked the old-fashioned way, and it’s waiting to become part of your camping stories too.
Why You’ll Love This Hearty Dutch Oven Campfire Chili Recipe
Having tested many campfire recipes, this Dutch oven chili stands out for a few reasons that I’ve learned from experience. It’s not just about throwing ingredients into a pot—it’s about the magic that happens when you cook with care and patience over an open flame. Here’s why this recipe has become a favorite for gatherings and solo adventures alike:
- Quick & Easy: While it simmers slowly, the prep comes together in about 20 minutes, making it perfect for those days when you want a filling meal without fuss.
- Simple Ingredients: No need for specialty stores—everything used here is easy to find, with pantry staples and fresh basics that pack big flavor.
- Perfect for Camping or Backyard Fire Pits: Whether you’re roughing it or just craving that smoky camp vibe, this chili hits the spot every time.
- Crowd-Pleaser: I’ve served this at casual cookouts, and it’s always the first pot to disappear—kids and adults alike love its rich, savory taste.
- Unbelievably Delicious: The slow cook in the Dutch oven melds spices and meat into a tender, hearty chili that’s comforting and satisfying.
What makes this recipe different? It’s the scratch-made approach—no canned chili seasoning mixes here, just fresh spices blended for a bold, balanced flavor. Plus, cooking it in a heavy Dutch oven over a campfire brings out a subtle smokiness that you just can’t replicate indoors. I remember tweaking the seasoning after my first try, adding a pinch of smoked paprika and a dash of dark cocoa powder. That twist sealed the deal on the flavor profile, turning good into unforgettable.
This chili isn’t just a recipe—it’s a little ritual, a way to slow down, connect with nature, and enjoy food that feels soulful and grounded. It’s a hearty hug after a long day outdoors, and honestly, it’s become my go-to comfort when I want something simple, filling, and made with care. If you like dishes that are easy to prepare but rich in character, this chili will probably make you close your eyes after the first bite, too.
What Ingredients You Will Need for Hearty Dutch Oven Campfire Chili
This recipe uses simple, wholesome ingredients to deliver bold flavor and satisfying texture without the fuss. Most of these are pantry staples or fresh items that travel well for camping trips. Here’s what you need:
- Ground beef (1 lb / 450 g): Choose 80/20 for the right fat balance—adds richness without being greasy.
- Yellow onion (1 medium, diced): Brings sweetness and depth when sautéed.
- Garlic cloves (3, minced): Fresh garlic is a must for that punchy base flavor.
- Green bell pepper (1, diced): Adds a mild, fresh contrast to the beef.
- Tomato paste (2 tbsp): Concentrated tomato flavor that thickens the chili.
- Diced tomatoes (1 can – 14.5 oz / 410 g): Use fire-roasted if you want extra smoky notes.
- Kidney beans (1 can – 15 oz / 425 g), drained and rinsed: Adds hearty texture and protein.
- Beef broth (1 cup / 240 ml): For simmering and keeping everything juicy.
- Chili powder (2 tbsp): The backbone of the chili heat and flavor.
- Ground cumin (1 tbsp): Earthy warmth that pairs perfectly with chili powder.
- Smoked paprika (1 tsp): Adds subtle smokiness that shines in campfire cooking.
- Dried oregano (1 tsp): Herbal lift to round out the spices.
- Dark cocoa powder (1 tsp, optional): A secret twist that deepens the flavor without sweetness.
- Salt and black pepper: To taste; essential for balancing flavors.
- Olive oil (2 tbsp): For sautéing the veggies and beef.
- Optional toppings: Shredded cheddar cheese, sour cream, chopped green onions, fresh cilantro, or sliced jalapeños.
For those camping with limited fresh produce, frozen diced onions and peppers work just fine (just thaw before cooking). If you prefer a leaner chili, swap ground beef with ground turkey or chicken. And hey, if you’re avoiding beans, black beans or pinto beans can be a good substitute. I usually recommend Bob’s Red Mill chili powder for its robust flavor and consistent quality, but honestly, your local brand will do just fine here.
Equipment Needed for Making Campfire Dutch Oven Chili
Cooking chili over a campfire with a Dutch oven is all about the gear you bring along. Here’s what you’ll need to make this recipe a success out in the wild—or even on your backyard fire pit:
- Cast iron Dutch oven (5-7 qt / 5-7 L): This is the star of the show. Its heavy lid traps heat and helps slow-cook the chili evenly. I personally swear by my seasoned Lodge Dutch oven—it’s tough, reliable, and perfect for open flame cooking.
- Long-handled stirring spoon or heat-resistant spatula: For safe and easy stirring over hot coals.
- Campfire tripod or sturdy grill grate: To suspend or hold your Dutch oven over the fire for indirect heat cooking.
- Lid lifter or sturdy tongs: Essential for lifting the hot Dutch oven lid without burns.
- Heat-resistant gloves or mitts: Don’t underestimate this one—cast iron gets seriously hot!
- Sharp knife and cutting board: For prepping your fresh ingredients.
- Measuring spoons and cups: For keeping the seasoning balance just right.
If you’re cooking indoors or don’t have a campfire, a heavy-bottomed Dutch oven or large oven-safe pot works well on the stove or in the oven. For budget-friendly options, some cast iron enamel Dutch ovens come pre-seasoned and require less maintenance. Just remember to clean and dry your cast iron properly after every use to keep it rust-free and ready for your next chili session.
Preparation Method for Hearty Dutch Oven Campfire Chili
- Prep your ingredients (15 minutes): Dice the onion, bell pepper, and mince the garlic. Drain and rinse the kidney beans to remove excess salt and canning liquid. Measure out your spices and have them ready.
- Heat the Dutch oven over medium coals or a gentle fire: Add 2 tablespoons of olive oil. When shimmering, toss in the diced onions and bell peppers. Sauté for about 5 minutes until they soften and start to caramelize, stirring occasionally to avoid burning.
- Add the garlic: Stir in the minced garlic and cook for another 1-2 minutes until fragrant but not browned—overcooked garlic can turn bitter.
- Brown the ground beef (8-10 minutes): Crumble the beef into the pot. Cook until no pink remains, breaking up lumps with your spoon. This is where the chili starts building its hearty base. Drain excess fat if needed to prevent greasiness.
- Incorporate tomato paste and spices: Stir in the tomato paste, chili powder, cumin, smoked paprika, oregano, and cocoa powder (if using). Mix well and cook for 2 minutes to toast the spices, which helps release their full flavor.
- Add diced tomatoes, kidney beans, and beef broth: Pour in the canned tomatoes with their juice, beans, and broth. Stir everything together, scraping any browned bits off the bottom. These bits add rich flavor, so don’t skip this step!
- Simmer the chili (30-40 minutes): Place the Dutch oven lid on and arrange hot coals on top of the lid and below the pot for even heat. Let the chili gently simmer, stirring every 10 minutes to prevent sticking. You want it thick, rich, and bubbling—if it looks dry, add a splash more broth or water.
- Season to taste: After simmering, taste your chili and add salt and pepper as needed. This is the moment to tweak if it needs a pinch more chili powder or a dash of sugar to balance acidity.
- Serve warm with your favorite toppings: Ladle into bowls and offer shredded cheddar, sour cream, chopped green onions, or jalapeños to customize.
Pro tip: When placing coals on the Dutch oven lid, I use a metal lid lifter to avoid burns. Also, don’t rush the simmering—slow-cooked flavors make all the difference. If you’re camping without coals, you can nestle your Dutch oven near embers, but keep an eye on heat to avoid scorching.
Cooking Tips & Techniques for Perfect Campfire Chili
Cooking chili over a campfire is a bit of an art, but once you get the hang of it, it’s incredibly rewarding. A few lessons I’ve learned the hard way might save you some frustration:
- Control your heat: Campfires can be unpredictable, so using coals instead of direct flames helps regulate temperature. Too hot, and your chili will scorch; too cool, and it won’t develop the deep flavors.
- Don’t skip browning the meat properly: That caramelized crust on the beef adds umami that’s crucial for a rich chili. Patience here pays off.
- Toast your spices: Stirring spices into the tomato paste and beef mixture before adding liquids unlocks aroma and depth.
- Stir regularly, but not obsessively: You want to prevent sticking but let the chili simmer undisturbed enough to meld flavors.
- Use the right beans: Kidney beans hold up well to long simmering. Avoid canned beans that are overly soft or mushy.
- Adjust seasoning at the end: Flavors concentrate as the chili cooks, so wait until the end to salt and pepper fully.
Once, I got impatient and cranked the heat too high, ending up with burnt bits that turned the chili bitter. Lesson learned: slow and steady is the way to go. Also, multitasking is key—while the chili simmers, I often prep toppings or set the table, making the most of the campfire downtime.
Variations & Adaptations for Your Chili
This hearty Dutch oven campfire chili recipe is pretty versatile. Here are some ways you can switch it up depending on taste, dietary needs, or what’s on hand:
- Vegetarian Chili: Replace ground beef with a mixture of chopped mushrooms and extra beans or lentils for a meaty texture. Add a splash of soy sauce for umami.
- Spicy Kick: Add diced jalapeños or a pinch of cayenne pepper to the spice mix. For a smoky heat, chipotle powder works beautifully.
- Slow Cooker Version: If you’re at home or have electricity at a campsite, brown the meat on the stove and transfer everything to a slow cooker. Cook on low for 6-8 hours for tender, melded flavors.
- Seasonal Twist: In fall, toss in diced butternut squash or sweet potatoes for sweetness and texture.
- Low-Carb Option: Skip the beans and add extra bell peppers and zucchini. Serve over cauliflower rice or with a side of cornbread.
Personally, I once swapped ground turkey for beef during a summer camping trip to cut down on grease. The chili still had that rich flavor, thanks to the smoked paprika and cocoa powder. It’s nice to have a flexible base like this so you can make it your own without losing that campfire soul.
Serving & Storage Suggestions for Campfire Chili
This chili is best served hot and fresh from the Dutch oven, ideally around a campfire or cozy kitchen table. Ladle it into sturdy bowls—ideally ceramic or enamel-coated for camping—and let everyone add their favorite toppings. Personally, I love a dollop of sour cream and a sprinkle of sharp cheddar cheese melting into the warm chili.
For sides, cornbread or warm crusty bread work perfectly to soak up all the juices. If you want to mix it up, you could serve this chili alongside a simple green salad or some grilled veggies. It’s a great pairing with a cold beer or a spicy ginger ale, especially on a cool evening.
Leftovers keep well in an airtight container in the refrigerator for up to 3 days. Reheat gently on the stove or over coals until steaming. For longer storage, freeze portions in zip-top bags or freezer-safe containers for up to 3 months. Just thaw overnight in the fridge before reheating.
The flavors actually deepen when the chili sits a day or two, so if you’re packing for a multi-day trip, consider making it a day ahead. It’s a comfort that lasts, warming you up even after the fire dies down.
Nutritional Information & Benefits of This Campfire Chili
This hearty Dutch oven campfire chili is a nutritious, balanced meal packed with protein from the ground beef and kidney beans, fiber from the beans and veggies, and a wealth of vitamins from fresh onion and peppers.
| Nutrient | Per Serving (approx.) |
|---|---|
| Calories | 350-400 kcal |
| Protein | 28 g |
| Fat | 15 g |
| Carbohydrates | 25 g |
| Fiber | 8 g |
| Sodium | 600 mg (varies by broth and beans) |
Beans contribute heart-healthy fiber and plant-based protein, helping you stay full and energized during outdoor adventures. The spices like chili powder and cumin have antioxidant properties and can aid digestion. For gluten-free diners, this chili is naturally gluten-free, but double-check broth ingredients if buying store-bought. If dairy toppings are a concern, swap sour cream for a dairy-free yogurt alternative.
From a wellness standpoint, this recipe balances comfort with nourishing ingredients, perfect for refueling after a day outdoors or simply cozying up at home. It’s the kind of meal that feels indulgent without undoing your health goals.
Conclusion: Make This Hearty Dutch Oven Campfire Chili Your Next Favorite
This Hearty Dutch Oven Campfire Chili from scratch has become my go-to for camping trips and chilly evenings alike. It’s not just about the food but the whole experience—cooking over an open flame, sharing stories, and savoring every rich, smoky bite. The recipe is easy to customize, forgiving for beginners, and always delivers a satisfying meal that feels like a warm hug in a bowl.
Whether you’re a seasoned camper or just somebody who loves a good chili, I encourage you to give this a try. You can tweak the spice levels, swap ingredients, and make it your own—just like I did when I first mixed in that unexpected pinch of cocoa powder.
And hey, if you’re interested in other easy homemade meals perfect for solo cooks or small batches, you might enjoy the cozy single-serving casserole recipe or the savory meatloaf for one. Both are great for comforting dinners when you want something homemade without a lot of fuss.
So grab your Dutch oven, build your fire, and get ready to make some memories with this unforgettable campfire chili. You won’t regret it.
Frequently Asked Questions about Hearty Dutch Oven Campfire Chili
Can I make this chili without a Dutch oven?
Absolutely. You can use any heavy-bottomed pot or slow cooker. The Dutch oven just adds that classic campfire flavor and even heat distribution.
How do I prevent the chili from burning over the campfire?
Use hot coals instead of direct flames and place coals on the lid as well. Stir the chili every 10 minutes to prevent sticking and adjust coal placement to control heat.
Can I prepare this chili ahead of time?
Yes! It actually tastes better the next day as flavors meld. Just store it in the fridge and reheat gently before serving.
What can I use if I don’t have kidney beans?
Black beans or pinto beans are great substitutes. Just adjust cooking time slightly if using dried beans (soak beforehand).
Is this chili spicy?
The base recipe has a mild to medium spice level, but you can easily add jalapeños, cayenne, or extra chili powder to suit your heat preference.
Pin This Recipe!
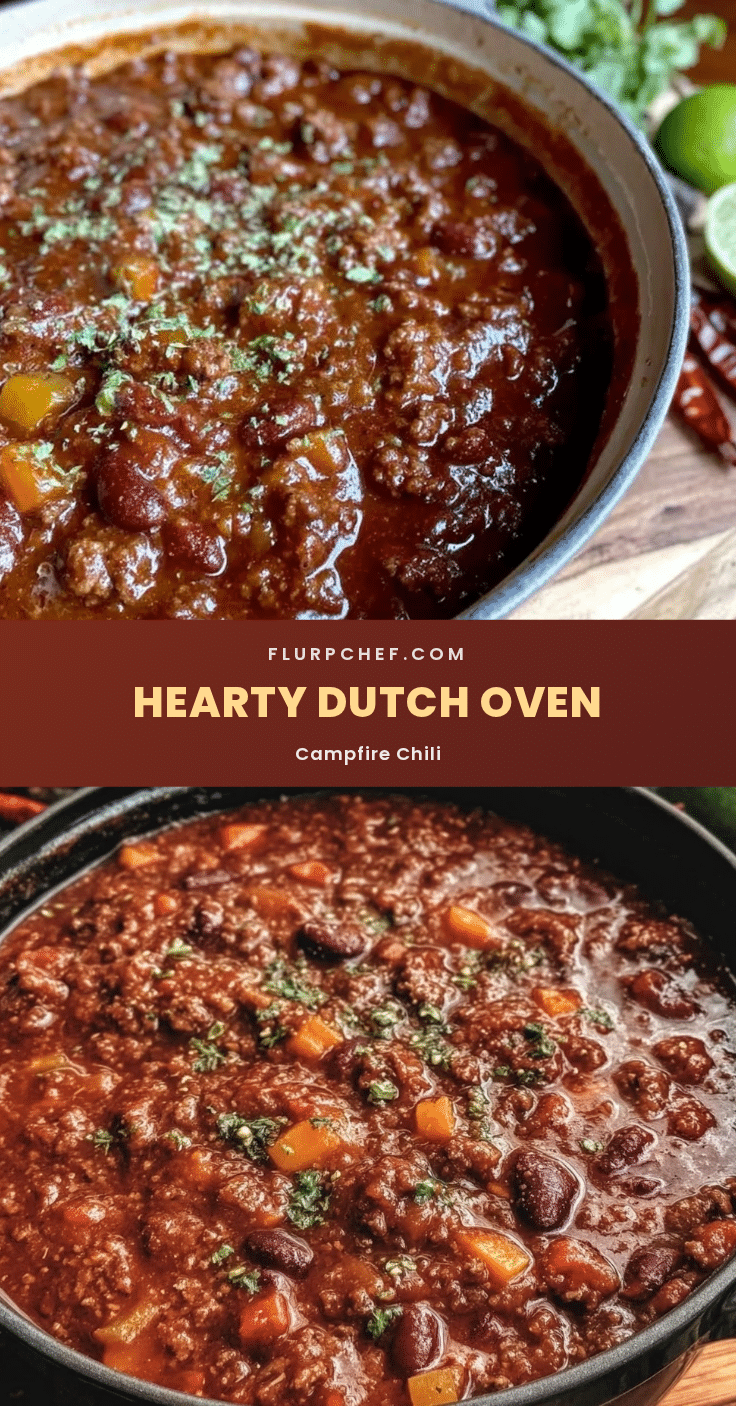
Hearty Dutch Oven Campfire Chili Recipe Easy Homemade from Scratch

A hearty, warming chili cooked from scratch in a Dutch oven over a campfire, perfect for camping or backyard fire pits. This recipe uses simple ingredients and slow simmering to develop bold, smoky flavors.
- Prep Time: 15 minutes
- Cook Time: 40 minutes
- Total Time: 55 minutes
- Yield: 6 servings 1x
- Category: Main Course
- Cuisine: American
Ingredients
- 1 lb ground beef (80/20)
- 1 medium yellow onion, diced
- 3 garlic cloves, minced
- 1 green bell pepper, diced
- 2 tbsp tomato paste
- 1 can (14.5 oz) diced tomatoes (fire-roasted optional)
- 1 can (15 oz) kidney beans, drained and rinsed
- 1 cup beef broth
- 2 tbsp chili powder
- 1 tbsp ground cumin
- 1 tsp smoked paprika
- 1 tsp dried oregano
- 1 tsp dark cocoa powder (optional)
- Salt and black pepper to taste
- 2 tbsp olive oil
- Optional toppings: shredded cheddar cheese, sour cream, chopped green onions, fresh cilantro, sliced jalapeños
Instructions
- Prep your ingredients: dice onion, bell pepper, mince garlic, drain and rinse kidney beans, measure spices (15 minutes).
- Heat Dutch oven over medium coals or gentle fire; add olive oil. When shimmering, sauté onions and bell peppers for about 5 minutes until softened and starting to caramelize.
- Add minced garlic and cook 1-2 minutes until fragrant but not browned.
- Add ground beef, crumble and cook 8-10 minutes until no pink remains, breaking up lumps. Drain excess fat if needed.
- Stir in tomato paste, chili powder, cumin, smoked paprika, oregano, and cocoa powder (if using). Cook 2 minutes to toast spices.
- Add diced tomatoes with juice, kidney beans, and beef broth. Stir well, scraping browned bits from bottom.
- Cover with lid and simmer for 30-40 minutes over coals, stirring every 10 minutes to prevent sticking. Add more broth or water if too dry.
- Season to taste with salt and pepper; adjust chili powder or add a dash of sugar if desired.
- Serve warm with optional toppings like shredded cheddar, sour cream, green onions, cilantro, or jalapeños.
Notes
Use hot coals instead of direct flames to control heat and prevent burning. Stir every 10 minutes during simmering. For leaner chili, substitute ground turkey or chicken. Beans can be swapped with black or pinto beans. Slow simmering melds flavors best. Optional cocoa powder adds depth without sweetness.
Nutrition
- Serving Size: 1 bowl (approx. 1 cu
- Calories: 375
- Sugar: 5
- Sodium: 600
- Fat: 15
- Saturated Fat: 6
- Carbohydrates: 25
- Fiber: 8
- Protein: 28
Keywords: campfire chili, Dutch oven chili, homemade chili, campfire recipe, easy chili, hearty chili, camping meal, scratch chili


