“You’ve got to try this,” my neighbor called out over the fence one unusually hot afternoon, dangling a pan of what looked like a vibrant, festive dessert. I was skeptical, honestly. No-bake? Strawberry cheesecake? Flag bars? It all sounded a bit too good to be true. But with the sun blazing and the last thing I wanted was to heat up my kitchen, I figured, why not give it a shot?
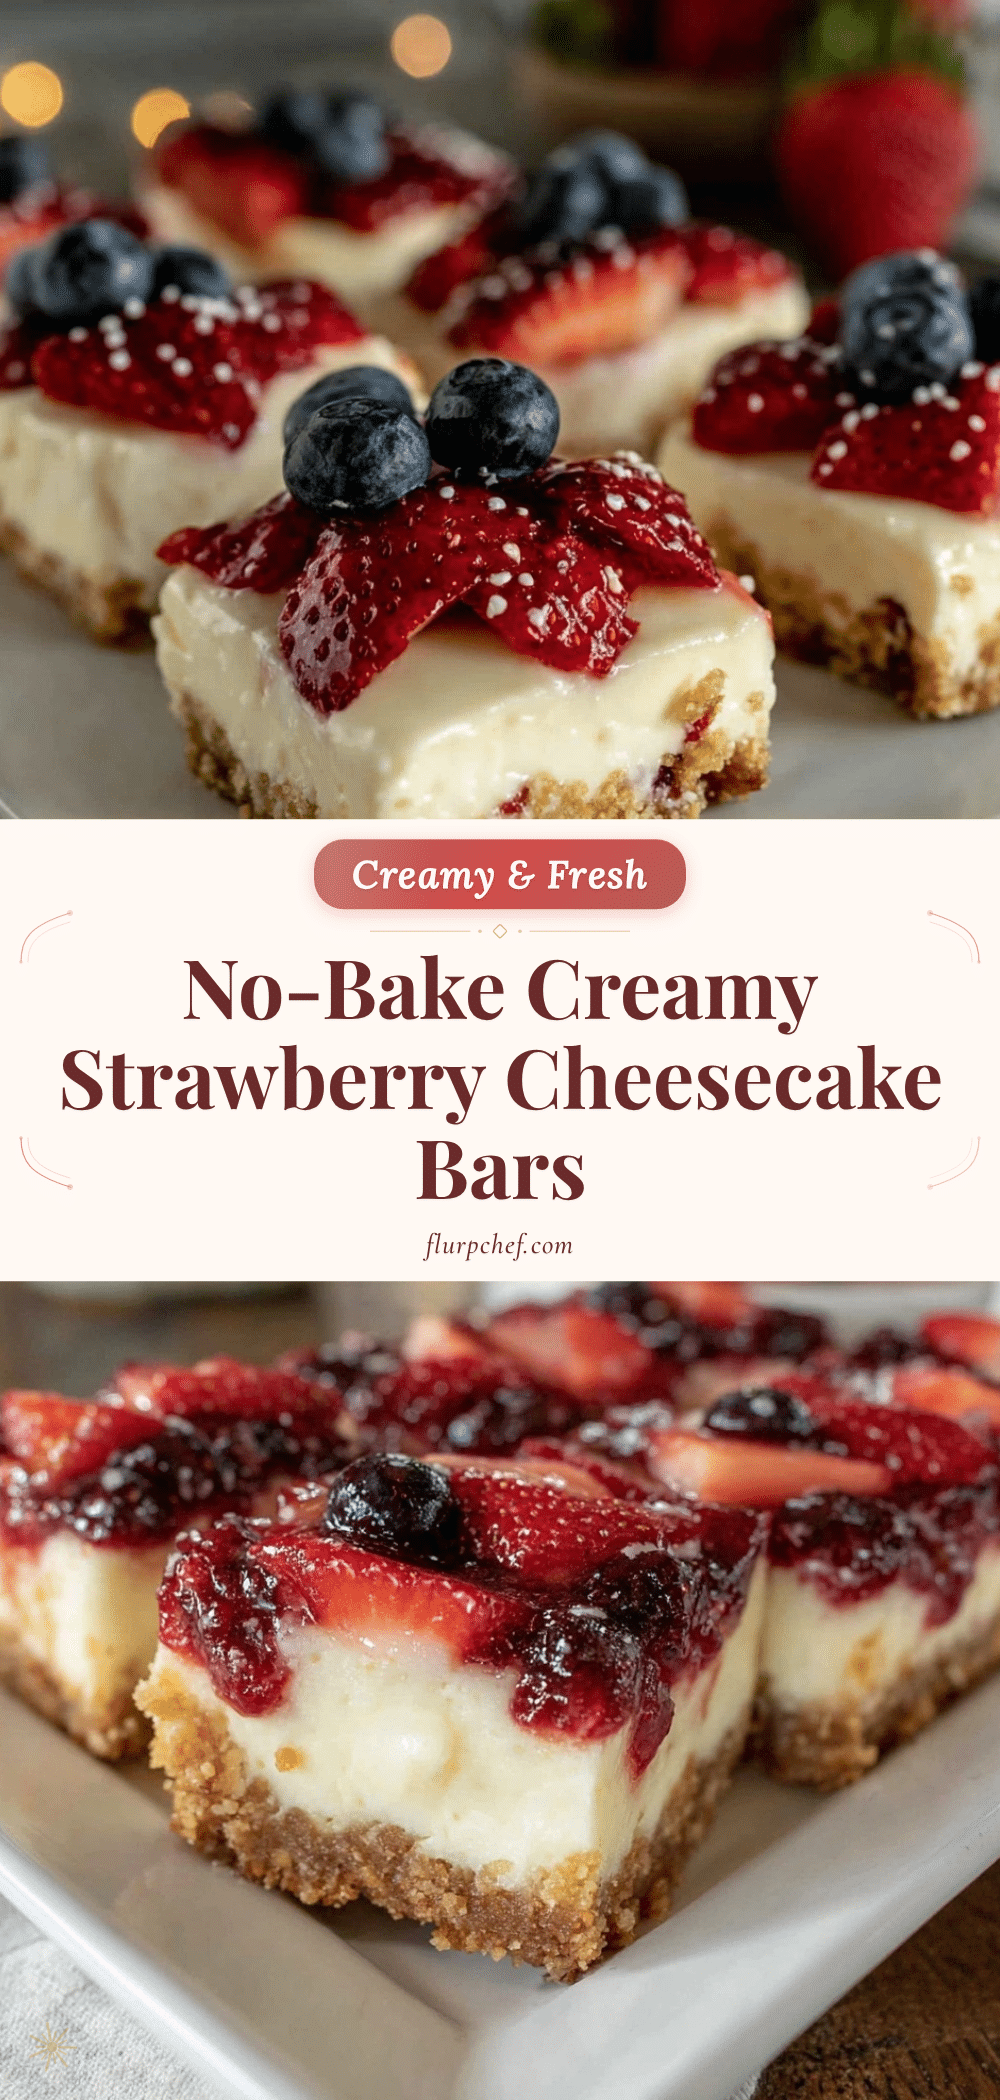
That first bite was a total game-changer. The creamy cheesecake layer was perfectly smooth and just sweet enough, the strawberry topping bursting with fresh, juicy flavor, and the crust—a buttery, crumbly base—gave just the right amount of crunch. It wasn’t fancy or complicated, but it hit that perfect note between refreshing and indulgent that I hadn’t realized I needed on such a sticky summer day.
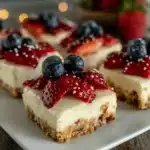
Since then, these Easy No-Bake Strawberry Cheesecake Flag Bars have become my go-to for everything from impromptu barbecues to July 4th celebrations. They’re like summer wrapped up in a dessert: light, colorful, and effortless. Plus, they bring a little patriotic charm to the table without any fuss. Honestly, the fact that they require no oven time is a lifesaver when you’re juggling kids, work, and a million other things.
What really stuck with me was how this recipe proved that sometimes the simplest ideas—no baking, just layering—can turn into something truly memorable. It’s a quiet reminder that you don’t need to overthink desserts to impress friends and family or to create those little moments that make summer feel special. So, if you’re looking for a sweet treat that’s as easy as it is eye-catching, you’re in the right spot.
Why You’ll Love This Recipe
After testing this recipe several times (and yes, eating way too many bars in the process), I can confidently say it checks all the boxes for a summer dessert that really works. Here’s why it stands out:
- Quick & Easy: Ready in under 30 minutes, no oven required—perfect for those last-minute summer parties or when the weather’s just too hot to cook.
- Simple Ingredients: You probably already have cream cheese, graham crackers, and strawberries on hand. No weird or hard-to-find items, which means less stress.
- Perfect for Summer Festivities: The red, white, and blue layers make it ideal for patriotic holidays, backyard barbecues, or casual get-togethers.
- Crowd-Pleaser: Kids love the sweet strawberry topping, while adults appreciate the creamy cheesecake layer and crumbly crust.
- Unbelievably Delicious: The creamy texture combined with the fresh strawberry layer is just pure comfort food—without weighing you down.
- Unique No-Bake Technique: Instead of baking, it uses a chilled set time to firm up, making it approachable for anyone intimidated by baking.
This easy no-bake strawberry cheesecake flag bars recipe isn’t just another dessert; it’s the kind of dish that brings people together, sparks compliments, and makes you want to reach for seconds (or thirds). And if you’re a fan of creamy, fruity desserts like the creamy no-bake Oreo cheesecake bars, you’ll find this one hits the same satisfying notes with a fresh summer twist.
What Ingredients You Will Need
This recipe uses simple, wholesome ingredients that come together beautifully to deliver bold flavor and a satisfying texture without fuss. Most of these are pantry staples or easy to find in any grocery store during strawberry season.
- For the Crust:
- 1 ½ cups graham cracker crumbs (about 10-12 full sheets, finely crushed)
- 6 tablespoons unsalted butter, melted (adds richness and helps the crust set)
- 2 tablespoons granulated sugar (balances the buttery crust)
- For the Cheesecake Layer:
- 16 ounces (450g) cream cheese, softened (I recommend Philadelphia for the best smoothness)
- ½ cup powdered sugar, sifted (for that perfect sweet creaminess)
- 1 teaspoon vanilla extract (pure vanilla makes a noticeable difference)
- 1 cup heavy whipping cream, cold (helps the cheesecake layer stay light and fluffy)
- For the Strawberry Topping:
- 2 cups fresh strawberries, hulled and sliced (in summer, fresh is the way to go; frozen works if fresh aren’t available)
- 2 tablespoons granulated sugar (to sweeten and macerate the berries)
- 1 tablespoon fresh lemon juice (brightens the strawberry flavor)
If you want to switch things up, almond flour can be swapped for the crust for a gluten-free option, and coconut cream can be used instead of heavy cream for a dairy-free twist. The key is to keep the cream cheese layer light and fluffy—so chilling your ingredients beforehand is a little trick I swear by.
Equipment Needed
- 9×13 inch (23×33 cm) baking dish or pan (glass or metal works fine)
- Mixing bowls (one large for the cheesecake, one small for the crust)
- Electric mixer or stand mixer (helps whip the cream into stiff peaks quickly; a hand mixer works well too)
- Spatula for folding and spreading layers (silicone spatulas are my favorite for smooth spreading)
- Measuring cups and spoons (precision helps keep the texture just right)
- Food processor or zip-top bag for crushing graham crackers (you can also crush them manually with a rolling pin, but this speeds things up)
Don’t worry if you don’t have a stand mixer—I’ve made these bars countless times with nothing but a hand mixer and a bit of patience. Also, a chilled mixing bowl helps the cream whip faster, which is a neat little pro tip I picked up over time. For a budget-friendly alternative, any standard mixing bowl and a whisk will do if you’re ready for a bit of an arm workout!
Preparation Method

- Prepare the Crust (10 minutes): Crush the graham crackers finely using a food processor or by placing them in a zip-top bag and rolling with a rolling pin. In a medium bowl, combine the crumbs, melted butter, and sugar. Stir until the mixture resembles wet sand.
- Press the Crust: Transfer the mixture into your 9×13 inch pan. Using the bottom of a measuring cup or your fingers, press it firmly and evenly into the bottom of the pan. This step is key for a crust that holds together well. Pop it into the fridge to chill while you prepare the filling.
- Make the Cheesecake Layer (15 minutes): In a large bowl, beat the softened cream cheese with an electric mixer until smooth and creamy, about 2-3 minutes. Add the powdered sugar and vanilla extract, beating until fully combined.
- In a separate chilled bowl, whip the heavy cream until stiff peaks form. This usually takes 3-5 minutes on medium speed. Be careful not to overwhip or it will turn grainy.
- Gently fold the whipped cream into the cream cheese mixture with a spatula, using slow, sweeping motions to keep it light and airy.
- Assemble the Bars: Spread the cheesecake layer evenly over the chilled crust, smoothing the top with your spatula.
- Prepare the Strawberry Topping (10 minutes): Toss the sliced strawberries with sugar and fresh lemon juice in a small bowl. Let them sit for about 10 minutes to macerate and release juices. This step really brings out the berry’s natural sweetness and flavor.
- Top the Bars: Spoon the strawberry mixture evenly over the cheesecake layer, spreading gently to cover the surface.
- Chill to Set (at least 4 hours or overnight): Cover the pan with plastic wrap and refrigerate until firm. This resting time lets the layers meld and the crust harden, making the bars easier to slice.
- Serve: Slice into 12-16 squares and enjoy chilled. For clean cuts, wipe your knife with a warm, damp cloth between slices.
If your cheesecake layer feels too soft before chilling, a quick fix is to pop it back in the fridge for a bit longer. Also, for a prettier presentation, you can arrange the strawberries in a flag pattern or scatter blueberries for a red, white, and blue effect. This little detail always sparks compliments at my summer parties.
Cooking Tips & Techniques
When making no-bake desserts, the key is patience and technique. Here are some tips I’ve gathered from trial, error, and a few happy accidents:
- Room Temperature Cream Cheese: It’s tempting to rush, but letting your cream cheese soften naturally is essential. Cold cream cheese lumps can ruin the smooth texture.
- Whip the Cream Properly: Keep your mixing bowl and beaters chilled for faster whipping. Watch closely to stop at stiff peaks—not too soft, not too stiff.
- Don’t Skip Chilling: The bars need time to set up firmly, or you’ll end up with a runny mess. Overnight chilling is best if you have the time.
- Crust Pressing: Press the crust firmly and evenly to prevent crumbling when slicing. Using the bottom of a glass or measuring cup works wonders.
- Strawberry Prep: Macerate the strawberries with sugar and lemon juice to draw out their juices and deepen the flavor. This step makes a huge difference.
- Cutting Bars: Use a sharp knife and wipe it between cuts for neat slices. A plastic knife can also help if you don’t want to wash frequently.
One time, I skipped the maceration step because I was in a hurry—huge mistake. The topping was bland and watery. Lesson learned: don’t rush the strawberries! Also, if you want to multitask, whipping the cream while the crust chills saves precious minutes.
Variations & Adaptations
There’s something wonderfully flexible about these no-bake cheesecake bars. Here are a few ways I’ve mixed things up (and you can too!):
- Berry Medley: Swap half of the strawberries for blueberries or raspberries for a colorful, flavor-packed topping. Perfect for a red, white, and blueberry dessert vibe.
- Gluten-Free Crust: Replace graham crackers with almond flour or gluten-free cookie crumbs to suit dietary needs without losing that buttery crunch.
- Flavor Twist: Add a teaspoon of lemon zest to the cheesecake layer for a fresh zing, or swirl in a spoonful of strawberry jam in the filling for extra berry intensity.
- Dairy-Free Version: Use coconut cream instead of heavy cream and dairy-free cream cheese alternatives. The texture will be slightly different but still delicious.
- Mini Flag Bars: Use a muffin tin lined with parchment for individual-sized bars. These are great for picnics or kids’ parties.
My personal favorite is the berry medley version for summer cookouts—it adds a nice contrast and keeps the dessert feeling light. If you love the idea of no-bake treats, you might also appreciate the creamy no-churn strawberry cheesecake ice cream for a cool, creamy dessert alternative.
Serving & Storage Suggestions
These strawberry cheesecake flag bars are best served chilled. I like to pull them out of the fridge about 10 minutes before serving to take the chill off slightly—that way, the creamy layer is soft but still firm enough to hold shape.
Presentation-wise, serving them on a white platter really makes the red and white colors pop. Fresh mint leaves or a dusting of powdered sugar add a little extra charm. Pair with iced tea, lemonade, or a light sparkling wine for summer parties.
Store any leftovers covered tightly in the refrigerator. They keep well for up to 4 days. For longer storage, you can freeze the bars (wrapped individually or in the pan) for up to a month. Just thaw in the fridge overnight before serving.
Reheating isn’t really recommended since these are no-bake and best enjoyed cool, but letting them sit at room temperature for 15-20 minutes before serving softens the texture nicely. The flavors actually meld and deepen a bit after a day or two in the fridge, making these bars a perfect make-ahead dessert.
Nutritional Information & Benefits
Per serving (based on 16 bars), these Easy No-Bake Strawberry Cheesecake Flag Bars offer approximately:
| Calories | Fat | Carbohydrates | Protein |
|---|---|---|---|
| 220 kcal | 14g | 20g | 3g |
The fresh strawberries provide a good dose of vitamin C and antioxidants, while the cream cheese adds calcium and protein. Though this is a treat, it’s made from real-food ingredients without artificial additives or preservatives. For those watching carbs, the crust can be modified with almond flour, and sugar amounts adjusted to taste.
From a personal wellness perspective, I appreciate how this dessert balances indulgence with freshness—no heavy, overly sweet layers here, just bright berry flavor and creamy texture. It’s a dessert that feels like summer without the sugar overload.
Conclusion
Easy No-Bake Strawberry Cheesecake Flag Bars have earned a permanent spot in my summer dessert rotation. They’re simple, colorful, and hit that sweet spot of creamy and fruity without any oven hassle. Whether you’re throwing a casual barbecue or just craving something fresh and satisfying, these bars are a no-fuss crowd-pleaser that you can customize however you like.
I love how they bring a little festive flair without any stress, and the fact that you can make them ahead means more time to enjoy the party (or relax after a busy day). Try tweaking the topping or crust to suit your taste, and don’t be shy about making this recipe your own. If you’ve enjoyed desserts like the decadent triple chocolate fudge brownie cookies, you’ll find this strawberry cheesecake bars recipe just as rewarding in its own light, refreshing way.
Feel free to share your tweaks or questions below—I’m always excited to hear how you make this recipe your own. Here’s to sweet summer moments made simple.
Frequently Asked Questions
Can I use frozen strawberries for the topping?
Yes, but thaw and drain them well before using to avoid excess liquid that can make the bars soggy.
How long can I store the bars in the refrigerator?
They keep well for up to 4 days when stored in an airtight container.
Can I make these bars ahead of time?
Absolutely! In fact, chilling them overnight helps the layers set perfectly and flavors meld beautifully.
Is there a way to make the crust gluten-free?
Yes, substitute graham crackers with almond flour or gluten-free cookie crumbs in the same amount.
Can I add other fruits besides strawberries?
Definitely! Blueberries, raspberries, or a mixed berry blend work wonderfully for a colorful twist.
Pin This Recipe!
Easy No-Bake Strawberry Cheesecake Flag Bars
A quick and easy no-bake dessert featuring a buttery graham cracker crust, creamy cheesecake layer, and fresh strawberry topping, perfect for summer parties and patriotic celebrations.
- Prep Time: 25 minutes
- Cook Time: 0 minutes
- Total Time: 4 hours 25 minutes
- Yield: 12-16 servings 1x
- Category: Dessert
- Cuisine: American
Ingredients
- 1 ½ cups graham cracker crumbs (about 10–12 full sheets, finely crushed)
- 6 tablespoons unsalted butter, melted
- 2 tablespoons granulated sugar
- 16 ounces (450g) cream cheese, softened
- ½ cup powdered sugar, sifted
- 1 teaspoon vanilla extract
- 1 cup heavy whipping cream, cold
- 2 cups fresh strawberries, hulled and sliced
- 2 tablespoons granulated sugar
- 1 tablespoon fresh lemon juice
Instructions
- Crush the graham crackers finely using a food processor or by placing them in a zip-top bag and rolling with a rolling pin.
- In a medium bowl, combine the graham cracker crumbs, melted butter, and 2 tablespoons granulated sugar. Stir until the mixture resembles wet sand.
- Transfer the crust mixture into a 9×13 inch pan. Press firmly and evenly into the bottom of the pan using the bottom of a measuring cup or your fingers. Refrigerate to chill while preparing the filling.
- In a large bowl, beat the softened cream cheese with an electric mixer until smooth and creamy, about 2-3 minutes.
- Add the powdered sugar and vanilla extract to the cream cheese and beat until fully combined.
- In a separate chilled bowl, whip the heavy cream until stiff peaks form, about 3-5 minutes on medium speed.
- Gently fold the whipped cream into the cream cheese mixture using slow, sweeping motions to keep it light and airy.
- Spread the cheesecake layer evenly over the chilled crust, smoothing the top with a spatula.
- In a small bowl, toss the sliced strawberries with 2 tablespoons granulated sugar and fresh lemon juice. Let sit for about 10 minutes to macerate.
- Spoon the strawberry mixture evenly over the cheesecake layer, spreading gently to cover the surface.
- Cover the pan with plastic wrap and refrigerate for at least 4 hours or overnight until firm.
- Slice into 12-16 squares and serve chilled. For clean cuts, wipe your knife with a warm, damp cloth between slices.
Notes
Use room temperature cream cheese for smooth texture. Chill mixing bowl and beaters for faster whipping of cream. Macerate strawberries to enhance flavor and reduce excess liquid. Press crust firmly to prevent crumbling. Use a sharp knife wiped between cuts for clean slices. Overnight chilling is best for firm bars. Frozen strawberries can be used if thawed and drained well.
Nutrition
- Serving Size: 1 bar (if sliced int
- Calories: 220
- Fat: 14
- Carbohydrates: 20
- Protein: 3
Keywords: no-bake, strawberry cheesecake, flag bars, summer dessert, easy dessert, patriotic dessert, no oven dessert, cheesecake bars


