My sister did not trust pumpkin in a cookie bar. She said it sounded like “eating a soggy spice candle” and refused to try the first batch I made last October. Honestly, I could not blame her. I had spent years perfecting my regular sugar cookie bars—the ones with the thick, glossy frosting that crackles when you cut into them—and pumpkin felt like a gamble. But I had this can of pumpkin puree sitting on my counter, leftover from a batch of cozy pumpkin cinnamon rolls with brown butter icing I made for a chilly Sunday morning, and I could not let it go to waste. So I tucked it into my go-to sugar cookie base, crossed my fingers, and hoped for the best.
The first bite was quiet. No dramatic sighs or eye-rolling. Just her chewing, then looking at the bar, then taking another bite. “Okay,” she said, like she was admitting defeat. “These are not a candle.” That was the moment I knew I had something worth keeping. The pumpkin does not make them heavy or wet—it makes them impossibly soft, like a cloud with a little crumb. The spices warm through the butter and sugar without screaming “pumpkin spice everything.” And the icing? It sets up firm enough to stack but stays creamy on the inside, the way good frosting should. I have made these bars four times since that first batch, tweaking the flour ratio and the spice blend until the texture felt just right. Now I make them every time the leaves start turning, and I have stopped apologizing for how many I eat straight from the pan.
Why You’ll Love This Recipe
These iced pumpkin sugar cookie bars are the kind of dessert that makes people stop mid-conversation and ask for the recipe. I have tested this version more times than I care to admit, and here is what makes it stand out from every other pumpkin bar you have tried:
- One-Bowl Wonder : No stand mixer required. You can whisk everything by hand in a single bowl, which means less cleanup and more time for licking the spatula.
- Perfectly Soft, Never Cakey : These bars have that dense, chewy sugar cookie texture—not a fluffy cake bar. The pumpkin adds moisture without making them gummy.
- No Chilling Required : Unlike traditional cut-out sugar cookies that need hours in the fridge, these bars go from bowl to oven in under 15 minutes. That is my kind of baking.
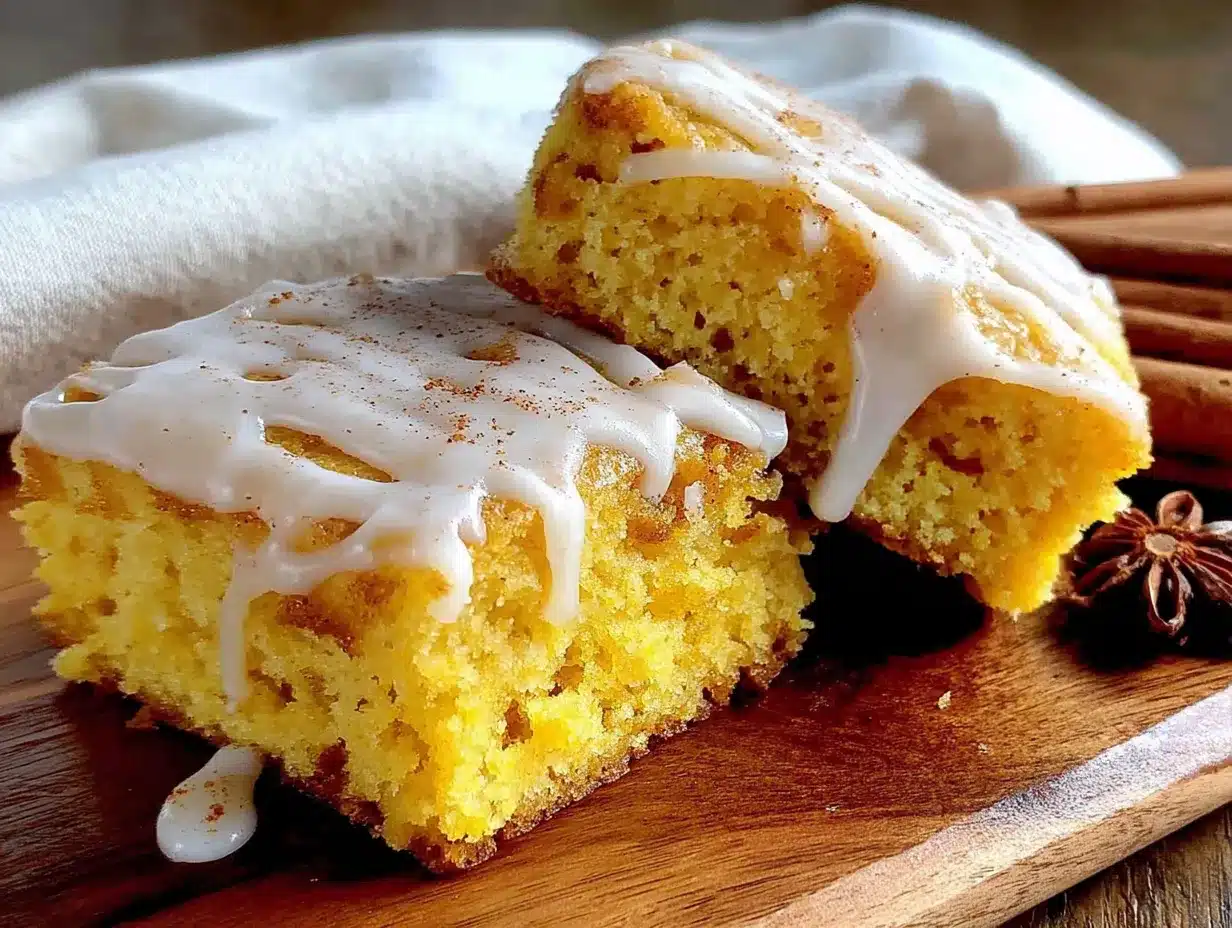
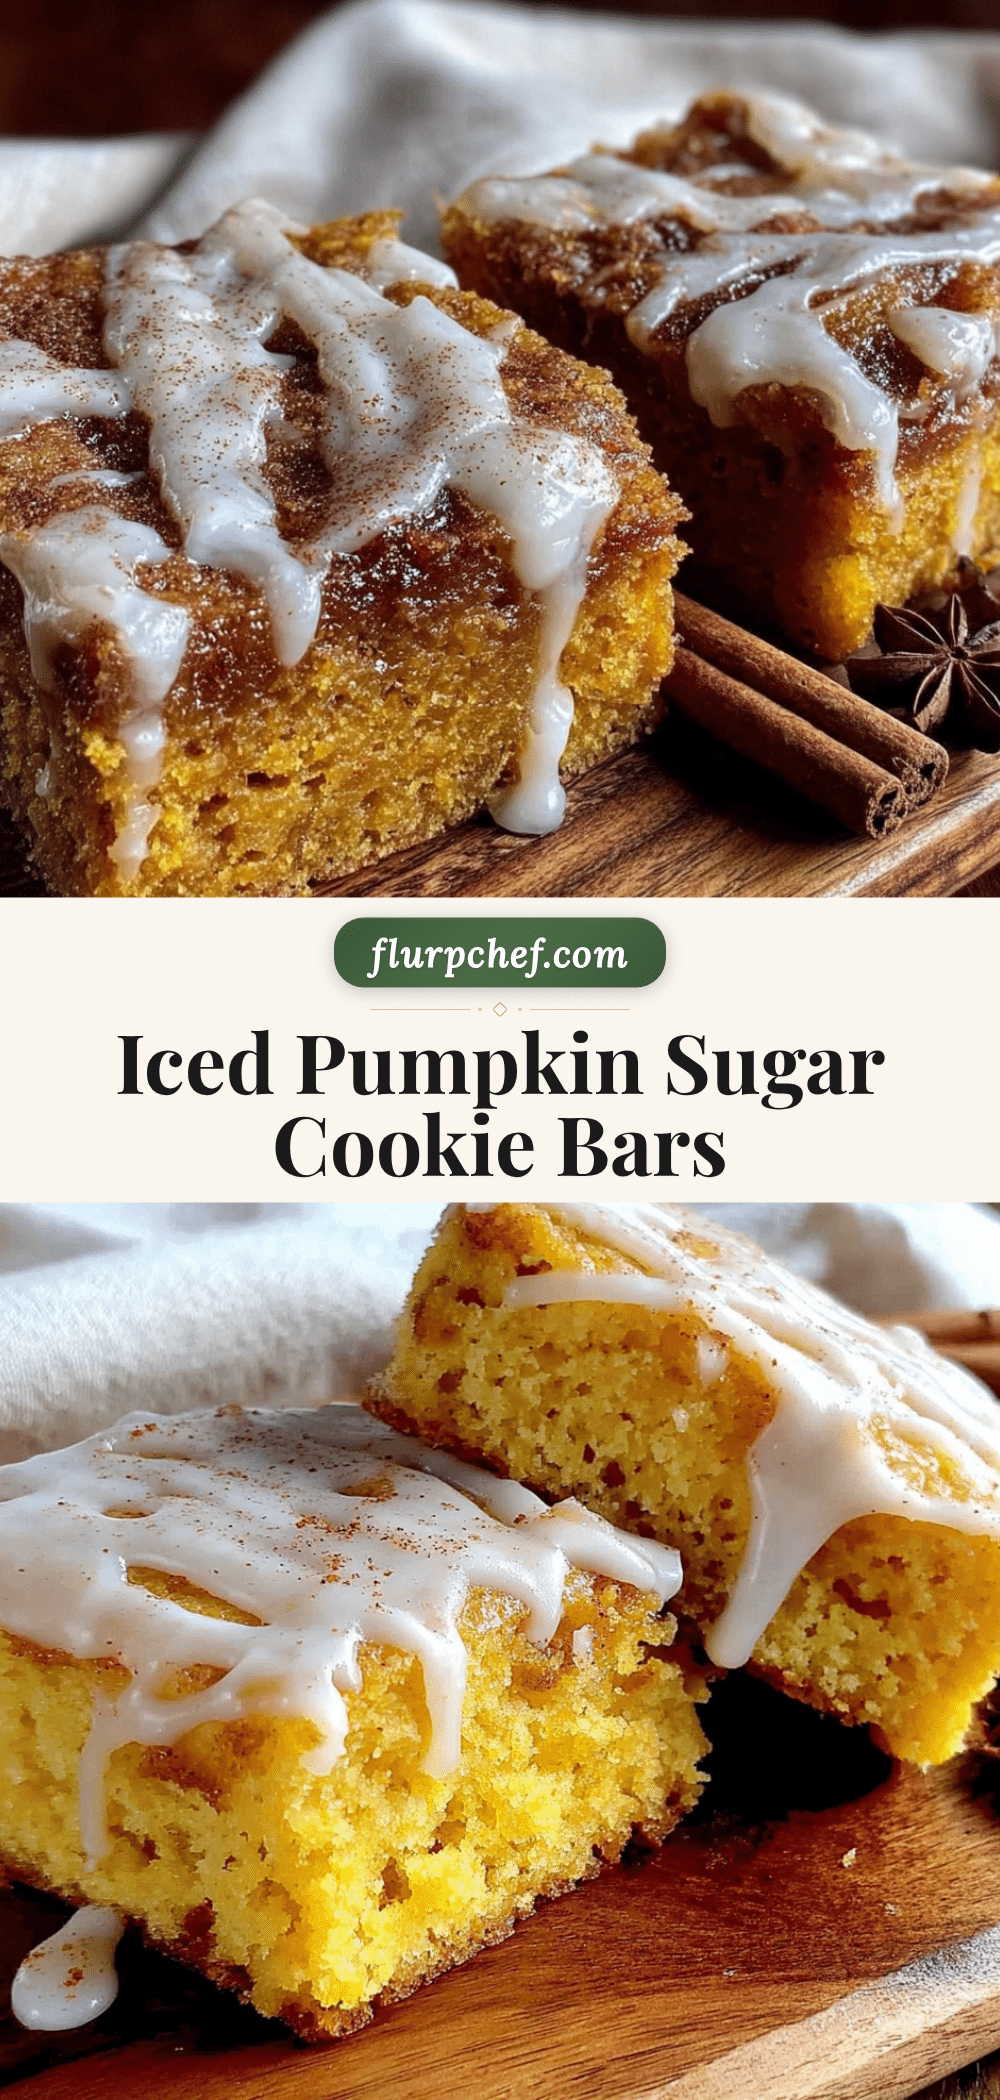
- The Icing Sets Like Magic : The simple powdered sugar glaze hardens just enough on top to give you that satisfying crackle when you bite in, but stays soft underneath.
- Pumpkin Flavor Done Right : Warm cinnamon, nutmeg, and ginger blend with real pumpkin puree—not artificial syrup—for a taste that feels like fall without being overwhelming.
- Crowd-Pleasing Size : One batch makes a full 9×13 pan, perfect for potlucks, Thanksgiving dessert tables, or stashing in the freezer for when you need a little seasonal comfort.
These bars are different because they treat pumpkin as a texture booster, not just a flavor gimmick. The puree keeps the bars soft for days—honestly, they taste better on day two—while the spice blend stays subtle enough that even people who claim they “do not like pumpkin desserts” will reach for a second one. My sister is living proof.
What Ingredients You Will Need
This recipe uses simple, pantry-friendly ingredients to create something that tastes far more complicated than it is. Here is everything you need and why each one matters:
- Unsalted butter, softened (1 cup / 2 sticks): Butter gives these bars their rich flavor and tender crumb. I always use unsalted so I can control the salt level. Let it sit out for about 30 minutes before starting—it should yield when you press it with your finger.
- Granulated sugar (1 ½ cups): Sugar does more than sweeten here. It helps create that crackly top and keeps the bars moist. Do not reduce the amount or the texture will suffer.
- Large egg (1): One egg binds everything together without making the bars too eggy or dense. Let it come to room temperature alongside the butter.
- Pumpkin puree (¾ cup): Use 100% pure pumpkin, not pumpkin pie filling. I prefer Libby’s brand for its consistent thickness and smooth texture. The puree adds moisture and a subtle earthy sweetness that plays beautifully with the spices.
- Vanilla extract (2 teaspoons): Pure vanilla extract adds depth. Skip the imitation stuff here—it makes a noticeable difference in the final flavor.
- All-purpose flour (2 ½ cups): Standard all-purpose flour gives these bars the perfect structure. Spoon and level your flour—do not scoop directly from the bag or you will pack in too much and end up with dry bars.
- Baking powder (1 teaspoon): This gives the bars a slight lift without making them puffy. We want a dense cookie texture, not a cake.
- Salt (½ teaspoon): Salt balances the sweetness and enhances the warm spices. Do not skip it.
- Ground cinnamon (2 teaspoons): The backbone of the spice blend. Use a fresh jar for the best flavor—old cinnamon tastes flat.
- Ground nutmeg (½ teaspoon): Adds a warm, slightly sweet note. Freshly grated nutmeg takes this to another level if you have it.
- Ground ginger (½ teaspoon): A little kick of warmth that keeps the bars from tasting one-dimensional.
- Ground cloves (¼ teaspoon): Just a pinch for depth. Cloves are strong, so do not overdo it.
For the Icing:
- Powdered sugar (2 cups): Sifted to remove lumps. This creates a smooth, spreadable glaze that sets firm on top.
- Milk (3-4 tablespoons): Whole milk gives the richest texture, but any milk works. Add it gradually until the icing reaches a thick but pourable consistency.
- Vanilla extract (½ teaspoon): A little extra vanilla in the icing ties everything together.
Equipment Needed
You do not need fancy equipment for these bars, which is part of why I love them. Here is what you will need:
- 9×13-inch baking pan : Metal pans work best for even browning. Glass pans work too, but they tend to hold heat longer, so your bars may continue baking after you pull them out. Line it with parchment paper for easy lifting.
- Large mixing bowl : Any large bowl works. I use a ceramic one because it does not slide around on the counter.
- Whisk or electric hand mixer : You can do this entirely by hand with a whisk and some elbow grease. An electric mixer makes it faster but is not necessary.
- Rubber spatula : For scraping down the sides of the bowl and spreading the batter evenly into the pan.
- Measuring cups and spoons : Accurate measurements matter in baking. Use dry measuring cups for flour and sugar, and liquid measuring cups for the pumpkin and milk.
- Parchment paper : This is non-negotiable for easy removal. Let the edges hang over the sides of the pan like handles.
- Cooling rack : Allows air to circulate underneath the bars so they cool evenly. If you ice them while they are still warm, the icing will melt into a puddle.
- Offset spatula or butter knife : For spreading the icing in an even layer. An offset spatula gives you more control, but a regular knife works fine.
Preparation Method
Let me walk you through this step by step. I have included all the little details I wish someone had told me the first time I made these.
- Preheat and prep your pan. Set your oven to 350°F (175°C). Line your 9×13-inch baking pan with parchment paper, leaving a few inches of overhang on the long sides. This creates handles that let you lift the entire slab of bars out later. Lightly grease the parchment with butter or nonstick spray.
- Cream the butter and sugar. In your large mixing bowl, beat the softened butter and granulated sugar together until light and fluffy, about 2-3 minutes if using an electric mixer, or 4-5 minutes by hand. You want the mixture to look pale and slightly aerated. Scrape down the sides of the bowl halfway through. Do not rush this step—proper creaming creates the tender texture we are after.
- Add the wet ingredients. Beat in the egg, pumpkin puree, and vanilla extract until fully combined. The mixture will look a little curdled or separated at this point—that is normal. The pumpkin and butter do not always want to cooperate, but the flour will bring everything together in the next step. Do not panic if it looks weird.
- Mix the dry ingredients separately. In a separate medium bowl, whisk together the flour, baking powder, salt, cinnamon, nutmeg, ginger, and cloves. Whisking ensures the spices and leavening are evenly distributed so you do not end up with one bar that tastes like straight cloves and another with no spice at all.
- Combine wet and dry. Gradually add the dry ingredients to the wet mixture, stirring gently with your rubber spatula or mixing on low speed. Stop as soon as the flour disappears. Overmixing develops gluten, which makes the bars tough. A few streaks of flour are fine—fold them in by hand.
- Spread the batter. Transfer the dough to your prepared pan. It will be thick and slightly sticky—do not try to pour it. Use your spatula to spread it evenly into the corners. Wet your spatula slightly if the dough sticks. Aim for an even layer about ½ inch thick. The batter will not fill the entire pan completely; it should spread to the edges but look thin. Trust the process—it rises.
- Bake until golden. Bake for 18-22 minutes, rotating the pan halfway through. The bars are done when the edges are lightly golden and a toothpick inserted into the center comes out clean or with a few moist crumbs. Do not overbake. The center should feel set but still soft when you press it gently. Overbaked bars lose that signature chewiness.
- Cool completely. Let the bars cool in the pan on a wire rack for about 10 minutes, then lift them out using the parchment handles and transfer to the rack to cool completely. This is crucial—if you ice them while they are still warm, the icing will melt and soak into the bars. Patience here pays off. I usually wait at least 45 minutes to an hour.
- Make the icing. In a small bowl, whisk together the sifted powdered sugar, 3 tablespoons of milk, and vanilla extract. Whisk until smooth. The icing should be thick but spreadable—if it is too thick, add more milk one teaspoon at a time. If it is too thin, add a little more powdered sugar. You want it to hold its shape when you drizzle it but still spread easily.
- Ice and set. Pour the icing over the cooled bars and spread it evenly with your offset spatula. Let the icing set for at least 30 minutes before cutting. The top will firm up into that beautiful crackly shell while staying soft underneath. For clean slices, use a sharp knife and wipe it clean between cuts.
Cooking Tips & Techniques
I have made these bars enough times to learn what can go wrong and how to fix it. Here are the things I wish I had known from the start:
Do not overmix the dough. This is the most common mistake. When you combine the wet and dry ingredients, mix just until the flour disappears. A few streaks are fine. Overmixing develops gluten and turns your tender cookie bars into hockey pucks. I learned this the hard way when I made a batch for a friend’s Halloween party and they came out dense and tough.
Check your pumpkin puree. Some brands of pumpkin puree are more watery than others. If your puree looks thin or has liquid pooling on top, blot it with a paper towel before adding it to the batter. Too much moisture will make the bars soggy and prevent them from setting properly. Libby’s is consistently thick, but store brands vary.
Room temperature ingredients matter. Cold butter does not cream properly with sugar, and cold egg can make the batter seize up. Take your butter and egg out of the fridge about 30 minutes before you start. If you forget, you can microwave the butter in 5-second bursts until it is soft but not melted, and place the egg in a bowl of warm water for 5 minutes.
Use the toothpick test wisely. These bars are meant to be soft and chewy, so do not wait for a completely clean toothpick. A few moist crumbs clinging to the toothpick means they are done. If the toothpick comes out completely clean, you have likely overbaked them.
Let them cool completely. I know it is tempting to rush this step, especially when your kitchen smells like fall and you want to dig in. But warm bars + icing = a melty mess. I once iced a batch after only 20 minutes of cooling and ended up with a pan of pumpkin-flavored soup. Give them the full hour.
Cut with a wet knife. For the cleanest slices, run your knife under hot water and dry it off between each cut. The heat helps the knife glide through the icing without dragging or cracking it.
Variations & Adaptations
One of the best things about this recipe is how easy it is to adapt. Here are some variations I have tried and loved:
Gluten-Free Version : Substitute the all-purpose flour with a 1:1 gluten-free baking flour blend that contains xanthan gum. I have used Bob’s Red Mill 1-to-1 Baking Flour with great results. The texture is slightly more tender, but the bars hold together beautifully. Do not use almond flour or coconut flour—they will not work here.
Dairy-Free Option : Swap the butter with a high-quality vegan butter stick (not margarine spread). I like Miyoko’s or Country Crock Plant Butter. Use oat milk or almond milk in the icing instead of dairy milk. The bars will be slightly less rich but still delicious.
Spice It Up : If you love a bolder pumpkin spice flavor, add ½ teaspoon of cardamom and a pinch of allspice to the flour mixture. I tried this for a Thanksgiving dessert table and got rave reviews. You can also swap the ground ginger for fresh grated ginger for a sharper kick.
Add Mix-Ins : Fold in ½ cup of white chocolate chips, chopped pecans, or dried cranberries before spreading the batter into the pan. White chocolate and pumpkin are a match made in heaven. I made a batch with toasted pecans and white chocolate chips for a fall potluck and they disappeared in minutes.
Make It a Layer Bar : Spread a thin layer of cream cheese frosting under the icing for extra richness. Beat 4 ounces of softened cream cheese with 2 tablespoons of butter, 1 cup of powdered sugar, and ½ teaspoon of vanilla. Spread it over the cooled bars, then add the vanilla icing on top. This turns them into something truly decadent.
Pumpkin Chocolate Chip Version : Fold in ½ cup of semi-sweet chocolate chips before baking. The chocolate pairs surprisingly well with the warm spices. My nephew refuses to eat them any other way now.
Serving & Storage Suggestions
These bars are incredibly versatile when it comes to serving. Here is how I like to enjoy them:
Serving Temperature : Serve at room temperature for the best texture. The bars are soft and chewy, and the icing has that perfect crackly top. If you refrigerate them, let them sit out for about 15 minutes before serving so the icing softens slightly.
Presentation Ideas : Cut into squares or rectangles and arrange on a rustic wooden board or a white platter. Dust with a pinch of cinnamon or a light sprinkle of flaky sea salt right before serving—the salt cuts through the sweetness beautifully. For holidays, cut them into smaller bite-sized pieces and serve on a dessert tray alongside cozy brown butter pumpkin snickerdoodle cookies for a full pumpkin spread.
Pairings : These bars are wonderful with a hot cup of coffee, a chai latte, or a glass of cold milk. For a dessert board, pair them with apple slices, sharp cheddar cheese, and a drizzle of caramel sauce. The sweet and savory combo is unexpected but fantastic.
Storage : Store the bars in an airtight container at room temperature for up to 4 days. Layer them between sheets of parchment paper to prevent the icing from sticking. Do not stack them too high or the bottom bars will get squished.
Freezing Instructions : These bars freeze beautifully. Freeze them un-iced for up to 3 months. Wrap the entire slab tightly in plastic wrap, then in aluminum foil. When you are ready to serve, thaw at room temperature, then make the icing and spread it on. You can also freeze iced bars, but the icing may lose some of its crackly texture. If you do freeze iced bars, place them in a single layer in a freezer-safe container with parchment between layers.
Flavor Development : Honestly, these bars taste even better on day two. The spices have time to meld with the pumpkin, and the texture softens slightly. I often make them a day ahead when I am serving them for a gathering.
Nutritional Information & Benefits
While these are definitely a treat, they do offer a few nutritional perks thanks to the pumpkin:
Estimated Nutritional Values (per bar, based on 24 servings):
- Calories: 185
- Total Fat: 8g
- Saturated Fat: 5g
- Carbohydrates: 28g
- Sugar: 18g
- Protein: 2g
- Fiber: 1g
- Sodium: 95mg
Health Benefits of Pumpkin: Pumpkin puree is packed with vitamin A (beta-carotene), which supports eye health and immune function. It also provides fiber, which helps with digestion and keeps you feeling full. Each bar contains about a tablespoon of pumpkin, so the nutritional boost is modest but real.
Dietary Considerations: This recipe is vegetarian. For a gluten-free version, use a 1:1 gluten-free flour blend. For a dairy-free version, use vegan butter and plant-based milk. The recipe is naturally nut-free if you skip the optional mix-ins.
Potential Allergens: Contains wheat (gluten), dairy, and eggs. Check your spice blends for any hidden additives if you have sensitivities.
My Personal Take: I do not pretend these are health food. But I love that I can make a dessert that feels indulgent while sneaking in a vegetable that my kids actually enjoy. It is comfort food with a tiny bit of redemption.
Conclusion
These iced pumpkin sugar cookie bars have become my go-to fall dessert for good reason. They are easy enough for a Tuesday night baking session but impressive enough for a holiday dessert table. The texture is that perfect balance of soft and chewy, the spice blend is warm without being aggressive, and the icing adds just the right amount of sweetness. Plus, they make your kitchen smell like autumn in the best possible way.
I love that this recipe is forgiving enough for beginner bakers but rewarding enough for experienced ones. You can keep it simple or dress it up with mix-ins and variations. And honestly, the fact that they taste even better the next day means you can make them ahead and actually enjoy your own party.
If you give these a try, I would love to hear how they turn out. Leave a comment below and let me know if you added any fun mix-ins or if you served them at a gathering. And if you are looking for more cozy fall recipes, check out our salted caramel apple blondie bars with oat crumble topping for another seasonal favorite. Happy baking, friends—may your kitchen smell like cinnamon and your cookie bars be perfectly soft.
Frequently Asked Questions
Can I use pumpkin pie filling instead of pumpkin puree?
No, please do not. Pumpkin pie filling is pre-sweetened and contains added spices and thickeners. Using it will throw off the sugar and spice balance in this recipe and make the bars overly sweet and dense. Always use 100% pure pumpkin puree for best results.
Why did my bars turn out dry?
Dry bars usually mean one of three things: you overmeasured the flour, you overbaked them, or you used a watery pumpkin puree without blotting it. Spoon and level your flour, pull the bars out of the oven when a toothpick comes out with a few moist crumbs, and blot your pumpkin puree if it looks thin.
Can I make these bars ahead of time?
Absolutely. You can bake the bars a day ahead and store them uncovered at room temperature. Make the icing and spread it on the day you plan to serve them for the best texture. You can also freeze the un-iced bars for up to 3 months.
How do I get clean cuts without the icing cracking?
Use a sharp chef’s knife and run it under hot water before each cut. Dry the knife off, make one clean cut, then rinse and repeat. The heat helps the knife glide through the icing without dragging or cracking it. Wipe the blade clean between cuts for the neatest edges.
Can I use a different size pan?
You can use an 8×8-inch pan for thicker bars, but you will need to increase the baking time by about 5-8 minutes and check for doneness with a toothpick. A 9×13-inch pan gives you the ideal thickness for that perfect cookie-to-icing ratio. If you use a smaller pan, the bars will be thicker and may need more time in the oven.
Pin This Recipe!
Best Easy Iced Pumpkin Sugar Cookie Bars Recipe
These iced pumpkin sugar cookie bars are impossibly soft, perfectly spiced, and topped with a crackly vanilla icing. They come together in one bowl with no chilling required, making them the ultimate easy fall dessert.
- Prep Time: 15 minutes
- Cook Time: 20 minutes
- Total Time: 1 hour 35 minutes (includes cooling and setting time)
- Yield: 24 servings 1x
- Category: Dessert
- Cuisine: American
Ingredients
- 1 cup (2 sticks) unsalted butter, softened
- 1 ½ cups granulated sugar
- 1 large egg, room temperature
- ¾ cup pumpkin puree (100% pure, not pie filling)
- 2 teaspoons vanilla extract
- 2 ½ cups all-purpose flour, spooned and leveled
- 1 teaspoon baking powder
- ½ teaspoon salt
- 2 teaspoons ground cinnamon
- ½ teaspoon ground nutmeg
- ½ teaspoon ground ginger
- ¼ teaspoon ground cloves
- 2 cups powdered sugar, sifted
- 3–4 tablespoons milk (whole milk preferred)
- ½ teaspoon vanilla extract
Instructions
- Preheat oven to 350°F (175°C). Line a 9×13-inch baking pan with parchment paper, leaving overhang on the long sides. Lightly grease the parchment.
- In a large mixing bowl, beat the softened butter and granulated sugar together until light and fluffy, about 2-3 minutes with an electric mixer or 4-5 minutes by hand.
- Beat in the egg, pumpkin puree, and vanilla extract until fully combined. The mixture may look curdled; this is normal.
- In a separate medium bowl, whisk together the flour, baking powder, salt, cinnamon, nutmeg, ginger, and cloves.
- Gradually add the dry ingredients to the wet mixture, stirring gently until just combined. Do not overmix.
- Transfer the dough to the prepared pan and spread evenly with a spatula. The batter will be thick and slightly sticky.
- Bake for 18-22 minutes, rotating the pan halfway through, until edges are lightly golden and a toothpick inserted in the center comes out with a few moist crumbs.
- Cool in the pan on a wire rack for 10 minutes, then lift out using parchment handles and cool completely on the rack (about 45 minutes to 1 hour).
- For the icing: In a small bowl, whisk together sifted powdered sugar, 3 tablespoons milk, and ½ teaspoon vanilla until smooth. Add more milk if needed to reach a thick but spreadable consistency.
- Pour the icing over the cooled bars and spread evenly. Let set for at least 30 minutes before cutting into squares.
Notes
Do not overmix the dough. Check pumpkin puree for excess water; blot if needed. Room temperature ingredients matter. Use the toothpick test wisely—a few moist crumbs means done. Cool completely before icing. For clean cuts, use a hot, wet knife.
Nutrition
- Serving Size: 1 bar
- Calories: 185
- Sugar: 18
- Sodium: 95
- Fat: 8
- Saturated Fat: 5
- Carbohydrates: 28
- Fiber: 1
- Protein: 2
Keywords: pumpkin sugar cookie bars, iced pumpkin bars, easy pumpkin dessert, fall cookie bars, pumpkin bars with icing