“Hey, you’ve got to try this,” my neighbor texted me one sweltering afternoon. I was already knee-deep in trying to keep cool with the AC blasting, and the idea of a frozen treat was suddenly the only thing on my mind. She swore by these Easy Creamy Frozen Strawberry Crunch Bars, claiming they were the perfect antidote to the relentless heat. Honestly, I was skeptical—how could something that simple actually hit the spot? But after the first bite, that creamy, slightly tangy strawberry layer combined with the satisfying crunch beneath made me pause mid-chew and admit defeat.
There’s something about this recipe that feels effortless but ends up delivering a cool, refreshing punch exactly when you need it. It’s not just a frozen dessert; it’s that little moment of calm and sweetness that turns a chaotic summer afternoon into something a bit more manageable. Plus, it’s simple enough that I found myself making these bars multiple times in the same week, tweaking and perfecting them (okay, mostly eating them). It’s kind of funny how a quick text led me to what’s now a staple summer treat in my freezer.
What stuck with me is how this recipe marries creamy texture with a crisp crust in a way that feels both nostalgic and fresh. It’s the kind of dessert that doesn’t overcomplicate things but still manages to impress anyone who tries it—whether you’re serving it at a backyard barbecue or just sneaking a bar after dinner, alone and enjoying the quiet. If you’ve been hunting for an easy recipe that’s just as good to make as it is to eat, this might be your new go-to.
Why You’ll Love This Recipe
After testing out quite a few frozen desserts, I can say the Easy Creamy Frozen Strawberry Crunch Bars truly stand out. This isn’t your typical ice cream bar or a plain frozen yogurt treat — it strikes a perfect balance between creamy, fruity, and crunchy that keeps you coming back for more.
- Quick & Easy: Ready in under 30 minutes, with freezing time aside. Great for when you want a fuss-free way to cool down.
- Simple Ingredients: Uses everyday pantry staples and fresh or frozen strawberries, so no last-minute grocery runs.
- Perfect for Summer Gatherings: Whether it’s a casual weekend hangout or a bigger get-together, these bars impress without stress.
- Crowd-Pleaser: Kids love the crunch, adults appreciate the fresh fruit flavor and subtle creaminess—everyone’s happy.
- Unbelievably Delicious: The creamy strawberry layer isn’t too sweet, and that buttery crunch on the bottom adds a texture contrast that’s just right.
What makes these bars different? Instead of drowning strawberries in sugar or artificial flavors, this recipe keeps it real with fresh fruit and a smooth, creamy base that’s light but indulgent. The crust is a simple mix of crushed cereal and butter, which creates a satisfyingly crispy layer without being heavy or greasy. Plus, it’s easily adaptable if you want to swap in gluten-free ingredients or add a little twist, so it’s not just a one-trick pony.
Honestly, it’s the kind of recipe that made me close my eyes after the first bite, realizing summer treats don’t have to be complicated or loaded with sugar to feel like a special moment. If you want a dessert that’s both refreshing and comforting, this is it.
What Ingredients You Will Need
This recipe calls for simple, wholesome ingredients that come together to create that perfect combination of creamy strawberry goodness and crunchy base. Most of these are pantry staples, with a few fresh or frozen items depending on the season.
- For the Crust:
- 1 ½ cups crispy rice cereal (I prefer Kellogg’s Rice Krispies for the best crunch)
- 5 tablespoons unsalted butter, melted (adds richness and helps bind the crust)
- 2 tablespoons granulated sugar (balances the butter’s flavor)
- For the Creamy Strawberry Layer:
- 2 cups fresh or frozen strawberries, hulled and chopped (fresh in summer, frozen works great year-round)
- 1 cup cream cheese, softened (for that creamy texture)
- ½ cup sweetened condensed milk (adds sweetness and creaminess)
- 1 teaspoon vanilla extract (boosts the strawberry flavor)
- 1 tablespoon lemon juice (brightens the overall taste)
- ¼ cup powdered sugar (to taste, depending on the sweetness of your strawberries)
Ingredient Tips: If you want to keep things dairy-free, swap cream cheese with a plant-based alternative and use coconut condensed milk. For a gluten-free option, ensure the rice cereal is certified gluten-free or substitute with crushed gluten-free cornflakes.
In the colder months, I sometimes replace strawberries with frozen raspberries or blueberries, which gives a nice twist while keeping the same creamy and crunchy vibe. The key is to keep the fruit fresh or properly thawed to avoid excess water in the creamy layer.
Equipment Needed
- 8×8-inch square baking pan (glass or metal works fine; I like glass because I can see the layers)
- Mixing bowls – one for the crust, one for the creamy strawberry layer
- Hand mixer or stand mixer (helps get the cream cheese smooth, but a sturdy whisk can work in a pinch)
- Spatula for spreading the creamy layer evenly
- Food processor or blender (optional, if you want to puree strawberries for a smoother texture)
- Measuring cups and spoons
- Plastic wrap or foil for covering during freezing
If you don’t have a hand mixer, just make sure your cream cheese is really softened, and give it a good whisk by hand. The baking pan size is pretty flexible, but changing the size will affect the thickness and freezing time. I’ve also used a silicone pan, which makes removing the bars easier but isn’t necessary.
Preparation Method
- Prepare the crust: In a medium bowl, combine 1 ½ cups crispy rice cereal, melted butter, and granulated sugar. Stir well until the cereal is evenly coated. Press this mixture firmly and evenly into the bottom of your 8×8-inch pan. Use the back of a spoon or a flat-bottomed glass to compact it tightly. This step usually takes about 5 minutes.
- Chill the crust: Place the pan in the freezer while you prepare the creamy strawberry layer. This helps the crust set firmly and prevents it from mixing with the creamy layer later.
- Make the creamy strawberry layer: If you prefer a chunkier texture, roughly chop the strawberries; for smoother bars, puree them in a blender or food processor. In a mixing bowl, beat softened cream cheese with sweetened condensed milk until smooth and fluffy (about 2 minutes). Add vanilla extract, lemon juice, and powdered sugar. Mix again until fully combined.
- Fold in strawberries: Gently fold chopped or pureed strawberries into the cream cheese mixture. The goal is to have a creamy pink batter with bits of strawberry throughout. This should take about 3-4 minutes.
- Assemble the bars: Remove the crust from the freezer. Spread the creamy strawberry mixture evenly over the chilled crust, smoothing the top with a spatula. Make sure to get the edges nicely covered.
- Freeze: Cover the pan tightly with plastic wrap or foil. Freeze for at least 4 hours or overnight to allow the bars to set completely.
- Serve: Once frozen solid, remove the bars from the pan using the edges of the plastic wrap. Cut into 12 bars with a sharp knife (warm the knife under hot water and dry it for cleaner cuts). Enjoy immediately or keep frozen until ready to eat.
Pro tip: If your bars are too hard straight from the freezer, let them sit at room temperature for 5-10 minutes before slicing. This softens them just enough to cut without crumbling. Also, pressing the crust firmly is key—if it’s loose, the bars won’t hold up well when you serve.
Cooking Tips & Techniques
One of the trickiest parts is getting the crust just right. Too loose, and it falls apart; too thick, and it overwhelms the creamy strawberry layer. I learned to press it firmly but not pack it down like you’re making a cookie crust. Think “secure but airy.”
Using softened cream cheese is crucial. If it’s cold, the mixture won’t blend smoothly, and you’ll end up with lumps. I usually leave my cream cheese out for about 30 minutes before starting, which gives it the perfect texture.
When folding in the strawberries, be gentle. Overmixing can break down the fruit too much and turn your bars more pink than strawberry-studded. I like to keep some texture so every bite feels fresh.
Freezing time is another spot where patience pays off. Rushing this step means your bars won’t cut cleanly or hold their shape. I always plan ahead and freeze overnight if possible.
If you want to save time, you can blend the strawberries and add a bit of gelatin or agar powder to help firm the creamy layer, but honestly, it’s best to keep it simple and let the freezing do the work.
When slicing, warming your knife blade with hot water prevents sticking and messy edges. I learned that the hard way after a few crumbly first attempts!
Variations & Adaptations
- Dairy-Free & Vegan: Use vegan cream cheese and coconut condensed milk, and swap butter for coconut oil in the crust. The flavor is slightly different but just as satisfying.
- Mixed Berry Crunch Bars: Replace strawberries with a berry medley—blueberries, raspberries, and blackberries give a more complex tartness and color contrast.
- Chocolate Crunch Twist: Add 2 tablespoons of cocoa powder to the crust mix and sprinkle mini chocolate chips over the creamy layer before freezing for a chocolate-strawberry combo.
- Low-Sugar Option: Use a sugar substitute like erythritol or stevia in the crust and creamy layer. Fresh strawberries’ natural sweetness helps keep it tasty.
I once tried adding crushed graham crackers to the crust mix for a more buttery, cookie-like base. It worked well but made the bars a bit denser. For a lighter crunch, sticking to the crispy rice cereal is my favorite.
These bars can also be made in muffin tins for individual portions—just reduce freezing time slightly and watch them closely to avoid over-freezing.
Serving & Storage Suggestions
These bars are best served straight from the freezer, but letting them sit for 5 minutes softens the texture just enough. They pair beautifully with a tall glass of iced tea or a light lemonade for a refreshing summer combo.
If you’re serving them at a party, consider topping each bar with a fresh strawberry slice or a small dollop of whipped cream for extra flair. They also make a great ending to a casual dinner, balancing out heavier mains like the easy cheeseburger pie or the cozy single-serving casserole.
Store bars tightly wrapped or in an airtight container in the freezer for up to 2 weeks. They hold their texture well, but flavors deepen if left overnight. To reheat, just thaw a bar at room temperature for 10 minutes before serving.
Nutritional Information & Benefits
Each bar provides a good balance of creamy richness and fresh fruit nutrients. Strawberries add vitamin C and antioxidants while the cream cheese offers a source of calcium and protein. The cereal crust provides some carbohydrates but is relatively light compared to traditional cookie crusts.
Approximate nutrition per bar (recipe yields 12 bars):
| Calories | Fat | Carbohydrates | Protein | Sugar |
|---|---|---|---|---|
| 150 kcal | 8 g | 18 g | 3 g | 12 g |
For those mindful of allergens, this recipe contains dairy and gluten unless substitutions are made. It’s a treat that feels indulgent but isn’t overloaded with processed ingredients, fitting well into a balanced summer diet.
Conclusion
These Easy Creamy Frozen Strawberry Crunch Bars have become a go-to in my kitchen for any time I want a simple yet satisfying frozen treat. The combination of creamy filling and crunchy crust makes for a texture and flavor mix that’s hard to beat. Whether you’re feeding a crowd or just treating yourself, this recipe is flexible enough to suit your needs and preferences.
I love how it doesn’t demand fancy ingredients or complicated steps, which means it’s approachable whether you’re a seasoned cook or just looking for a no-fuss dessert. Don’t hesitate to tweak it—add your favorite berries, swap ingredients, or even pair it with a light meal like the quick honey soy glazed salmon for a full summer menu.
Give these bars a try and see how a simple recipe can become a favorite. I’d love to hear how you customize them, so feel free to share your thoughts and tweaks in the comments below. Here’s to cool, creamy, crunchy moments that make summer a little sweeter!
FAQs
Can I make these bars without an electric mixer?
Yes! Just make sure your cream cheese is very soft and use a sturdy whisk or spoon to mix until smooth. It might take a bit longer, but it works fine.
How long should I freeze the bars before serving?
At least 4 hours, but overnight freezing is best for a firm set and clean slicing.
Can I use frozen strawberries instead of fresh?
Absolutely. Just thaw and drain excess liquid to avoid a watery creamy layer.
What’s the best way to store leftover bars?
Keep them in an airtight container or wrapped well in the freezer for up to 2 weeks. Thaw slightly before eating.
Is there a way to make the crust gluten-free?
Yes, use gluten-free crispy rice cereal or substitute crushed gluten-free cornflakes for the crust.
Pin This Recipe!
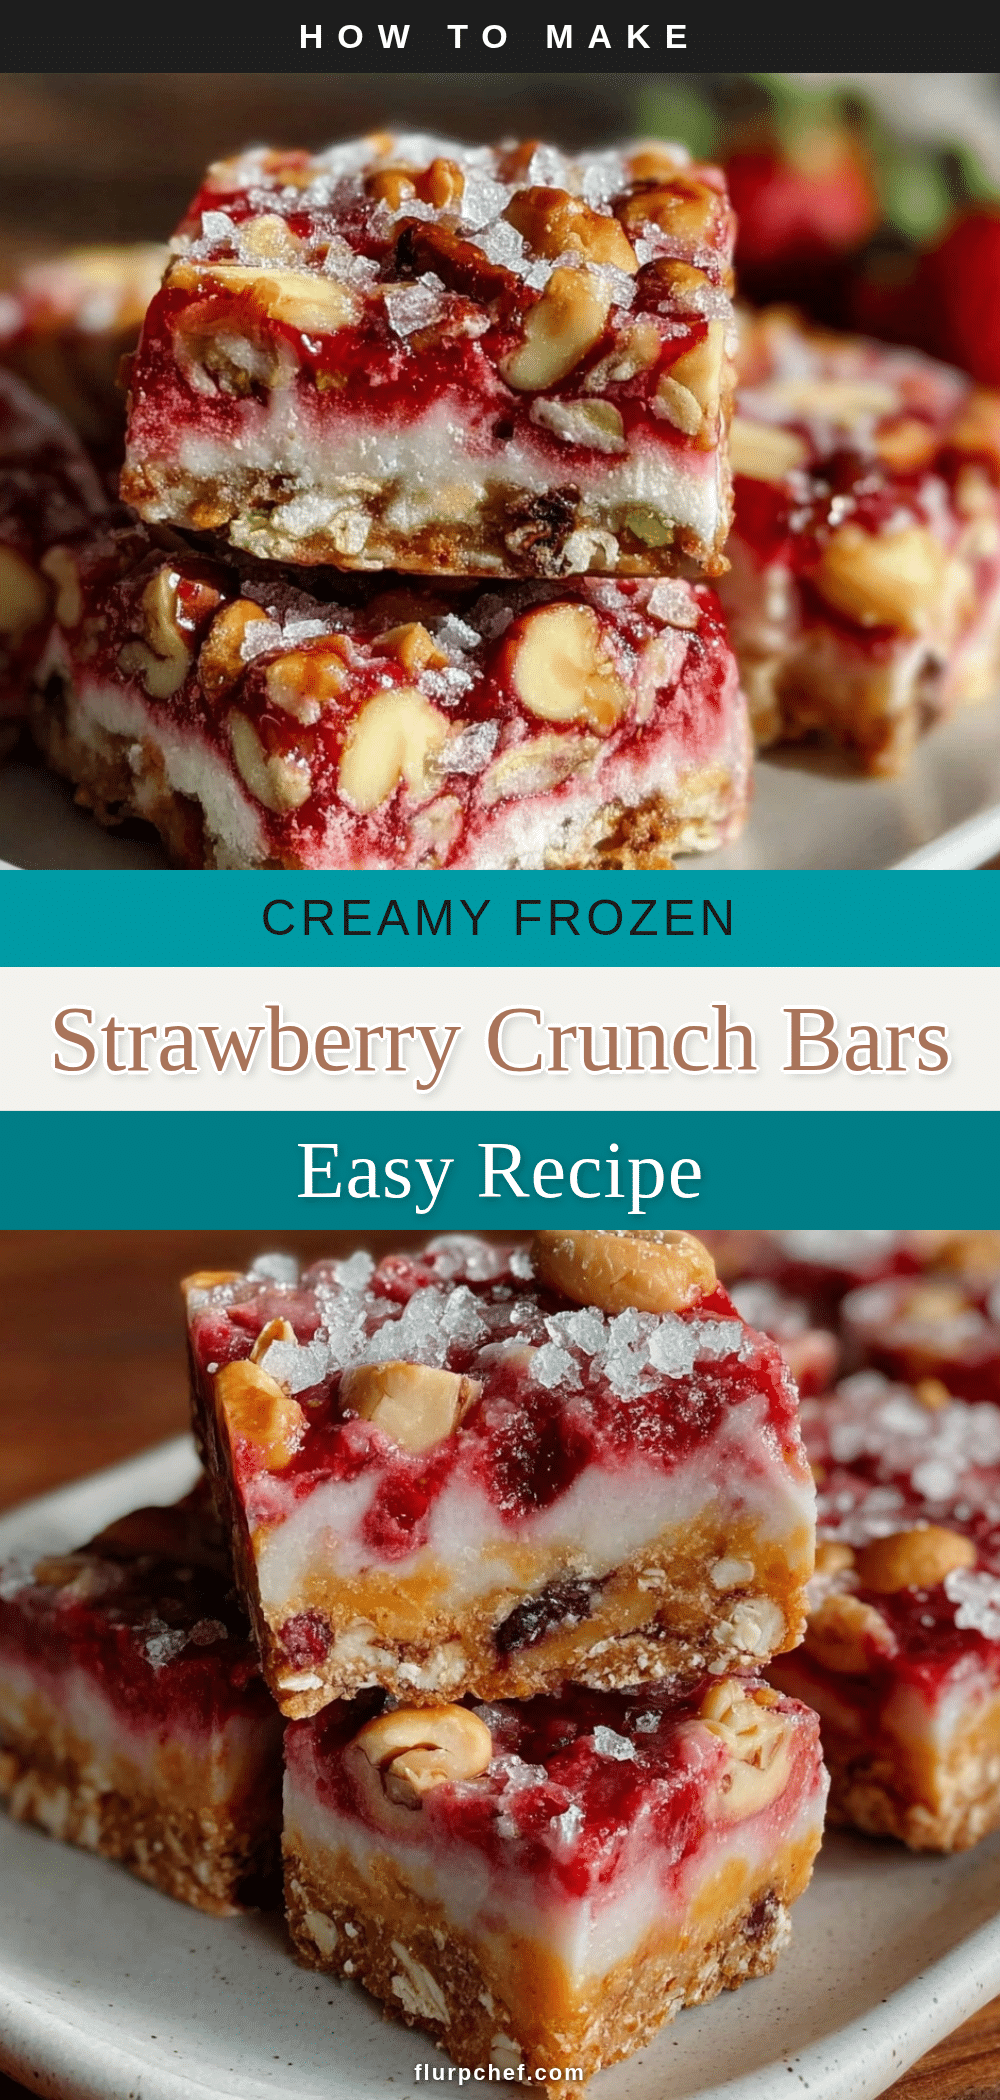
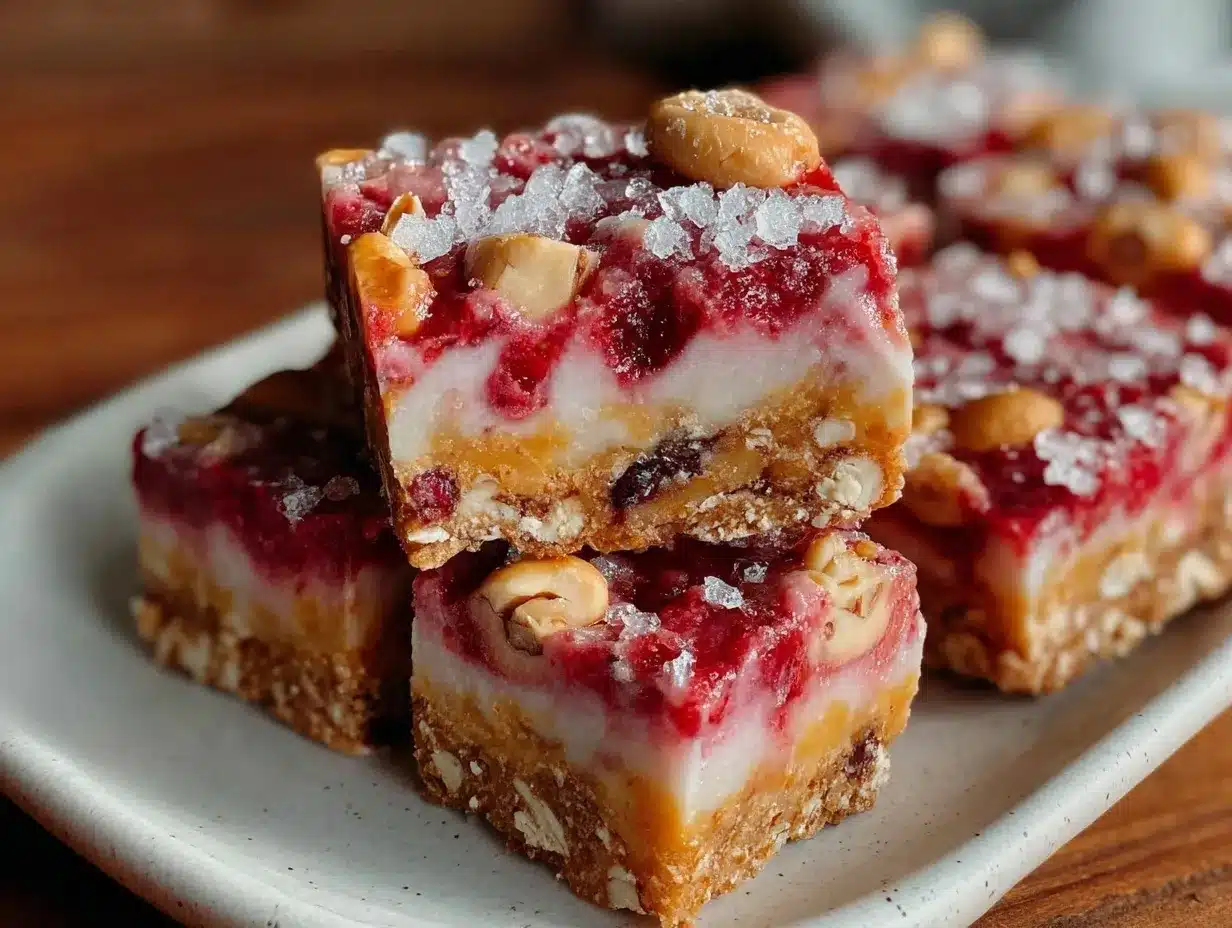
Easy Creamy Frozen Strawberry Crunch Bars
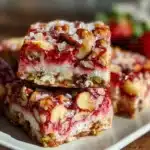
A quick and easy frozen dessert combining a creamy strawberry layer with a crunchy crispy rice cereal crust, perfect for cooling down on hot summer days.
- Prep Time: 15 minutes
- Cook Time: 0 minutes
- Total Time: 4 hours 15 minutes
- Yield: 12 bars 1x
- Category: Dessert
- Cuisine: American
Ingredients
- 1 ½ cups crispy rice cereal (e.g., Kellogg’s Rice Krispies)
- 5 tablespoons unsalted butter, melted
- 2 tablespoons granulated sugar
- 2 cups fresh or frozen strawberries, hulled and chopped
- 1 cup cream cheese, softened
- ½ cup sweetened condensed milk
- 1 teaspoon vanilla extract
- 1 tablespoon lemon juice
- ¼ cup powdered sugar (to taste)
Instructions
- Prepare the crust: In a medium bowl, combine 1 ½ cups crispy rice cereal, melted butter, and granulated sugar. Stir well until the cereal is evenly coated. Press this mixture firmly and evenly into the bottom of an 8×8-inch pan. Compact tightly using the back of a spoon or flat-bottomed glass. This takes about 5 minutes.
- Chill the crust: Place the pan in the freezer while preparing the creamy strawberry layer to help the crust set firmly.
- Make the creamy strawberry layer: Roughly chop strawberries for chunkier texture or puree for smoother bars. In a mixing bowl, beat softened cream cheese with sweetened condensed milk until smooth and fluffy (about 2 minutes). Add vanilla extract, lemon juice, and powdered sugar. Mix until fully combined.
- Fold in strawberries: Gently fold chopped or pureed strawberries into the cream cheese mixture, aiming for a creamy pink batter with bits of strawberry throughout (3-4 minutes).
- Assemble the bars: Remove the crust from the freezer. Spread the creamy strawberry mixture evenly over the chilled crust, smoothing the top with a spatula and covering edges.
- Freeze: Cover the pan tightly with plastic wrap or foil. Freeze for at least 4 hours or overnight to set completely.
- Serve: Remove bars from the pan using plastic wrap edges. Cut into 12 bars with a sharp knife warmed under hot water for clean cuts. Enjoy immediately or keep frozen until ready to eat.
Notes
Press the crust firmly but not too hard to ensure it holds together without being dense. Use softened cream cheese for smooth mixing. Freeze bars overnight for best texture and clean slicing. Warm knife blade before cutting to prevent crumbling. For dairy-free, use vegan cream cheese and coconut condensed milk; for gluten-free, use certified gluten-free rice cereal or cornflakes.
Nutrition
- Serving Size: 1 bar
- Calories: 150
- Sugar: 12
- Fat: 8
- Carbohydrates: 18
- Protein: 3
Keywords: frozen dessert, strawberry bars, creamy strawberry bars, summer treats, easy dessert, crunchy crust, no-bake dessert


