“Mom, can I have a burrito for lunch tomorrow?” That text popped up just as I was about to collapse onto the couch after an especially long day. Honestly, my brain was already running on empty, and the thought of scrambling together something last minute felt like a small nightmare. I’d tried all the quick fixes before, but nothing really stuck — until I stumbled on this recipe for easy make-ahead freezer burritos.
One restless evening, while staring into the fridge full of odds and ends, I decided to throw together whatever I had on hand. It was a bit of an accident, honestly. I heated some beans, threw in some cheese, and wrapped it all up in a tortilla, then froze a bunch of them to save for later. When the kids pulled one out the next morning, warmed it up, and came home raving about how good it was, I was floored. Skeptical at first about freezing burritos, I quickly became a believer — these simple burritos turned out to be the quick school lunch lifesaver I didn’t know I needed.
Since then, I’ve made these freezer burritos more times than I can count, tweaking the fillings and spices until I hit the perfect balance. The best part? I can prep a batch on Sunday night and have lunches ready to go for the whole week. No stress, no last-minute grocery runs, just wholesome, satisfying meals that travel well and keep everyone happy.
What’s stuck with me the most is how these burritos quietly changed my morning chaos into a calm routine. It’s not just about feeding the kids; it’s about carving out a little breathing space for myself during the hectic school days. This recipe isn’t flashy — but it’s honest, reliable, and exactly what we need when life gets busy.
Why You’ll Love This Recipe
I’ve tested this easy make-ahead freezer burritos recipe over and over, and it’s become a trusted staple in our household. Whether you’re juggling work, school runs, or just need a break from the daily lunchbox scramble, this recipe fits right in.
- Quick & Easy: These burritos come together in under 30 minutes, perfect for a Sunday prep session or whenever you have a spare moment.
- Simple Ingredients: No need for fancy or hard-to-find items — most ingredients are pantry staples or easy to grab at any grocery store.
- Perfect for School Lunches: Portable, mess-free, and kid-approved, these burritos make lunchtime a breeze.
- Crowd-Pleaser: Adults love them too — they’re hearty and flavorful enough to enjoy any day of the week.
- Unbelievably Delicious: The combo of seasoned beans, melty cheese, and soft tortillas hits that satisfying comfort-food note every time.
Unlike other freezer burrito recipes I’ve tried, this one uses a simple seasoning blend and a quick sauté method that keeps the filling moist without getting soggy. I also like folding the burritos tightly, so they hold up well during freezing and reheating. It’s a straightforward approach that doesn’t sacrifice flavor or texture.
For busy parents, this recipe means fewer mornings spent stressing and more time enjoying a quiet breakfast or a moment to breathe. And if you ever want to switch things up, the base is flexible enough for different fillings and taste preferences — I’ve even swapped in some shredded chicken from my honey mustard chicken recipe for a change of pace.
What Ingredients You Will Need
This easy make-ahead freezer burritos recipe uses simple, wholesome ingredients to deliver bold flavor and satisfying texture without the fuss. Most of these are pantry staples, which makes it a perfect grab-and-go meal prep option. Feel free to customize based on what you have or prefer!
- Large flour tortillas (10-inch size works best for wrapping everything comfortably)
- Black beans (1 can, drained and rinsed — you can also use pinto beans for a milder flavor)
- Cooked rice (about 1 cup cooked, white or brown rice; leftover rice works great here)
- Shredded cheddar cheese (1 cup — I recommend a sharp cheddar for punchy flavor)
- Onion, finely diced (about ½ cup; yellow or white onion works well)
- Garlic cloves, minced (2 cloves for depth of flavor)
- Ground cumin (1 teaspoon, adds that warm smoky note)
- Chili powder (1 teaspoon, optional for a little kick)
- Salt and pepper to taste
- Olive oil (1 tablespoon for sautéing the onion and garlic)
- Fresh cilantro, chopped (optional, about 2 tablespoons to brighten the filling)
- Hot sauce or salsa (optional, to serve or mix into the filling)
If you want to add some protein, cooked ground beef, shredded rotisserie chicken, or even crumbled tofu can be folded right into the filling. For a dairy-free option, swap the shredded cheese with a plant-based cheese or simply omit it. When I’m feeling a bit fancy, I add a dollop of sour cream or Greek yogurt at serving — it’s a small step that makes a big difference.
Most of these ingredients are easy to find year-round, but if you want a fresher touch, swapping canned beans for freshly cooked ones or using homemade salsa makes for a nice upgrade. Pro tip: use tortillas from your local bakery or a trusted brand like Mission for best wrapping and texture.
Equipment Needed
- Large skillet or sauté pan: Essential for cooking the onion, garlic, and warming the beans and rice together. A non-stick pan works best for easy cleanup.
- Mixing bowl: For combining the filling ingredients evenly.
- Measuring spoons and cups: To keep the seasoning balanced and filling consistent.
- Foil or parchment paper: For wrapping burritos individually before freezing to prevent freezer burn and sticking.
- Freezer-safe storage bags or airtight containers: To store the burritos neatly and save space in the freezer.
For reheating, I usually use a microwave, but if you prefer, a toaster oven or conventional oven works well and gives a nice crisp to the tortilla. If you don’t have a skillet handy, a small saucepan can do in a pinch, but you’ll want to stir frequently to avoid burning.
Honestly, you don’t need any fancy gadgets for this recipe — just the basics that most kitchens already have. If you want to make life even easier, a rice cooker or instant pot can speed up the rice cooking process, but it’s not required.
Preparation Method
- Prepare the filling: Heat 1 tablespoon olive oil in a large skillet over medium heat. Add the diced onion and sauté for about 3–4 minutes until softened and translucent. Toss in the minced garlic and cook for another 30 seconds until fragrant.
- Add beans and seasoning: Stir in the drained black beans, cooked rice, ground cumin, chili powder (if using), salt, and pepper. Cook for 5 minutes, stirring occasionally, so the flavors meld together and the mixture warms through. If the filling feels dry, splash in a little water or broth to loosen it up.
- Finish the filling: Remove from heat and stir in the shredded cheddar cheese and chopped cilantro, if using. The cheese should melt slightly from the residual heat, helping everything stick together nicely.
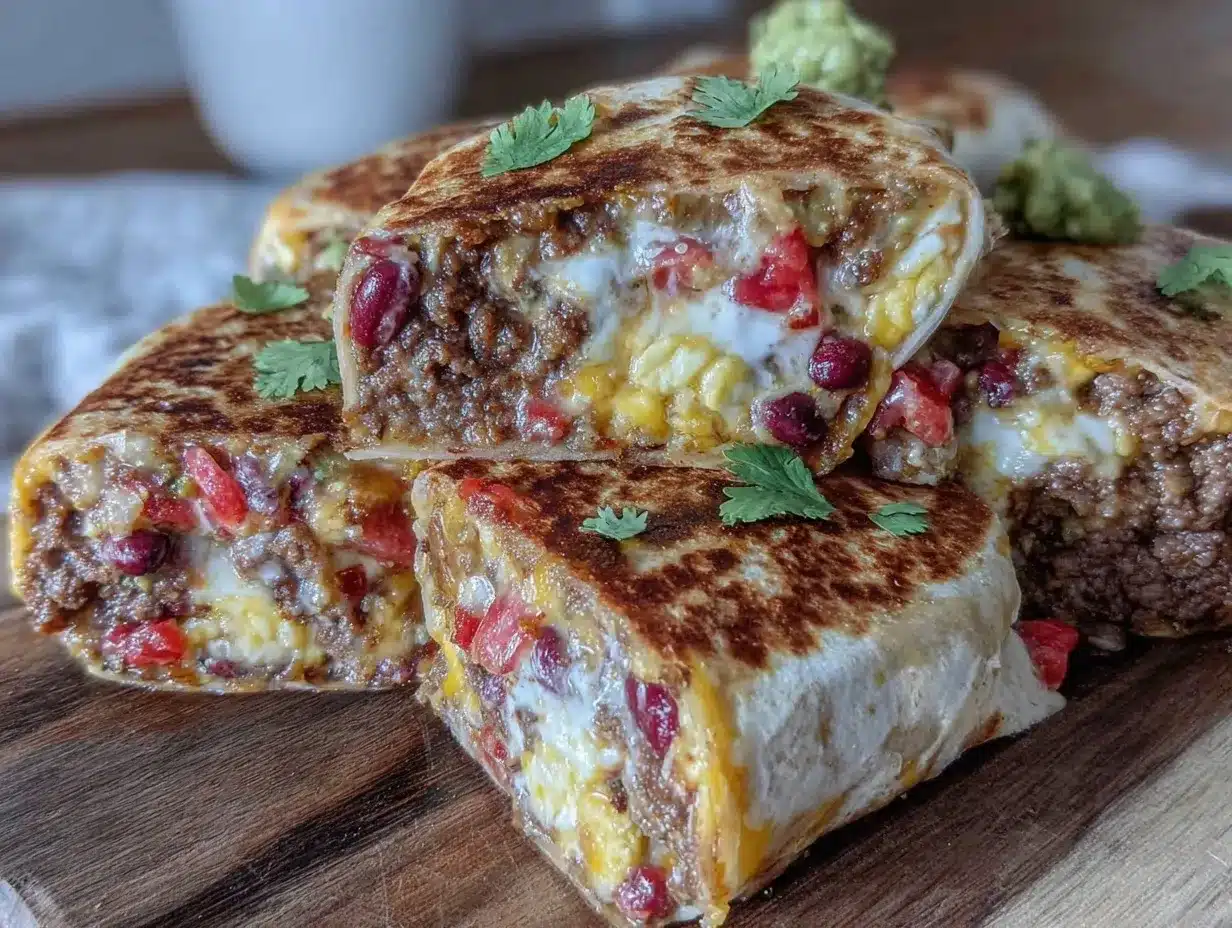
- Assemble the burritos: Lay a tortilla flat on a clean surface. Spoon about ½ cup (120 g) of the filling onto the center of the tortilla. Fold the sides inward, then roll the tortilla tightly from one end to the other, making sure the filling is snug inside.
- Wrap and freeze: Wrap each burrito individually in foil or parchment paper, then place wrapped burritos in a freezer-safe bag or airtight container. Label with the date. These keep well for up to 3 months.
- Reheat before serving: To enjoy, unwrap the burrito and microwave on high for 2–3 minutes, flipping halfway through for even heating. Alternatively, bake in a preheated 375°F (190°C) oven for 20–25 minutes until hot and slightly crisp.
Be mindful not to overfill your burritos, or they might burst when reheating. I found that ½ cup filling per tortilla is the sweet spot for easy handling and perfect portion size. If you’re prepping multiple batches, keeping a clean workspace and stacking your wrapped burritos neatly helps speed things along.
Cooking Tips & Techniques
One trick I learned early on is to keep the filling on the moist side — too dry, and the burrito gets crumbly; too wet, and it gets soggy. If your beans or rice seem dry, adding a splash of broth or salsa while cooking helps keep everything cohesive.
When folding, tuck the sides in first before rolling tightly. This prevents any filling from escaping and makes for a neater burrito that holds its shape when frozen and reheated. If the tortillas feel stiff, warming them for 10 seconds in the microwave makes them more pliable and less likely to crack.
Don’t rush the sauté stage — cooking the onions and garlic properly is what builds the base flavor. I’ve tried skipping this step, and honestly, the filling tastes flatter. Patience here pays off.
For uniform heating, flipping the burrito halfway through microwaving is key. Otherwise, you might end up with a cold spot. If you prefer a crispier tortilla, finishing in a toaster oven or under the broiler for a minute or two works wonders.
And hey, if you’re ever in a pinch, these burritos work well straight from the freezer — just add a minute or two to the reheating time. I’ve done this on busy mornings plenty of times, and it still tastes great.
Variations & Adaptations
This recipe is a great base to mix and match flavors or accommodate dietary needs. Here are a few ideas I’ve played around with:
- Protein boost: Add cooked shredded chicken (try leftovers from my honey mustard chicken breast) or crumbled cooked ground beef for a meatier bite.
- Vegetarian or vegan: Use dairy-free cheese or omit cheese altogether. Add sautéed bell peppers, corn, or zucchini for extra veggies.
- Spicy twist: Mix in chopped jalapeños or a dash of cayenne pepper to the filling. Serve with salsa verde for an extra kick.
- Different grains: Swap rice for quinoa or cauliflower rice for a lower-carb option.
One personal favorite is mixing black beans with roasted sweet potato cubes — the sweetness balances the spices beautifully. You can also experiment with different cheeses like pepper jack or Monterey Jack for a milder or spicier profile.
Serving & Storage Suggestions
These freezer burritos are fantastic served warm, straight from the microwave or oven. I like to add a little fresh salsa, guacamole, or sour cream on the side for dipping. A simple side salad or sliced veggies turn this quick lunch into a balanced meal.
Store the wrapped burritos in an airtight container or freezer bag for up to 3 months. For best texture, consume within the first month. When thawing, you can either reheat directly from frozen or thaw overnight in the fridge.
Reheating in the oven produces a crispier tortilla exterior, while the microwave is best for speed and convenience. If using the oven, wrap the burrito in foil to prevent drying out. Flavors tend to meld and improve a bit after a day or two in the freezer, making this an ideal recipe to stockpile.
Nutritional Information & Benefits
Each burrito has approximately 300–350 calories, depending on size and fillings. They provide a good source of protein from the beans and cheese, fiber from the beans and rice, and essential vitamins from the onion and optional cilantro.
This recipe is naturally gluten-free if you use corn tortillas instead of flour, and you can easily make it dairy-free by swapping out cheese. The whole ingredients list leans toward wholesome and minimally processed, which is a win when packing lunches for growing kids.
From a wellness perspective, these burritos strike a nice balance — they’re hearty and satisfying without being overly heavy. The beans offer plant-based protein and fiber, which helps keep energy steady through the school day.
Conclusion
Easy make-ahead freezer burritos have quietly transformed my hectic mornings into manageable moments. They pack convenience, flavor, and nutrition into one neat little package that’s ready whenever you need it. Whether you stick to the classic filling or experiment with your own twists, I’m confident this recipe will become a go-to in your meal prep rotation.
Personally, I love knowing that a homemade lunch is waiting in the freezer, ready to bring a little comfort and calm to busy school days. If you give this recipe a try, I’d love to hear how you customize it to fit your family’s tastes — sharing those ideas always makes cooking more fun!
And if you’re looking for other quick and satisfying meals that fit into a busy schedule, you might enjoy my honey soy glazed salmon or the one-pan garlic butter steak bites. Both come together fast and pack a ton of flavor.
FAQs
Can I use whole wheat or corn tortillas for these freezer burritos?
Yes! Whole wheat tortillas add extra fiber and nutrition, while corn tortillas work well if you need a gluten-free option. Just be gentle when folding corn tortillas, as they can be less flexible.
How long can I store these burritos in the freezer?
They keep best for up to 3 months in an airtight container or freezer bag. Beyond that, they’re safe but might start losing texture and flavor.
Can I freeze the burritos after they’re cooked or before cooking?
This recipe is designed for freezing after assembly but before reheating. Cook the filling fully, assemble, then freeze wrapped burritos. Reheat when ready to eat.
What’s the best way to reheat freezer burritos?
Microwaving is fastest — unwrap and heat for 2–3 minutes, flipping halfway. For a crispier tortilla, bake in a 375°F (190°C) oven for 20–25 minutes.
Can I add vegetables to the filling?
Absolutely! Sautéed bell peppers, corn, spinach, or zucchini all work well. Just make sure to cook them ahead so the filling isn’t too watery.
Pin This Recipe!
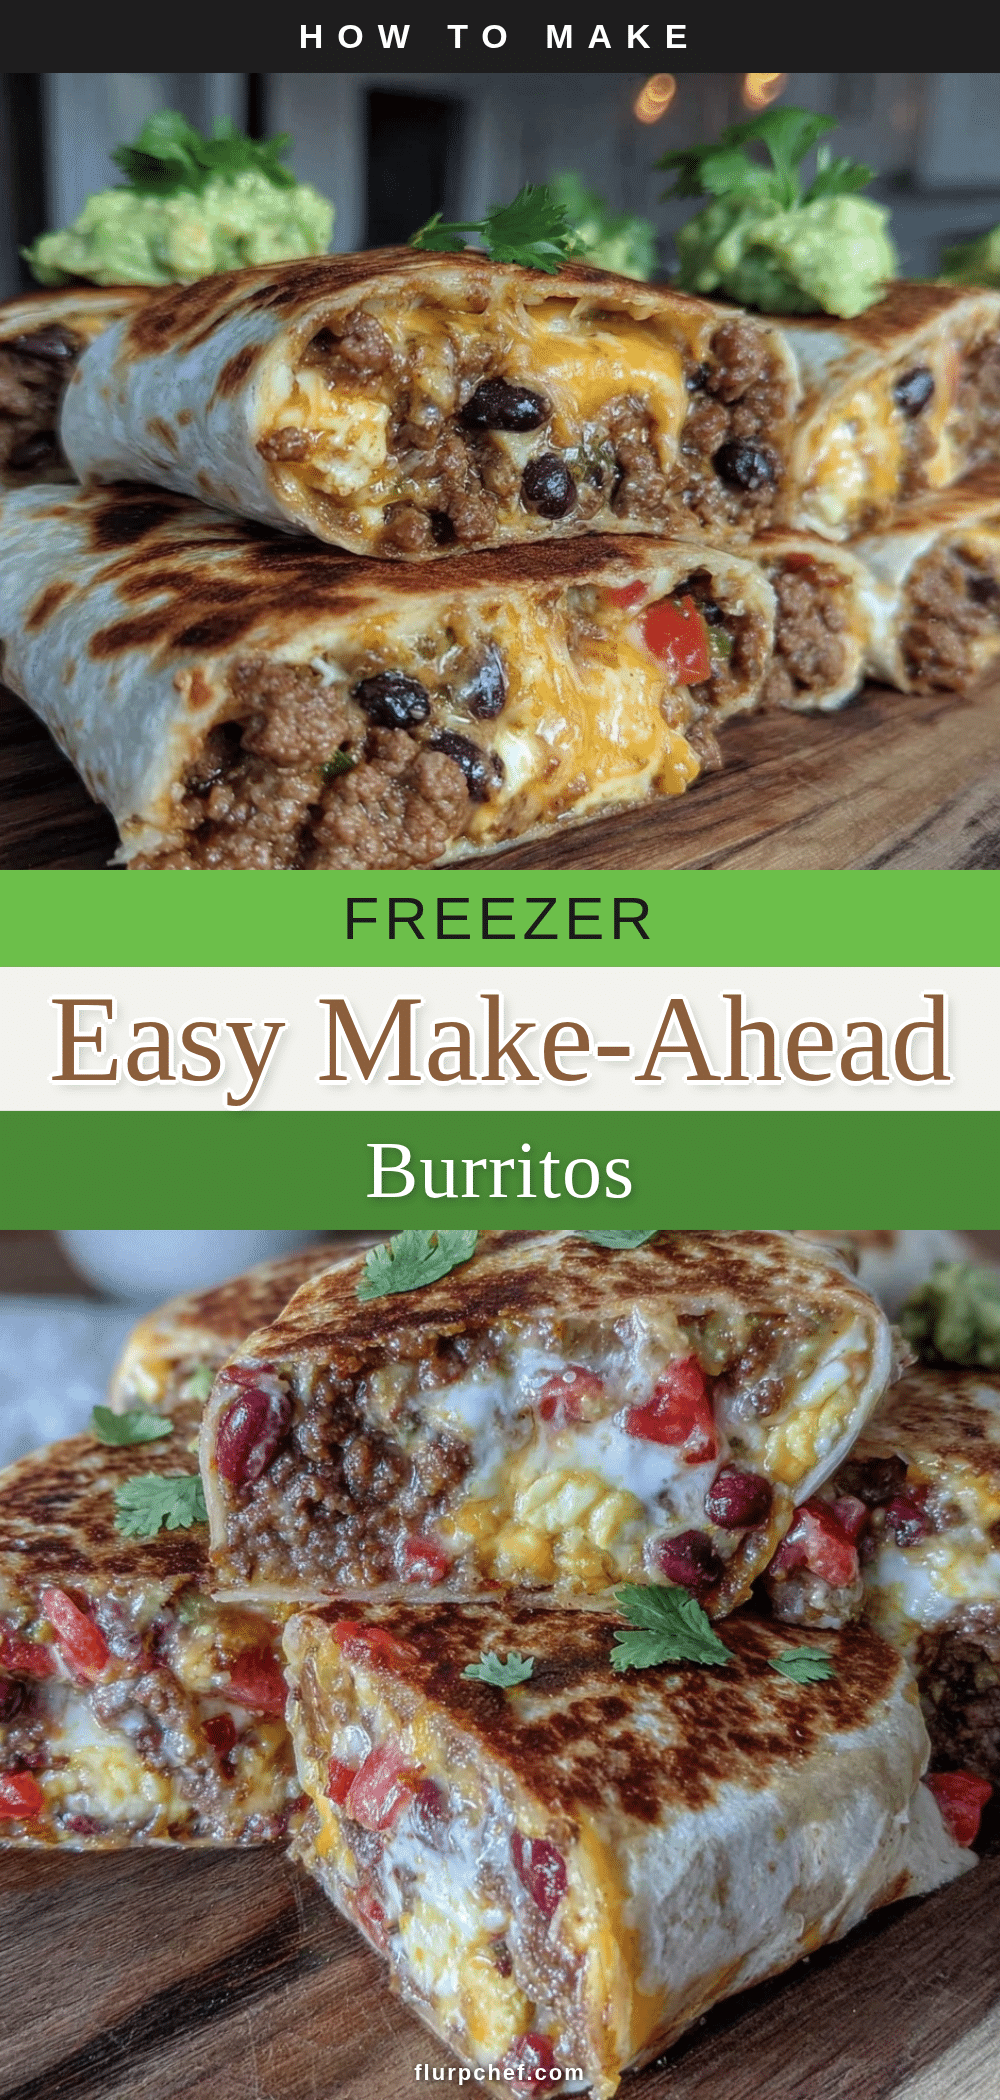
Easy Make-Ahead Freezer Burritos Recipe for Quick School Lunches

This easy make-ahead freezer burritos recipe is a quick, wholesome, and kid-approved meal prep solution perfect for busy school days. Made with simple pantry staples, these burritos freeze well and reheat easily for convenient lunches.
- Prep Time: 15 minutes
- Cook Time: 15 minutes
- Total Time: 30 minutes
- Yield: 6 servings 1x
- Category: Main Course
- Cuisine: Mexican-inspired
Ingredients
- Large flour tortillas (10-inch size)
- 1 can black beans, drained and rinsed (or pinto beans)
- 1 cup cooked rice (white or brown)
- 1 cup shredded cheddar cheese (sharp cheddar recommended)
- ½ cup finely diced onion (yellow or white)
- 2 garlic cloves, minced
- 1 teaspoon ground cumin
- 1 teaspoon chili powder (optional)
- Salt and pepper to taste
- 1 tablespoon olive oil
- 2 tablespoons fresh cilantro, chopped (optional)
- Hot sauce or salsa (optional, to serve or mix into filling)
Instructions
- Heat 1 tablespoon olive oil in a large skillet over medium heat. Add diced onion and sauté for 3–4 minutes until softened and translucent.
- Add minced garlic and cook for another 30 seconds until fragrant.
- Stir in drained black beans, cooked rice, ground cumin, chili powder (if using), salt, and pepper. Cook for 5 minutes, stirring occasionally. Add a splash of water or broth if the filling feels dry.
- Remove from heat and stir in shredded cheddar cheese and chopped cilantro, if using, allowing cheese to melt slightly.
- Lay a tortilla flat on a clean surface. Spoon about ½ cup (120 g) of filling onto the center of the tortilla. Fold sides inward and roll tightly from one end to the other.
- Wrap each burrito individually in foil or parchment paper. Place wrapped burritos in a freezer-safe bag or airtight container and label with the date. Freeze up to 3 months.
- To reheat, unwrap burrito and microwave on high for 2–3 minutes, flipping halfway through. Alternatively, bake in a preheated 375°F (190°C) oven for 20–25 minutes until hot and slightly crisp.
Notes
Keep the filling moist to avoid crumbly or soggy burritos by adding a splash of broth or salsa if needed. Fold burritos tightly to prevent filling from escaping during freezing and reheating. Warm tortillas briefly before assembling if they feel stiff. Burritos keep best for up to 3 months in the freezer; consume within the first month for best texture. Reheat by microwaving for speed or baking for a crispier tortilla.
Nutrition
- Serving Size: 1 burrito (approxima
- Calories: 325
- Sugar: 2
- Sodium: 450
- Fat: 12
- Saturated Fat: 5
- Carbohydrates: 40
- Fiber: 8
- Protein: 14
Keywords: freezer burritos, make-ahead lunch, school lunch, easy burritos, meal prep, quick lunch, kid-friendly, freezer meals


