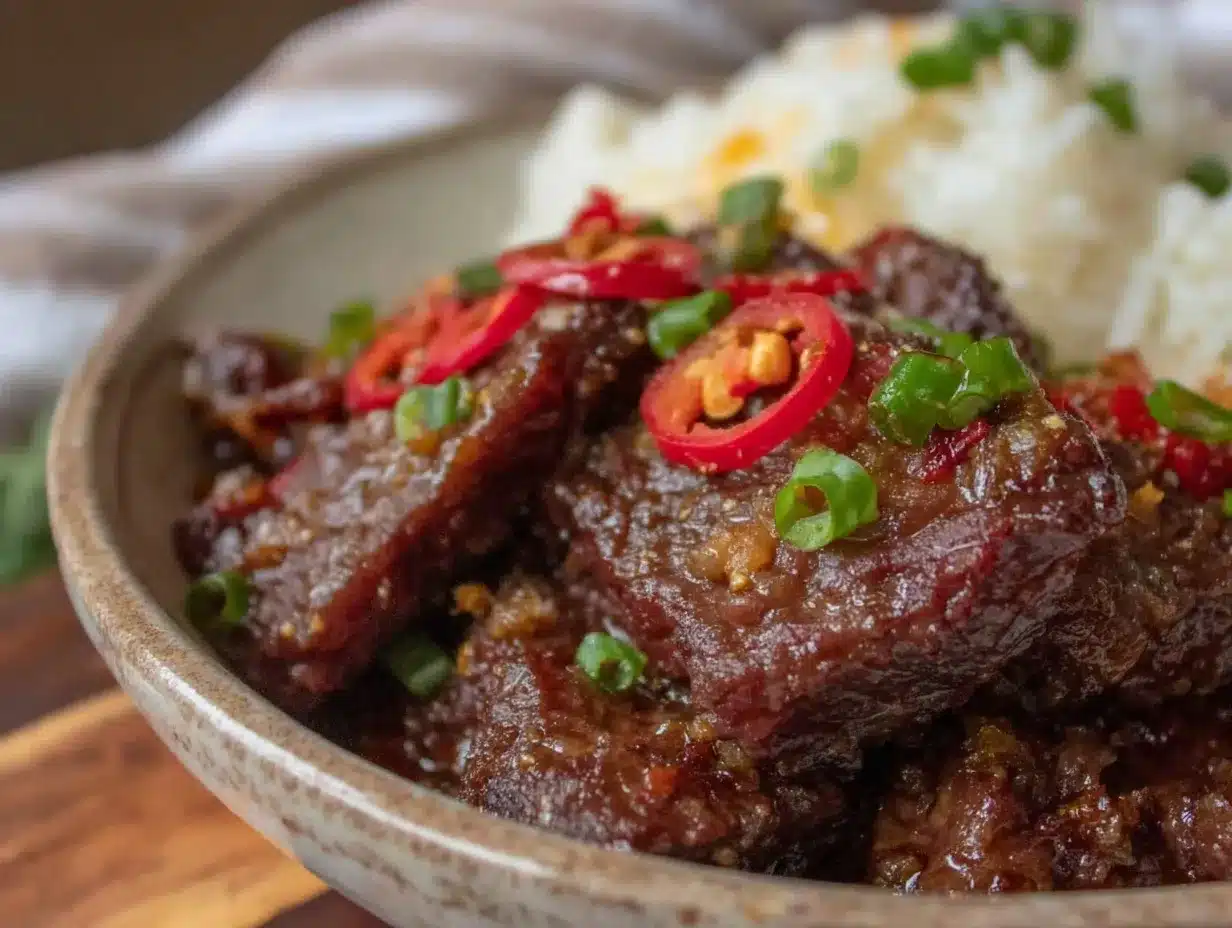
“You’re telling me this is homemade? No way!” That’s the usual reaction when I serve up this flavorful Mongolian beef better than takeout. Honestly, it started on a rare evening when I was too tired to face the phone and the temptation of delivery menus. I’d tried a few stir-fries before, but something about this one clicked in a way I didn’t expect. The sauce clings perfectly to thinly sliced beef, and the caramelized edges? Chef’s kiss.
Once, while mid-sizzle, the sticky-sweet aroma filled the whole apartment, and a neighbor popped in, curious. I joked, “It’s just my Mongolian beef, way better than anything you’ll get out there.” Skepticism was in the air, but after a bite, they were quietly impressed—no takeout needed. It’s a recipe that’s become a quiet staple when I want a meal that feels indulgent but isn’t a hassle.
The magic is in the balance: sweet, salty, and just a little smoky, with tender beef strips that don’t dry out. I love that I can whip it up in about 30 minutes, with ingredients I usually have on hand. It reminds me that sometimes the best meals come from a little kitchen experiment that turns out better than expected. And now, it’s one of those dishes I trust to impress at casual dinners or just cheer me up on a hectic day.
There’s something about the way this Mongolian beef holds its own against any restaurant version—without the greasy aftertaste or blandness you sometimes get. It’s a recipe that’s stuck with me because it’s reliable, rewarding, and honestly, it tastes like a warm hug after a long day in the kitchen.
Why You’ll Love This Flavorful Mongolian Beef Recipe
This Mongolian beef recipe isn’t just another stir-fry tossed together—it’s been tested, tweaked, and loved through many meals. I’ve made it on busy weeknights, lazy weekends, and even when I needed to impress some unexpected guests. Here’s why you’ll find yourself making it again and again:
- Quick & Easy: Ready in under 30 minutes, it’s perfect for nights when hunger strikes hard and fast.
- Simple Ingredients: No need for specialty stores; soy sauce, brown sugar, and basic aromatics do the trick beautifully.
- Perfect for Casual Dinners: Whether it’s a family meal or a small get-together, this dish feels special but doesn’t stress you out.
- Crowd-Pleaser: Kids, picky eaters, and grown-ups alike usually ask for seconds.
- Unbelievably Delicious: The caramelized sauce with just a hint of garlic and ginger makes every bite crave-worthy.
What sets this recipe apart? It’s the way the beef slices get that perfect sear without drying out, thanks to a simple cornstarch coating and high heat. Plus, the sauce has a beautiful balance—not too sweet, not too salty—that clings with just the right thickness. I swap out scallions sometimes for extra crunch and add a splash of hoisin for depth. It’s all about making the classic Mongolian beef feel homemade but with that restaurant-quality flair.
This recipe isn’t just food; it’s a little moment of comfort and achievement in your day. Once you master this, you’ll see why it’s better than takeout and maybe even start tweaking it your way—like I did with my favorite quick garlic shrimp pasta with spinach for another speedy dinner option.
What Ingredients You Will Need for Flavorful Mongolian Beef
This flavorful Mongolian beef recipe uses simple, wholesome ingredients to deliver bold flavor and tender texture without any fuss. Most are pantry staples or easy to find at your local grocery store.
- Beef: 1 lb (450g) flank steak or sirloin, thinly sliced against the grain (for tenderness)
- Cornstarch: ¼ cup (30g) to coat the beef, creating that crisp exterior
- Vegetable oil: 2 tablespoons for frying (can substitute with canola or peanut oil for higher smoke point)
- Soy sauce: ½ cup (120ml), regular or low-sodium depending on preference
- Brown sugar: ⅓ cup (70g) packed, which brings the signature sweetness
- Garlic: 3 cloves, minced (fresh is best for punchy flavor)
- Ginger: 1 teaspoon fresh grated, adds warmth and depth (optional but recommended)
- Beef broth or water: ¼ cup (60ml) to loosen the sauce slightly
- Green onions: 3 stalks, sliced thinly on an angle (for garnish and fresh bite)
- Red pepper flakes: ¼ teaspoon, optional for a subtle kick
Ingredient tips: I like using a trusted soy sauce brand like Kikkoman for consistent flavor. For gluten-free, swap soy sauce with tamari. If you want a slightly richer sauce, a splash of oyster sauce works wonders.
Seasonal note: In spring and summer, I sometimes toss in fresh snap peas or bell peppers to brighten the dish. For a low-carb twist, swap brown sugar with a little coconut sugar or a sugar substitute that measures like sugar.
Equipment Needed
- Sharp chef’s knife: Essential for slicing beef thinly and evenly—makes a big difference in texture.
- Cutting board: Preferably wood or plastic, easy to clean after prepping beef and aromatics.
- Large bowl: For tossing beef with cornstarch—makes coating easier without mess.
- Wok or large skillet: A heavy-bottomed wok or cast iron skillet works best for quick, high-heat cooking.
- Spatula or wooden spoon: For stirring and scraping up that flavorful sauce.
- Measuring cups and spoons: For precise sauce ratios—trust me, a little too much sugar or soy changes the whole vibe.
If you don’t have a wok, a large non-stick skillet will do. I used to rely on a budget-friendly stainless steel skillet before upgrading, and it still cooks great when preheated properly. Also, keep your spatula handy to scrape up the caramelized bits stuck to the pan—they’re pure flavor gold.
Preparation Method for Flavorful Mongolian Beef
- Slice the beef: Lay your flank steak flat and slice thinly across the grain into strips about ¼ inch thick (about 6mm). This helps keep the beef tender after cooking. Set aside in a large bowl.
- Coat the beef: Add ¼ cup (30g) cornstarch to the beef strips and toss until every piece is lightly coated. This makes the exterior crispy when cooked and helps the sauce cling better.
- Prepare the sauce: In a small bowl, whisk together ½ cup (120ml) soy sauce, ⅓ cup (70g) brown sugar, ¼ cup (60ml) beef broth or water, minced garlic, and grated ginger. Set aside.
- Heat the oil: In your wok or skillet, warm 2 tablespoons of vegetable oil over medium-high heat until shimmering but not smoking (about 2-3 minutes).
- Cook the beef: Add the coated beef strips in a single layer (cook in batches if needed to avoid overcrowding). Let them sear for about 2 minutes without stirring, then toss to cook evenly until browned and crispy around the edges (total about 4-5 minutes). Remove beef and set aside on a plate.
- Sauté aromatics: Lower heat to medium, add a touch more oil if pan is dry, then add the minced garlic and ginger. Stir constantly for 30 seconds or until fragrant—but watch for burning!
- Add the sauce: Pour in the prepared sauce mixture. Let it bubble and reduce slightly for about 2-3 minutes until it thickens into a glossy glaze.
- Return beef to pan: Toss the cooked beef back into the pan, stirring thoroughly so every strip is coated with the sticky sauce. Let it cook together for 1-2 minutes to meld flavors.
- Finish and garnish: Remove from heat, sprinkle sliced green onions and red pepper flakes (if using) on top for a fresh pop and subtle heat.
Pro tip: Use high heat when cooking the beef to get a nice sear, but watch carefully to avoid burning the sauce. If sauce thickens too fast, splash a teaspoon of water to loosen it up. If you want more sauce, double the soy and sugar but be mindful of the saltiness.
Cooking Tips & Techniques for Mongolian Beef Mastery
From my kitchen missteps to wins, here are a few tips to keep your Mongolian beef tasting amazing every time:
- Slice cold beef: Pop your beef in the freezer for 15 minutes before slicing. It firms up the meat and makes it easier to cut thin, even strips.
- Don’t overcrowd the pan: Cooking in batches ensures the beef crisps instead of steams. I learned this the hard way when my first try was soggy and sad.
- Use cornstarch: This simple trick creates that crave-worthy crispy coating without frying deep in oil.
- Watch your heat: Medium-high for searing, medium for sauce simmering. Too hot can burn the sauce; too low leaves it watery.
- Timing matters: Have your sauce ready before cooking beef, so you can move quickly and avoid overcooking.
Honestly, the first few times I made this, the sauce was either too runny or too salty. Adjusting the balance by adding broth and tasting as I went made all the difference. And a quick tip: keep some sliced green onions ready to sprinkle on last minute—they add freshness and color that turns the dish from everyday to restaurant-worthy.
Variations & Adaptations for Flavorful Mongolian Beef
This recipe is flexible, so feel free to tweak it for your taste or dietary needs:
- Vegetarian twist: Swap beef for sliced king oyster mushrooms or tempeh for a meaty texture with the same sauce love.
- Spicy version: Add a teaspoon of chili garlic sauce or double the red pepper flakes for a bolder, fiery kick.
- Gluten-free option: Use tamari instead of soy sauce and ensure your brown sugar is pure cane sugar without additives.
- Extra veggies: Toss in broccoli florets, bell peppers, or snap peas during the final toss for added crunch and color.
One variation I adore is adding a splash of hoisin sauce to the mix—it deepens the sauce’s flavor and rounds out the sweetness nicely. I also sometimes serve this alongside my quick savory beef and broccoli stir fry when I want more greens on the table.
Serving & Storage Suggestions
Serve your flavorful Mongolian beef hot over steamed white or jasmine rice to soak up all that saucy goodness. For a lower-carb option, cauliflower rice or spiralized zucchini noodles work beautifully.
Pair it with some simple sides like steamed broccoli or a fresh cucumber salad for brightness—if you want an easy fresh side, try the crisp cucumber watermelon mint salad to balance the rich beef flavors.
Store leftovers in an airtight container in the fridge for up to 3 days. When reheating, gently warm in a skillet over medium heat to keep that crispiness, or microwave briefly with a splash of water to prevent drying out.
Pro tip: The sauce thickens as it cools, so a quick stir and splash of water when reheating brings back that perfect consistency. Flavors meld nicely overnight, so sometimes I make it a day ahead when hosting casual dinners.
Nutritional Information & Benefits
This Mongolian beef recipe offers a satisfying dose of protein from the lean beef, which supports muscle repair and energy. Garlic and ginger bring anti-inflammatory properties and add a digestive boost.
With moderate sodium from soy sauce, it’s best enjoyed with plenty of steamed veggies to round out your meal. The brown sugar adds sweetness but can be reduced slightly if you prefer a less sugary dish.
For those mindful of carbs, swapping rice for cauliflower rice lowers the carbohydrate content without sacrificing satisfaction. As a health-conscious yet indulgent meal, this recipe strikes a nice balance between comfort and nutrition.
Conclusion
This flavorful Mongolian beef better than takeout has become one of those recipes I reach for when I want something quick, tasty, and just a little bit special. It’s flexible enough to fit into busy weeknights but impressive enough to serve guests without stress.
Feel free to make it your own—add veggies, change up the spice level, or tweak the sweetness. I love how it turns simple ingredients into a memorable meal, and I hope you find it as satisfying and reliable in your kitchen as I do.
If you give it a try, I’d love to hear how you made it your own. There’s something so rewarding about sharing a dish that’s better than takeout and still feels like home.
Frequently Asked Questions about Flavorful Mongolian Beef
Can I use a different cut of beef for this recipe?
Yes! While flank steak is ideal for tenderness and quick cooking, sirloin or ribeye slices work well too. Just slice thinly against the grain for best results.
How do I prevent the beef from becoming tough?
Thin slices and quick cooking over high heat are key. Also, coating the beef in cornstarch helps lock in moisture and gives a nice crispy texture.
Can I prepare the sauce ahead of time?
Absolutely. You can mix the sauce ingredients a day ahead and store in the fridge. Just bring to room temperature before cooking.
Is there a vegetarian version of Mongolian beef?
Yes! King oyster mushrooms or tempeh are great substitutes that soak up the sauce nicely and provide a similar texture.
What should I serve with Mongolian beef for a complete meal?
Steamed rice or cauliflower rice pairs perfectly. Add a side of steamed greens or a fresh salad like the cucumber watermelon mint salad for balance.
Pin This Recipe!
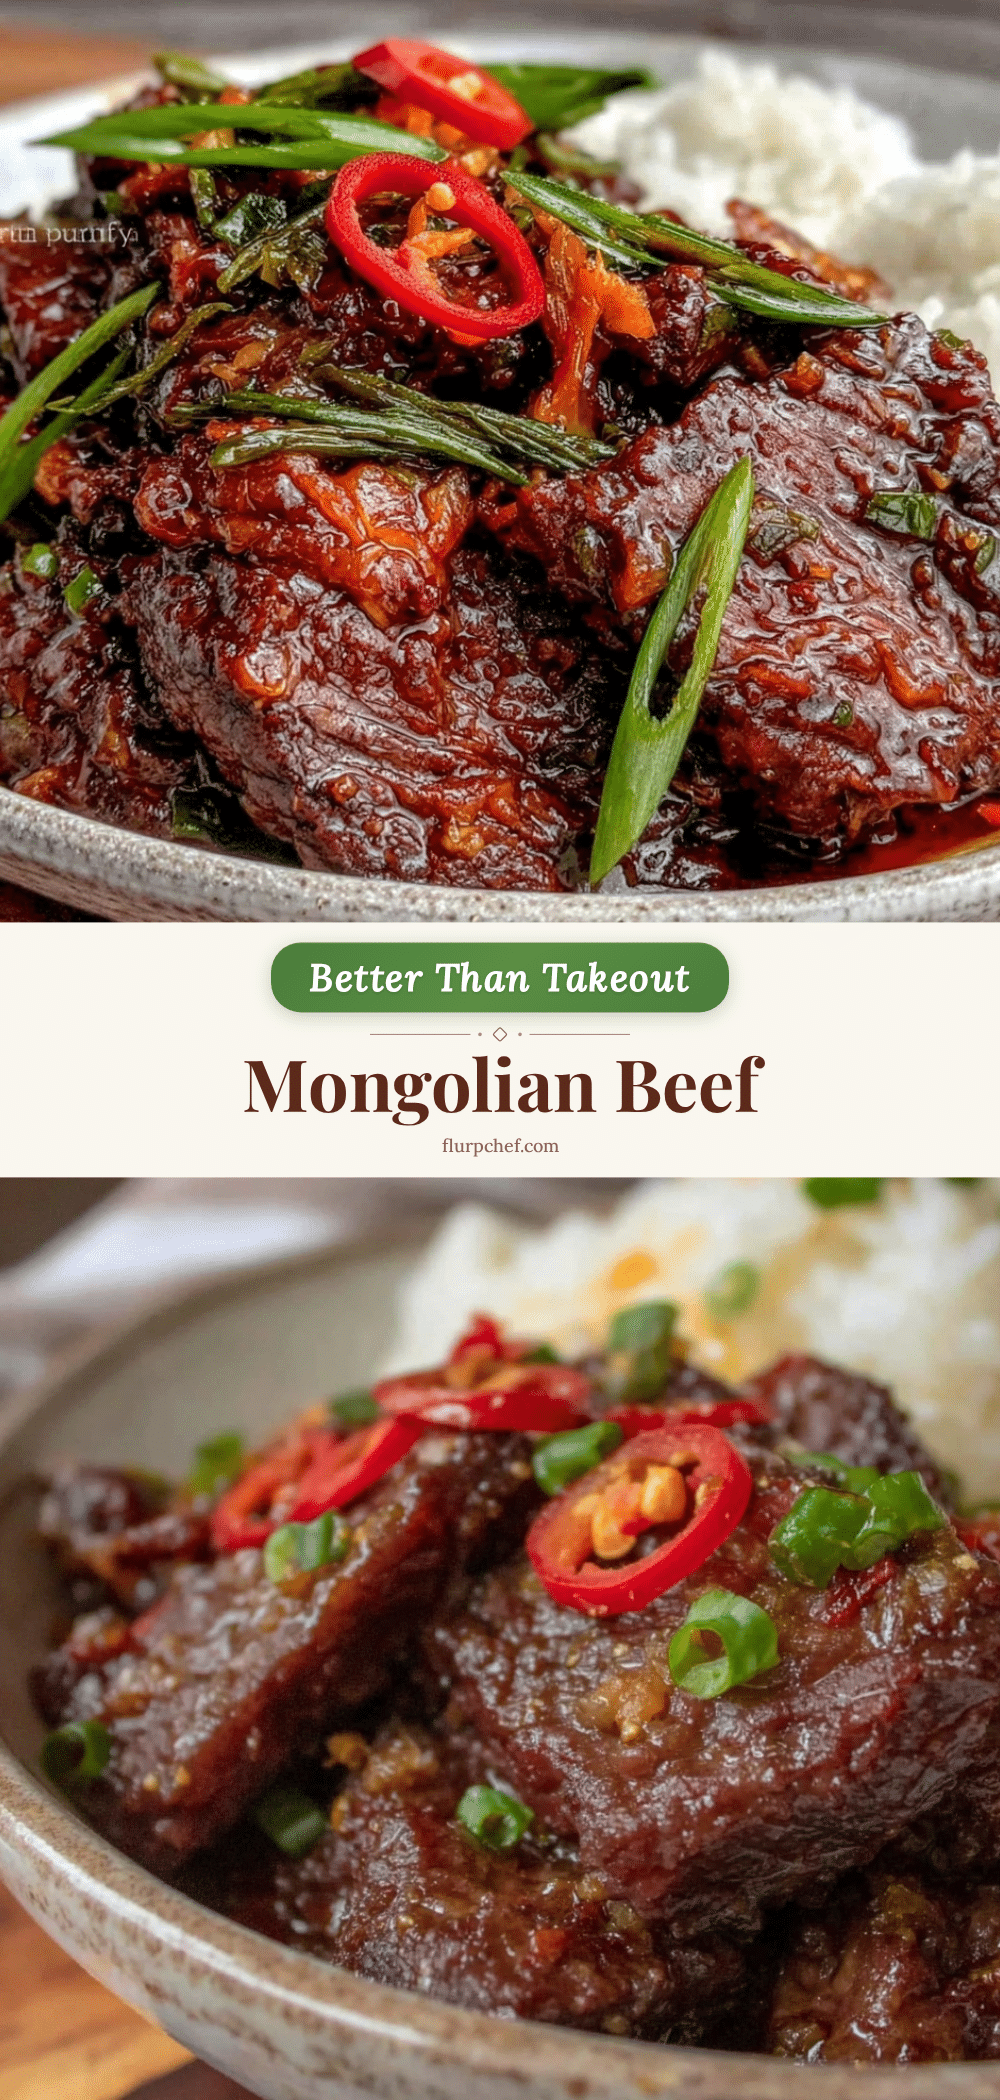
Flavorful Mongolian Beef Recipe Easy Homemade Better Than Takeout

A quick and easy homemade Mongolian beef recipe with a perfect balance of sweet, salty, and smoky flavors, featuring tender beef strips coated in a caramelized sauce that rivals takeout.
- Prep Time: 10 minutes
- Cook Time: 15 minutes
- Total Time: 25 minutes
- Yield: 4 servings 1x
- Category: Main Course
- Cuisine: Chinese
Ingredients
- 1 lb flank steak or sirloin, thinly sliced against the grain
- ¼ cup cornstarch (30g)
- 2 tablespoons vegetable oil (can substitute with canola or peanut oil)
- ½ cup soy sauce (120ml), regular or low-sodium
- ⅓ cup brown sugar (70g), packed
- 3 cloves garlic, minced
- 1 teaspoon fresh grated ginger (optional but recommended)
- ¼ cup beef broth or water (60ml)
- 3 stalks green onions, sliced thinly on an angle
- ¼ teaspoon red pepper flakes (optional)
Instructions
- Slice the beef: Lay your flank steak flat and slice thinly across the grain into strips about ¼ inch thick (about 6mm). Set aside in a large bowl.
- Coat the beef: Add ¼ cup (30g) cornstarch to the beef strips and toss until every piece is lightly coated.
- Prepare the sauce: In a small bowl, whisk together ½ cup (120ml) soy sauce, ⅓ cup (70g) brown sugar, ¼ cup (60ml) beef broth or water, minced garlic, and grated ginger. Set aside.
- Heat the oil: In your wok or skillet, warm 2 tablespoons of vegetable oil over medium-high heat until shimmering but not smoking (about 2-3 minutes).
- Cook the beef: Add the coated beef strips in a single layer (cook in batches if needed). Let them sear for about 2 minutes without stirring, then toss to cook evenly until browned and crispy around the edges (total about 4-5 minutes). Remove beef and set aside.
- Sauté aromatics: Lower heat to medium, add a touch more oil if pan is dry, then add the minced garlic and ginger. Stir constantly for 30 seconds or until fragrant.
- Add the sauce: Pour in the prepared sauce mixture. Let it bubble and reduce slightly for about 2-3 minutes until it thickens into a glossy glaze.
- Return beef to pan: Toss the cooked beef back into the pan, stirring thoroughly so every strip is coated with the sticky sauce. Let it cook together for 1-2 minutes to meld flavors.
- Finish and garnish: Remove from heat, sprinkle sliced green onions and red pepper flakes (if using) on top.
Notes
Use high heat when cooking the beef to get a nice sear but watch carefully to avoid burning the sauce. If sauce thickens too fast, splash a teaspoon of water to loosen it. For gluten-free, swap soy sauce with tamari and ensure brown sugar is pure cane sugar. Slice cold beef for easier thin slicing. Cook beef in batches to avoid overcrowding and sogginess.
Nutrition
- Serving Size: 1 serving (about 1 c
- Calories: 350
- Sugar: 20
- Sodium: 900
- Fat: 15
- Saturated Fat: 4
- Carbohydrates: 25
- Fiber: 1
- Protein: 30
Keywords: Mongolian beef, homemade Mongolian beef, easy stir-fry, quick dinner, beef recipe, Asian cuisine, sweet and savory beef


