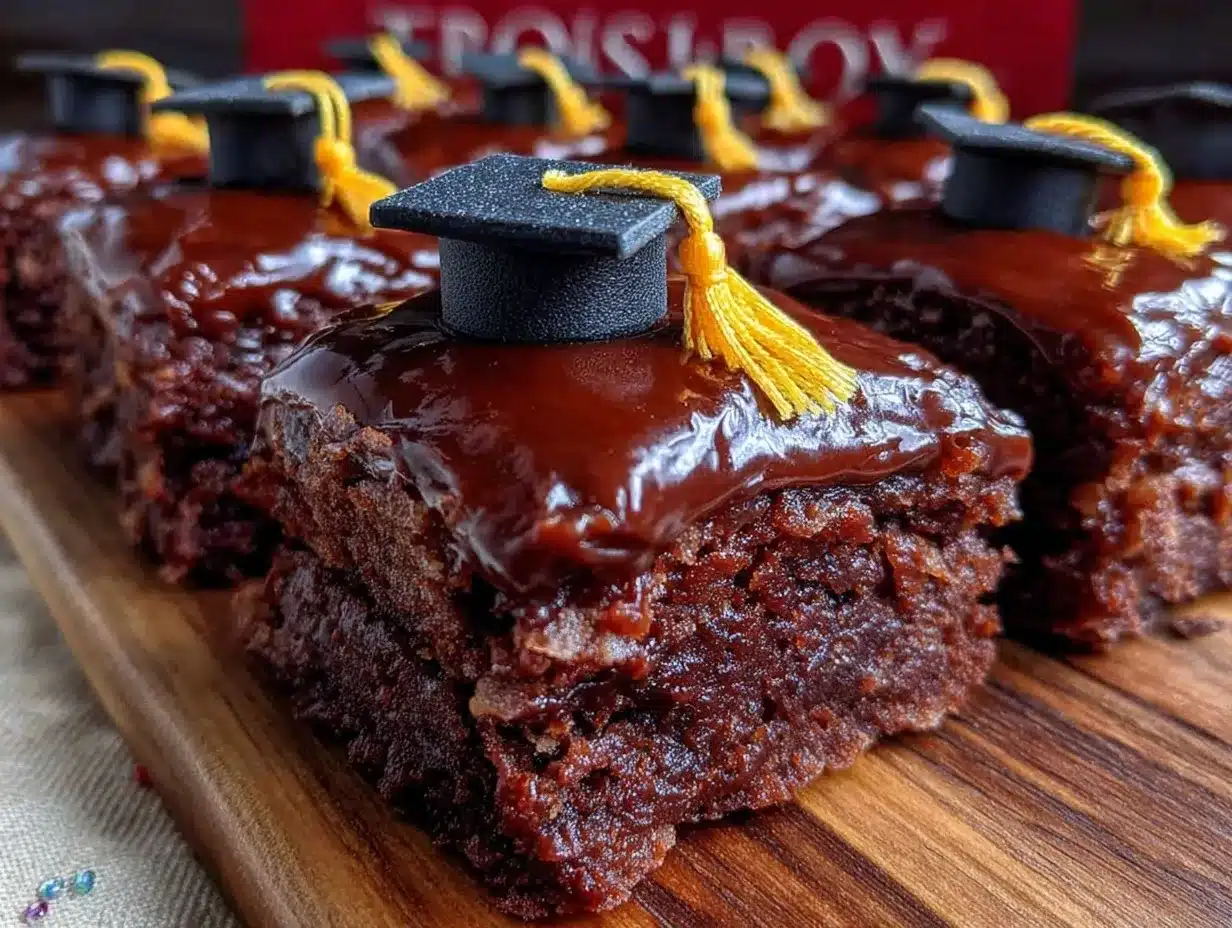
“Are you sure these are just brownie bites?” my cousin asked, eyeing the tiny treats perched on the platter like little graduation caps. Honestly, I wasn’t sure either when I first whipped up these Perfect Graduation Cap Brownie Bites for Celebrations. It started as a last-minute scramble the night before my niece’s high school graduation party. I needed something quick, festive, and easy to nibble on between hugs and photos.
With barely any time to spare, I grabbed a box of brownie mix, some black icing, and a handful of mini candies from the pantry. The result? These adorable, bite-sized brownie caps that looked way too cute to eat—yet everyone dove in immediately. The smell of rich chocolate mingled with the faint scent of vanilla icing filled the kitchen. The laughter and chatter around the dessert table made me realize these little treats had somehow become the life of the party.
Since then, I’ve made the recipe so many times I’ve lost count—sometimes for impromptu celebrations, sometimes just because chocolate always needs a reason to come out of hiding. There’s something about these Perfect Graduation Cap Brownie Bites that turns an ordinary gathering into a memory. I think it’s the mix of simplicity and that playful, celebratory vibe that keeps me coming back. So if you’re looking for a fuss-free, charming way to mark a milestone, this recipe might just be your new go-to. It’s the kind of recipe that makes you smile before you even take a bite.
Why You’ll Love This Recipe
- Quick & Easy: Comes together in under 45 minutes, perfect for those last-minute graduation parties or celebrations.
- Simple Ingredients: Pantry staples like cocoa powder, sugar, and basic baking essentials—no need for fancy store runs.
- Perfect for Celebrations: These bite-sized treats bring a festive touch to graduation parties, baby showers, or even office milestones.
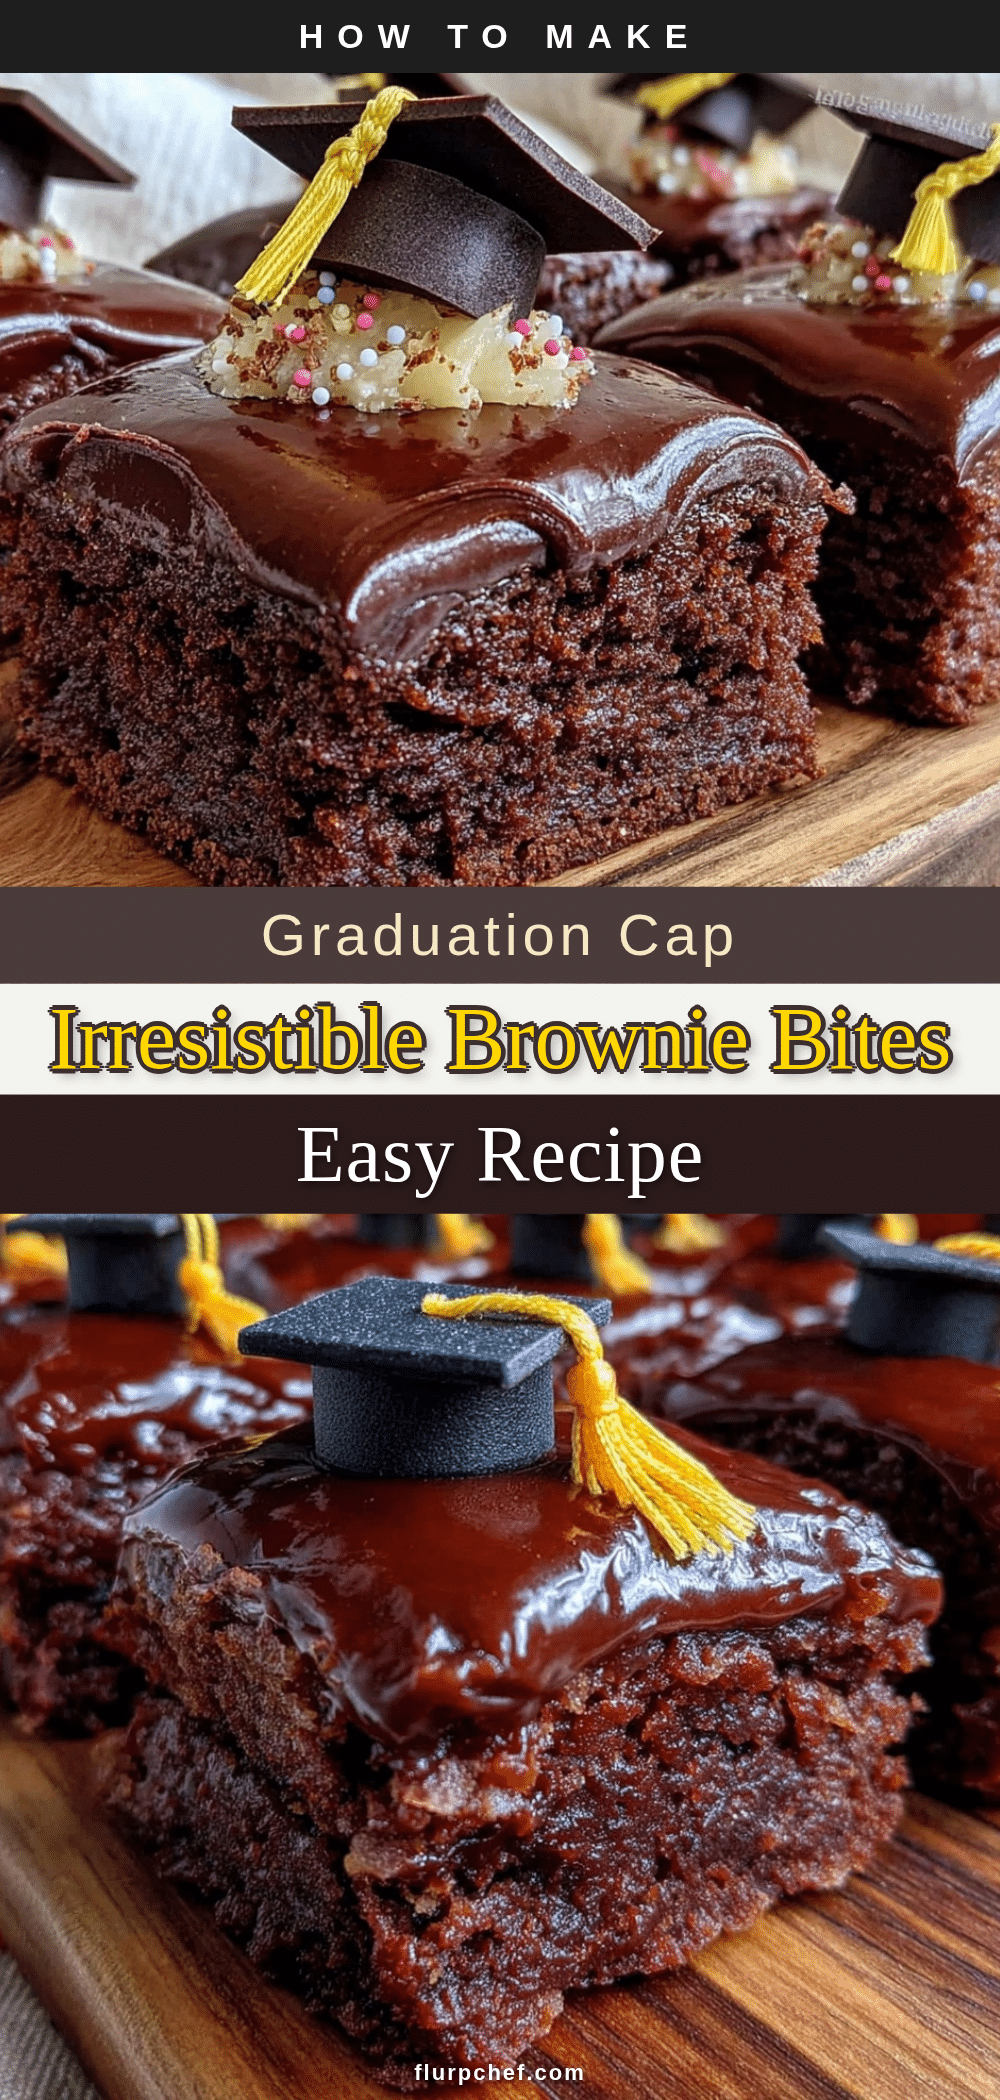
- Crowd-Pleaser: Kids and adults alike can’t resist these rich, fudgy brownie bites topped with charming edible mortarboards.
- Unbelievably Delicious: The fudgy texture combined with the creamy frosting cap is a next-level chocolate delight.
- Distinctive Design: Unlike usual brownies, the graduation cap shape adds a playful, thematic twist that’s both impressive and approachable.
What sets this recipe apart is the way it balances ease with that wow factor. The trick is in the frosting consistency—it has to be spreadable but firm enough to hold those little square caps in place. Plus, the mini candy tassel adds just the right pop of color. Honestly, it’s the kind of treat that makes guests pause and say, “How did you make these?” without feeling overwhelmed by complicated steps.
For a celebration, you want something that feels special but not stressful. These brownie bites deliver that sweet spot beautifully. They’re festive without fuss and rich without heaviness, making them an ideal choice for both casual backyard parties and formal graduations. Trust me, once you try these, you’ll find excuses to make them beyond graduation season.
What Ingredients You Will Need
This recipe uses simple, wholesome ingredients to deliver bold chocolate flavor and a satisfying texture without any fuss. Most items are pantry staples, and substitutions are easy if needed.
- For the Brownie Bites:
- 1 cup (125g) all-purpose flour
- 1/2 cup (45g) unsweetened cocoa powder (I prefer Ghirardelli for a deep chocolate flavor)
- 1 cup (200g) granulated sugar
- 1/2 cup (115g) unsalted butter, melted
- 2 large eggs, room temperature
- 1 tsp vanilla extract (adds warmth and depth)
- 1/4 tsp salt
- 1/4 tsp baking powder (for a slight lift but still fudgy)
- For the Frosting Caps:
- 1 cup (120g) powdered sugar
- 2 tbsp unsalted butter, softened
- 1-2 tbsp milk or cream (adjust for consistency)
- 1/2 tsp vanilla extract
- Black gel food coloring (for the mortarboard color, use AmeriColor for vibrant results)
- Mini square candies or chocolate squares (for the cap top)
- Thin licorice strings or colored sugar strands (to mimic tassels)
Ingredient Notes: You can swap all-purpose flour with almond flour for a gluten-free option, but expect a slightly denser texture. If you prefer dairy-free, substitute the butter with coconut oil and use your favorite plant-based milk. Freshly melted butter makes a big difference in brownie texture, so avoid using margarine or spread. The black gel color is key for that sharp graduation cap look—liquid coloring tends to thin the frosting too much.
Seasonal twist? In spring or summer, try adding a few fresh raspberries on top of the frosting for a fruity contrast. For a nutty crunch, sprinkle chopped toasted pecans into the batter or on the frosting just before it sets.
Equipment Needed
- Mixing bowls (medium and small sizes)
- Electric hand mixer or stand mixer (for smooth frosting, but a whisk works too)
- 8×8-inch (20x20cm) baking pan (for even brownie thickness)
- Cooling rack (essential for letting brownies cool completely)
- Sharp knife or pizza cutter (for clean brownie bite cuts)
- Small offset spatula or butter knife (for spreading frosting)
- Piping bag with small round tip (optional, for neater frosting application)
- Measuring cups and spoons (precise baking depends on these)
If you don’t have a stand mixer, no worries—hand mixing works fine, especially for the frosting. Just take your time to beat it until smooth and creamy. For cutting brownie bites, a plastic knife dipped in warm water helps achieve cleaner edges without sticking. I’ve tried silicone baking pans but prefer metal ones for crisper edges and faster baking.
Preparation Method
- Preheat your oven to 350°F (175°C). Grease your 8×8-inch baking pan or line it with parchment paper for easy removal. This step ensures your brownies don’t stick and come out in perfect squares.
- Mix dry ingredients. In a medium bowl, sift together the flour, cocoa powder, salt, and baking powder. This helps avoid lumps and distributes the leavening evenly. Set aside.
- Combine wet ingredients. In a separate large bowl, whisk the melted butter and granulated sugar until combined. Add the eggs one at a time, beating well after each addition, then stir in the vanilla extract.
- Fold dry into wet. Gradually add the dry ingredients to the wet mixture, folding gently with a spatula until just combined. Avoid over-mixing to keep the brownies tender and fudgy.
- Pour batter into the prepared pan. Spread it evenly with a spatula. The batter will be thick but smooth. Bake for 20-25 minutes or until a toothpick inserted near the center comes out with a few moist crumbs (not wet batter).
- Cool completely. Let the brownies cool in the pan on a wire rack for at least 30 minutes. Patience here is key to clean cutting and frosting application.
- Prepare the frosting. Beat the softened butter until fluffy (about 2 minutes). Gradually add powdered sugar, mixing on low speed. Add vanilla and milk 1 tablespoon at a time until it reaches a thick but spreadable consistency. Mix in black gel food coloring until evenly dark.
- Cut brownies into small squares. Aim for about 1.5-inch (4cm) squares to make perfect bite-sized pieces. Use a sharp knife and wipe it clean between cuts for neat edges.
- Frost each brownie bite. Using a small offset spatula or piping bag, spread or pipe a thin layer of black frosting on top of each brownie square.
- Add the graduation cap top and tassel. Place a mini candy square or small chocolate piece in the center of the frosting. Attach a short piece of licorice string or colored sugar strand on one corner to mimic the tassel. Press gently to secure.
- Chill briefly. Place the finished brownie bites in the fridge for 10-15 minutes to set the frosting before serving.
Pro Tip: If your frosting feels too thin after coloring, add a little more powdered sugar. If too stiff, thin with a drop of milk. Also, make sure brownies are completely cool before frosting to avoid melting the top layer.
Cooking Tips & Techniques
Getting the perfect fudgy texture with these brownie bites is all about timing and ingredient quality. Melt the butter gently—overheating can make the batter greasy. When mixing the batter, folding is your friend; it keeps the brownies tender rather than cakey.
A common mistake is cutting brownies too soon. I learned the hard way that warm brownies crumble and smear easily. Waiting until they’re fully cool (or even chilled) makes all the difference for neat squares.
For frosting, gel food color is a game-changer. Liquid colors thin the frosting, making it hard to hold the mortarboard shape. If you’ve ever tried piping colored frosting and it slid right off, that’s probably why. Using a small offset spatula instead of a knife for spreading gives more control and a smoother finish.
Multitasking tip: While brownies bake, prepare your frosting and get your toppings ready. That way, as soon as brownies cool, you can jump straight into decorating without losing momentum.
Lastly, don’t skip chilling the finished bites. It sets the frosting and keeps those delicate tassels from drooping. Patience here means your treats look as good as they taste.
Variations & Adaptations
These Perfect Graduation Cap Brownie Bites are versatile and easy to customize.
- Dietary: Use gluten-free flour blend and dairy-free butter to make these treats suitable for gluten and dairy intolerances. Coconut milk works well in frosting for a subtle tropical hint.
- Seasonal: Swap the black frosting for school colors—think red or blue gel colors—for a personalized touch. Add edible glitter for extra sparkle at winter graduations.
- Flavor: Stir in a teaspoon of espresso powder to the brownie batter to deepen the chocolate flavor. For a minty twist, mix peppermint extract into the frosting instead of vanilla.
- Cooking Method: If you prefer, bake the brownie batter in mini muffin tins for naturally bite-sized shapes — just reduce baking time to 15-18 minutes.
- Personal Variation: I once tried adding a layer of peanut butter between the brownie and frosting. It was a hit with the peanut butter lovers in the family, creating a rich, nutty surprise beneath the cap.
Serving & Storage Suggestions
Serve these brownie bites at room temperature for the best flavor and texture. Arrange them on a festive platter or tiered stand to highlight their playful graduation cap design. They pair wonderfully with a cold glass of milk, coffee, or even sparkling cider for toasting.
Store leftover bites in an airtight container in the refrigerator for up to 4 days. Before serving again, let them sit out for about 15 minutes to soften slightly. For longer storage, freeze the bites in a single layer on a baking sheet, then transfer to a freezer-safe container for up to 2 months. Thaw overnight in the fridge before serving.
Flavors actually deepen after a day or two, so if you’re prepping ahead of time, that’s a bonus! Just be mindful the frosting may lose some firmness, so keep chilled until serving. These little treats make a great addition to a dessert table alongside other crowd-pleasers like cheeseburger pie for savory balance or creamy Tuscan garlic shrimp pasta for a full celebratory spread.
Nutritional Information & Benefits
Each Perfect Graduation Cap Brownie Bite contains an estimated 120-140 calories depending on size and frosting amount. They provide a satisfying dose of antioxidants from cocoa powder, which is rich in flavonoids known to support heart health.
While these bites are definitely a treat, using quality dark cocoa and controlling sugar levels helps keep them from being overly sweet. The small portion size also encourages mindful indulgence without overdoing it.
This recipe is naturally gluten-free adaptable and can be modified for dairy-free needs. Be aware they contain eggs and nuts if you add the peanut butter variation. For those watching carbs, consider swapping sugar with erythritol or monk fruit sweeteners to reduce impact.
From my perspective, these bites are a joyful way to celebrate achievements without sacrificing flavor or fun. They remind me that good food isn’t just fuel—it’s a way to bring people together and mark moments worth remembering.
Conclusion
The Perfect Graduation Cap Brownie Bites for Celebrations hold a special place in my heart—not just for their chocolatey goodness but for the smiles they bring. Whether you’re rushing to prep a last-minute party or planning a memorable graduation gathering, these bites deliver charm, flavor, and ease all in one.
Feel free to tweak the colors, flavors, or even the size to fit your celebration style. I love how adaptable this recipe is and how it invites creativity without stress. Plus, it pairs beautifully with savory sides or hearty mains like those found in the cozy single-serving casserole recipe that’s perfect for smaller gatherings.
Give these brownie bites a try and watch them become a crowd favorite. Don’t hesitate to share your own spin in the comments—I’m always excited to hear how you make this recipe your own. Here’s to sweet celebrations and even sweeter memories!
FAQs
- Can I make these brownie bites ahead of time? Yes! You can bake and frost them a day in advance. Store in the fridge and bring them to room temperature before serving.
- What if I don’t have black gel food coloring? You can mix blue and red gel colors to create a dark shade, or use regular black food coloring but add less liquid to keep frosting thick.
- How do I keep the frosting from melting? Make sure brownies are completely cooled before frosting. Chill the finished bites before serving to help set the frosting.
- Can I use a boxed brownie mix? Absolutely! Just follow the package instructions and let the brownies cool fully before decorating.
- What can I use instead of licorice strings for tassels? Thin strips of fruit roll-ups or colored sugar strands work well as alternatives.
Pin This Recipe!
Perfect Graduation Cap Brownie Bites
These bite-sized brownie treats are quick, easy, and perfect for graduation parties or celebrations, featuring a playful graduation cap design with rich chocolate flavor and creamy frosting.
- Prep Time: 15 minutes
- Cook Time: 25 minutes
- Total Time: 40 minutes
- Yield: 24 brownie bites 1x
- Category: Dessert
- Cuisine: American
Ingredients
- 1 cup (125g) all-purpose flour
- 1/2 cup (45g) unsweetened cocoa powder
- 1 cup (200g) granulated sugar
- 1/2 cup (1 stick or 115g) unsalted butter, melted
- 2 large eggs, room temperature
- 1 tsp vanilla extract
- 1/4 tsp salt
- 1/4 tsp baking powder
- 1 cup (120g) powdered sugar
- 2 tbsp unsalted butter, softened
- 1–2 tbsp milk or cream
- 1/2 tsp vanilla extract
- Black gel food coloring
- Mini square candies or chocolate squares
- Thin licorice strings or colored sugar strands
Instructions
- Preheat your oven to 350°F (175°C). Grease an 8×8-inch baking pan or line it with parchment paper.
- In a medium bowl, sift together the flour, cocoa powder, salt, and baking powder. Set aside.
- In a large bowl, whisk the melted butter and granulated sugar until combined. Add eggs one at a time, beating well after each addition, then stir in vanilla extract.
- Gradually fold the dry ingredients into the wet mixture until just combined. Avoid over-mixing.
- Pour batter into the prepared pan and spread evenly. Bake for 20-25 minutes or until a toothpick inserted near the center comes out with a few moist crumbs.
- Cool brownies completely in the pan on a wire rack for at least 30 minutes.
- Prepare the frosting by beating softened butter until fluffy. Gradually add powdered sugar, mixing on low speed. Add vanilla and milk 1 tablespoon at a time until thick but spreadable. Mix in black gel food coloring until evenly dark.
- Cut brownies into approximately 1.5-inch squares using a sharp knife, wiping clean between cuts.
- Frost each brownie bite with a thin layer of black frosting using a small offset spatula or piping bag.
- Place a mini candy square or chocolate piece in the center of each frosted brownie. Attach a short piece of licorice string or colored sugar strand on one corner to mimic the tassel.
- Chill the finished brownie bites in the refrigerator for 10-15 minutes to set the frosting before serving.
Notes
Use black gel food coloring for best frosting consistency and color. Ensure brownies are completely cooled before frosting to prevent melting. For gluten-free, substitute all-purpose flour with almond flour. For dairy-free, use coconut oil and plant-based milk. Chill finished bites to set frosting and keep tassels in place. Use a plastic knife dipped in warm water for cleaner cuts.
Nutrition
- Serving Size: 1 brownie bite (appr
- Calories: 130
- Sugar: 15
- Sodium: 90
- Fat: 6
- Saturated Fat: 3.5
- Carbohydrates: 20
- Fiber: 1
- Protein: 2
Keywords: brownie bites, graduation treats, party desserts, chocolate brownies, easy brownies, festive desserts, bite-sized brownies


