I was standing in line at my local hardware store, of all places, holding a bag of lightbulbs and a new garden hose, when the woman behind me—a retired schoolteacher named Mrs. Kowalski who I’d only ever seen watering her petunias—started talking about dinner rolls. Not just any rolls, mind you. She was describing these quick honey butter dinner rolls she’d made the night before, and she was so animated about it that the cashier stopped scanning my items to listen.
“You just mix it in one bowl,” she said, waving her hand like it was the simplest thing in the world. “No stand mixer, no fancy equipment. And they’re ready in under an hour.” I’ll be honest, I was skeptical. Homemade rolls that are actually quick? I’ve been burned by that promise before—you know the ones, where “quick” still means two hours and a sink full of dishes. But something about the way she described that honey butter glaze, pooling warm over the tops, made me grab a scrap of paper from my pocket and write it down right there between the plumbing aisle and the paint samples.
I made them that same night, and let me tell you, I haven’t looked back. These quick honey butter dinner rolls have become my weeknight secret weapon. They’re soft, they’re fluffy, they’re slathered in that sweet honey butter that seeps into every crevice. And honestly? They come together so fast that you’ll have them on the table before you finish making the rest of your dinner. Maybe you’ve been there—standing in your kitchen at 5:45, wondering what on earth you’re going to serve with the soup that’s already simmering. These rolls are your answer.
Why You’ll Love This Recipe
I’ve tested this recipe more times than I care to count, tweaking the flour ratio, adjusting the honey amount, and timing the rise just right. What I ended up with is a roll that’s foolproof, fast, and genuinely delicious. Here’s why this one’s different:
- Ready in Under an Hour — From mixing bowl to dinner table in about 45 minutes. That’s faster than picking up a bakery order.
- One Bowl, No Mixer — You don’t need a stand mixer, a bread hook, or any fancy gadget. Just a bowl, a spoon, and your hands.
- Pantry-Friendly Ingredients — Flour, yeast, butter, honey, milk, salt. That’s it. No weird special-order stuff.
- Perfect for Busy Weeknights — These rolls save the day when you need something warm and comforting without the fuss.
- Kid-Approved, Guest-Impressing — My niece calls them “the sticky sweet ones,” and she’s not wrong. Adults love them just as much.
What makes these quick honey butter dinner rolls stand out from every other recipe out there is the technique. Most quick-rise roll recipes end up dense or dry because they rush the yeast. But I figured out a way to get that bakery-style softness without the long wait. The secret is in how you handle the butter—melting it just right so the dough stays tender. Plus, that honey butter glaze? It’s not just brushed on top. It gets a second coat halfway through baking, so it caramelizes into this gorgeous golden crust. Trust me, this isn’t just another roll recipe. It’s the one you’ll come back to again and again.
What Ingredients You Will Need
This recipe uses simple, everyday ingredients to create something that tastes anything but ordinary. Most of these are probably in your kitchen right now, which is exactly the point. Here’s what you’ll need:
For the Dough
- All-purpose flour, 3 cups (360g) — I use Gold Medal, but any brand works. Spoon and level it into your measuring cup for accuracy.
- Instant yeast, 1 packet (2 ¼ teaspoons) — This is key for speed. No proofing needed with instant yeast. Look for Fleischmann’s or Red Star.
- Granulated sugar, 2 tablespoons — Just a touch to feed the yeast and add a hint of sweetness.
- Salt, 1 teaspoon — Don’t skip this. Salt controls the yeast and brings out the flavor.
- Whole milk, ¾ cup (180ml), warmed to about 110°F — You can use 2% or even oat milk in a pinch, but whole milk gives the richest texture.
- Unsalted butter, 4 tablespoons (½ stick), melted — Let it cool slightly so it doesn’t kill the yeast.
- Honey, 3 tablespoons — Use a mild honey like clover or orange blossom. Strong honey can overpower the rolls.
- Large egg, 1, at room temperature — This adds richness and helps the rolls stay soft for days.
For the Honey Butter Glaze
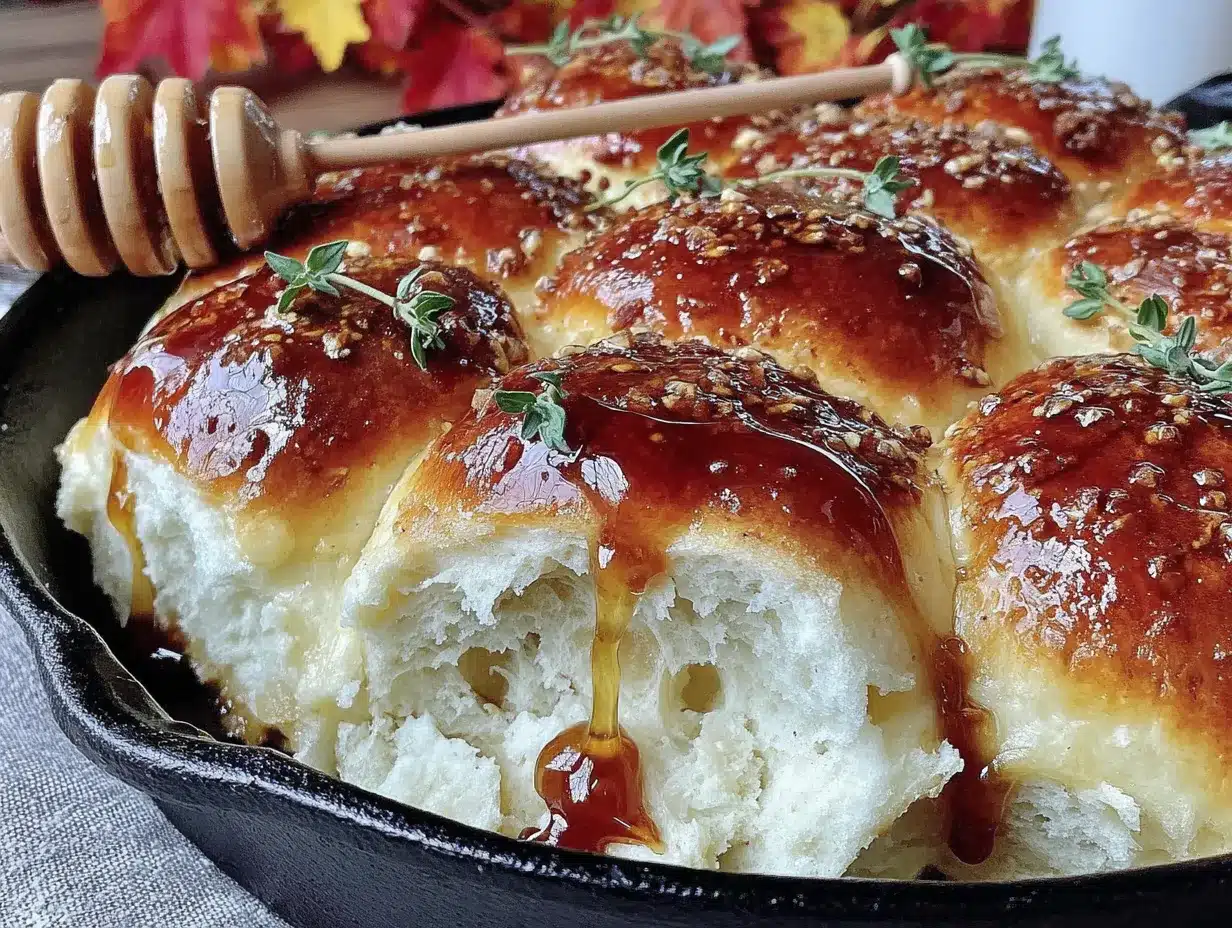
- Unsalted butter, 3 tablespoons, melted
- Honey, 2 tablespoons
- Flaky sea salt (optional but amazing) — A tiny sprinkle on top right when they come out of the oven.
I really recommend using instant yeast here rather than active dry. Active dry needs to be dissolved in warm water first, which adds time and another step. Instant yeast just gets mixed right in with the flour—simple and fast. For the honey, I’ve tried this with local wildflower honey and with the basic store-brand stuff, and honestly, both work great. Just avoid anything labeled “honey flavored syrup.” That’s not real honey, and it’ll mess with the texture.
Equipment Needed
You don’t need much for these quick honey butter dinner rolls, which is exactly how I like it on a busy weeknight. Here’s what you’ll want to have handy:
- Large mixing bowl — Any big bowl works, but I prefer a ceramic one because it holds warmth nicely.
- Wooden spoon or silicone spatula — For mixing the dough. Your hands work too, honestly.
- Measuring cups and spoons — Accuracy matters with baking, even quick breads.
- 9-inch round baking pan or 8-inch square dish — A cake pan, pie plate, or even a cast-iron skillet works. I’ve used my 10-inch cast iron before, and the rolls get an extra-crispy edge that’s fantastic.
- Pastry brush — For slathering on that honey butter glaze. If you don’t have one, just use a spoon and drizzle it over.
- Kitchen towel or plastic wrap — To cover the dough while it rises.
- Oven mitts — Because hot honey butter burns are real, and I’ve got the scars to prove it.
If you don’t have a pastry brush, no worries. I’ve used a folded paper towel in a pinch, and it worked just fine. Just don’t use a silicone basting brush if you have one—they tend to leave glops of butter instead of an even coat. A natural bristle brush is better for this.
Preparation Method
Let’s get these quick honey butter dinner rolls going. I’ve broken this down into simple steps, and I’ll tell you exactly what to look for at each stage so you know you’re on the right track.
- Warm the milk. Pour ¾ cup of milk into a microwave-safe measuring cup and heat it for about 30-40 seconds. You want it warm to the touch—around 110°F—but not hot. If it’s too hot, it’ll kill the yeast. Think warm bathwater, not hot coffee. If you don’t have a thermometer, test a drop on your wrist. It should feel pleasantly warm, not burning.
- Mix the dry ingredients. In your large bowl, whisk together 3 cups of flour, the instant yeast, 2 tablespoons sugar, and 1 teaspoon salt. Make sure they’re evenly distributed. I like to use a whisk for this to break up any clumps in the flour.
- Add the wet ingredients. Make a well in the center of the flour mixture. Pour in the warm milk, 4 tablespoons of melted butter (cooled slightly), 3 tablespoons of honey, and the egg. Stir everything together with your wooden spoon until a shaggy dough forms. It’ll look rough and sticky at this point—that’s normal.
- Knead the dough. Turn the dough out onto a lightly floured surface. Knead it for about 3-4 minutes, adding just a sprinkle more flour if it’s too sticky to handle. You’re not looking for the super-smooth, elastic dough you’d get from bread. This dough should be soft and slightly tacky but not sticking to your hands. I usually knead until it just comes together—over-kneading will make the rolls tough.
- Let it rise. Place the dough back in the bowl (you can wipe it out first if you want, but I never bother). Cover the bowl with a clean kitchen towel and let it sit in a warm spot for 20 minutes. I put mine on the counter near the stove while I’m cooking something else. The dough should puff up noticeably but won’t double in size like traditional bread dough. That’s fine—we’re going for speed here.
- Shape the rolls. After the rest, punch the dough down gently. Divide it into 8 equal pieces—I just eyeball it, but you can use a kitchen scale if you’re particular. Shape each piece into a smooth ball by tucking the edges under and rolling it between your palms. Place the balls in your greased 9-inch pan, spacing them evenly. They’ll touch as they rise, which is exactly what you want.
- Second rise. Cover the pan with the towel again and let the rolls rise for another 15 minutes. They should look puffy and have grown about 50% larger. Meanwhile, preheat your oven to 375°F.
- Make the glaze and bake. While the rolls are doing their second rise, mix together 3 tablespoons of melted butter and 2 tablespoons of honey in a small bowl. Brush half of this glaze over the tops of the risen rolls. Pop them in the oven and bake for 12 minutes. Then pull them out, brush on the remaining glaze, and bake for another 5-8 minutes, until the tops are deep golden brown.
- Finish and serve. As soon as they come out of the oven, brush them one more time with any leftover glaze in the bowl. If you’re using flaky sea salt, sprinkle a little over the tops right now. Let them cool in the pan for about 5 minutes—if you can wait that long—then serve warm.
Cooking Tips & Techniques
I’ve made these quick honey butter dinner rolls more times than I can count, and I’ve learned a few things the hard way. Here are the tips that’ll save you from my mistakes.
Don’t overheat the milk. This is the number one mistake people make with any yeast recipe. If the milk is too hot, it kills the yeast, and your rolls will be dense little hockey pucks. Too cold, and the yeast won’t activate properly. I use an instant-read thermometer, but if you don’t have one, the wrist test works: a drop on the inside of your wrist should feel warm but not hot.
Measure your flour correctly. Scooping flour directly with the measuring cup packs it down, and you’ll end up with too much. Instead, fluff the flour with a spoon, then spoon it into the measuring cup and level it off with a knife. Or just use a kitchen scale—360 grams is 360 grams every time.
Let the dough rest properly. I know it’s tempting to rush the rise, but those 20 and 15-minute rests are non-negotiable. The first rest develops the gluten structure, and the second rest makes the rolls light and airy. I once tried to cut the second rise to 5 minutes because I was starving, and the rolls came out dense and chewy. Learn from my impatience.
Brush the glaze twice. This is the trick that makes these rolls special. The first brush of glaze during baking creates a subtle sweetness, but the second brush halfway through caramelizes into that sticky, golden crust. Don’t skip it—it’s what makes people ask for the recipe.
Use room temperature egg. A cold egg straight from the fridge can shock the dough and make it harder to mix. Just set your egg on the counter while you gather the other ingredients, and it’ll be ready by the time you need it.
Variations & Adaptations
These quick honey butter dinner rolls are pretty perfect as-is, but I’ve played around with them enough to know they’re also super adaptable. Here are some variations I’ve tried and loved.
Garlic Herb Rolls. Add 1 teaspoon of garlic powder and 1 tablespoon of dried rosemary or thyme to the flour mixture. Then, in the glaze, use only 1 tablespoon of honey and add a minced garlic clove. These are incredible with pasta or roast chicken.
Whole Wheat Version. Swap 1 cup of the all-purpose flour for whole wheat flour. You’ll need to add an extra 2 tablespoons of milk because whole wheat absorbs more liquid. The rolls won’t be quite as fluffy, but they’ll have a nice nutty flavor that pairs beautifully with the honey.
Vegan Adaptation. Use oat milk or almond milk instead of dairy milk, substitute the butter with vegan butter (I like Miyoko’s), and replace the egg with a flax egg (1 tablespoon ground flaxseed mixed with 3 tablespoons water, let sit for 5 minutes). The texture will be slightly denser, but they’re still delicious.
Cinnamon Honey Rolls. After the first rise, roll the dough out into a rectangle, brush with melted butter, sprinkle with cinnamon and sugar, then roll it up and slice into rounds. Bake as directed, and you’ve got cinnamon rolls in under an hour. My kids go crazy for these.
Cheesy Pull-Apart Rolls. Before shaping the dough into balls, flatten each piece, place a small cube of cheddar or mozzarella in the center, then seal it up and shape into a ball. The cheese melts inside, and you get these gooey, savory surprises. Perfect alongside chili or soup.
Serving & Storage Suggestions
These quick honey butter dinner rolls are best served warm, straight from the oven, with the honey butter still glistening on top. But they’re also fantastic at room temperature, so don’t stress if dinner runs late.
Serving Ideas. I love these alongside a big bowl of tomato soup, a hearty beef stew, or a simple roast chicken. They’re also amazing for breakfast—split one open, toast it lightly, and slather on more butter. Or use them for mini sandwiches with ham and cheese. Honestly, they’re so versatile that I’ve served them with everything from Thanksgiving turkey to weekday scrambled eggs.
Complementary Dishes. If you’re planning a full meal, try these rolls with creamy tuscan chicken or one pot beef stew. The honey butter sweetness balances the savory richness perfectly.
Storage. Store leftover rolls in an airtight container at room temperature for up to 3 days. Don’t refrigerate them—the fridge dries out bread faster than anything. If you need to keep them longer, freeze them.
Freezing Instructions. Let the rolls cool completely, then wrap them tightly in plastic wrap and place them in a freezer bag. They’ll keep for up to 3 months. To reheat, thaw at room temperature, then warm in a 350°F oven for 5-7 minutes. Brush with a little extra honey butter before serving, and they’ll taste almost as good as fresh.
Reheating Tip. For that just-baked texture, wrap the rolls in foil and heat them in a 350°F oven for 10 minutes. The foil traps steam and re-softens the rolls. Don’t use the microwave unless you’re in a desperate hurry—it makes them chewy.
Nutritional Information & Benefits
These quick honey butter dinner rolls are a treat, but they’re made with real food ingredients, which counts for something. Here’s a rough breakdown per roll (based on 8 servings):
| Nutrient | Amount per Roll |
|---|---|
| Calories | 285 |
| Total Fat | 12g |
| Saturated Fat | 7g |
| Carbohydrates | 38g |
| Sugar | 12g |
| Protein | 6g |
| Fiber | 1g |
| Sodium | 320mg |
Honey, the star of the show here, contains antioxidants and has natural antibacterial properties. It’s also a better choice than refined sugar for sweetness, though it’s still sugar, so moderation is key. The butter provides vitamin A and healthy fats, while the milk and egg add protein and calcium. These rolls aren’t health food, but they’re made from scratch with wholesome ingredients—no preservatives, no weird additives. For a busy weeknight, that’s a win in my book.
If you’re watching your carb intake, you could try a low-carb flour blend, but I’ll be honest—the texture won’t be the same. Sometimes, a real roll is worth the carbs.
Conclusion
These quick honey butter dinner rolls have saved my sanity on more weeknights than I can count. They’re fast enough for a Tuesday, special enough for a holiday, and simple enough that anyone can make them. The story of how I got the recipe—from a retired teacher in a hardware store line—still makes me smile every time I pull a pan of these golden beauties out of the oven. There’s something about unexpected recipes that feel a little bit like magic, you know?
I really hope you give these a try. Customize them however you like—throw in some herbs, make them cheesy, or keep them classic with that honey butter glaze. And when you do, I’d love to hear about it. Leave a comment below and tell me how they turned out, or share a photo on Pinterest with your own twist. These rolls are meant to be shared, after all. Happy baking, friends!
Frequently Asked Questions
Can I use active dry yeast instead of instant yeast?
Yes, but you’ll need to proof it first. Dissolve the yeast in the warm milk with a pinch of sugar and let it sit for 5-10 minutes until it’s frothy. Then proceed with the recipe. It adds about 10 minutes to the process, so plan accordingly.
Why did my rolls turn out dense?
Most likely, the milk was too hot and killed the yeast, or the dough was over-kneaded. Make sure your milk is around 110°F and only knead until the dough comes together—about 3-4 minutes max. Also, check that your yeast isn’t expired.
Can I make these rolls ahead of time?
Absolutely. You can prepare the dough through the first rise, then cover and refrigerate it overnight. The next day, let it sit at room temperature for 20 minutes, then shape and proceed with the second rise and baking. The flavor actually develops more this way.
Can I double this recipe?
Yes, it doubles beautifully. Use a 9×13-inch pan and increase the baking time by about 5 minutes. Keep an eye on the color—you want deep golden brown tops.
What if I don’t have honey?
You can substitute maple syrup or agave nectar in equal amounts. The flavor will change slightly, but the texture will be similar. Maple syrup gives a lovely woodsy sweetness that’s especially good with the garlic herb variation.
Pin This Recipe!
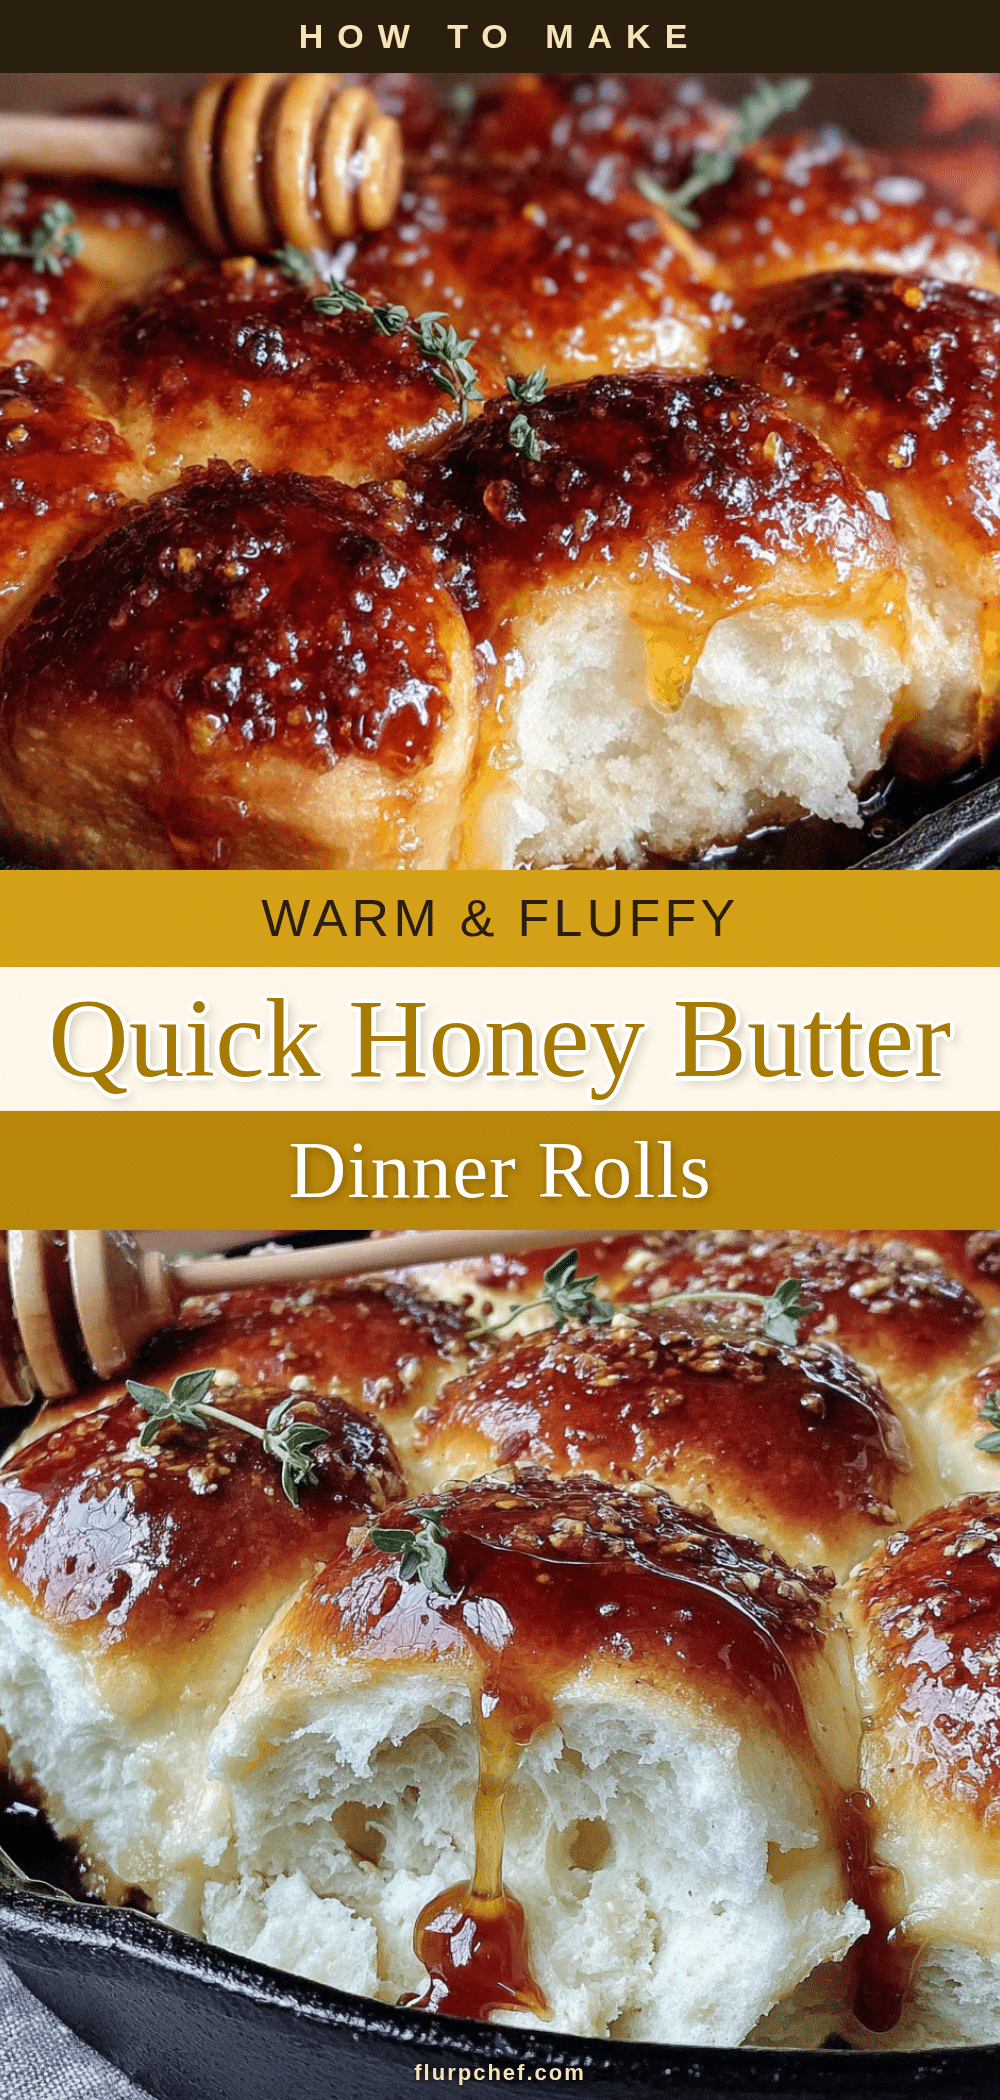
Quick Honey Butter Dinner Rolls Recipe Easy Homemade

These quick honey butter dinner rolls are soft, fluffy, and slathered in a sweet honey butter glaze. Ready in under an hour with just one bowl and no mixer, they’re perfect for busy weeknights.
- Prep Time: 15 minutes
- Cook Time: 17-20 minutes
- Total Time: 45 minutes
- Yield: 8 servings 1x
- Category: Side Dish
- Cuisine: American
Ingredients
- 3 cups (360g) all-purpose flour
- 1 packet (2 ¼ teaspoons) instant yeast
- 2 tablespoons granulated sugar
- 1 teaspoon salt
- ¾ cup (180ml) whole milk, warmed to about 110°F
- 4 tablespoons (½ stick) unsalted butter, melted and cooled slightly
- 3 tablespoons honey
- 1 large egg, at room temperature
- 3 tablespoons unsalted butter, melted (for glaze)
- 2 tablespoons honey (for glaze)
- Flaky sea salt (optional, for topping)
Instructions
- Warm the milk: Pour ¾ cup of milk into a microwave-safe measuring cup and heat for 30-40 seconds until warm (about 110°F). Test a drop on your wrist; it should feel pleasantly warm, not hot.
- Mix dry ingredients: In a large bowl, whisk together 3 cups flour, instant yeast, 2 tablespoons sugar, and 1 teaspoon salt until evenly distributed.
- Add wet ingredients: Make a well in the center of the flour mixture. Pour in the warm milk, 4 tablespoons melted butter (cooled slightly), 3 tablespoons honey, and the egg. Stir with a wooden spoon until a shaggy dough forms.
- Knead the dough: Turn dough out onto a lightly floured surface. Knead for 3-4 minutes, adding a sprinkle more flour if too sticky. Dough should be soft and slightly tacky but not sticking to your hands.
- First rise: Place dough back in the bowl, cover with a clean kitchen towel, and let rise in a warm spot for 20 minutes. Dough should puff up noticeably but not double.
- Shape the rolls: Punch down dough gently. Divide into 8 equal pieces. Shape each into a smooth ball by tucking edges under and rolling between your palms. Place balls in a greased 9-inch round baking pan, spacing evenly.
- Second rise: Cover pan with towel and let rolls rise for 15 minutes until puffy and about 50% larger. Meanwhile, preheat oven to 375°F.
- Make glaze and bake: In a small bowl, mix 3 tablespoons melted butter and 2 tablespoons honey. Brush half the glaze over the risen rolls. Bake for 12 minutes. Remove from oven, brush with remaining glaze, and bake for another 5-8 minutes until deep golden brown.
- Finish and serve: As soon as rolls come out, brush with any leftover glaze. Sprinkle with flaky sea salt if desired. Let cool in pan for 5 minutes, then serve warm.
Notes
Don’t overheat the milk; it should be around 110°F. Measure flour correctly by spooning and leveling. Let the dough rest for the full times specified. Brush the glaze twice for a caramelized crust. Use room temperature egg. For variations, try garlic herb, whole wheat, vegan, cinnamon honey, or cheesy pull-apart rolls. Store leftovers in an airtight container at room temperature for up to 3 days. Freeze for up to 3 months.
Nutrition
- Serving Size: 1 roll
- Calories: 285
- Sugar: 12
- Sodium: 320
- Fat: 12
- Saturated Fat: 7
- Carbohydrates: 38
- Fiber: 1
- Protein: 6
Keywords: quick honey butter dinner rolls, easy homemade rolls, one bowl dinner rolls, no mixer rolls, weeknight rolls