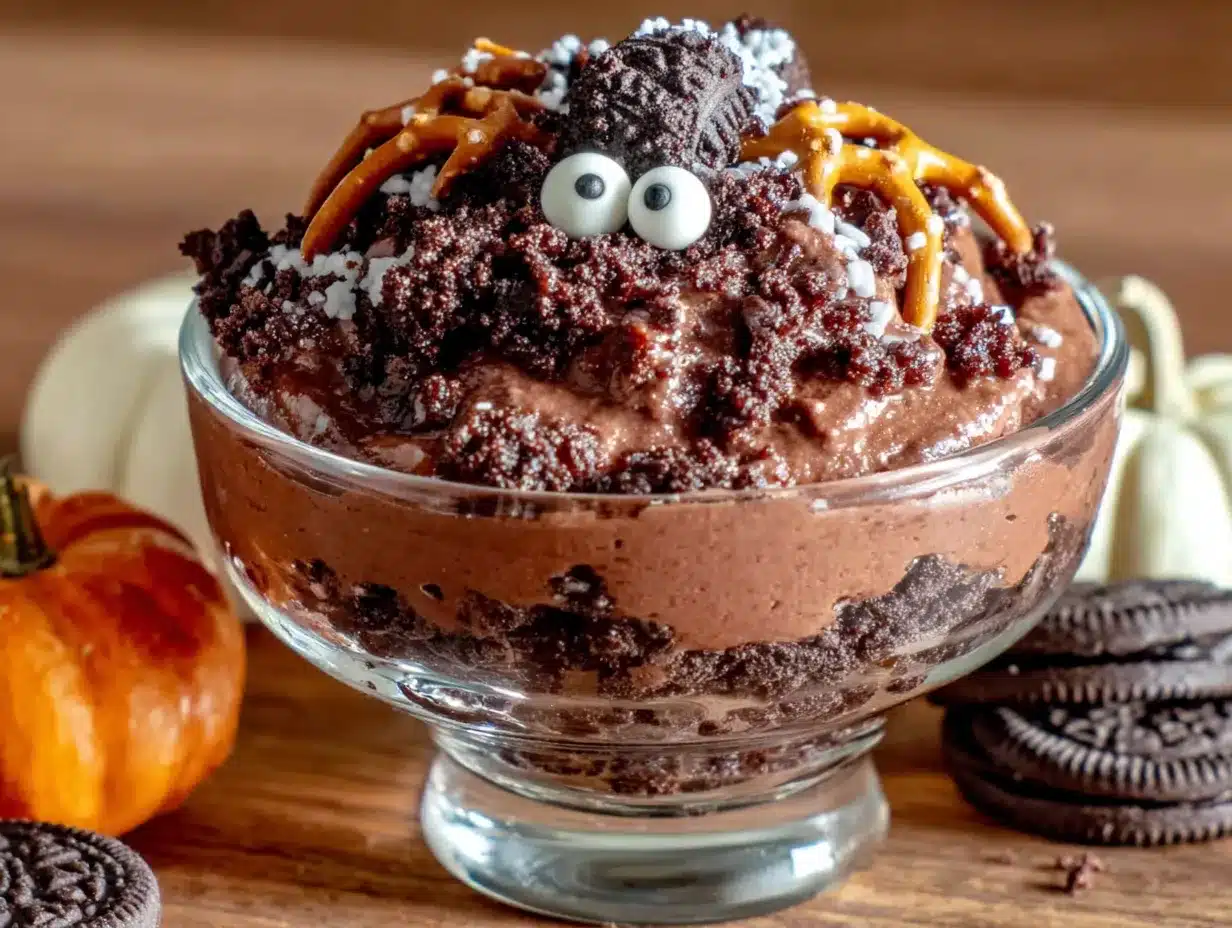
My niece didn’t ask for candy when she walked in the door last Halloween. She spotted the tray of these spider cheesecake cups on the counter and just froze. Then she pointed and said, “Those are MINE,” with a look that left no room for argument. I hadn’t even planned on making them that year—I was tired, and store-bought candy felt like the path of least resistance. But I’d seen a bag of Oreos in the pantry and a block of cream cheese in the fridge, and something clicked. Twenty minutes later, I had eight little cups chilling in the fridge, each one topped with a chocolate spider that looked way too proud of itself. Watching her guard that cup with her life (she ate it before she even touched her candy haul) made me realize this wasn’t just a dessert—it was a new Halloween tradition.
These no-bake spider cheesecake cups are the kind of recipe that feels like cheating. The filling is impossibly creamy, thanks to a little trick with heavy cream that gives it a mousse-like texture without any gelatin. And the Oreo crust? It’s just crushed cookies and butter, pressed into the bottom of a cup. No baking, no fuss, no turning on the oven when you’re already sweating from wrestling with costume zippers. The spiders themselves are made from chocolate—either melted and piped or just using whole Oreos with pretzel legs. They look complicated, but honestly, a five-year-old could assemble them. Probably faster than you could.
This is the dessert that saves Halloween. It’s the one you make when you want something homemade without spending your whole evening in the kitchen. It’s the one that makes kids feel like you went all out, even though you secretly didn’t. And honestly, it’s the one I look forward to making every October now—not because it’s fancy, but because it’s fun. And because watching someone’s face light up when they see a spider made of chocolate is a pretty good feeling.
Why You’ll Love This Recipe
I’ve made a lot of Halloween desserts over the years. Some were complicated. Some were disasters. These spider cheesecake cups are the ones I keep coming back to, and here’s why they work so well:
- No-Bake & Quick: You don’t need to turn on the oven or stand over a stove. The whole thing comes together in about 20 minutes of active time—perfect for Halloween chaos when you’re juggling costumes, decorations, and last-minute candy runs.
- Simple Ingredients: Cream cheese, heavy cream, Oreos, powdered sugar, and vanilla. That’s it. No fancy baking chocolate, no gelatin, no obscure extracts you’ll never use again. You probably already have everything in your kitchen right now.
- Perfect for Halloween Parties: These individual cups are ideal for school parties, potlucks, or just a spooky family dessert. They’re portable, kid-friendly, and they look like you spent way more time on them than you actually did.
- Crowd-Pleaser: I’ve served these to kids and adults alike, and they disappear every single time. The creamy cheesecake filling is rich without being heavy, and the Oreo crust adds that familiar chocolate cookie crunch everyone loves.
- Unbelievably Delicious: The texture is what gets people. It’s not dense like a traditional cheesecake—it’s light and airy, almost like a mousse, because of the whipped cream folded in. The chocolate spider on top is just the cherry on top (or the legs on top, I guess).
This recipe is different from other no-bake cheesecakes because of that whipped cream trick. Most recipes just mix cream cheese and sugar, and you end up with something that’s fine but a little heavy. By whipping the cream separately and folding it in, you get a filling that’s silky and cloud-like. It’s a small step that makes a big difference, and it’s the reason people always ask me for the recipe after they take their first bite.
What Ingredients You Will Need
This recipe uses simple, everyday ingredients that come together to create something that feels surprisingly fancy. No weird stuff here—just pantry staples and a little Halloween magic.
For the Oreo Crust
- Oreo cookies – 20 cookies (regular, not double-stuff). You’ll crush them into fine crumbs. I recommend using a food processor or a zip-top bag and a rolling pin. The crumbs should be uniform for the best crust texture.
- Unsalted butter – 4 tablespoons, melted. If you only have salted butter, just skip adding any extra salt to the crust. The butter binds the crumbs together and adds richness.
For the Cheesecake Filling
- Cream cheese – 8 ounces, softened to room temperature. This is important—cold cream cheese will leave you with lumps. Let it sit on the counter for about 30 minutes before you start.
- Powdered sugar – 1/2 cup (60 grams). This sweetens the filling without the graininess of granulated sugar. Sift it if you have time, but honestly, I rarely do and it works fine.
- Vanilla extract – 1 teaspoon. Pure vanilla extract is best, but imitation works in a pinch. You could also use vanilla bean paste for those pretty little specks.
- Heavy cream – 1 cup (240 ml), cold. This is the secret to the light, mousse-like texture. Make sure it’s well-chilled so it whips up properly. I like using Horizon Organic or Organic Valley for their consistent quality.
For the Spider Decoration
- Chocolate melting wafers – 1/2 cup (or dark chocolate chips). I prefer Ghirardelli melting wafers because they melt smoothly and set up firm. You can also use regular chocolate chips mixed with a teaspoon of coconut oil.
- Pretzel sticks – 8, broken in half to make 16 legs. The salted kind adds a nice salty-sweet contrast. If you’re making a lot of spiders, just double or triple the pretzel count.
- Candy eyes – 16 (optional, but highly recommended). You can find these at any craft store or grocery store baking aisle. They make the spiders look adorable instead of scary.
Substitution note: If you need a dairy-free version, use vegan cream cheese and coconut cream (chilled) instead of heavy cream. The texture will be slightly different but still delicious. For a gluten-free option, use gluten-free chocolate sandwich cookies and check your pretzels for gluten-free certification.
Equipment Needed
You don’t need a fancy kitchen to make these spider cheesecake cups. Here’s what you’ll need:
- 8 small cups or ramekins (about 4-6 ounces each). I use small mason jars or disposable plastic cups for parties. Glass cups look prettier, but plastic is easier for kids to hold.
- Electric hand mixer or stand mixer. You could whisk by hand, but your arm will thank you for using a mixer. A hand mixer works perfectly fine.
- Food processor or zip-top bag for crushing Oreos. A food processor gives you the finest crumbs, but a bag and a rolling pin work just as well—and it’s a great way to let kids help.
- Mixing bowls (one medium, one small). You’ll need separate bowls for the crust, filling, and chocolate.
- Rubber spatula for folding the whipped cream into the cream cheese mixture. A spatula is gentler than a whisk and won’t deflate the air you just whipped in.
- Small piping bag or zip-top bag for the chocolate. If you don’t have a piping bag, a sandwich bag with a tiny corner snipped off works just as well.
- Baking sheet lined with parchment paper. You’ll use this to set the chocolate spiders before placing them on the cups.
If you don’t have a food processor, don’t stress. I’ve crushed Oreos with a rolling pin more times than I can count, and the crust turns out great. The key is just getting the crumbs fine enough so they stick together when you add the butter.
Preparation Method
Let’s make these spider cheesecake cups. I’ll walk you through each step so you get perfect results every time.
Step 1: Make the Oreo Crust
Place 20 Oreo cookies in a food processor and pulse until you have fine crumbs. If you don’t have a food processor, put the cookies in a zip-top bag and crush them with a rolling pin—just make sure the bag is sealed tight so you don’t end up with crumbs all over your kitchen (speaking from experience here).
Transfer the crumbs to a medium bowl and pour in 4 tablespoons of melted butter. Stir with a fork until the crumbs are evenly moistened. They should look like wet sand and hold together when you press them between your fingers.
Divide the crust mixture evenly among your 8 cups. Use the bottom of a small glass or a shot glass to press the crumbs down firmly. You want a compact, even layer at the bottom of each cup. Pop the cups in the fridge while you make the filling.
Step 2: Make the Cheesecake Filling
In a large bowl, beat the softened cream cheese with an electric mixer on medium speed until smooth and creamy—about 1 minute. Scrape down the sides of the bowl with a spatula.
Add the powdered sugar and vanilla extract, and beat on low speed until combined, then increase to medium and beat for another 30 seconds until smooth. Again, scrape down the sides. You want no lumps at this stage.
In a separate medium bowl, pour in the cold heavy cream. Using clean beaters, whip the cream on medium-high speed until stiff peaks form. This takes about 2-3 minutes. You’ll know it’s ready when you lift the beaters and the cream holds its shape without drooping. Be careful not to over-whip, or you’ll end up with butter (which is a different recipe entirely).
Now, here’s the important part: Gently fold the whipped cream into the cream cheese mixture using a rubber spatula. Start by adding about a third of the whipped cream and folding until just combined, then add the rest. Fold gently—you want to keep as much air in the mixture as possible. The final filling should be light, fluffy, and completely smooth.
Step 3: Assemble the Cheesecake Cups
Remove the cups from the fridge. Spoon or pipe the cheesecake filling on top of the Oreo crust, dividing it evenly among the 8 cups. I like to leave a little space at the top (about 1/4 inch) so the spider has room to sit.
Smooth the tops with the back of a spoon or a small offset spatula. Tap each cup gently on the counter to settle the filling and remove any air bubbles.
Return the cups to the fridge and let them chill for at least 2 hours, or until the filling is firm. You can also make them a day ahead—they actually get better as they sit.
Step 4: Make the Chocolate Spiders
While the cheesecake cups are chilling, make your chocolate spiders. Melt 1/2 cup of chocolate melting wafers in a microwave-safe bowl in 30-second intervals, stirring between each, until smooth. Be careful not to overheat the chocolate—it should be just warm enough to flow.
Line a baking sheet with parchment paper. Transfer the melted chocolate to a small piping bag or a zip-top bag with a tiny corner snipped off. Pipe small spider bodies onto the parchment paper—just little ovals or circles, about the size of a quarter. You’ll need one spider body per cup.
While the chocolate is still wet, gently press two pretzel stick halves into each side of the spider body to make the legs. I like to angle them slightly so they look like a spider crawling. If you’re using candy eyes, press two into the top of each spider body before the chocolate sets.
Place the baking sheet in the fridge for about 10-15 minutes to let the chocolate harden completely. Once set, carefully peel the spiders off the parchment paper.
Step 5: Decorate and Serve
When the cheesecake cups are firm and the spiders are set, place one chocolate spider on top of each cup. You can press it in gently so it sticks. If you want extra creepiness, drizzle a little extra melted chocolate around the spider to look like webs.
Serve immediately, or keep refrigerated until ready to serve. These cups are best enjoyed within 24 hours, but they’ll keep for up to 3 days in the fridge.
Cooking Tips & Techniques
I’ve made these spider cheesecake cups more times than I can count, and I’ve learned a few things along the way. Here are my best tips to make sure yours turn out perfect.
Room temperature cream cheese is non-negotiable. I know, I know—it’s tempting to just use it straight from the fridge. But cold cream cheese won’t blend smoothly, and you’ll end up with lumpy filling. Leave it on the counter for at least 30 minutes before you start. If you’re in a hurry, cut it into small cubes and microwave it for 10 seconds at a time until softened.
Don’t skip the whipped cream step. This is what makes the filling so light and airy. I tried making these once without whipping the cream separately—just mixing everything together—and the result was dense and heavy. Not bad, but not the same. The extra few minutes of whipping are worth it.
Chill your bowl and beaters for the whipped cream. If your kitchen is warm, pop the bowl and beaters in the freezer for 10 minutes before whipping. Cold equipment helps the cream whip up faster and hold its shape better.
Press the crust firmly. A loose crust will fall apart when you try to eat the cheesecake. Use the bottom of a glass or a small measuring cup to press the crumbs down as tight as you can. You want them to hold together like a sandcastle.
Make the spiders ahead of time. The chocolate spiders can be made up to a week in advance and stored in an airtight container at room temperature. This is a huge time-saver if you’re making these for a party. Just don’t put them in the fridge long-term, or they might get condensation and lose their shine.
One mistake I made early on: I tried using regular chocolate chips for the spiders without adding any oil. They seized up and became grainy. If you’re using chocolate chips, add a teaspoon of coconut oil or vegetable shortening to help them melt smoothly.
Variations & Adaptations
This recipe is super flexible. Here are some ways to change it up depending on your mood, dietary needs, or what you have on hand.
Peanut Butter Spider Cheesecake Cups
Add 1/4 cup of creamy peanut butter to the cream cheese mixture before folding in the whipped cream. The peanut butter adds a savory depth that pairs beautifully with the chocolate Oreo crust. Use mini Reese’s cups for the spider bodies instead of plain chocolate—trust me on this one.
Pumpkin Spice Version
Since we’re in the Halloween season, a pumpkin twist feels right. Add 1/4 cup of pumpkin puree and 1 teaspoon of pumpkin pie spice to the cream cheese mixture. Reduce the heavy cream to 3/4 cup to account for the extra moisture. The result tastes like a pumpkin cheesecake in a cup, and it’s absolutely perfect for fall. If you’re looking for more pumpkin inspiration, these pumpkin cream cheese swirl muffins are another favorite of mine.
Gluten-Free Option
Use gluten-free chocolate sandwich cookies for the crust (like Glutino or Kinnikinnick brands). For the spiders, skip the pretzels and use gluten-free pretzel sticks or just pipe extra chocolate legs directly onto the spider body. The filling itself is naturally gluten-free.
Vegan Version
Use vegan cream cheese (I like Kite Hill or Violife) and chilled coconut cream instead of heavy cream. The coconut cream needs to be refrigerated overnight so the solid part separates from the liquid. Whip it just like you would heavy cream. Use dairy-free chocolate for the spiders. The texture will be slightly different—a little less firm—but still delicious.
Extra Spooky Decorations
Instead of pretzel legs, use black licorice strings cut into small pieces. Or skip the spiders entirely and top each cup with a gummy worm crawling out of the cheesecake. You can also add a few drops of black food coloring to the filling for a truly dark and spooky look—just be careful not to overmix or you’ll deflate the filling.
Serving & Storage Suggestions
These spider cheesecake cups are best served cold, straight from the fridge. The filling is firm but still creamy, and the crust has a satisfying crunch. If you leave them out for too long, the filling will soften and lose its shape.
How to serve: Place each cup on a small plate or napkin so the spider is visible. If you’re serving a crowd, arrange them on a large tray with some fake spider webs or plastic spiders scattered around for effect. Kids love finding the spiders before they eat them—it adds to the Halloween fun.
What to serve with them: These cups are rich enough to stand alone, but they pair beautifully with a warm fall drink. Try serving them alongside a creamy pumpkin cold brew float or a cozy chai latte. For a non-caffeinated option, a glass of cold milk is always a winner—especially for kids.
Storage: Keep the cups covered in the refrigerator for up to 3 days. I recommend placing them in a container with a lid or covering each cup with plastic wrap. The chocolate spiders can be stored separately at room temperature for up to a week, but they’ll also last in the fridge on top of the cups.
Reheating: Don’t. These are meant to be served cold. If you’ve stored them in the fridge, just take them out about 5 minutes before serving to take the chill off slightly. Any longer and the filling will start to soften.
Freezing: You can freeze the cheesecake cups (without the spiders) for up to 1 month. Wrap each cup tightly in plastic wrap and then foil. Thaw in the refrigerator overnight before adding the spider decorations. The texture will be slightly less creamy after freezing, but it’s still good in a pinch.
Flavor development: These cups actually taste better the next day. The flavors meld together, and the crust softens just a little, making it easier to scoop up with the filling. If you can resist eating them immediately, make them a day ahead for the best results.
Nutritional Information & Benefits
Let’s be real—these spider cheesecake cups are a treat, not a health food. But here’s a rough estimate of what you’re getting in each serving (based on 8 cups):
- Calories: Approximately 320-350 per cup
- Fat: 22g (mostly from cream cheese and heavy cream)
- Carbohydrates: 28g (from Oreos and powdered sugar)
- Protein: 5g
- Sugar: 20g
- Fiber: 1g
Now, let’s talk about the bright side. Cream cheese is a good source of calcium and vitamin A, and it contains some protein. The heavy cream adds a dose of healthy fats that help keep you full. And if you use dark chocolate for the spiders, you’re getting antioxidants—so there’s that.
Dietary considerations: This recipe contains dairy, gluten, and soy (from the Oreos). If you need to avoid any of these, check the variations section above for substitutions. The sugar content is moderate for a dessert, but you can reduce it by using a sugar substitute like monk fruit sweetener in the filling.
Personally, I don’t stress about the nutritional stats on Halloween. This is a once-a-year treat, and it’s meant to be enjoyed. But if you’re serving these at a party and want a slightly lighter option, you can use reduced-fat cream cheese and skip the whipped cream topping (though the texture won’t be as light).
Conclusion
These easy no-bake Halloween Oreo spider cheesecake cups are the kind of recipe that makes you look like a hero with almost no effort. They’re creamy, crunchy, chocolatey, and just the right amount of spooky. The best part? You can make them with your kids, customize them however you want, and have them ready in under 30 minutes of active time.
I love this recipe because it captures everything I want from a Halloween dessert: it’s fun to make, fun to eat, and fun to look at. The chocolate spiders always get a reaction, whether it’s a delighted squeal from a child or an amused smile from an adult. And honestly, seeing people’s faces light up when they realize the spider is edible is worth the tiny bit of effort it takes to pipe those little chocolate bodies.
If you make these spider cheesecake cups, I’d love to hear about it. Leave a comment below and let me know how they turned out—did your kids help with the pretzel legs? Did you try a variation? Did someone refuse to eat the spider because it looked too real? (That happened at my house, and my niece was more than happy to eat the rejected spider herself.)
Don’t forget to pin this recipe for later and share it with your Halloween-loving friends. And if you’re looking for more easy fall desserts, check out my brown butter peach cobbler or these brown butter pumpkin chocolate chip cookies for more cozy seasonal treats. Happy Halloween, and happy eating!
Frequently Asked Questions
Can I make these spider cheesecake cups ahead of time?
Absolutely. In fact, they taste better the next day. Make the cups up to 2 days in advance and keep them covered in the fridge. Add the chocolate spiders just before serving so they stay crisp and don’t get condensation on them.
Can I use a different cookie for the crust?
Yes! Any chocolate sandwich cookie works. You can use gluten-free versions, mint-flavored Oreos, or even chocolate graham crackers. If you use a different cookie, just make sure you have about 1 1/2 cups of fine crumbs for the crust.
My cheesecake filling turned out lumpy. What went wrong?
This usually happens when the cream cheese is too cold. Make sure it’s fully softened to room temperature before you start. If you already have lumps, try beating the mixture for another minute or two—sometimes they’ll break down. If not, you can strain the filling through a fine-mesh sieve before folding in the whipped cream.
How do I make the chocolate spiders without a piping bag?
No problem. Use a zip-top sandwich bag with a tiny corner snipped off. You can also use a small spoon to drop dollops of chocolate onto the parchment paper and then shape them with the back of the spoon. They won’t be as neat, but they’ll still look great.
Can I use Cool Whip instead of homemade whipped cream?
Technically yes, but the texture won’t be as light and airy. Cool Whip has stabilizers that make it denser than freshly whipped cream. If you’re in a hurry, you can use it—just fold it in gently. But for the best results, whip your own cream. It takes 2 extra minutes and makes a noticeable difference.
Pin This Recipe!
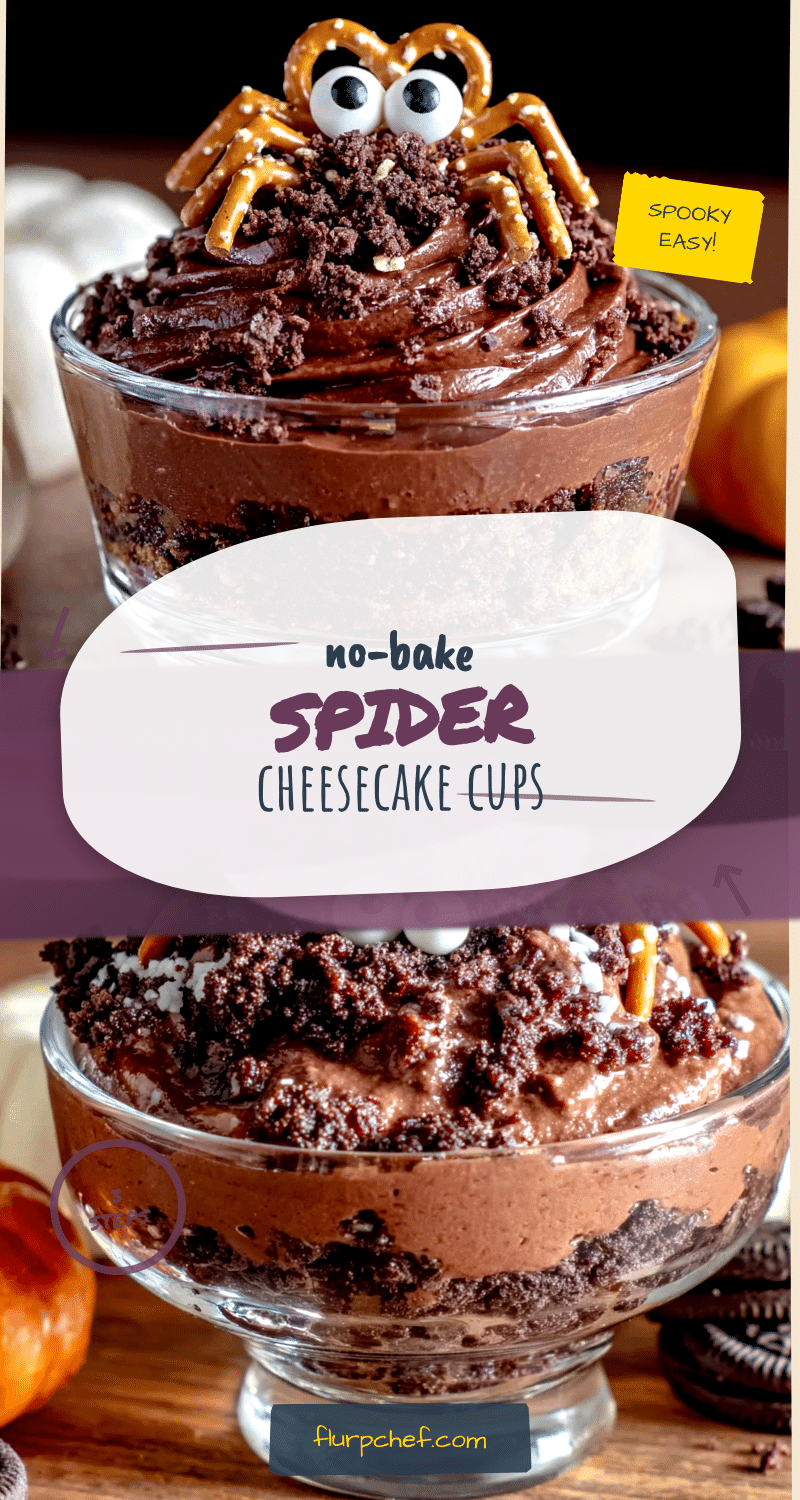
Easy No-Bake Spider Cheesecake Cups (Best Halloween Dessert)
These no-bake spider cheesecake cups are creamy, crunchy, and spooky—perfect for Halloween. With an Oreo crust, a light mousse-like filling, and chocolate spiders on top, they come together in just 20 minutes of active time.
- Prep Time: 20 minutes
- Cook Time: 0 minutes
- Total Time: 2 hours 20 minutes (includes chilling)
- Yield: 8 servings 1x
- Category: Dessert
- Cuisine: American
Ingredients
- 20 Oreo cookies (regular, not double-stuff)
- 4 tablespoons unsalted butter, melted
- 8 ounces cream cheese, softened to room temperature
- 1/2 cup powdered sugar (60 grams)
- 1 teaspoon vanilla extract
- 1 cup heavy cream (240 ml), cold
- 1/2 cup chocolate melting wafers (or dark chocolate chips)
- 8 pretzel sticks, broken in half to make 16 legs
- 16 candy eyes (optional)
Instructions
- Make the Oreo crust: Crush 20 Oreo cookies into fine crumbs using a food processor or a zip-top bag and rolling pin. Transfer to a medium bowl and stir in 4 tablespoons melted butter until evenly moistened. Divide the mixture among 8 small cups (4-6 ounces each) and press firmly with the bottom of a glass. Refrigerate while making the filling.
- Make the cheesecake filling: In a large bowl, beat the softened cream cheese with an electric mixer on medium speed until smooth, about 1 minute. Add the powdered sugar and vanilla extract, beat on low until combined, then increase to medium for 30 seconds until smooth. Scrape down the sides.
- In a separate medium bowl, whip the cold heavy cream on medium-high speed until stiff peaks form, about 2-3 minutes. Gently fold the whipped cream into the cream cheese mixture using a rubber spatula, adding about a third at a time, until light and fluffy.
- Assemble the cups: Remove the cups from the fridge. Spoon or pipe the cheesecake filling on top of the crust, dividing evenly. Smooth the tops and tap gently to settle. Refrigerate for at least 2 hours until firm.
- Make the chocolate spiders: Melt the chocolate wafers in a microwave-safe bowl in 30-second intervals, stirring between each, until smooth. Line a baking sheet with parchment paper. Transfer the melted chocolate to a small piping bag or zip-top bag with a tiny corner snipped off. Pipe small oval spider bodies (about the size of a quarter) onto the parchment. While the chocolate is still wet, press two pretzel stick halves into each side for legs and add two candy eyes. Refrigerate for 10-15 minu…
- Decorate and serve: Once the cheesecake cups are firm and the spiders are set, place one chocolate spider on top of each cup. Serve immediately or keep refrigerated.
Notes
Room temperature cream cheese is essential for a smooth filling. Don’t skip whipping the cream separately—it gives the filling a light, mousse-like texture. The chocolate spiders can be made up to a week in advance and stored in an airtight container at room temperature. For best results, make the cups a day ahead to allow flavors to meld.
Nutrition
- Serving Size: 1 cup
- Calories: 335
- Sugar: 20
- Sodium: 220
- Fat: 22
- Saturated Fat: 13
- Carbohydrates: 28
- Fiber: 1
- Protein: 5
Keywords: no-bake cheesecake, Halloween dessert, spider cheesecake cups, Oreo crust, easy dessert, spooky treat