It was 11:47 PM on a random Wednesday in November, and I was staring into my fridge like it owed me answers. Friendsgiving was in three days — I’d volunteered to bring “something easy” for a crowd of fourteen, which is code for “I have no idea what I’m doing.” The usual suspects ran through my head: a casserole? Boring. A salad? Nobody wants that at a feast. Then my eyes landed on the block of cheddar, the half-empty jar of olives, and the sad little bag of almonds I bought for snacking. And honestly? A weird little lightbulb went off. I didn’t have a plan for a proper grazing spread, but I had enough odds and ends to fake one. That night, standing there in my pajamas, I sketched out a Friendsgiving charcuterie board on a napkin — and it turned out to be the best decision I made all holiday season.
Maybe you’ve been there, too — the panic of feeding a crowd without spending three days in the kitchen. I get it. That’s why this easy Friendsgiving charcuterie board for a crowd became my go-to. It’s forgiving, flexible, and honestly, it looks way more impressive than it has any right to be. No fancy cheese knowledge required. No stress. Just a big board, some tasty bites, and a whole lot of happy people.
Why You’ll Love This Easy Friendsgiving Charcuterie Board for a Crowd
Let me tell you why this board works — and why I keep coming back to it year after year. I’ve tested this setup at three different Friendsgivings now, and every single time, it’s the first thing to disappear. That’s not bragging; that’s just what happens when you nail the combo of salty, sweet, tangy, and crunchy.
- Quick & Easy: This board comes together in under 20 minutes. No cooking, no baking, no fuss. Just arrange and go — perfect for the busiest holiday of the year.
- Simple Ingredients: You don’t need a specialty grocery store. Most of these items are already in your pantry or easy to grab at your regular supermarket. I’m talking crackers, cheese, deli meat, and a few fun extras.
- Perfect for Friendsgiving: This is the ultimate crowd-pleaser. It feeds 12-15 people easily, and everyone can pick and choose what they love. No dietary drama, no complaints.
- Crowd-Pleaser: I’ve watched picky eaters, cheese snobs, and gluten-free friends all hover around this board happily. It’s democratic deliciousness.
- Unbelievably Delicious: The magic is in the mix — creamy brie next to sharp cheddar, salty prosciutto wrapped around sweet figs, crunchy almonds cutting through rich cheese. Every bite is a little adventure.
What makes this board different from the rest? It’s not about fancy techniques or expensive ingredients. It’s about balance and abundance — making sure every flavor and texture has a partner. I learned this the hard way after a first attempt that was all salt and no sweetness. Trust me, you want both.
This isn’t just another cheese plate. It’s the centerpiece that lets you actually enjoy your own party. No slaving over a hot stove. No last-minute panic. Just good food and good company — which is what Friendsgiving is really about.
What Ingredients You Will Need
This recipe uses simple, crowd-friendly ingredients to deliver bold flavor and satisfying variety without the fuss. Most of these are pantry staples or easy holiday finds. Here’s what you’ll need to build your board:
Cheeses (3-4 varieties)
- Brie (8 oz wheel) — soft, creamy, and always a hit. I like the double-cream variety for extra richness.
- Aged Cheddar (8 oz block) — sharp and firm, it balances the softer cheeses. Look for a white cheddar for visual contrast.
- Manchego (6 oz wedge) — nutty and slightly salty, it’s a crowd-pleaser that pairs beautifully with membrillo (quince paste).
- Blue Cheese (4 oz wedge, optional) — for the adventurous eaters. Gorgonzola dolce is milder and less intimidating.
Meats (2-3 varieties)
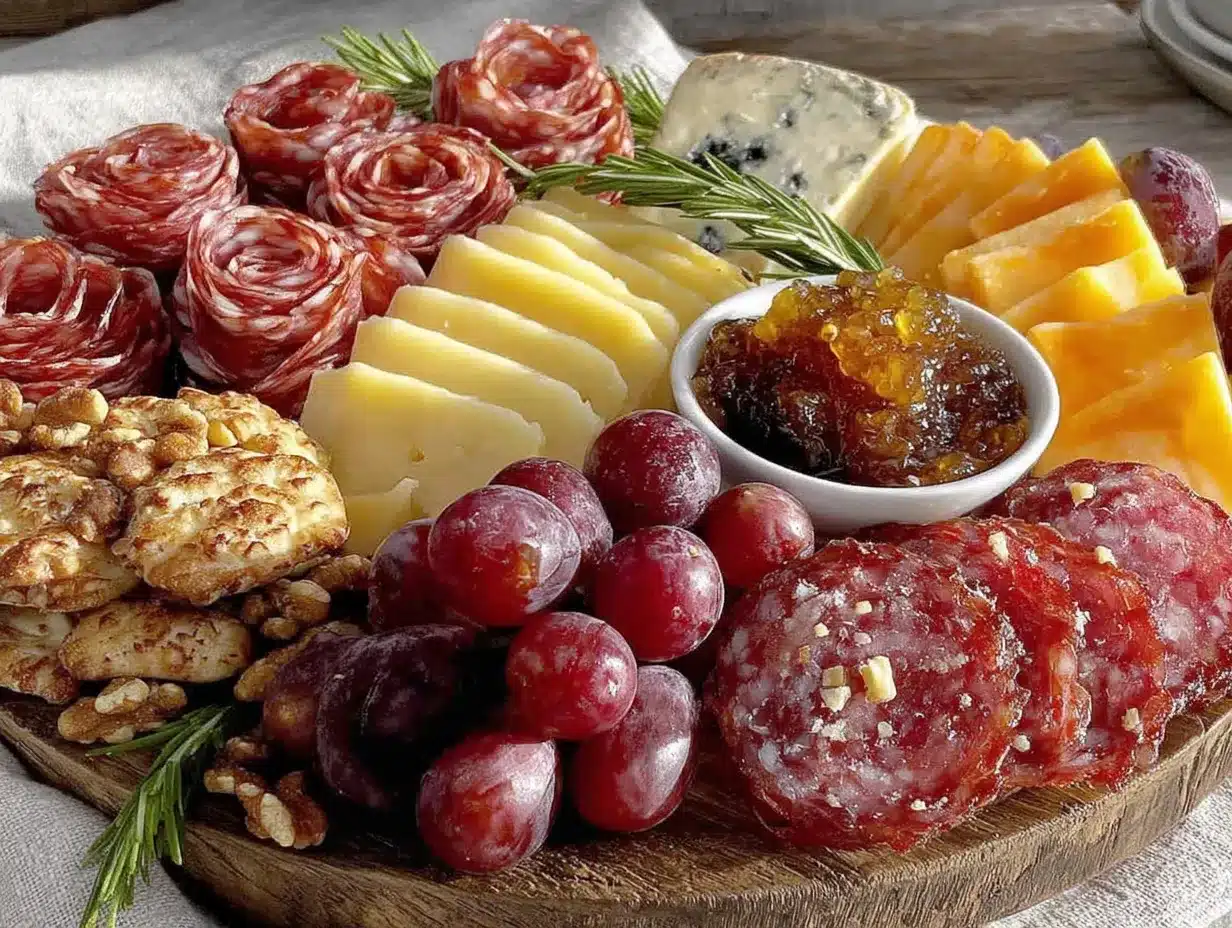
- Prosciutto (6 oz, thinly sliced) — salty and delicate, it wraps beautifully around cheese or fruit.
- Salami (6 oz, sliced) — I prefer Genoa salami for its peppery finish. Look for pre-sliced to save time.
- Soppressata (4 oz, optional) — spicy and bold, it adds a nice kick if your crowd likes heat.
Accompaniments
- Crackers (2-3 varieties, about 12 oz total) — mix textures: water crackers, buttery rounds, and seeded crisps work well.
- Bread (1 baguette, sliced and lightly toasted) — adds heartiness for bigger appetites.
- Fresh Fruit — red grapes (1 bunch), figs (6-8, halved if large), and apple slices (1 apple, tossed in lemon juice to prevent browning).
- Dried Fruit — dried apricots (1 cup) and mission figs (1 cup) for sweetness and chew.
- Nuts — Marcona almonds (1 cup, lightly salted) and candied pecans (1 cup) for crunch.
- Olives — Castelvetrano olives (1 cup, drained) are buttery and mild, even olive skeptics like them.
- Pickles — cornichons (1/2 cup) and pickled onions (1/4 cup) for acidity to cut through rich cheese.
- Jams & Spreads — fig jam (1/3 cup) and honey (for drizzling over brie). I recommend Bonne Maman fig preserves for consistent quality.
- Chocolate — dark chocolate squares (4 oz, broken into pieces) for a sweet finish.
Substitution Guidance
If you’re feeding a crowd with dietary needs, swap the brie for a dairy-free almond-based cheese, or replace salami with roasted red peppers and marinated artichokes for a vegetarian version. For gluten-free friends, use only gluten-free crackers and skip the baguette. The beauty of a charcuterie board is its flexibility — nothing is set in stone.
Equipment Needed
You don’t need much to pull this off, which is part of the charm. Here’s what I use:
- A Large Board or Platter — a wooden cutting board (at least 18×12 inches), a marble slab, or even a baking sheet lined with parchment paper works. I’ve used all three, and honestly, the baking sheet trick saved me when my board was too small.
- Small Bowls — for jams, olives, and pickles. Ramekins or small dipping bowls keep wet ingredients from making everything soggy.
- Cheese Knives — one for soft cheese, one for hard. If you don’t have them, a butter knife and a paring knife work fine.
- Tongs or Small Spoons — for serving olives and pickles. Keeps things tidy.
- Parchment Paper — optional, but helpful for lining the board for easy cleanup. I learned this after a particularly sticky fig jam incident.
- Napkins or Small Plates — guests need something to put their selections on. Trust me, don’t forget these.
Budget-friendly tip: Thrift stores often have beautiful wooden boards for a few dollars. That’s where I got my favorite one — it has a few knife marks, but that just adds character.
Preparation Method
Here’s how to build your easy Friendsgiving charcuterie board for a crowd, step by step. Take your time, but honestly, it goes fast.
- Set out your board. Give it a quick wipe, and if you’re using wood, rub it with a little mineral oil if it looks dry. Place your small bowls first — they’ll anchor the layout and keep wet items contained.
- Fill the small bowls. Spoon fig jam into one, honey into another, olives into a third, and cornichons into a fourth. Arrange them around the board, leaving plenty of space between them. I like to put them at the corners or edges so they don’t get buried.
- Place the cheeses. Take the brie out of the fridge 20 minutes before serving (it’s creamier at room temperature). Cut the cheddar and manchego into thin slices or small cubes — about 1-inch pieces. Arrange the cheeses in different areas of the board, not all clustered together. The brie should be whole with a knife next to it, or cut into wedges if you prefer easier grabbing.
- Add the meats. Fold prosciutto slices loosely into ribbons or waves — don’t lay them flat. Roll salami slices into little cylinders or fold them into quarters. Distribute the meats around the board, near but not touching the cheeses. This gives guests options to mix and match.
- Fill in with fruit. Scatter red grapes in small clusters — they add beautiful color and a pop of sweetness. Place halved figs and dried apricots in gaps. Arrange apple slices in a fan near the cheddar (they pair beautifully). The fruit should look abundant, not sparse.
- Add crunch. Sprinkle Marcona almonds and candied pecans in the remaining empty spaces. Don’t pile them all in one spot — spread them out so every corner of the board has something crunchy. This is where you can get creative with placement.
- Lay out crackers and bread. Fan water crackers along one edge of the board. Arrange buttery rounds near the brie. Place toasted baguette slices in a stack or row. Keep some crackers in a separate basket if the board gets too crowded — I’ve definitely overstuffed a board and had crackers slide off.
- Add finishing touches. Tuck dark chocolate squares in a few spots — near the figs and almonds is perfect. Drizzle a little honey over the brie if you’re feeling fancy. Scatter a few fresh herbs like rosemary sprigs or thyme for color (they’re not for eating, but they look gorgeous).
- Check for balance. Step back and look at your board. Are there empty spots? Fill them with extra nuts or dried fruit. Does everything feel accessible? Move items around so guests can reach from all sides. The goal is abundance — a full board looks more inviting and generous.
- Serve immediately. Place the board in the center of the table with small plates, napkins, and cheese knives. Set out a few extra bowls for discarded stems or pits. Then step back and let your guests dig in — this is the moment it all comes together.
A quick note: If you’re making this ahead, assemble the board up to 2 hours before serving, but keep it covered with plastic wrap in the fridge. Add crackers and bread just before serving so they stay crisp. I learned this the hard way after a batch of soggy crackers — not a good look.
Cooking Tips & Techniques
I’ve made a lot of charcuterie boards, and I’ve definitely made some mistakes. Here’s what I’ve learned so you don’t have to repeat them:
- Room temperature cheese is non-negotiable. Cold cheese tastes like nothing. Take everything out of the fridge at least 30 minutes before serving. For brie, give it a full hour if you can. The difference is night and day — creamy, flavorful, and actually worth eating.
- Don’t overcrowd the board. I know it’s tempting to pile everything on, but guests need room to grab things without knocking over a bowl of olives. Leave about 20% of the board empty — it looks more intentional and is easier to navigate. If you have too much food, use a second board or a side plate.
- Slice cheese in different ways. Cube the cheddar, wedge the brie, shave the manchego into thin strips. Visual variety makes the board more interesting and helps guests know what they’re grabbing. Plus, it’s just prettier.
- Use color as your guide. A good board has contrast — red grapes against white cheese, green olives next to dark chocolate, golden apricots beside deep red salami. If everything is the same color, it looks flat. I once made a board that was all beige and brown — it was delicious but visually boring.
- Prep everything before you start arranging. Wash and dry grapes, slice apples, toast bread, open packages. Once you start placing items, you don’t want to stop and wash a knife. I learned this after a frantic mid-assembly trip to the sink.
- Keep a backup stash. Have extra crackers, nuts, and cheese in the kitchen. When the board starts looking picked over, you can refresh it without running to the store. This saved me last year when my board disappeared in 20 minutes flat.
Variations & Adaptations
This easy Friendsgiving charcuterie board for a crowd is endlessly customizable. Here are a few ways I’ve adapted it for different crowds and occasions:
- Vegetarian Version: Skip the meats entirely and double up on cheese — add a creamy goat cheese log and a smoky gouda. Roasted red peppers, marinated artichoke hearts, and grilled halloumi chunks make excellent replacements. I did this for a vegetarian friend’s Friendsgiving and nobody missed the meat.
- Seasonal Twist: In fall, swap grapes for sliced pears and add roasted pumpkin seeds instead of almonds. In summer, use fresh berries and peaches. In winter, pomegranate seeds and clementine segments add festive color. The board adapts to whatever looks good at the market.
- Spicy Kick: Add pickled jalapeños, spicy chorizo, and a habanero jam for heat lovers. I tried this once for a group that likes bold flavors — the chorizo went fast, and the jam was a surprise hit.
- Dairy-Free Adaptation: Use cashew-based “cheese” spreads, marinated mushrooms, and roasted vegetables. Many stores now carry excellent dairy-free cheese alternatives that melt and spread beautifully. Pair with gluten-free crackers for a fully allergy-friendly board.
- Mini Board for Two: Scale down everything to a quarter of the amounts and use a small bread board. Perfect for a cozy Friendsgiving date night or a pre-feast snack for you and a friend.
My personal favorite variation? A “breakfast for dinner” board with mini pancakes, bacon, scrambled eggs, and maple syrup for dipping. It’s ridiculous and wonderful — and yes, I served it at a Friendsgiving once. It was a hit.
Serving & Storage Suggestions
This board is best served at room temperature, so let it sit out for about 20 minutes after assembling before guests arrive. Place it in the center of the table where everyone can reach — it’s meant to be shared and grazed on over conversation.
For presentation, I like to scatter a few fresh herb sprigs (rosemary or thyme) around the board for color. A small vase of dried wheat or seasonal flowers nearby adds a festive touch without taking up table space.
Storage: If you have leftovers (unlikely, but possible), separate the components. Store cheeses wrapped in wax paper in the fridge — plastic wrap makes them sweat. Meats go in an airtight container. Crackers and bread stay in a sealed bag at room temperature. Fruit and olives in separate containers. Everything keeps for 2-3 days.
Reheating: You don’t really reheat a charcuterie board, but if you have leftover brie, you can bake it with a drizzle of honey and some walnuts at 350°F for 10 minutes — it becomes a warm, gooey dip that’s incredible with crackers. I’ve done this with sad-looking leftover cheese and turned it into a whole new snack.
Flavors actually improve after a day in the fridge — the cheeses meld with the jams and the meats absorb the aromas. It’s a different experience, but still delicious. Just bring everything back to room temperature before serving again.
Nutritional Information & Benefits
This board is indulgent, but it also has some surprising nutritional perks. Here’s a rough estimate per serving (assuming 12 servings):
| Nutrient | Amount per Serving |
|---|---|
| Calories | 380-420 |
| Protein | 18g |
| Fat | 24g |
| Carbohydrates | 28g |
| Fiber | 4g |
| Sugar | 14g |
| Sodium | 680mg |
The cheeses provide calcium and protein, while nuts offer healthy fats and vitamin E. Grapes and figs are packed with antioxidants and fiber. Even the dark chocolate has flavonoids that support heart health — so you can feel a little better about that second square.
If you’re watching sodium, skip the pickles and olives, and choose low-sodium meats. For a lower-calorie option, load up on fresh fruit and vegetables instead of crackers. But honestly? Friendsgiving is one day. Enjoy the board, savor every bite, and don’t stress the numbers.
Potential allergens: This board contains dairy (cheese), tree nuts (almonds, pecans), gluten (crackers, bread), and sulfites (dried fruit). Label everything clearly if you’re serving guests with allergies.
Conclusion
This easy Friendsgiving charcuterie board for a crowd is the kind of recipe that makes you look like a hero without breaking a sweat. It’s forgiving, flexible, and always a hit — exactly what you need when you’re hosting a holiday full of hungry friends. I love it because it lets me actually enjoy the party instead of hiding in the kitchen. And honestly? Watching people gather around a beautiful board, laughing and reaching for another piece of cheese — that’s the whole point of Friendsgiving.
I hope you try this board and make it your own. Swap in your favorite cheeses, add whatever fruit looks good at the store, and don’t be afraid to get creative. The best boards are the ones that reflect what you and your friends love to eat. So go ahead — build something beautiful, share it with people you care about, and have the best Friendsgiving yet.
If you make this board, I’d love to hear about it! Leave a comment below with your favorite cheese combo or tag me in your photos. And if you’re looking for more crowd-pleasing holiday ideas, check out my easy holiday appetizer recipes — they’re perfect for pairing with this board. Happy Friendsgiving, friends!
Frequently Asked Questions
How far in advance can I assemble a charcuterie board?
You can assemble the board up to 2 hours before serving, but keep it covered in the fridge. Add crackers and bread just before serving to keep them crisp. If you’re prepping the day before, slice the cheese and wash the fruit, but don’t arrange everything until the day of.
How much food do I need per person for a charcuterie board?
A good rule of thumb is 2-3 ounces of cheese and 2 ounces of meat per person for a main event board. For a snack or appetizer board, reduce to 1-2 ounces each. For a crowd of 14, I use about 24 ounces of cheese total and 12-16 ounces of meat. Adjust based on your group’s appetite — my friends are big eaters, so I always lean toward more.
What if I don’t have a large board?
No problem! Use a baking sheet, a large cutting board, or even a clean pizza pan. You can also use multiple smaller plates or trays arranged in a cluster. I’ve used a wooden cutting board from IKEA for years — it cost $15 and works perfectly. The key is having enough surface area to spread everything out.
Can I make this board vegetarian or vegan?
Absolutely. For a vegetarian board, skip the meat and add extra cheeses, roasted vegetables, and marinated items. For a vegan board, use dairy-free cheese alternatives, hummus, roasted chickpeas, and plenty of fresh and dried fruit. I’ve made a vegan version with cashew cheese and marinated mushrooms — it was a hit with everyone, not just vegans.
What’s the best way to arrange a charcuterie board so it looks professional?
Start with the bowls (for wet items), then place the cheeses in different zones, followed by meats. Fill gaps with fruit, nuts, and crackers. Use color contrast — red grapes against white cheese, green olives next to dark chocolate. Don’t overcrowd; leave some empty space for visual breathing room. And remember: height adds interest, so fold meats into ribbons and stack crackers in fans.
Pin This Recipe!
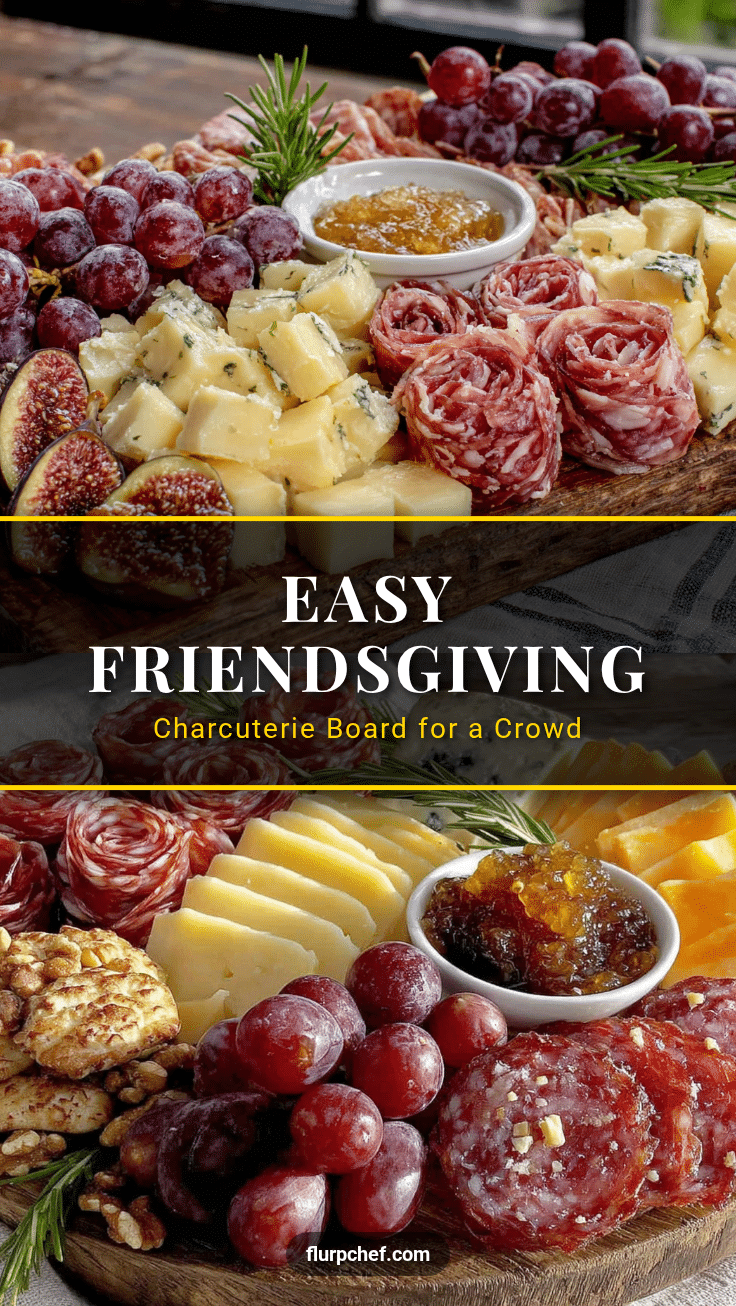
Easy Friendsgiving Charcuterie Board for a Crowd
This easy Friendsgiving charcuterie board for a crowd is the ultimate crowd-pleaser, coming together in under 20 minutes with simple ingredients. It’s forgiving, flexible, and looks way more impressive than it has any right to be—perfect for feeding 12-15 people without spending three days in the kitchen.
- Prep Time: 20 minutes
- Cook Time: 0 minutes
- Total Time: 20 minutes
- Yield: 12-15 servings
- Category: Appetizer
- Cuisine: American
Ingredients
- Brie (8 oz wheel)
- Aged Cheddar (8 oz block)
- Manchego (6 oz wedge)
- Blue Cheese (4 oz wedge, optional)
- Prosciutto (6 oz, thinly sliced)
- Salami (6 oz, sliced)
- Soppressata (4 oz, optional)
- Crackers (2-3 varieties, about 12 oz total)
- Baguette (1, sliced and lightly toasted)
- Red grapes (1 bunch)
- Figs (6-8, halved if large)
- Apple (1, sliced and tossed in lemon juice)
- Dried apricots (1 cup)
- Mission figs (1 cup)
- Marcona almonds (1 cup, lightly salted)
- Candied pecans (1 cup)
- Castelvetrano olives (1 cup, drained)
- Cornichons (1/2 cup)
- Pickled onions (1/4 cup)
- Fig jam (1/3 cup)
- Honey (for drizzling)
- Dark chocolate squares (4 oz, broken into pieces)
Instructions
- Set out your board. Give it a quick wipe, and if you’re using wood, rub it with a little mineral oil if it looks dry. Place your small bowls first—they’ll anchor the layout and keep wet items contained.
- Fill the small bowls. Spoon fig jam into one, honey into another, olives into a third, and cornichons into a fourth. Arrange them around the board, leaving plenty of space between them. I like to put them at the corners or edges so they don’t get buried.
- Place the cheeses. Take the brie out of the fridge 20 minutes before serving (it’s creamier at room temperature). Cut the cheddar and manchego into thin slices or small cubes—about 1-inch pieces. Arrange the cheeses in different areas of the board, not all clustered together. The brie should be whole with a knife next to it, or cut into wedges if you prefer easier grabbing.
- Add the meats. Fold prosciutto slices loosely into ribbons or waves—don’t lay them flat. Roll salami slices into little cylinders or fold them into quarters. Distribute the meats around the board, near but not touching the cheeses. This gives guests options to mix and match.
- Fill in with fruit. Scatter red grapes in small clusters—they add beautiful color and a pop of sweetness. Place halved figs and dried apricots in gaps. Arrange apple slices in a fan near the cheddar (they pair beautifully). The fruit should look abundant, not sparse.
- Add crunch. Sprinkle Marcona almonds and candied pecans in the remaining empty spaces. Don’t pile them all in one spot—spread them out so every corner of the board has something crunchy. This is where you can get creative with placement.
- Lay out crackers and bread. Fan water crackers along one edge of the board. Arrange buttery rounds near the brie. Place toasted baguette slices in a stack or row. Keep some crackers in a separate basket if the board gets too crowded—I’ve definitely overstuffed a board and had crackers slide off.
- Add finishing touches. Tuck dark chocolate squares in a few spots—near the figs and almonds is perfect. Drizzle a little honey over the brie if you’re feeling fancy. Scatter a few fresh herbs like rosemary sprigs or thyme for color (they’re not for eating, but they look gorgeous).
- Check for balance. Step back and look at your board. Are there empty spots? Fill them with extra nuts or dried fruit. Does everything feel accessible? Move items around so guests can reach from all sides. The goal is abundance—a full board looks more inviting and generous.
- Serve immediately. Place the board in the center of the table with small plates, napkins, and cheese knives. Set out a few extra bowls for discarded stems or pits. Then step back and let your guests dig in—this is the moment it all comes together.
Notes
Room temperature cheese is non-negotiable—take everything out of the fridge at least 30 minutes before serving. Don’t overcrowd the board; leave about 20% empty for easy access. Prep everything before arranging. Keep a backup stash of crackers, nuts, and cheese to refresh the board. If assembling ahead, keep covered in the fridge for up to 2 hours, adding crackers and bread just before serving.
Nutrition
- Serving Size: 1 serving (based on
- Calories: 400
- Sugar: 14
- Sodium: 680
- Fat: 24
- Saturated Fat: 12
- Carbohydrates: 28
- Fiber: 4
- Protein: 18
Keywords: Friendsgiving, charcuterie board, easy appetizer, crowd-pleaser, holiday appetizer, cheese board, grazing board