My brother-in-law, Mark, asked why I couldn’t just cut the backbone out of the turkey and flatten it. I started to explain why that wouldn’t work—something about even cooking and moisture loss, all the things I’d read in cookbooks. Then I stopped. I had no real answer. I was just repeating what I’d always done, roasting that bird upright for hours, wrestling with it in the pan, and praying the white meat didn’t turn into sawdust. Honestly, I was a little embarrassed. Here I was, the family “cook,” being questioned by a guy who mostly grills burgers. But he had a point. So, that Thanksgiving, I grabbed my kitchen shears, took a deep breath, and made the cut.
Let me tell you, it was a mess at first. I snipped wrong, the backbone was tougher than I expected, and I nearly sent the whole bird flying off the counter. I mean, there was a moment where I just stood there, covered in turkey juice, questioning every life choice that had led me to that point. But I pressed on, flattened that bird with a satisfying crack, and slathered it with a ridiculous amount of herb butter. The result? A turkey that cooked in half the time, with crispy, golden skin all over and meat so juicy it practically begged to be carved. The oven wasn’t tied up for hours, and I actually had time to make a decent gravy without panicking. That was the year I stopped being a turkey snob and started being a smarter cook. Maybe you’ve been there, staring at a raw turkey and wondering if there’s a better way. There is. This is it.
Why You’ll Love This Recipe
This Perfect Herb Butter Spatchcock Turkey is the Thanksgiving hero you didn’t know you needed. It’s not just another turkey recipe; it’s a game-changer that frees up your oven and your sanity. After years of testing, I can tell you this method delivers a bird that’s consistently better than any upright-roasted version I’ve ever made. The spatchcock technique ensures every part of the turkey cooks at the same rate, so you never have to choose between dry white meat and undercooked dark meat. It’s backed by science, but it tastes like pure comfort.
- Quick & Easy: This bird cooks in about 80 minutes, freeing up your oven for all those side dishes. No more waking up at 5 AM to start roasting.
- Simple Ingredients: You likely have butter, garlic, and herbs in your kitchen right now. No need for a specialty grocery run or exotic spices.
- Perfect for Thanksgiving: This is the centerpiece that actually lets you enjoy the holiday. Less oven time means less stress and more time with your family.
- Crowd-Pleaser: The crispy, herb-flecked skin is always the first thing to disappear. Even the dark-meat skeptics come back for seconds.
- Unbelievably Delicious: The herb butter seeps into every crevice, creating a flavor that’s both rich and bright. It’s the kind of turkey that makes you close your eyes after the first bite.
What makes this recipe different is the technique. By butterflying the bird, you expose more surface area to the heat, which means the skin gets incredibly crispy while the meat stays tender. The herb butter isn’t just a rub; it’s a flavor delivery system that bastes the turkey from the inside out. This isn’t just another version of Thanksgiving turkey—it’s your new best version. It’s comfort food reimagined: faster, juicier, but with the same soul-soothing satisfaction that makes the holiday special. Perfect for impressing a crowd without the stress of a traditional roast.
What Ingredients You Will Need
This recipe uses simple, wholesome ingredients to deliver bold flavor without the fuss. Each component plays a specific role, from the rich butter that creates that golden crust to the fresh herbs that bring brightness to every bite. Most of these are pantry staples or easy to find at your local grocery store.
For the Herb Butter
- 1 cup (2 sticks) unsalted butter, softened (I prefer Kerrygold for its rich flavor, but any good-quality butter works)
- 4 cloves garlic, minced (fresh is non-negotiable here—skip the jarred stuff)
- 2 tablespoons fresh rosemary, finely chopped
- 2 tablespoons fresh thyme leaves
- 1 tablespoon fresh sage, finely chopped
- 1 tablespoon fresh parsley, finely chopped
- 1 teaspoon salt (use a flaky sea salt if you have it)
- 1/2 teaspoon black pepper, freshly ground
- 1 teaspoon lemon zest (adds brightness and cuts through the richness)
For the Turkey
- 1 whole turkey, 12-14 pounds, thawed if frozen (look for one without a pre-brined label if you want to control the salt)
- 2 tablespoons olive oil
- 1 teaspoon salt
- 1/2 teaspoon black pepper
- 1 lemon, halved (for stuffing the cavity, adds moisture and flavor)
- 4 sprigs fresh thyme (for the cavity)
- 2 sprigs fresh rosemary (for the cavity)
For the herb butter, I recommend using fresh herbs over dried whenever possible. The flavor is brighter, and the texture integrates better with the butter. If you’re in a pinch, you can substitute dried herbs, but use half the amount—dried herbs are more concentrated. For the turkey, a 12-14 pound bird is the sweet spot for spatchcocking. Anything larger might be tricky to fit on a sheet pan, and anything smaller cooks even faster. If you’re using a frozen turkey, make sure it’s fully thawed in the refrigerator—this takes about 24 hours for every 4-5 pounds. Don’t rush this step; a partially frozen turkey won’t cook evenly.
Equipment Needed
You don’t need a lot of fancy gear for this recipe, but a few key tools make the job much easier. Here’s what you’ll need:
- Kitchen shears or poultry shears (a sharp pair is essential for cutting through the backbone. I use the OXO Good Grips shears, and they’ve held up for years)
- Large rimmed baking sheet (at least 18×13 inches, to catch all the juices without spilling)
- Wire rack (fits inside the baking sheet to elevate the turkey for even air circulation and crispier skin)
- Sharp chef’s knife (for any final trimming or carving)
- Cutting board (a large, sturdy one that won’t slide around)
- Meat thermometer (an instant-read one is best; I love my Thermapen for its speed and accuracy)
- Small bowl (for mixing the herb butter)
- Paper towels (for drying the turkey skin—this is crucial for crispiness)
If you don’t have kitchen shears, you can use a sharp chef’s knife to cut along each side of the backbone, but it takes more effort. A wire rack isn’t strictly necessary, but it makes a big difference in getting that all-over crispy skin. Without it, the bottom of the turkey can get soggy from sitting in its own juices. Budget-friendly tip: I’ve used a cooling rack set inside a sheet pan in a pinch, and it works fine.
Preparation Method
This method might look intimidating, but I promise it’s easier than wrestling with a traditional roast. Take it step by step, and you’ll have a stunning turkey that’s cooked to perfection.
- Preheat your oven to 425°F (220°C). Place your oven rack in the lower third of the oven. This high heat is key for crispy skin.
- Prepare the herb butter. In a small bowl, combine the softened butter, minced garlic, chopped rosemary, thyme, sage, parsley, salt, pepper, and lemon zest. Mix until everything is well incorporated. Set it aside. You can do this a day ahead and keep it in the fridge—just let it come to room temperature before using.
- Spatchcock the turkey. Place the turkey breast-side down on your cutting board. Using your kitchen shears, cut along one side of the backbone, from the tail to the neck. Repeat on the other side. Remove the backbone and save it for making stock later. Flip the turkey over and press down firmly on the breastbone with the heels of your hands until you hear a crack. The turkey should lie flat. Don’t worry if it’s not perfectly even; it will still cook well.
- Dry the turkey thoroughly. Pat the entire turkey dry with paper towels—inside and out, including under the skin. This is the most important step for crispy skin. If the skin is damp, the butter won’t stick well, and the skin will steam instead of crisp.
- Season the turkey. Rub the turkey all over with the olive oil. Sprinkle with the 1 teaspoon salt and 1/2 teaspoon pepper, making sure to get the underside too.
- Apply the herb butter. Gently loosen the skin over the breast and thighs by sliding your fingers between the skin and the meat. Be careful not to tear the skin. Spread about half of the herb butter directly under the skin, pressing it into an even layer. Rub the remaining butter all over the outside of the turkey, covering every nook and cranny.
- Stuff the cavity. Place the lemon halves and the sprigs of thyme and rosemary inside the cavity. This adds moisture and a subtle citrus-herb aroma as the turkey roasts.
- Place on the baking sheet. Set the wire rack inside the rimmed baking sheet. Arrange the turkey on the rack, breast-side up, making sure it lies as flat as possible. Tuck the wing tips under the turkey to prevent them from burning.
- Roast. Place the turkey in the preheated oven. Roast for about 80-90 minutes, or until the thickest part of the breast reaches 155°F (68°C) and the thighs reach 170°F (77°C). Start checking the temperature at the 60-minute mark, as ovens vary. The skin should be deep golden brown and crispy.
- Rest. Remove the turkey from the oven and let it rest on the baking sheet for 20-30 minutes. Do not skip this step—resting allows the juices to redistribute, ensuring every bite is moist. Tent loosely with foil if you’re worried about it cooling too fast.
- Carve and serve. Transfer the turkey to a cutting board. Carve against the grain into slices. The meat will be incredibly tender, and the skin will shatter with each cut.
Cooking Tips & Techniques
After making this turkey for several Thanksgivings, I’ve learned a few things the hard way. Here are my top tips to ensure success.
Don’t skip the drying step. I once rushed through this and ended up with pale, rubbery skin. The moisture on the surface creates steam, which prevents browning. Take the extra minute to really pat it dry. If you have time, you can even leave the spatchcocked turkey uncovered in the fridge overnight to dry out the skin further—it’s a game-changer.
Use a meat thermometer, not a pop-up timer. The pop-up timer that comes with some turkeys is notoriously inaccurate. An instant-read thermometer is your best friend here. Insert it into the thickest part of the breast and the thigh, avoiding the bone. I’ve had turkeys that looked done on the outside but were still raw inside. Trust the thermometer, not your eyes.
Watch the cooking time. A 12-14 pound spatchcock turkey will cook much faster than a traditional roast. I once got distracted by football games and left mine in for an extra 15 minutes. It was still okay, but the breast meat was a touch dry. Set a timer for the first check at 60 minutes, and go from there. Remember, the turkey will continue to cook as it rests, so pull it out when it’s about 5 degrees below your target temperature.
Don’t be afraid of the high heat. 425°F might seem high for a turkey, but the spatchcock method allows for it. The flattened shape means the heat circulates evenly, and the high temperature creates that beautiful, crackling skin. If you notice the skin browning too quickly, you can tent the turkey loosely with foil for the last 15-20 minutes.
Make gravy while the turkey rests. While your bird is resting, pour the pan drippings into a fat separator. Use the juices as the base for a quick gravy. The browned bits on the sheet pan are pure gold—deglaze with a splash of white wine or broth and scrape them up. It takes five minutes and tastes leagues better than anything from a packet.
Variations & Adaptations
One of the best things about this recipe is how adaptable it is. Here are a few variations I’ve tried and loved.
Citrus-Herb Twist. Swap the lemon in the cavity for a halved orange or grapefruit. The sweetness pairs beautifully with the savory herb butter. I tried this one year when I had an extra orange lying around, and it added a lovely brightness that cut through the richness of the dark meat. Just be careful not to add too much citrus, or it can overpower the herbs.
Spicy Chipotle Butter. For a smoky, spicy kick, add 1-2 minced chipotle peppers in adobo sauce to the herb butter. Reduce the fresh herbs to 1 tablespoon each. This is a great option if you’re serving a crowd that loves bold flavors. I made this for a Friendsgiving once, and it was a hit with the guys who usually skip the turkey. The heat is subtle but present.
Garlic and Parmesan Crust. After applying the herb butter, sprinkle the turkey with 1/4 cup of freshly grated Parmesan cheese. The cheese melts into the butter, creating an extra-crispy, savory crust. This works best if you’re not serving anyone with dairy restrictions. I tried this on a whim one year, and the Parmesan added a nutty, salty depth that was incredible.
For a Gluten-Free Option. This recipe is naturally gluten-free, as long as you’re using gluten-free broth for your gravy. Double-check your spice blends for any hidden gluten, but the herb butter itself is safe. I’ve served this to gluten-sensitive guests without any issues, and they loved it.
For a Smaller Gathering. You can easily scale this down for a 6-8 pound turkey or even a large chicken. Adjust the herb butter proportionally (about 1/4 cup of butter per 4 pounds of bird). The cooking time will be shorter—around 45-60 minutes for a smaller bird. Just use the same temperature and thermometer method.
Serving & Storage Suggestions
This turkey is best served hot, right after it’s rested. The skin is at its crispiest, and the meat is at its juiciest. Here’s how to make the most of it.
Serving Temperature: Serve the turkey warm, not piping hot. Letting it rest for 20-30 minutes brings it to the perfect serving temperature. If you’re not ready to carve, you can keep it loosely tented with foil for up to 30 minutes more.
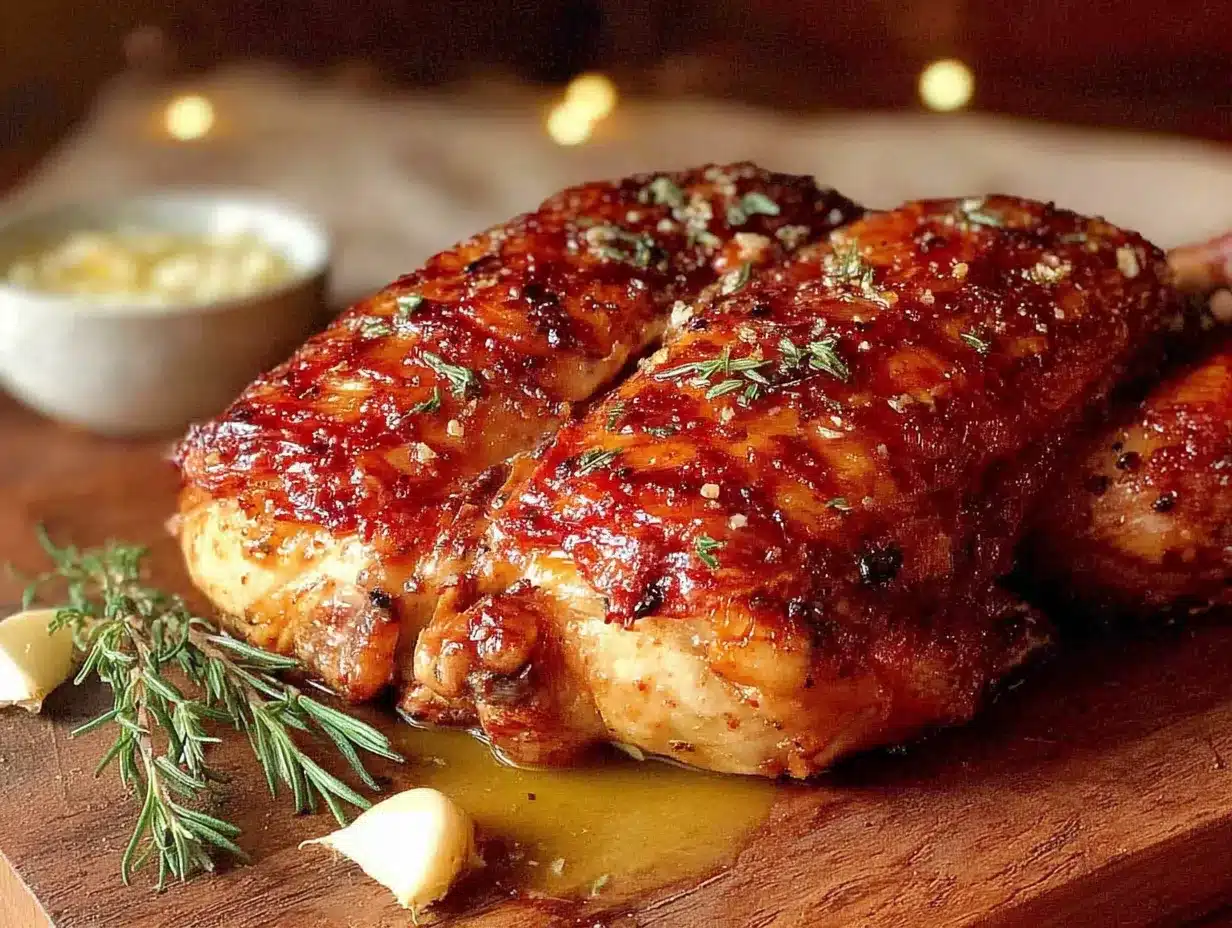
Presentation: Arrange the carved turkey on a large platter. Garnish with fresh sprigs of rosemary and thyme, and maybe some lemon slices. The golden-brown skin with flecks of green herbs is stunning against a white platter. It’s a centerpiece that looks as good as it tastes.
Complementary Dishes: This turkey pairs beautifully with classic Thanksgiving sides. Try it with creamy mashed potatoes, roasted Brussels sprouts, and a tangy cranberry sauce. The herb butter flavors also work well with a simple green salad or roasted root vegetables. For drinks, a crisp white wine like Sauvignon Blanc or a light Pinot Noir complements the herbs without overwhelming them.
Storage: Store leftover turkey in an airtight container in the refrigerator for up to 4 days. The meat stays moist, but the skin will lose its crispiness. For longer storage, you can freeze the carved meat in a freezer-safe bag for up to 3 months. Just make sure to remove as much air as possible to prevent freezer burn.
Reheating: To reheat, place the turkey slices in a single layer on a baking sheet. Cover with foil and warm in a 325°F (160°C) oven for 10-15 minutes. For crispy skin, remove the foil for the last 5 minutes. Avoid microwaving, as it will make the meat tough and the skin rubbery. I’ve also had success reheating it in a skillet with a splash of broth over medium heat—it’s quick and the meat stays tender.
Flavor Development: The flavors of this turkey actually deepen overnight. The herb butter continues to infuse the meat, making leftovers even more delicious. I often find myself looking forward to turkey sandwiches the next day more than the main meal itself.
Nutritional Information & Benefits
This recipe is a healthier take on a classic holiday centerpiece. Here’s a rough estimate per serving (based on a 12-pound turkey serving 12 people, with skin included):
- Calories: ~350
- Protein: ~40g
- Fat: ~20g
- Carbohydrates: ~1g
Turkey is an excellent source of lean protein, which is essential for muscle repair and satiety. The herb butter adds healthy fats from the butter, while the fresh herbs provide antioxidants like rosmarinic acid and thymol, which have anti-inflammatory properties. Garlic is known for its immune-boosting benefits, and lemon zest offers a small dose of vitamin C.
This recipe is naturally low in carbohydrates and can fit into a low-carb or keto diet. If you’re watching your sodium, you can reduce the salt in the herb butter. The turkey itself is a great source of B vitamins, particularly B6 and B12, which support energy metabolism. I personally love that this method allows me to enjoy a rich, satisfying meal without feeling overly stuffed or guilty. It’s a holiday indulgence that also nourishes your body.
Conclusion
Honestly, I never thought I’d be the person who swore by spatchcocking a turkey. It felt like a shortcut, like cheating on the tradition. But after that first Thanksgiving with Mark’s suggestion, I’ve never looked back. This Perfect Herb Butter Spatchcock Turkey has become my go-to, not just for the holiday, but for any occasion that calls for a show-stopping roast. It’s faster, juicier, and more flavorful than any upright bird I’ve ever made. The crispy skin, the tender meat, the way the herb butter melts into every bite—it’s everything you want from a Thanksgiving centerpiece, without the stress.
I encourage you to make this recipe your own. Play with the herbs, swap in different citrus, or try the chipotle version for a spicy twist. The beauty of this method is that it’s forgiving and adaptable. Whether you’re a seasoned cook or a nervous first-timer, this turkey will make you look like a pro. So go ahead, grab those kitchen shears, and give it a try. I promise you won’t regret it. And when you do, come back and let me know how it turned out. I’d love to hear about your own kitchen victories—and your happy accidents too. Happy cooking!
Frequently Asked Questions
Can I use dried herbs instead of fresh in the butter?
Yes, you can substitute dried herbs, but use half the amount since dried herbs are more concentrated. The flavor won’t be as bright, but it will still be delicious. If you’re in a pinch, a dried herb blend like herbes de Provence works well.
How do I know when the turkey is fully cooked?
The most reliable way is to use a meat thermometer. Insert it into the thickest part of the breast (avoiding the bone) and the thigh. The breast should read 155°F (68°C) and the thigh 170°F (77°C) before resting. The turkey will continue to cook as it rests, reaching a safe temperature.
Can I spatchcock the turkey a day ahead?
Absolutely! Spatchcocking the turkey a day in advance is a great time-saver. After cutting out the backbone, dry the turkey thoroughly, season it, and keep it uncovered in the refrigerator. This helps the skin dry out even more, leading to a crispier result. Just apply the herb butter right before roasting.
What do I do with the backbone after cutting it out?
Don’t throw it away! The backbone is perfect for making turkey stock. You can freeze it along with any other turkey scraps and use it later for soups, gravies, or risotto. It adds a deep, savory flavor that you can’t get from store-bought broth.
Can I use this method for a chicken or a smaller turkey?
Yes, this method works beautifully for any poultry. For a 4-5 pound chicken, reduce the herb butter to about 1/4 cup and roast at 425°F for 45-55 minutes. For a smaller turkey (8-10 pounds), use the same herb butter recipe but reduce the roasting time to 60-70 minutes. Always use a thermometer to check for doneness.
Pin This Recipe!
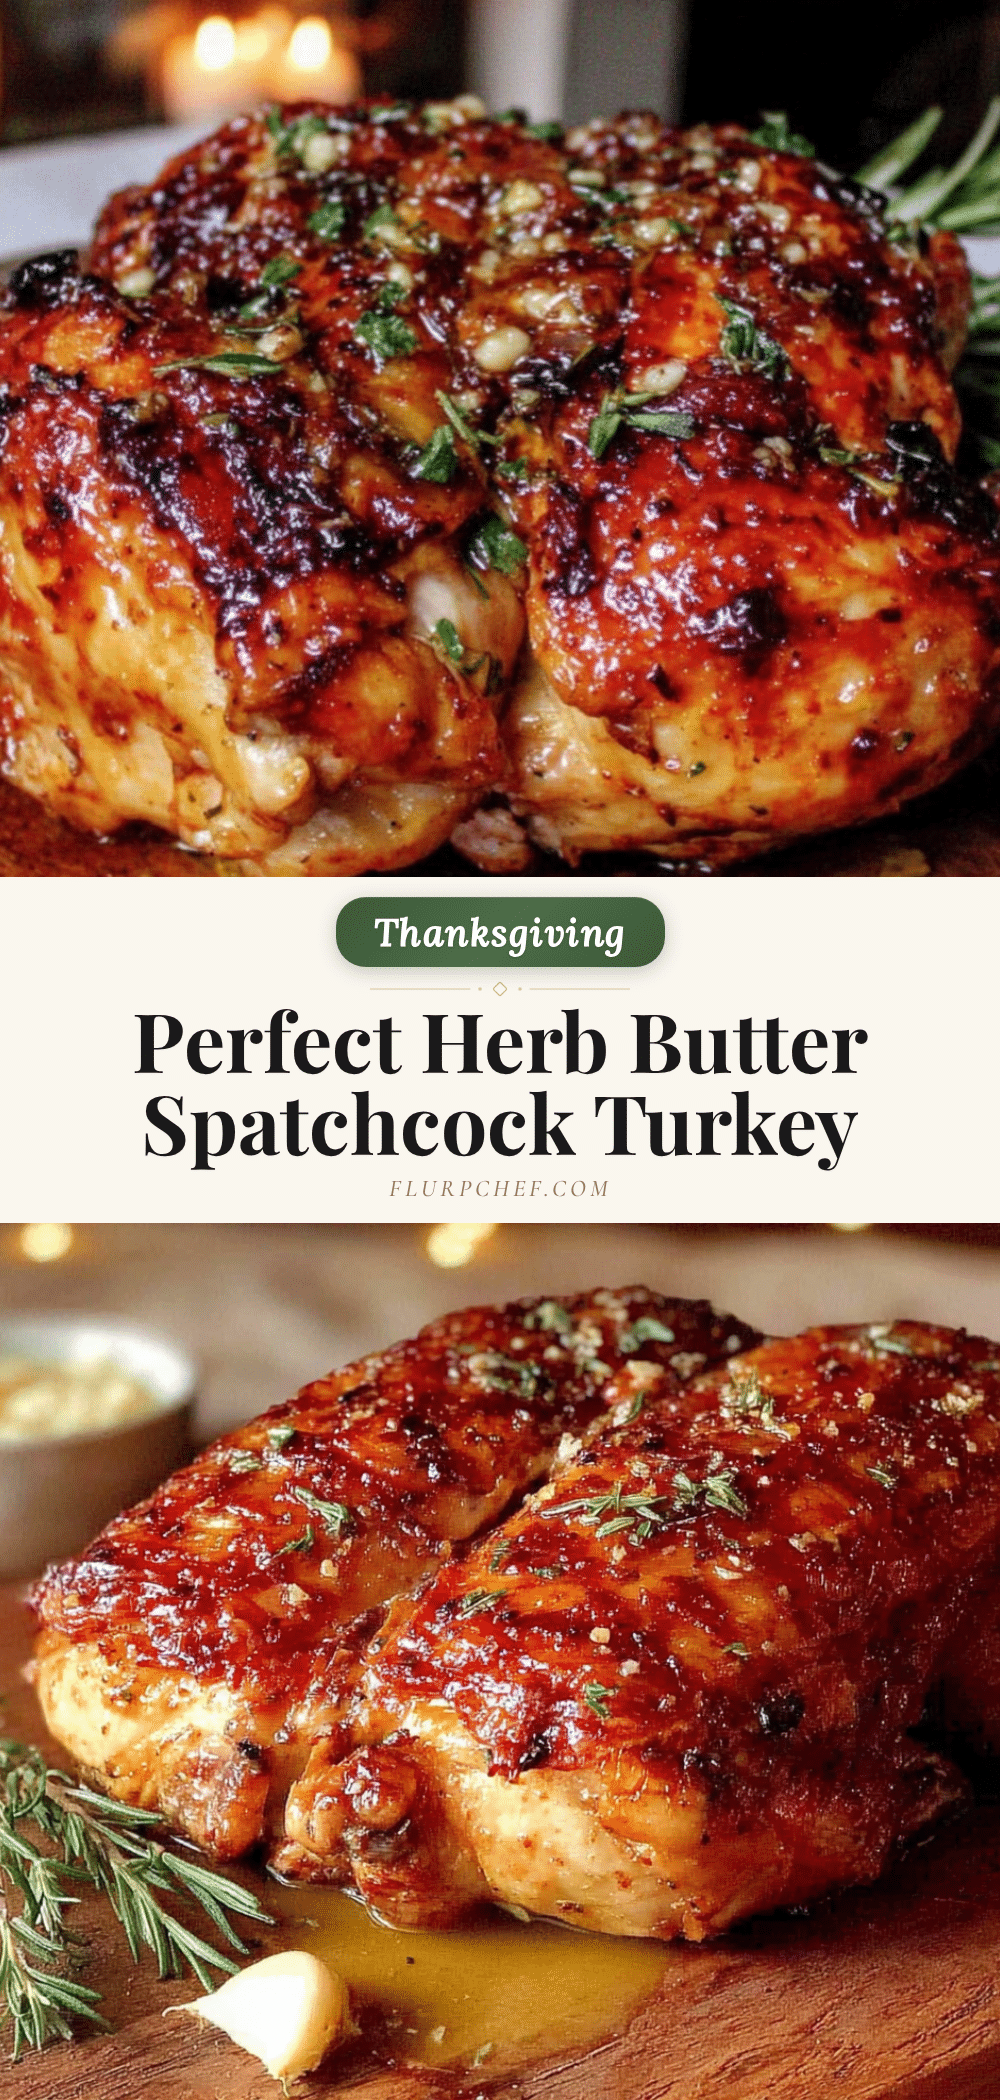
Perfect Herb Butter Spatchcock Turkey for Thanksgiving
This Perfect Herb Butter Spatchcock Turkey is the Thanksgiving hero you didn’t know you needed. It’s a game-changer that frees up your oven and your sanity, delivering a bird that’s consistently better than any upright-roasted version.
- Prep Time: 30 minutes
- Cook Time: 80 minutes
- Total Time: 110 minutes
- Yield: 12 servings 1x
- Category: Main Course
- Cuisine: American
Ingredients
- 1 cup (2 sticks) unsalted butter, softened
- 4 cloves garlic, minced
- 2 tablespoons fresh rosemary, finely chopped
- 2 tablespoons fresh thyme leaves
- 1 tablespoon fresh sage, finely chopped
- 1 tablespoon fresh parsley, finely chopped
- 1 teaspoon salt
- 1/2 teaspoon black pepper, freshly ground
- 1 teaspoon lemon zest
- 1 whole turkey, 12-14 pounds, thawed if frozen
- 2 tablespoons olive oil
- 1 teaspoon salt
- 1/2 teaspoon black pepper
- 1 lemon, halved
- 4 sprigs fresh thyme
- 2 sprigs fresh rosemary
Instructions
- Preheat your oven to 425°F (220°C). Place your oven rack in the lower third of the oven.
- Prepare the herb butter. In a small bowl, combine the softened butter, minced garlic, chopped rosemary, thyme, sage, parsley, salt, pepper, and lemon zest. Mix until everything is well incorporated. Set it aside.
- Spatchcock the turkey. Place the turkey breast-side down on your cutting board. Using your kitchen shears, cut along one side of the backbone, from the tail to the neck. Repeat on the other side. Remove the backbone and save it for making stock later. Flip the turkey over and press down firmly on the breastbone with the heels of your hands until you hear a crack. The turkey should lie flat.
- Dry the turkey thoroughly. Pat the entire turkey dry with paper towels—inside and out, including under the skin.
- Season the turkey. Rub the turkey all over with the olive oil. Sprinkle with the 1 teaspoon salt and 1/2 teaspoon pepper, making sure to get the underside too.
- Apply the herb butter. Gently loosen the skin over the breast and thighs by sliding your fingers between the skin and the meat. Be careful not to tear the skin. Spread about half of the herb butter directly under the skin, pressing it into an even layer. Rub the remaining butter all over the outside of the turkey, covering every nook and cranny.
- Stuff the cavity. Place the lemon halves and the sprigs of thyme and rosemary inside the cavity.
- Place on the baking sheet. Set the wire rack inside the rimmed baking sheet. Arrange the turkey on the rack, breast-side up, making sure it lies as flat as possible. Tuck the wing tips under the turkey to prevent them from burning.
- Roast. Place the turkey in the preheated oven. Roast for about 80-90 minutes, or until the thickest part of the breast reaches 155°F (68°C) and the thighs reach 170°F (77°C). Start checking the temperature at the 60-minute mark, as ovens vary. The skin should be deep golden brown and crispy.
- Rest. Remove the turkey from the oven and let it rest on the baking sheet for 20-30 minutes. Do not skip this step—resting allows the juices to redistribute, ensuring every bite is moist. Tent loosely with foil if you’re worried about it cooling too fast.
- Carve and serve. Transfer the turkey to a cutting board. Carve against the grain into slices. The meat will be incredibly tender, and the skin will shatter with each cut.
Notes
Don’t skip the drying step for crispy skin. Use a meat thermometer for accuracy. The turkey will continue to cook as it rests, so pull it out when it’s about 5 degrees below your target temperature. Make gravy while the turkey rests using the pan drippings.
Nutrition
- Serving Size: 1 serving (based on
- Calories: 350
- Sodium: 500
- Fat: 20
- Saturated Fat: 10
- Carbohydrates: 1
- Protein: 40
Keywords: Thanksgiving turkey, spatchcock turkey, herb butter turkey, roasted turkey, holiday turkey