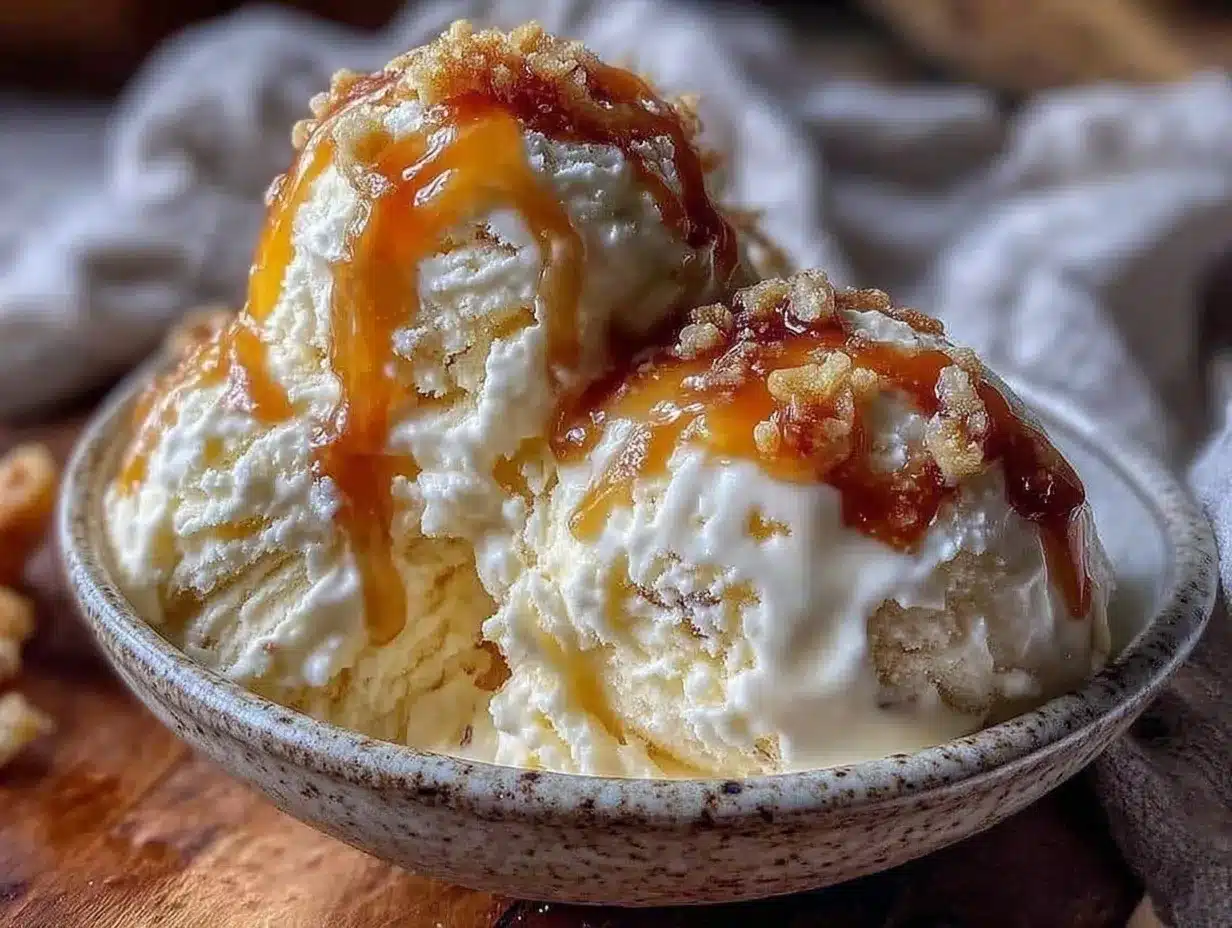
“You really don’t need a fancy ice cream maker for this,” my neighbor joked one humid July afternoon as we both reached for the last scoop of the creamy old fashioned homemade ice cream I’d just whipped up. I’d been skeptical at first—how could just five ingredients churn out something that tasted this rich and velvety? Honestly, I thought it was going to be one of those nostalgic recipes that look great on paper but fall flat in the mouth. But then, after stirring the chilled custard and letting it freeze overnight, the texture was spot-on. Smooth, luscious, with that perfect old-timey richness that reminds you of summer afternoons spent licking cones on the porch.
It wasn’t a big production, either. Just a handful of pantry basics, a little patience, and a bit of elbow grease. The whole process felt like a quiet reset after a long day—simple, soothing, and surprisingly satisfying. I’ve made this creamy old fashioned homemade ice cream recipe several times since then, and it never fails to bring a calm kind of joy, like a little homemade treat that says, “Hey, you deserve this.” I keep coming back to it because it’s just that reliably good without any fuss.
That’s the charm of this recipe: honest, straightforward, and comforting. No weird additives, no complicated steps, just a timeless flavor that somehow hits the spot every single time. You know, the kind of ice cream that makes you close your eyes and savor the chill and creaminess—pure and simple.
It’s not just about the ice cream itself either; it’s the memories it stirs up, the easy summer vibes, and the quiet satisfaction of making something by hand that tastes better than anything store-bought. That’s why this recipe has stuck around in my kitchen rotation—it’s a little reminder that sometimes, less really is more.
Why You’ll Love This Creamy Old Fashioned Homemade Ice Cream Recipe
After testing this recipe multiple times (and yes, sometimes more than once a week), I can genuinely say it hits a sweet spot that many ice cream recipes miss. Here’s why it stands out:
- Quick & Easy: With just five ingredients and no complicated steps, you can have this ice cream ready to freeze in under 20 minutes—perfect for busy days or spontaneous cravings.
- Simple Ingredients: No need to hunt for exotic items. Cream, sugar, eggs, vanilla, and salt—basics you probably already have in your kitchen.
- Perfect for Summer Gatherings: Whether it’s a backyard barbecue or a quiet family dessert, this recipe brings that classic homemade charm everyone appreciates.
- Crowd-Pleaser: Kids, adults, picky eaters—they all seem to love the creamy texture and rich vanilla flavor.
- Unbelievably Delicious: The smooth custard base gives it a velvety mouthfeel, and the flavor balance is spot-on—not too sweet, just that perfect creamy comfort food.
What makes this recipe different? The secret lies in the custard base, made by gently cooking eggs with cream and sugar, which results in that old fashioned richness and melt-in-your-mouth texture. Unlike some quick “no-churn” recipes, this one has that classic ice cream depth. Plus, I love that it doesn’t rely on stabilizers or fancy additives—you get pure, honest flavor.
For me, this isn’t just ice cream. It’s that little homemade indulgence that turns ordinary days into something a bit brighter, a bit sweeter. It’s comfort food with a nostalgic twist, and honestly, once you try it, you might find yourself making it more often than you planned.
What Ingredients You Will Need
This creamy old fashioned homemade ice cream recipe uses simple, wholesome ingredients to deliver bold flavor and satisfying texture without the fuss. These basics are pantry staples, and you can tweak them a bit if you want to experiment.
- Heavy Cream – 2 cups (480 ml): The backbone of the ice cream’s richness. I prefer organic heavy cream for its fresh flavor and texture.
- Whole Milk – 1 cup (240 ml): Adds creaminess while balancing the heaviness of the cream. You can swap for almond milk for a lighter version, but texture will differ.
- Granulated Sugar – ¾ cup (150 g): Sweetens the custard perfectly without overpowering. I usually use standard white sugar, but organic cane sugar works great too.
- Egg Yolks – 4 large, room temperature: These create the velvety custard base that’s key to the creamy texture. Make sure they’re fresh for the best taste.
- Pure Vanilla Extract – 2 teaspoons: For that warm, classic vanilla flavor. I recommend Nielsen-Massey or any good-quality pure vanilla, which really makes a difference.
- Optional pinch of salt: Just a tiny bit to balance and brighten the flavors.
That’s really it! No artificial stabilizers or additives. Just the kind of ingredients that make you think, “Yep, I could make this at home.” And if you’re curious about pairing this creamy delight with something fresh, I’ve found it goes wonderfully after a light salad like the fresh cucumber watermelon feta salad—something crisp to contrast the rich ice cream.
Equipment Needed
- Medium saucepan: For gently heating the cream, milk, and sugar mixture. A heavy-bottomed pan works best to avoid scorching.
- Mixing bowls: One for whisking the egg yolks, preferably heatproof if you want to temper the eggs carefully.
- Whisk: Essential for mixing the custard smoothly and avoiding lumps.
- Fine mesh sieve: To strain the custard for an ultra-smooth texture—trust me, it’s worth the extra step.
- Ice cream maker (optional): If you have one, great! But honestly, this recipe works well even if you freeze it in a container and stir every 30 minutes for a few hours.
- Freezer-safe container: For freezing your ice cream—preferably shallow and wide to speed up freezing time.
If you don’t have a dedicated ice cream maker, no worries. I’ve done this in a pinch with just a sturdy container and a bit of patience. For those who love gadgets, a hand mixer can speed up the mixing when you’re stirring during freezing. And as a side note, I keep my ice cream container covered tightly with plastic wrap or a lid to prevent ice crystals forming—a small trick I picked up after a few less-than-perfect batches.
Preparation Method
- Warm the dairy: In a medium saucepan, combine 2 cups (480 ml) heavy cream, 1 cup (240 ml) whole milk, and ¾ cup (150 g) granulated sugar. Heat over medium heat, stirring occasionally, until the sugar dissolves and the mixture is hot but not boiling—about 5 minutes. You should see steam rising and tiny bubbles forming around the edges.
- Whisk egg yolks: While the milk mixture heats, place 4 large egg yolks in a heatproof bowl. Whisk them gently until smooth and slightly pale—this helps prevent scrambling later.
- Temper the eggs: Slowly pour about one cup of the hot cream mixture into the yolks while whisking constantly. This warms the eggs gradually, preventing curdling. Then, pour the tempered yolk mixture back into the saucepan with the remaining cream mixture.
- Cook the custard: Return the saucepan to medium-low heat. Stir constantly with a wooden spoon or heatproof spatula, scraping the bottom to avoid burning. Cook until the custard thickens slightly and coats the back of the spoon—this usually takes 5-8 minutes. It should reach about 170°F (77°C) if you have a thermometer. Don’t let it boil!
- Strain and cool: Pour the custard through a fine mesh sieve into a clean bowl to remove any cooked egg bits. Stir in 2 teaspoons pure vanilla extract and a pinch of salt. Let it cool at room temperature for about 30 minutes, then cover with plastic wrap directly on the surface to prevent a skin forming. Chill in the refrigerator for at least 4 hours or overnight.
- Freeze: If you have an ice cream maker, churn the chilled custard according to the manufacturer’s instructions—usually about 20-25 minutes. If not, pour the custard into a freezer-safe shallow container. Freeze for 1 hour, then stir vigorously with a fork or whisk to break up ice crystals. Repeat every 30 minutes for 2-3 hours until creamy and firm.
- Serve or store: Once the ice cream reaches your desired consistency, serve immediately or transfer to an airtight container and freeze for up to 2 weeks. Let it soften for 5-10 minutes before scooping for the best texture.
Pro tip: When cooking the custard, patience is key. Rushing this step or overheating will scramble your eggs and ruin the texture. Keep the heat low and stir gently but continuously. Also, the step of chilling the custard overnight really helps deepen the flavors and improve the creaminess.
Cooking Tips & Techniques
Making old fashioned homemade ice cream might sound intimidating, but a few tips can make it feel like second nature:
- Use room temperature eggs: They incorporate better and reduce the risk of cooking too fast when tempered.
- Don’t boil the custard: Keep the temperature below boiling to avoid curdling. Use a thermometer if you have one, or look for the “nappe” stage where the custard coats the back of a spoon.
- Strain the custard: This is a non-negotiable for silky smooth ice cream. Even the tiniest cooked egg bits can ruin the mouthfeel.
- Chill thoroughly: Cold custard freezes faster and churns better, leading to smaller ice crystals and creamier texture.
- Hand-stir if no ice cream maker: Stirring during freezing breaks up ice crystals. It’s a bit of a workout but totally worth it if you want creamy no-churn ice cream.
- Experiment with vanilla: Real vanilla extract makes a big difference, but you can also infuse the cream with a vanilla bean pod for an extra-special touch.
Over the years, I’ve had my share of custard disasters—curdled eggs, icy textures, and frustratingly hard scoops. What taught me the most? Slow, attentive cooking and patience. It’s not a race. Letting the custard cool slowly and freezing it gradually really turns it from “meh” to “wow.”
Variations & Adaptations
This creamy old fashioned homemade ice cream recipe is a fantastic base that you can tweak in several ways:
- Dairy-free option: Use full-fat coconut milk instead of cream and a plant-based milk for the whole milk. Whisk carefully to get a smooth custard, though texture will be a little different.
- Flavor twists: Add mix-ins like crushed chocolate chips, toasted nuts, or swirls of homemade caramel after churning for extra texture and flavor.
- Fruit infusion: Try stirring in a homemade berry compote or fresh peaches right before freezing to add a summery burst.
- Low-sugar swap: Replace granulated sugar with a natural sweetener like honey or maple syrup, but reduce the amount slightly and adjust cooking temperature.
- Cooking method: If you don’t have an ice cream maker, freeze in a shallow pan and stir every 30 minutes to keep the texture creamy.
One of my favorite variations is folding in chopped mint leaves and dark chocolate chunks for a fresh twist on the classic vanilla. It adds a little zing and crunch that’s irresistible on a hot day.
Serving & Storage Suggestions
The best way to serve this ice cream is slightly softened—about 5-10 minutes at room temperature—so it scoops perfectly. Serve it in vintage bowls or simple cones for that old-fashioned feel.
Pair it with fresh fruit like strawberries or a drizzle of warm chocolate sauce. For a nostalgic dessert plate, try alongside a slice of cozy sourdough discard cinnamon rolls—the combo is a crowd-pleaser.
Keep leftover ice cream in an airtight container in the freezer for up to two weeks. To prevent ice crystals, cover the surface with plastic wrap before sealing the container. When reheating, simply let it sit out a bit to soften naturally—avoid microwaving, which can cause texture changes.
Flavors actually deepen after a day or two in the freezer, so sometimes I make it a day ahead to let everything meld beautifully.
Nutritional Information & Benefits
This classic recipe provides a rich source of fat and protein from the cream and eggs, making it satisfying and energy-dense. A typical serving (about ½ cup or 125 ml) contains roughly:
| Calories | 250-300 kcal |
|---|---|
| Total Fat | 18-22 g |
| Protein | 5-6 g |
| Carbohydrates | 20-25 g (from sugar) |
While it’s not a low-calorie treat, the recipe uses real ingredients without stabilizers or artificial additives, which is a plus for many. Whole eggs provide vitamins A, D, and E, and real vanilla extract offers antioxidants.
If you need a gluten-free dessert option, this recipe fits perfectly. For those watching sugar intake, the recipe can be adjusted with alternative sweeteners, but keep in mind it may impact texture.
I like to think of this ice cream as a wholesome treat—real ingredients, real flavor, and made with care, which feels better than anything store-bought.
Conclusion
This creamy old fashioned homemade ice cream recipe is a testament to how a handful of simple ingredients and a little time can create something truly special. It’s the kind of dessert that brings a quiet smile, a little comfort, and a taste of nostalgia all at once.
Don’t hesitate to make it your own—try different flavor add-ins, adjust sweetness, or pair it with fresh fruit or baked goods for a personal touch. I love coming back to this recipe because it’s reliable, endlessly adaptable, and genuinely delicious.
Give it a try, and I’d love to hear how you make it your own—drop a comment or share your favorite variations. Homemade ice cream might just become your new favorite simple pleasure.
Frequently Asked Questions
Can I make this ice cream without an ice cream maker?
Yes! Just freeze the custard in a shallow container and stir every 30 minutes for 2-3 hours to break up ice crystals. It takes a bit more effort but still produces creamy results.
Can I use a different type of milk?
Whole milk is best for creaminess, but you can substitute almond or oat milk for a lighter or dairy-free version. Keep in mind the texture and flavor will change slightly.
How long can I store homemade ice cream in the freezer?
Store it in an airtight container for up to two weeks. For best texture, cover the surface with plastic wrap to prevent ice crystals.
Why is tempering eggs important in this recipe?
Tempering slowly warms the eggs and prevents them from scrambling when added to the hot cream mixture, resulting in a smooth custard.
Can I add mix-ins like chocolate chips or nuts?
Absolutely! Add them after churning or during the stirring phase if no ice cream maker is used. Just fold them in gently for even distribution.
Pin This Recipe!
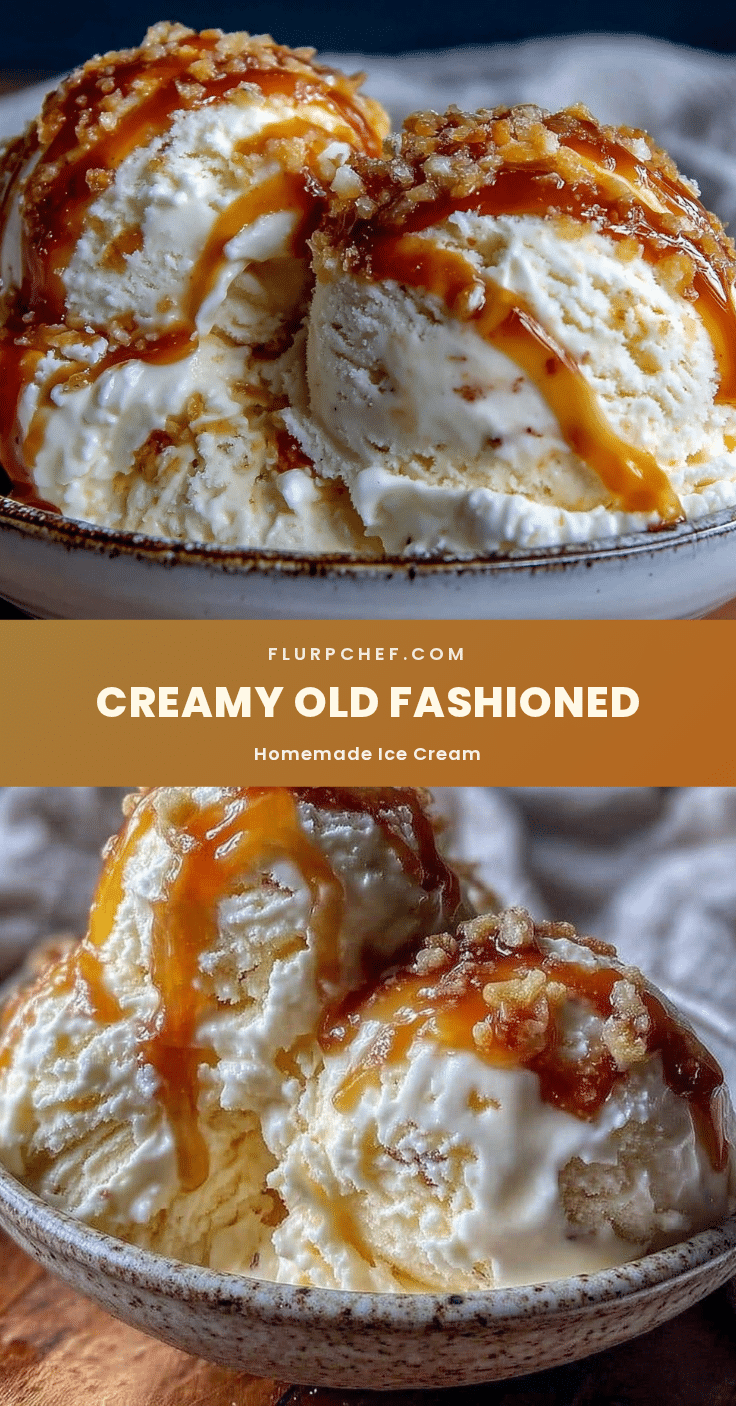
Creamy Old Fashioned Homemade Ice Cream Recipe Easy 5-Ingredient Delight
A simple, nostalgic homemade ice cream recipe using just five basic ingredients to create a rich, velvety custard base with classic vanilla flavor. No fancy equipment needed, perfect for summer treats.
- Prep Time: 15 minutes
- Cook Time: 15 minutes
- Total Time: 5 hours 30 minutes
- Yield: 6 servings 1x
- Category: Dessert
- Cuisine: American
Ingredients
- 2 cups heavy cream (480 ml)
- 1 cup whole milk (240 ml)
- 3/4 cup granulated sugar (150 g)
- 4 large egg yolks, room temperature
- 2 teaspoons pure vanilla extract
- Optional pinch of salt
Instructions
- In a medium saucepan, combine heavy cream, whole milk, and granulated sugar. Heat over medium heat, stirring occasionally, until sugar dissolves and mixture is hot but not boiling, about 5 minutes.
- Place egg yolks in a heatproof bowl and whisk gently until smooth and slightly pale.
- Slowly pour about one cup of the hot cream mixture into the yolks while whisking constantly to temper the eggs.
- Pour the tempered yolk mixture back into the saucepan with the remaining cream mixture.
- Return saucepan to medium-low heat and stir constantly until custard thickens slightly and coats the back of a spoon, about 5-8 minutes, reaching about 170°F (77°C). Do not boil.
- Strain custard through a fine mesh sieve into a clean bowl to remove any cooked egg bits.
- Stir in vanilla extract and a pinch of salt. Let cool at room temperature for 30 minutes, then cover with plastic wrap directly on the surface and chill in refrigerator for at least 4 hours or overnight.
- If using an ice cream maker, churn the chilled custard according to manufacturer’s instructions, about 20-25 minutes.
- If no ice cream maker, pour custard into a freezer-safe shallow container. Freeze for 1 hour, then stir vigorously to break up ice crystals. Repeat stirring every 30 minutes for 2-3 hours until creamy and firm.
- Serve immediately or transfer to an airtight container and freeze up to 2 weeks. Let soften 5-10 minutes before scooping.
Notes
Use room temperature eggs to prevent scrambling. Do not boil custard to avoid curdling. Strain custard for smooth texture. Chill custard overnight for best creaminess. If no ice cream maker, stir every 30 minutes during freezing to break ice crystals. Cover surface with plastic wrap before freezing to prevent ice crystals.
Nutrition
- Serving Size: About 1/2 cup (125 m
- Calories: 275
- Sugar: 20
- Sodium: 50
- Fat: 20
- Saturated Fat: 12
- Carbohydrates: 22
- Protein: 6
Keywords: homemade ice cream, old fashioned ice cream, creamy ice cream, vanilla ice cream, easy ice cream recipe, no churn ice cream, custard ice cream


