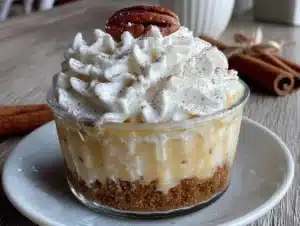
I was elbow-deep in a pile of vintage linens at a dusty estate sale last October, honestly just looking for a tablecloth that didn’t smell like mothballs. The woman running the sale, a tiny lady named Edna with bright red glasses and a no-nonsense voice, watched me struggle with a particularly stubborn trunk lid. She didn’t offer help—she just said, “You’re wasting your time with that. The good stuff is in the kitchen box.” And then, out of nowhere, she started talking about pumpkin cheesecake. Not a big, fancy one that takes all afternoon, but these little cups she used to make for her grandson’s school bake sales. “They’re gone in two bites,” she said, “and nobody believes they took fifteen minutes to throw together.” I bought a chipped pie plate just to be polite, but I left with her recipe scribbled on the back of a receipt. That was three years ago, and I haven’t stopped making them since. These quick bite-size pumpkin cheesecake cups are the perfect solution for when you want that rich, creamy fall flavor without the hassle of a full-sized cheesecake. Maybe you’ve been there—craving something seasonal but running out of steam before dinner is even on the table. Let me tell you, these little guys are a game-changer.
Why You’ll Love This Recipe
Let’s face it—weeknights are a juggling act. Between work, school runs, and that mountain of laundry that never seems to shrink, the last thing you need is a complicated dessert recipe. These bite-size pumpkin cheesecake cups are here to save the day. They come together in under 20 minutes of active prep time, and they bake up in just 15 minutes. That’s faster than ordering takeout.
- Quick & Easy: From start to finish, you’re looking at about 35 minutes. Most of that is hands-off baking time, so you can get dinner on the table while these do their thing in the oven.
- Simple Ingredients: You probably already have most of these in your pantry. No trips to a specialty store needed—just basic baking staples and a can of pumpkin puree.
- Perfect for Weeknights: These are small enough to satisfy a sweet craving without leaving you with a whole cake to polish off. Portion control that actually feels good.
- Crowd-Pleaser: I’ve brought these to potlucks, book club meetings, and casual dinners. Kids love them, adults love them, and people always ask for the recipe.
- Unbelievably Delicious: The texture is what gets me every time. That creamy, tangy cheesecake layer paired with the warm, spiced pumpkin—it’s comfort food in a tiny cup.
What makes this version different from the rest? It’s the balance. I tested this about six times to get the cream cheese to pumpkin ratio just right. Too much pumpkin and it gets heavy. Too much cream cheese and you lose that fall flavor. This recipe hits that sweet spot where both flavors shine. Plus, we’re using a simple graham cracker crust that doesn’t require pre-baking. Honest, it’s my best version yet.
What Ingredients You Will Need
This recipe uses simple, wholesome ingredients to deliver that bold pumpkin-and-cheesecake flavor without any fuss. Most of these are pantry staples, especially if you do any fall baking at all.
For the Crust
- 1 cup graham cracker crumbs (about 8 full sheets, crushed finely)
- 2 tablespoons granulated sugar
- 4 tablespoons unsalted butter, melted (I use Land O’Lakes—consistent quality every time)
For the Cheesecake Filling
- 8 ounces cream cheese, softened to room temperature (Philadelphia is my go-to for the smoothest texture)
- 1/3 cup granulated sugar
- 1 large egg, room temperature
- 1 teaspoon vanilla extract
- 1/2 cup pumpkin puree (not pumpkin pie filling—make sure it’s 100% pumpkin)
- 1 teaspoon pumpkin pie spice
- 1/4 teaspoon ground cinnamon (adds warmth)
- Pinch of salt (balances sweetness)
For the Topping (Optional but Recommended)
- 1/2 cup heavy cream, cold
- 1 tablespoon powdered sugar
- 1/4 teaspoon vanilla extract
- Ground cinnamon or nutmeg, for dusting
A quick note on the pumpkin puree—I’ve tried a few brands over the years, and Libby’s is my favorite for its smooth, consistent texture. If you’re in a pinch, store brands work fine, just give it a quick stir before measuring. For the graham crackers, you can buy pre-made crumbs, but I find crushing my own gives a better texture. Throw them in a zip-top bag and go at it with a rolling pin—it’s a great way to work out some frustration!
If you’re dairy-free, you can swap the cream cheese for a plant-based version. I’ve had good luck with Kite Hill’s cream cheese alternative. Just make sure it’s softened the same way. For a gluten-free crust, use gluten-free graham crackers or crushed gluten-free digestive biscuits.
Equipment Needed
You don’t need much fancy gear for this recipe, which is part of the beauty of it. Here’s what you’ll want to have on hand:
- A 12-cup mini muffin tin: This is non-negotiable. Standard muffin tins are too big for the bite-size concept. I’ve had my Wilton one for years and it still works perfectly.
- Mini muffin liners: Paper liners make cleanup a breeze. You can skip them if you grease the pan well, but honestly, liners save you the hassle of prying them out.
- Mixing bowls: One medium bowl for the crust, one large bowl for the filling. Nothing fancy—I use my grandmother’s old Pyrex set.
- Hand mixer or stand mixer: A whisk and some elbow grease will work in a pinch, but a mixer gets the cream cheese silky smooth without lumps.
- Measuring cups and spoons: Precision matters here, especially for the pumpkin and spices.
- Spatula: For scraping down the bowl and getting every last bit of filling into the cups.
- Small cookie scoop or teaspoon: Makes filling the cups neat and even. I use a #60 scoop—holds about a tablespoon.
If you don’t have a mini muffin tin, you can use a regular 12-cup muffin tin and make slightly larger cups. Just increase the baking time by 3-5 minutes. Budget-friendly tip: check thrift stores for mini muffin tins. I found my backup one for three bucks.
Preparation Method
Alright, let’s get cooking. This whole process moves pretty fast, so I like to have everything measured out and ready to go before I start. Trust me, it makes the whole thing feel effortless.
- Preheat your oven to 350°F (175°C). Line your mini muffin tin with paper liners. This step takes two minutes, and it saves you from scrubbing later. I’ve forgotten to do this before, and let me tell you, chiseled-on cheesecake is not a fun Saturday activity.
- Make the crust. In a medium bowl, combine the graham cracker crumbs and 2 tablespoons of sugar. Pour in the melted butter and stir with a fork until the mixture looks like wet sand. Every crumb should be coated. If it looks dry, add another teaspoon of melted butter.
- Press the crust into the liners. Drop about 1 heaping teaspoon of the crust mixture into each liner. Use the bottom of a small shot glass or a clean spice jar to press it down firmly. You want a compact, even layer—about 1/4-inch thick. Don’t skip the pressing step; a loose crust will fall apart when you bite into it.
- Make the cheesecake filling. In a large bowl, beat the softened cream cheese with the 1/3 cup sugar until smooth and creamy. This takes about 2 minutes with a hand mixer on medium speed. Scrape down the sides of the bowl halfway through. You don’t want any sneaky lumps.
- Add the egg and vanilla. Beat in the egg and vanilla extract until just combined. Don’t overmix here—too much air can cause the cheesecake to puff up and crack. You want it smooth, not fluffy.
- Add the pumpkin and spices. Add the pumpkin puree, pumpkin pie spice, cinnamon, and salt. Mix on low speed until everything is incorporated and the filling is a uniform orange color. Give it a taste—it should be creamy, spiced, and just sweet enough. I always sneak a finger-lick here. It’s the cook’s privilege.
- Fill the cups. Spoon or scoop the filling into the prepared crusts, filling each liner almost to the top—leave about 1/8-inch of space. A small cookie scoop makes this step mess-free. You should get exactly 24 mini cheesecakes from this batch.
- Bake. Place the muffin tin on the middle rack of your preheated oven. Bake for 14-16 minutes, or until the edges are set and the centers are just slightly jiggly. They will look a bit puffed and pale on top. Don’t wait for them to look fully firm—they’ll set as they cool.
- Cool completely. Let the cheesecake cups cool in the pan on a wire rack for 15 minutes. Then carefully transfer them (still in the liners) to the rack to cool completely, about 30 minutes more. If you try to eat them warm, the texture will be loose and runny. Patience, my friend.
- Chill for best results. Once cooled, place the cheesecake cups in the refrigerator for at least 2 hours. Overnight is even better. This step is where the magic happens—the flavors meld together and the texture becomes perfectly creamy.
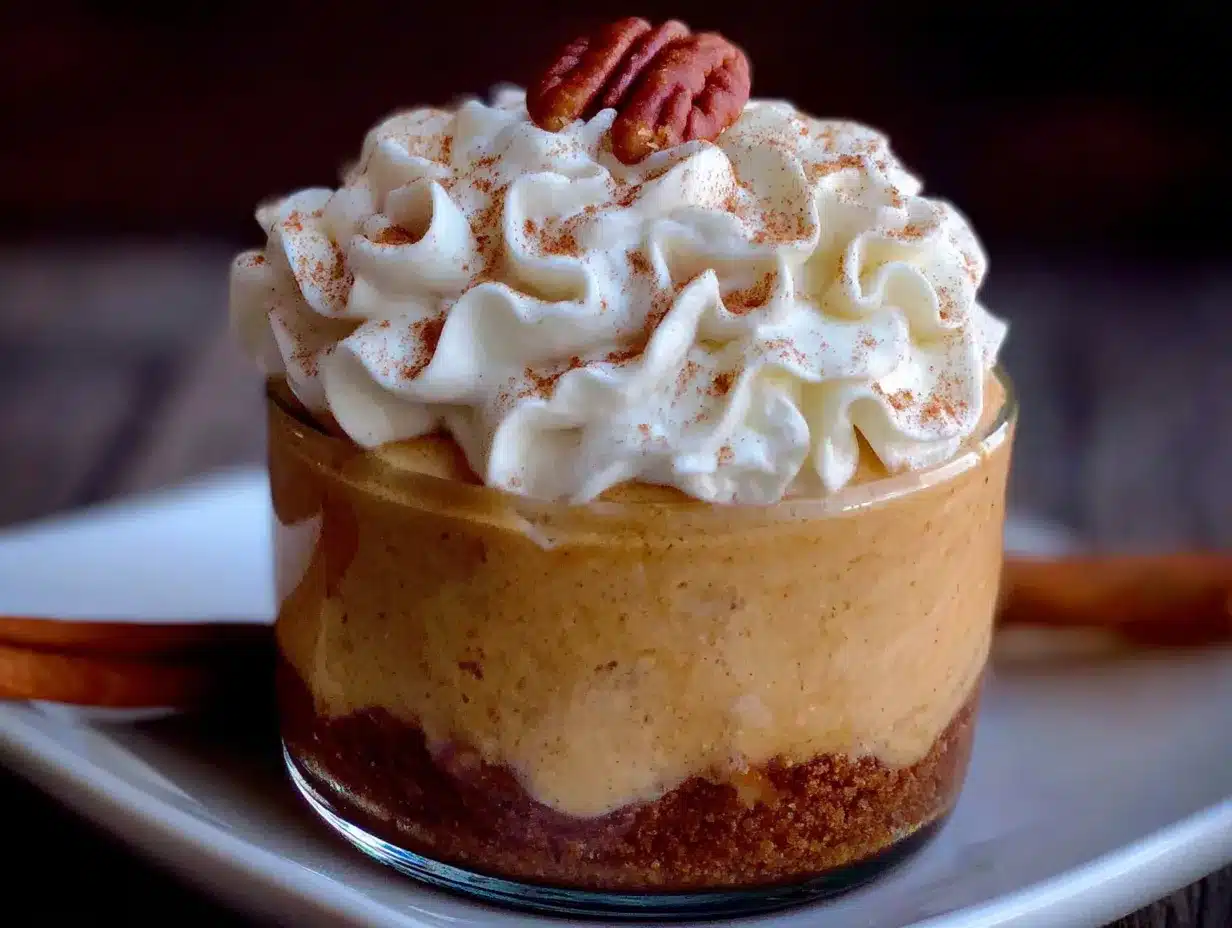
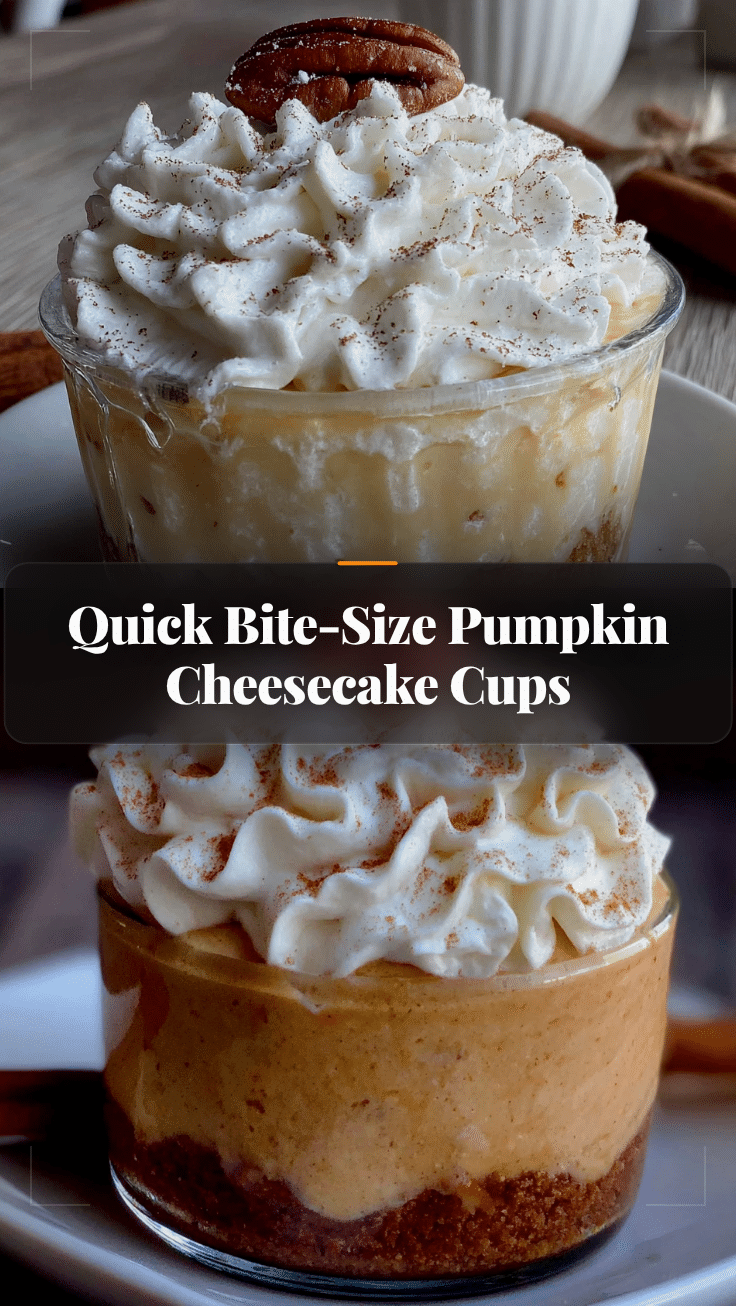
- Add topping just before serving. If you’re using the whipped cream topping, whip the cold heavy cream, powdered sugar, and vanilla together until soft peaks form. Spoon or pipe a small dollop onto each chilled cheesecake cup. Dust with a pinch of cinnamon or nutmeg.
Cooking Tips & Techniques
I’ve made these bite-size pumpkin cheesecake cups more times than I can count, and I’ve picked up a few tricks along the way. Here’s what I’ve learned through trial and error.
Room temperature ingredients matter. I know, I know—every recipe says this. But it’s especially true for cheesecake. Cold cream cheese will leave you with lumpy batter, no matter how long you beat it. Take the cream cheese and egg out of the fridge about 30 minutes before you start. If you forgot (it happens), cut the cream cheese into small cubes and let it sit for 10 minutes. It’ll soften faster.
Don’t overmix the filling. This was a hard lesson for me. I used to beat the filling until it was perfectly smooth and airy, thinking that would make it lighter. Instead, the cheesecakes puffed up in the oven and then collapsed into sad little craters. Mix just until the ingredients come together. A few tiny lumps are okay—they’ll bake out.
Watch the baking time closely. Every oven runs a little differently. My old oven used to run hot, and I’d pull these out at 12 minutes. My current oven needs the full 16 minutes. Start checking at the 12-minute mark. The edges should look set and slightly golden, but the center should still wobble when you gently shake the pan. They’ll finish setting as they cool.
Use a water bath hack. Full-sized cheesecakes often bake in a water bath to prevent cracking. For these mini cups, I skip the water bath entirely—they’re small enough that they cook evenly on their own. But if you want an extra-creamy texture, place a small oven-safe dish of water on the lower rack of your oven while they bake. The steam helps keep them moist.
Let them chill properly. I once served these after only an hour in the fridge, and they were… fine. But after a full 4 hours? They were incredible. The texture firms up, the flavors deepen, and the crust stays crisp instead of getting soggy. If you can, make these a day ahead. Your future self will thank you.
Variations & Adaptations
One of the best things about this recipe is how easy it is to tweak. Here are a few ways I’ve changed it up depending on what I have on hand or who I’m feeding.
Gluten-Free Version: Swap the graham crackers for gluten-free graham crackers or crushed gluten-free shortbread cookies. I’ve used Schär’s graham-style crackers with great results. The texture is a bit more delicate, so press the crust firmly.
Dairy-Free Version: Use a plant-based cream cheese (Kite Hill or Violife work well) and coconut cream in place of the heavy cream for the topping. The filling will be slightly less tangy, but still delicious. I made these for a friend with a dairy allergy, and she ate six before anyone noticed.
Pumpkin-Free Version: Believe it or not, you can make these without pumpkin! Swap the pumpkin puree for an equal amount of sweet potato puree or butternut squash puree. The flavor will be milder, so add an extra 1/2 teaspoon of pumpkin pie spice to keep that warm fall taste.
Spiced-Up Version: For a more intense flavor, add 1/4 teaspoon of ground ginger and a pinch of ground cloves to the filling. I tried this one Thanksgiving when I ran out of pumpkin pie spice, and honestly, I liked it better. The ginger gives it a little kick.
Chocolate Lover’s Version: Add 2 tablespoons of unsweetened cocoa powder to the crust mixture for a chocolate-graham base. Or drizzle melted dark chocolate over the finished cheesecake cups. My kids go crazy for this version—it’s like a pumpkin cheesecake brownie bite.
No-Bake Version: If you don’t want to turn on the oven, you can make a no-bake version. Use a pre-made graham cracker crust (the mini ones from the store) and fill with a no-bake cheesecake filling: beat 8 ounces cream cheese with 1/3 cup sugar, then fold in 1/2 cup pumpkin puree, 1 teaspoon pumpkin pie spice, and 1 cup of whipped topping. Chill for 4 hours. It’s softer than the baked version, but still delicious.
Serving & Storage Suggestions
These bite-size pumpkin cheesecake cups are best served cold, straight from the fridge. The texture is at its creamiest when they’ve had time to set properly. I like to take them out about 10 minutes before serving to take the chill off just a bit—it lets the flavors open up.
For presentation, arrange them on a simple white platter or a wooden serving board. A dusting of cinnamon or a tiny star anise on the side makes them look extra festive. If you’re serving them at a fall gathering, scatter a few mini pumpkins or colorful leaves around the platter. It’s a small touch that gets noticed.
These pair beautifully with a cup of hot coffee, spiced chai, or even a crisp apple cider. For a dessert spread, serve them alongside pumpkin snickerdoodles or apple cider donut holes. The combination of flavors is pure autumn heaven.
Storage: Keep any leftover cheesecake cups in an airtight container in the refrigerator. They’ll stay fresh for up to 5 days, though I doubt they’ll last that long. The texture actually improves after a day or two as the flavors meld together.
Freezing: These freeze beautifully! Place the cooled, unfrosted cheesecake cups on a baking sheet and freeze for 1 hour. Then transfer them to a freezer-safe bag or container. They’ll keep for up to 3 months. To thaw, move them to the refrigerator overnight. Add the whipped cream topping after thawing, just before serving.
Reheating: Honestly, I prefer these cold. But if you want a warm dessert, you can microwave one for about 10 seconds. The crust will soften slightly, and the filling will become a little gooey. It’s a different experience, but a good one.
Nutritional Information & Benefits
Here’s the estimated nutritional breakdown for one bite-size pumpkin cheesecake cup (without whipped cream topping):
| Nutrient | Amount per serving (1 cup) |
|---|---|
| Calories | 98 |
| Total Fat | 6g |
| Saturated Fat | 3.5g |
| Cholesterol | 28mg |
| Sodium | 85mg |
| Total Carbohydrates | 10g |
| Dietary Fiber | 0.5g |
| Sugars | 7g |
| Protein | 2g |
| Vitamin A | 35% DV |
These little cups pack a surprising nutritional punch, thanks to the pumpkin. Pumpkin is loaded with vitamin A, which supports eye health and immune function. It’s also a good source of fiber and antioxidants. The cream cheese adds calcium and protein, while the graham cracker crust provides a little energy from carbohydrates.
If you’re watching your sugar intake, you can reduce the sugar in the filling to 1/4 cup. The pumpkin adds natural sweetness, so you won’t miss it much. For a lower-fat option, use reduced-fat cream cheese—just know the texture will be slightly less creamy.
These are not a health food, but they’re a reasonable indulgence. One or two cups satisfy a sweet craving without derailing your day. And honestly, that’s a win in my book.
Conclusion
So there you have it—quick bite-size pumpkin cheesecake cups that come together in a flash and taste like you spent all afternoon in the kitchen. These little guys have become my go-to fall dessert, whether I’m hosting a dinner party or just want something sweet after a long Tuesday. They’re proof that you don’t need a complicated recipe or a ton of time to make something truly delicious.
I love that this recipe is flexible enough to adapt to whatever you have on hand, and forgiving enough that even a beginner baker can nail it on the first try. The creaminess of the cheesecake, the warmth of the pumpkin spice, the crunch of the crust—it’s a combination that just works.
I’d love to hear how yours turn out! Did you try a variation? Add a topping I didn’t mention? Share your experience in the comments below—I read every single one. And if you snap a photo, tag me on social media. There’s nothing that makes my day like seeing these little cups in your kitchen.
Go on, give them a try. Your weeknight dessert situation is about to get a whole lot better.
Frequently Asked Questions
Can I use a regular muffin tin instead of a mini muffin tin?
Yes, you can. Use a standard 12-cup muffin tin with paper liners. The baking time will increase to about 20-22 minutes. You’ll get 12 regular-sized cups instead of 24 mini ones. The texture and flavor are the same—they’re just bigger portions.
Do I have to use pumpkin pie spice?
Not at all. If you don’t have pumpkin pie spice on hand, you can make your own blend: mix 1/2 teaspoon cinnamon, 1/4 teaspoon nutmeg, 1/4 teaspoon ginger, and a pinch of cloves. Or just use cinnamon alone—it’ll still taste great.
Can I make these ahead of time for a party?
Absolutely. In fact, I recommend it. These taste even better after a day in the fridge. Make them up to 2 days in advance, keep them covered in the refrigerator, and add the whipped cream topping just before serving. One less thing to worry about on party day!
Why did my cheesecake cups crack on top?
Small cracks are normal and nothing to worry about—the whipped cream topping covers them nicely. But if you want to prevent cracking, avoid overmixing the batter (too much air causes puffing and cracking) and don’t overbake them. Pull them out when the centers are still slightly jiggly. Cooling them slowly also helps.
Can I use fresh pumpkin instead of canned?
Yes, but you’ll need to cook and puree the pumpkin first. Roast a small sugar pumpkin at 400°F for 45 minutes, then scoop out the flesh and blend until smooth. Drain any excess liquid through a cheesecloth or paper towel—fresh pumpkin can be more watery than canned, which might make the filling too loose.
Pin This Recipe!
Easy Bite-Size Pumpkin Cheesecake Cups Recipe
These quick bite-size pumpkin cheesecake cups are the perfect solution for when you want that rich, creamy fall flavor without the hassle of a full-sized cheesecake. They come together in under 20 minutes of active prep time and bake up in just 15 minutes.
- Prep Time: 20 minutes
- Cook Time: 15 minutes
- Total Time: 35 minutes
- Yield: 24 servings 1x
- Category: Dessert
- Cuisine: American
Ingredients
- 1 cup graham cracker crumbs (about 8 full sheets, crushed finely)
- 2 tablespoons granulated sugar
- 4 tablespoons unsalted butter, melted
- 8 ounces cream cheese, softened to room temperature
- 1/3 cup granulated sugar
- 1 large egg, room temperature
- 1 teaspoon vanilla extract
- 1/2 cup pumpkin puree (not pumpkin pie filling)
- 1 teaspoon pumpkin pie spice
- 1/4 teaspoon ground cinnamon
- Pinch of salt
- 1/2 cup heavy cream, cold (for topping, optional)
- 1 tablespoon powdered sugar (for topping, optional)
- 1/4 teaspoon vanilla extract (for topping, optional)
- Ground cinnamon or nutmeg, for dusting (for topping, optional)
Instructions
- Preheat your oven to 350°F (175°C). Line your mini muffin tin with paper liners.
- Make the crust: In a medium bowl, combine the graham cracker crumbs and 2 tablespoons of sugar. Pour in the melted butter and stir with a fork until the mixture looks like wet sand.
- Press the crust into the liners: Drop about 1 heaping teaspoon of the crust mixture into each liner. Use the bottom of a small shot glass or a clean spice jar to press it down firmly into a compact, even layer about 1/4-inch thick.
- Make the cheesecake filling: In a large bowl, beat the softened cream cheese with the 1/3 cup sugar until smooth and creamy, about 2 minutes with a hand mixer on medium speed. Scrape down the sides of the bowl halfway through.
- Add the egg and vanilla: Beat in the egg and vanilla extract until just combined. Do not overmix.
- Add the pumpkin and spices: Add the pumpkin puree, pumpkin pie spice, cinnamon, and salt. Mix on low speed until everything is incorporated and the filling is a uniform orange color.
- Fill the cups: Spoon or scoop the filling into the prepared crusts, filling each liner almost to the top, leaving about 1/8-inch of space. You should get exactly 24 mini cheesecakes.
- Bake: Place the muffin tin on the middle rack of your preheated oven. Bake for 14-16 minutes, or until the edges are set and the centers are just slightly jiggly.
- Cool completely: Let the cheesecake cups cool in the pan on a wire rack for 15 minutes. Then carefully transfer them (still in the liners) to the rack to cool completely, about 30 minutes more.
- Chill for best results: Once cooled, place the cheesecake cups in the refrigerator for at least 2 hours. Overnight is even better.
- Add topping just before serving: If using the whipped cream topping, whip the cold heavy cream, powdered sugar, and vanilla together until soft peaks form. Spoon or pipe a small dollop onto each chilled cheesecake cup. Dust with a pinch of cinnamon or nutmeg.
Notes
Room temperature ingredients matter for a smooth batter. Do not overmix the filling to avoid cracking. Watch the baking time closely; start checking at 12 minutes. For extra-creamy texture, place a small oven-safe dish of water on the lower rack while baking. Chill for at least 2 hours, preferably overnight, for best flavor and texture. These freeze well for up to 3 months.
Nutrition
- Serving Size: 1 mini cheesecake cu
- Calories: 98
- Sugar: 7
- Sodium: 85
- Fat: 6
- Saturated Fat: 3.5
- Carbohydrates: 10
- Fiber: 0.5
- Protein: 2
Keywords: pumpkin cheesecake cups, bite-size cheesecake, mini pumpkin cheesecake, fall dessert, easy cheesecake recipe, quick dessert, pumpkin dessert, cheesecake cups