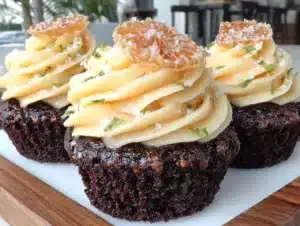
This was supposed to be a standard red velvet cake. I had the buttermilk out, the cocoa powder measured, and I was feeling pretty good about myself for making a birthday treat from scratch for my daughter’s class party. Then my three-year-old, mid-tantrum over a broken crayon, decided to “help” by dumping an entire bottle of black food coloring into my pristine, ruby-red batter. I stood there, staring at this goth-looking mess, with the timer ticking and a classroom of five-year-olds expecting cupcakes the next morning. I almost cried. But I didn’t have time to start over, so I stirred it up, baked it anyway, and figured I’d just call them “chocolate.” The result? The most moist, tender, ridiculously dark cupcake I’d ever made. The black food coloring, in its excessive quantity, didn’t ruin it—it made the crumb velvety and impossibly dark. Desperate to salvage the flavor profile, I grabbed a lone orange from the fruit bowl and zested it into my buttercream. That tangy, bright citrus against the deep, almost smoky chocolate was a revelation. Honestly, I’ve never gone back to red velvet since. The kids at the party didn’t just eat them; they fought over the last one. And now, every time my daughter asks for her “Halloween cupcakes” (even in April), I know exactly what to do. Maybe you’ve been there—a kitchen disaster that turns into your most requested recipe. This is that story, but with a much better ending.
Why You’ll Love This Recipe
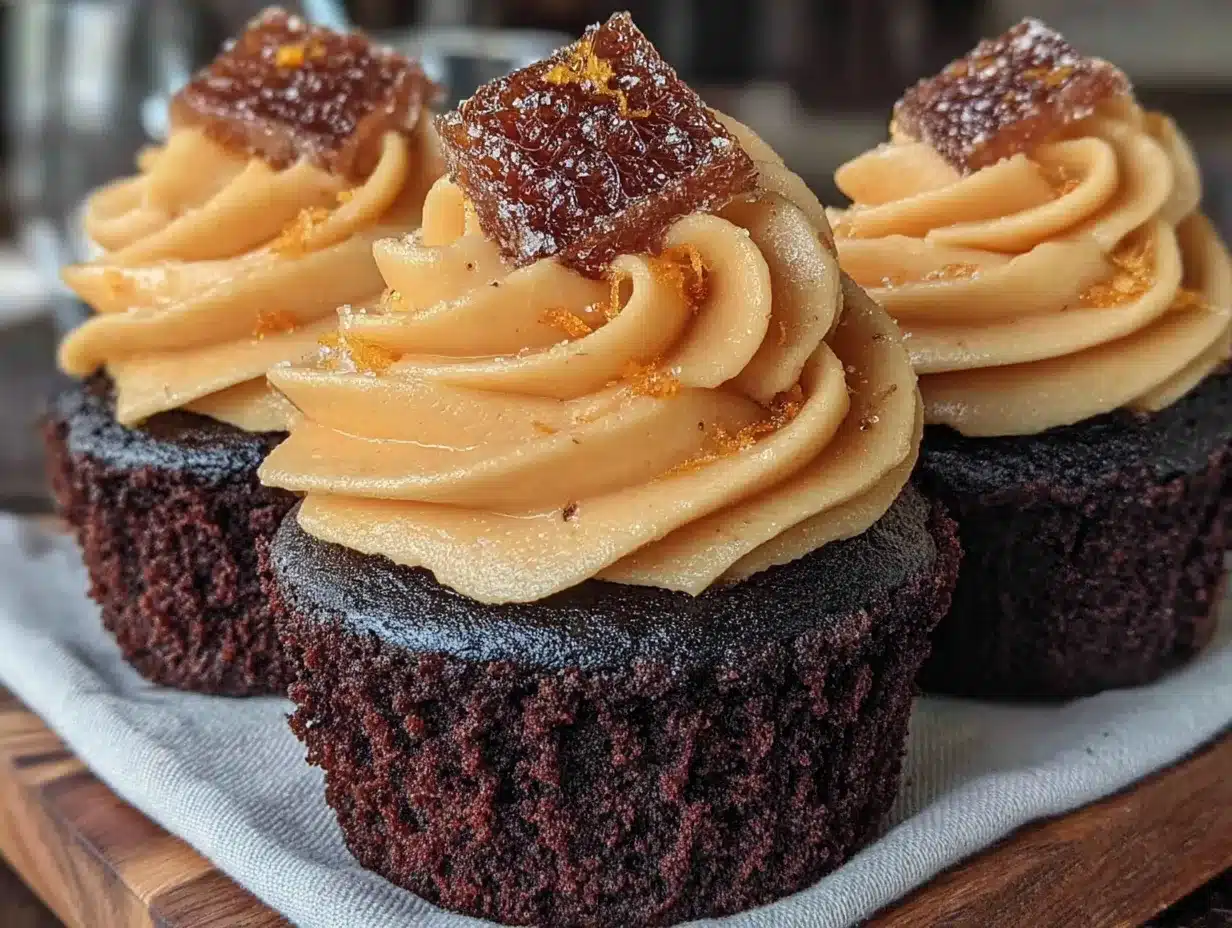
These aren’t just pretty black cupcakes. They are a testament to the fact that a kitchen flub can become a family legend. As a mom who’s tested this recipe on a panel of very honest (read: brutally blunt) children, I can tell you these are a certified hit. They are moist, deeply chocolatey, and the orange frosting cuts through the richness perfectly, making them feel light and fun—not heavy like some store-bought versions.
- Quick & Easy: From start to finish, you’re looking at about 45 minutes. The batter comes together in one bowl with no fancy gadgets needed.
- Simple Ingredients: You probably have the cocoa powder, flour, and sugar in your pantry right now. The only “special” thing is the black food coloring, which is easy to find.
- Perfect for Any Occasion: Birthday parties, Halloween, a random Tuesday—these cupcakes bring a smile to any face. They are a crowd-pleaser that always gets a “Wow!”
- Unbelievably Delicious: The texture is what gets you. It’s not a dry, crumbly cake. It’s moist, almost like a brownie, but light enough to be a cupcake. The orange frosting is the hero—it’s not too sweet and has a real, fresh fruit flavor.
What makes this recipe different is the method. I use hot coffee in the batter (a trick I learned from a bakery in Chicago), which deepens the chocolate flavor without making it taste like coffee. And the frosting? It’s a simple American buttercream, but the key is using fresh orange zest and a tiny splash of orange extract. It makes the flavor pop in a way that juice alone never could. This isn’t just another cupcake recipe; it’s the one that makes you close your eyes after the first bite.
What Ingredients You Will Need
This recipe uses simple, wholesome ingredients to deliver that bold, rich flavor. Most of these are pantry staples, so you likely won’t need a special trip to the store. The list looks long, but it’s broken down into the cupcake and the frosting.
For the Black Velvet Cupcakes
- 1 ½ cups (190g) all-purpose flour – Spoon and level it for the best texture. Don’t scoop directly from the bag.
- 1 cup (200g) granulated sugar – Adds sweetness and helps with the tender crumb.
- ½ cup (45g) unsweetened cocoa powder – I prefer Dutch-processed for a smoother, richer chocolate flavor.
- 1 teaspoon baking soda – This helps the cupcakes rise and stay fluffy.
- ½ teaspoon salt – Balances the sweetness and enhances the chocolate.
- 1 cup (240ml) buttermilk, room temperature – The acid in the buttermilk makes the cake incredibly tender. (adds moistness)
- ½ cup (120ml) vegetable oil – Keeps the cupcakes moist for days. Use a neutral oil like canola or grapeseed.
- 1 large egg, room temperature – Binds everything together.
- 2 teaspoons vanilla extract – Pure vanilla makes a difference here.
- ½ cup (120ml) hot coffee – This is my secret weapon. It deepens the chocolate flavor without making it taste like coffee.
- 2-3 tablespoons black gel food coloring – Gel is much more concentrated than liquid. You’ll need less, and it won’t thin out the batter. I recommend Americolor Super Black for the best results.
For the Orange Frosting
- 1 cup (226g) unsalted butter, softened – Let it sit out for at least 30 minutes. It should be soft but not melty.
- 3-4 cups (360-480g) powdered sugar – Start with 3 cups and add more if needed for stiffness.
- 2 tablespoons fresh orange zest – From about 2 large oranges. Don’t skip this—it’s the soul of the frosting.
- 2-3 tablespoons fresh orange juice – Adds flavor and thins the frosting.
- ½ teaspoon orange extract (optional, but recommended) – This gives a lovely, intense orange punch.
- Pinch of salt – Balances the sweetness.
Substitution Guidance: If you don’t have buttermilk, you can make a quick substitute by adding 1 tablespoon of white vinegar or lemon juice to 1 cup of milk. Let it sit for 5 minutes. For a dairy-free option, use almond milk with the same trick.
Equipment Needed
You don’t need a professional bakery setup for these. Here’s what you’ll need to pull this off without a hitch.
- Two 12-cup muffin tins – This recipe makes about 18-20 cupcakes, so you’ll need two pans or bake in batches.
- Paper cupcake liners – I like using dark-colored or orange liners to match the theme.
- Large mixing bowls – One for the dry ingredients, one for the wet.
- Whisk and a rubber spatula – A whisk for the dry ingredients, a spatula for folding the batter.
- Electric hand mixer or stand mixer – For the frosting. You can do it by hand, but your arm will get a workout.
- Piping bag with a star tip (like Wilton 1M) – For that pretty, bakery-style swirl. If you don’t have one, a zip-top bag with the corner snipped off works fine.
- Microplane or fine grater – For zesting the oranges. A box grater works too, but a Microplane is easier.
I’ve made these with a cheap hand mixer from the grocery store, and they turned out perfect. Don’t stress about having the fanciest tools.
Preparation Method
Let’s get baking! This is a straightforward process, but I’ll break it down step-by-step with a few of my personal tricks.
- Preheat and Prep: Preheat your oven to 350°F (175°C). Line your muffin tins with paper liners. This is a good time to get your buttermilk and egg out of the fridge so they come to room temperature.
- Mix the Dry Ingredients: In a large bowl, whisk together the flour, sugar, cocoa powder, baking soda, and salt. Make sure there are no lumps of cocoa. Whisking aerates the flour, which makes for a lighter cupcake.
- Mix the Wet Ingredients: In a separate bowl (or a large liquid measuring cup), whisk together the buttermilk, oil, egg, and vanilla extract until smooth.
- Combine Wet and Dry: Pour the wet ingredients into the dry ingredients. Stir with a rubber spatula until just combined. It will look a little thick and lumpy. Don’t overmix! Overmixing develops gluten and makes the cupcakes tough.
- The Magic Ingredient: Pour in the hot coffee and the black gel food coloring. Stir gently until the batter is smooth and a deep, dark black. The batter will be very thin—that’s normal! It’s what makes these cupcakes so moist. This is where you need to trust the process. I once forgot the coffee and the cupcakes were dry and sad. Don’t skip it.
- Fill the Liners: Use a cookie scoop or a ¼ cup measure to fill each liner about ⅔ full. Don’t overfill them, or they will overflow and look like little volcanoes.
- Bake: Bake for 18-20 minutes, or until a toothpick inserted into the center comes out with a few moist crumbs. The tops should spring back when lightly touched. Let them cool in the pan for 5 minutes, then transfer them to a wire rack to cool completely. Do not frost warm cupcakes! The frosting will melt into a puddle.
- Make the Frosting: While the cupcakes are cooling, make the frosting. In a large bowl, beat the softened butter with an electric mixer until it’s pale and fluffy, about 2 minutes. Add the orange zest and beat again.
- Add the Sugar: Gradually add the powdered sugar, one cup at a time, beating on low speed until incorporated. Add the orange juice, orange extract (if using), and a pinch of salt. Turn the mixer to medium-high and beat for 2-3 minutes until the frosting is light, fluffy, and spreadable. If it’s too thick, add a splash more orange juice. If it’s too thin, add more powdered sugar.
- Frost and Enjoy: Once the cupcakes are completely cool, frost them. I like to use a piping bag with a star tip for a pretty swirl, but you can just spread it on with a butter knife. Top with a little extra orange zest or a few orange sprinkles for a fun touch.
Cooking Tips & Techniques
Over the years, I’ve made these cupcakes more times than I can count. Here are the lessons I’ve learned the hard way so you don’t have to.
- Room Temperature Ingredients Matter: I know, it’s annoying to wait. But cold buttermilk and eggs don’t emulsify well with the oil and sugar. This leads to a denser, less tender crumb. Take them out 30 minutes before you start.
- Don’t Overbake: This is the most common mistake. Cupcakes continue to bake in the hot pan after you pull them out. If you wait until a toothpick comes out completely clean, they will be dry. Pull them when there are just a few moist crumbs attached.
- The Coffee Trick: If you’re worried about caffeine, use decaf. The coffee doesn’t add any coffee flavor; it just enhances the chocolate. Think of it as a flavor amplifier.
- Gel vs. Liquid Food Coloring: Please use gel. Liquid coloring will make your batter too thin and watery, and you’ll need half the bottle to get a true black. Gel gives you a deep, dark color without messing with the liquid ratio.
- Frosting Consistency: If your frosting looks curdled or separated, don’t panic. It usually means your butter was too cold. Just keep beating it for another minute or two. It will come together. If it’s too soft to pipe, pop the bowl in the fridge for 10 minutes to firm up.
Variations & Adaptations
This is a great base recipe, so don’t be afraid to play around with it. Here are a few ways I’ve customized it over the years.
- Gluten-Free Option: Substitute the all-purpose flour with a 1:1 gluten-free baking blend (like Bob’s Red Mill). The texture will be slightly more crumbly, but still delicious.
- Dairy-Free Version: Use a dairy-free buttermilk (almond milk + vinegar) and a plant-based butter for the frosting. I’ve used Miyoko’s butter with great success.
- Halloween Spider Webs: For a spooky twist, use white frosting instead of orange, and drizzle melted dark chocolate in a spiral on top. Then, drag a toothpick from the center outwards to create a web.
- Lemon Frosting: If orange isn’t your thing, swap the zest and juice for lemon. It’s equally bright and refreshing.
- Chocolate Orange Cupcakes: Fold ½ cup of mini chocolate chips into the batter before baking. The little pockets of melted chocolate are a lovely surprise.
Serving & Storage Suggestions
These cupcakes are best enjoyed at room temperature. The frosting is soft and creamy, and the cake is perfectly moist. They are fantastic for a birthday party, a school bake sale, or just a weekend treat with the family.
- Serving: Arrange them on a pretty cake stand. The black cake with the bright orange frosting is a stunning visual contrast. They pair beautifully with a glass of cold milk or a hot cup of coffee for the adults.
- Storage: Store unfrosted cupcakes in an airtight container at room temperature for up to 3 days. Frosted cupcakes should be stored in the fridge, but let them sit out for 20 minutes before serving to soften the buttercream.
- Freezing: You can freeze the unfrosted cupcakes for up to 3 months. Wrap them individually in plastic wrap and then place them in a freezer bag. Thaw at room temperature before frosting. The frosting itself can also be frozen in a piping bag for up to a month. Just let it thaw in the fridge overnight and re-whip it before using.
- Flavor Development: Honestly, these cupcakes taste even better the next day. The flavors meld together, and the cake gets even more moist. So if you’re making them for a party, bake them the day before and frost them the morning of.
Nutritional Information & Benefits
Let’s be real—this is a dessert, and it’s meant to be enjoyed. But there are a few little perks hidden in these treats.
- Estimated Values (per cupcake with frosting): Approximately 320 calories, 18g fat, 38g carbs, 3g protein.
- Health Benefits: The cocoa powder is rich in antioxidants (flavonoids) which are good for heart health. The oranges provide a dose of Vitamin C, which supports your immune system. So, you know, it’s practically a health food!
- Dietary Considerations: This recipe is nut-free (if you use the right ingredients), making it safe for school parties. It can easily be made gluten-free or dairy-free with the substitutions listed above.
- Potential Allergens: Contains wheat (gluten), dairy (butter, buttermilk), and eggs.
I always tell my kids that a little treat is good for the soul. These cupcakes are a perfect example of that. They bring joy without being overly heavy or complicated.
Conclusion
So there you have it—the story of a kitchen disaster that became a family favorite. These Kid-Approved Black Velvet Cupcakes with Orange Frosting are proof that sometimes the best recipes come from the most unexpected places. They are moist, rich, and the orange frosting is just the right amount of zingy to keep you coming back for more. I really hope you give them a try, especially if you have a picky eater at home. My kids, who swear they hate “fancy” cakes, devour these.
Don’t be afraid to make them your own. Add sprinkles, swap the citrus, or just enjoy them as is. The best part of cooking is making a recipe work for your family. If you make these, I’d love to hear about it. Drop a comment below or tag me in your photos. Happy baking, friend!
Frequently Asked Questions
Can I use liquid food coloring instead of gel?
You can, but you will need a lot more to get a true black color. This will thin out your batter, potentially making the cupcakes gummy or flat. Gel is highly concentrated and won’t affect the liquid ratio of the batter, so it’s the better choice for a professional-looking result.
Why did my cupcakes turn out dry?
The most common reason is overbaking. Oven temperatures vary, so start checking your cupcakes at the 15-minute mark. Another culprit is overmixing the batter after adding the flour. Mix just until the streaks disappear. Also, make sure you’re using the hot coffee—it adds moisture that makes the crumb tender.
Can I make this recipe into a cake?
Absolutely! Pour the batter into two greased and floured 8-inch round cake pans. Bake at 350°F (175°C) for 25-30 minutes, or until a toothpick comes out clean. The frosting recipe can easily be doubled to cover a two-layer cake.
My frosting is too runny. How do I fix it?
If your buttercream is too soft, it likely means your butter was too warm or you added too much orange juice. Pop the bowl in the refrigerator for 10-15 minutes to firm it up, then re-whip it. If it’s still too thin, beat in an extra ¼ cup of powdered sugar.
How far in advance can I make these?
You can bake the cupcakes up to 2 days in advance. Store them in an airtight container at room temperature. The frosting can be made up to a week ahead and stored in the fridge. When you’re ready to serve, bring the frosting to room temperature, give it a quick whip, and frost the cupcakes.
Pin This Recipe!
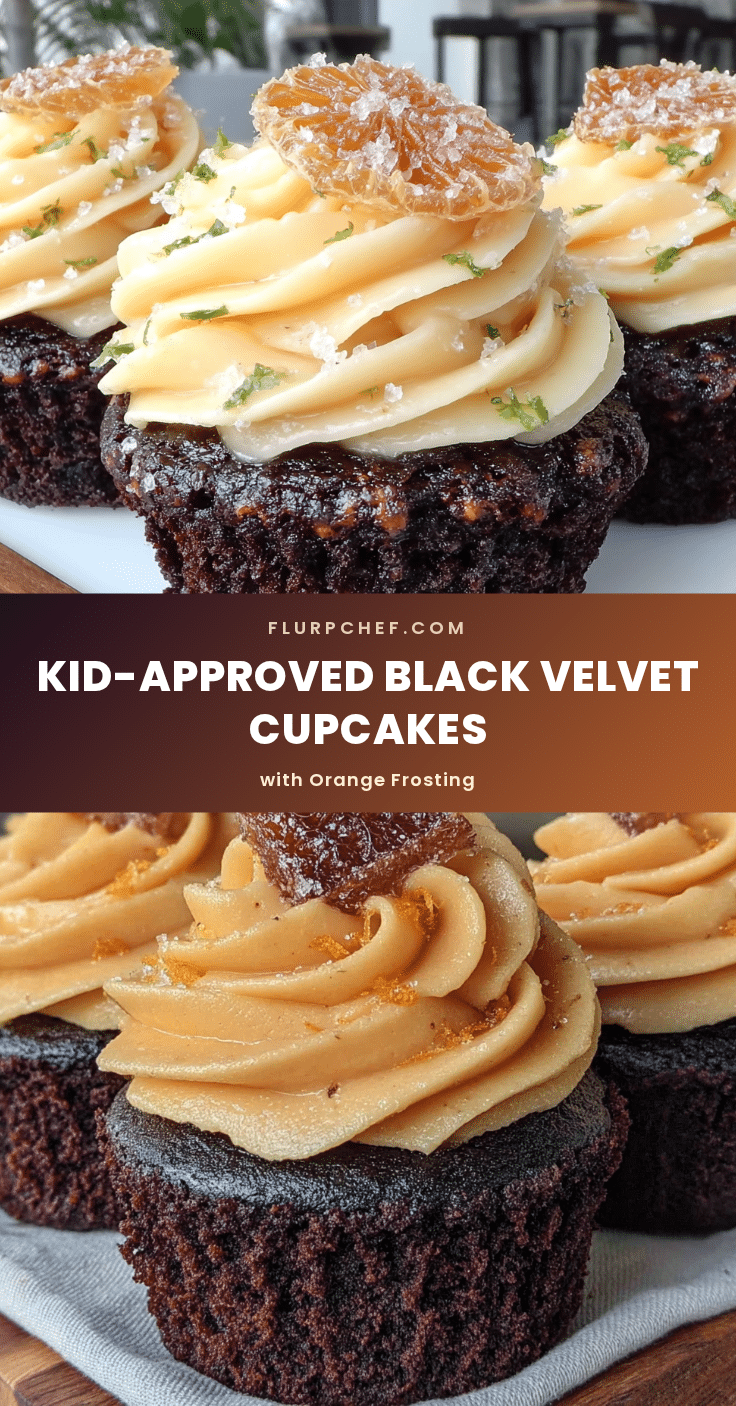
Kid-Approved Black Velvet Cupcakes: Easy Orange Frosting Recipe
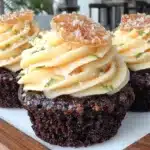
These moist, deeply chocolatey black velvet cupcakes are topped with a bright, tangy orange buttercream. A kitchen disaster turned family favorite, this easy recipe is perfect for birthdays, Halloween, or any occasion that calls for a show-stopping treat.
- Prep Time: 15 minutes
- Cook Time: 20 minutes
- Total Time: 45 minutes
- Yield: 18-20 cupcakes 1x
- Category: Dessert
- Cuisine: American
Ingredients
- 1 ½ cups (190g) all-purpose flour
- 1 cup (200g) granulated sugar
- ½ cup (45g) unsweetened cocoa powder (Dutch-processed preferred)
- 1 teaspoon baking soda
- ½ teaspoon salt
- 1 cup (240ml) buttermilk, room temperature
- ½ cup (120ml) vegetable oil
- 1 large egg, room temperature
- 2 teaspoons vanilla extract
- ½ cup (120ml) hot coffee
- 2–3 tablespoons black gel food coloring (e.g., Americolor Super Black)
- 1 cup (226g) unsalted butter, softened
- 3–4 cups (360-480g) powdered sugar
- 2 tablespoons fresh orange zest
- 2–3 tablespoons fresh orange juice
- ½ teaspoon orange extract (optional)
- Pinch of salt
Instructions
- Preheat oven to 350°F (175°C). Line muffin tins with paper liners.
- In a large bowl, whisk together flour, sugar, cocoa powder, baking soda, and salt.
- In a separate bowl, whisk together buttermilk, oil, egg, and vanilla extract until smooth.
- Pour wet ingredients into dry ingredients and stir with a rubber spatula until just combined.
- Add hot coffee and black gel food coloring; stir gently until batter is smooth and deep black. Batter will be thin.
- Fill each liner about ⅔ full using a cookie scoop or ¼ cup measure.
- Bake for 18-20 minutes, until a toothpick inserted in the center comes out with a few moist crumbs. Cool in pan 5 minutes, then transfer to a wire rack to cool completely.
- For frosting: Beat softened butter with an electric mixer until pale and fluffy, about 2 minutes. Add orange zest and beat again.
- Gradually add powdered sugar, one cup at a time, beating on low. Add orange juice, orange extract (if using), and salt. Beat on medium-high for 2-3 minutes until light and fluffy.
- Frost cooled cupcakes using a piping bag with a star tip or a butter knife. Top with extra orange zest or sprinkles if desired.
Notes
Room temperature ingredients are key for a tender crumb. Don’t overbake; pull cupcakes when a toothpick has a few moist crumbs. Use gel food coloring for best results. The coffee enhances chocolate flavor without adding coffee taste. Frosting can be made ahead and stored in the fridge; bring to room temperature and re-whip before using.
Nutrition
- Serving Size: 1 cupcake
- Calories: 320
- Sugar: 28
- Sodium: 180
- Fat: 18
- Saturated Fat: 9
- Carbohydrates: 38
- Fiber: 2
- Protein: 3
Keywords: black velvet cupcakes, orange frosting, chocolate cupcakes, Halloween cupcakes, easy cupcake recipe, kid-friendly dessert