I was at the hardware store, of all places, buying a new lightbulb for my kitchen when the cashier—a woman named Carol with bright purple glasses and a nametag that said “Ask me about my cats”—started telling me about the best Halloween cookies she’d ever made. I hadn’t asked. I was just standing there, wallet in hand, and she leaned over the counter like we were old friends. “You look like someone who bakes,” she said. “You have that flour-on-your-sweater look.” She wasn’t wrong.
Carol told me her grandmother used to make these witch finger cookies every year for Halloween, and the secret was in the almonds. Not just any almonds, but whole blanched ones, pressed into the dough just right so they looked like actual fingernails. She described the whole thing with such weird, specific enthusiasm that I couldn’t not try it. I mean, a recipe from a hardware store cat lady? That felt like the kind of thing you have to make at least once.
So I went home, grabbed my mixing bowl, and gave these spooky witch finger cookies with almond nails a shot. And honestly? They turned out way better than I expected. Creepy, but in a fun way. The kind of creepy that makes kids laugh and adults do a double-take. The dough was simple—butter, sugar, flour, the usual suspects—but the shaping part was where the magic happened. I rolled each piece into a thin, knobby finger shape, scored the knuckles with a knife, and pressed an almond onto the tip for the nail. My first batch looked more like sad little potatoes, but by the third tray, I had a full hand of convincing witch fingers.
There’s something about making food that looks like body parts that brings people together. Maybe you’ve been there, standing over a baking sheet, laughing at how ridiculous and wonderful it is that we get to eat cookies shaped like fingers. That’s the energy these cookies bring. They’re not just a Halloween treat—they’re a conversation starter, a photo op, and a genuinely good shortbread cookie all rolled into one. And I keep making them because every year, someone new sees them and says, “Wait, those are cookies?” And that moment never gets old.
Why You’ll Love This Recipe
These spooky witch finger cookies with almond nails aren’t just another Halloween recipe you’ll try once and forget. They’ve become a staple in my October baking rotation for good reason, and I’ve tested them enough times to work out all the little kinks that could trip you up. Here’s why they deserve a spot on your holiday baking list:
- Quick & Easy: From start to finish, you’re looking at about 45 minutes. The dough comes together in one bowl, and the shaping is surprisingly forgiving once you get the hang of it. Perfect for a last-minute Halloween party or a lazy Sunday baking session.
- Simple Ingredients: You probably have everything in your pantry right now. Butter, sugar, flour, eggs, vanilla, and a bag of whole almonds. No fancy extracts, no specialty flours, no midnight runs to the store.
- Perfect for Halloween: These cookies were basically born for spooky season. They’re creepy enough to impress at a costume party but not so gross that kids won’t eat them. Trust me, I’ve watched a five-year-old happily munch on a “witch finger” while wearing a princess costume.
- Crowd-Pleaser: Every single time I bring these somewhere, they’re the first thing to disappear. Adults get a kick out of the presentation, and kids love the almond “nails.” It’s the kind of cookie that gets people talking before they even take a bite.
- Unbelievably Delicious: Here’s the thing—these aren’t just a gimmick. The shortbread base is buttery, tender, and just sweet enough, with a slight crunch from the almond that mimics the texture of a nail in the most delightful way. It’s comfort food with a creepy twist.
What makes this version different from the dozens of witch finger recipes floating around the internet? It’s the technique. I spent three batches figuring out exactly how to shape the fingers so they look genuinely unsettling without falling apart. The trick is chilling the dough just enough before baking, and using a specific type of almond that stays put without sliding off. I’ve also adjusted the sugar level so the cookies aren’t cloyingly sweet—because let’s face it, a finger-shaped cookie that tastes like pure sugar is just weird. This version balances the creep factor with actually good flavor.
This is the kind of recipe that makes you close your eyes after the first bite. It’s Halloween fun reimagined—creepy, but with the same soul-soothing satisfaction of a perfect shortbread cookie. Perfect for impressing party guests without stress, or turning a simple October afternoon into something memorable.
What Ingredients You Will Need
This recipe uses simple, wholesome ingredients to deliver that perfect buttery shortbread texture and just the right amount of spooky charm. Most of these are pantry staples, which makes these cookies an easy last-minute Halloween project.
For the Cookie Dough
- 1 cup (226g) unsalted butter, softened to room temperature — I prefer using Land O’Lakes or Kerrygold for the richest flavor. Make sure it’s truly soft, not melted, or your fingers will spread too much.
- 1 cup (200g) granulated sugar — Regular white sugar works perfectly here. You could use organic cane sugar if you prefer, but the texture might be slightly grainier.
- 1 large egg, room temperature — Cold eggs can make the dough seize up. Just set yours out on the counter about 30 minutes before you start.
- 1 teaspoon vanilla extract — Pure vanilla extract makes a noticeable difference, but imitation works fine in a pinch. I’ve used both and honestly, the cookies are still delicious.
- 1/2 teaspoon almond extract (optional, but recommended) — This adds a subtle nuttiness that complements the almond nails beautifully. If you don’t have it, just use an extra 1/2 teaspoon of vanilla.
- 2 1/2 cups (312g) all-purpose flour — Spoon and level your flour for the most accurate measurement. Scooping directly from the bag can pack in too much and make the dough dry.
- 1/2 teaspoon salt — Fine sea salt or table salt both work. The salt balances the sweetness and enhances the buttery flavor.
- 1/2 teaspoon baking powder — This gives the cookies just a tiny bit of lift without making them puffy. Don’t skip it, or the fingers will be too dense.
For the “Nails” and Decoration
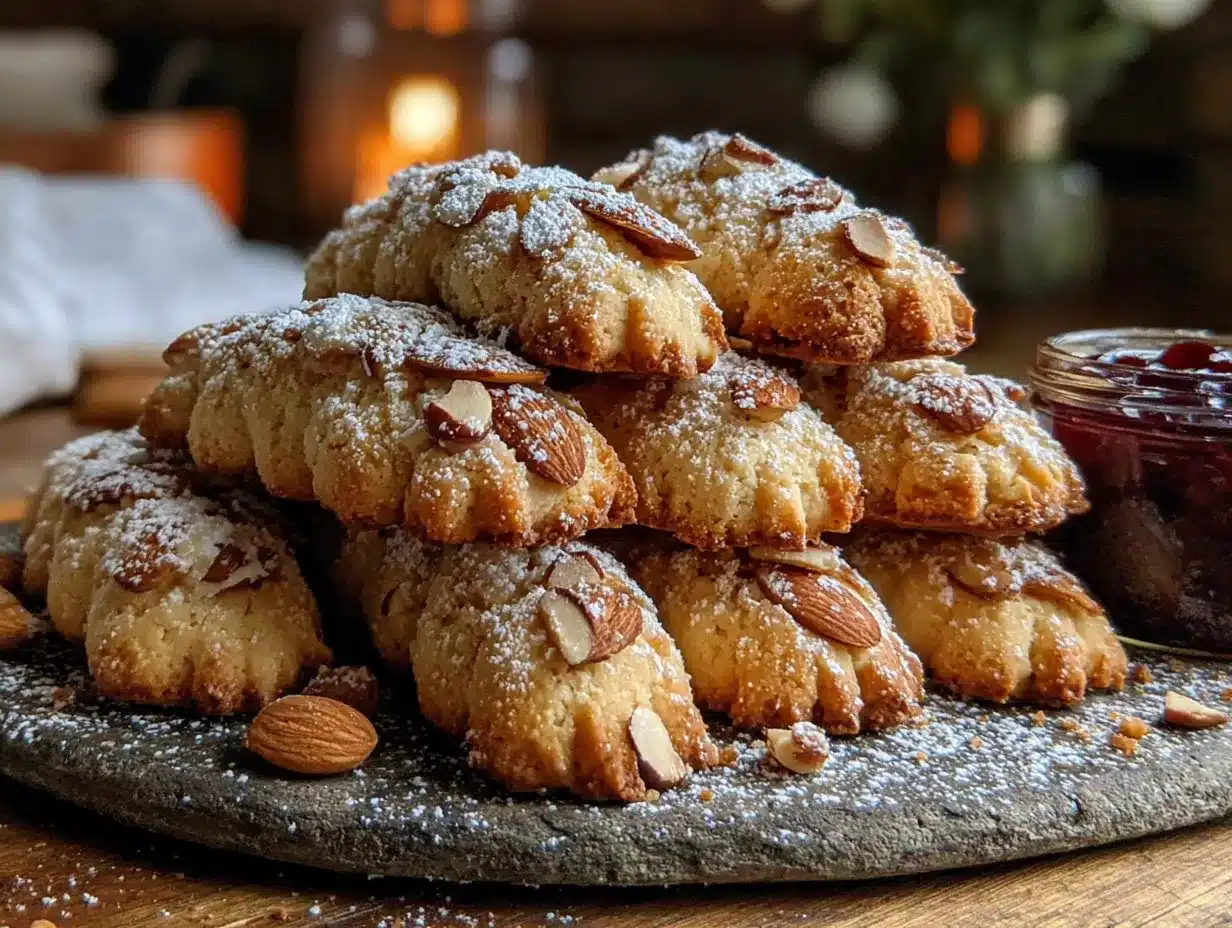
- 48-60 whole blanched almonds (about 1 cup) — This is crucial. Blanched almonds (the ones with the skins removed) look much more like real fingernails. I’ve tried using slivered almonds and even peanut halves, but whole blanched almonds are the clear winner. Look for them in the baking aisle or online.
- Red food coloring (gel or liquid) — For that creepy “blood” effect at the base of the nail. I use Wilton gel food coloring because it’s concentrated and doesn’t thin the dough. A little goes a long way.
- Optional: Green or gray food coloring — If you want to make the dough look more “witchy,” you can add a drop or two to the dough. I usually skip this and let the natural pale color do the work, but some people love the green skin effect.
For the best results, I recommend using Diamond of California almonds or Blue Diamond whole natural almonds. They’re consistently sized and hold up well during baking. One important tip: don’t use roasted or salted almonds for the nails. The salt can create weird spots on the cookie, and roasted almonds are darker and less convincing as fingernails. Raw blanched almonds are the way to go.
If you’re making these for someone with a nut allergy, you can substitute the almond nails with a small piece of white chocolate or a sliced grape. It won’t look quite as realistic, but it still gets the point across. For the almond extract, simply omit it and add extra vanilla instead.
Equipment Needed
You don’t need anything fancy for these spooky witch finger cookies with almond nails, but having the right tools makes the shaping process a lot smoother. Here’s what you’ll want on hand:
- Large mixing bowl — Any medium-to-large bowl works. I use a glass Pyrex bowl because I can see if the butter and sugar are fully creamed.
- Electric hand mixer or stand mixer — You can cream the butter and sugar by hand if you’re feeling ambitious, but a mixer makes it much faster and gives you a lighter texture. I use my KitchenAid stand mixer with the paddle attachment.
- Baking sheets — Two standard half-sheet pans work well. Line them with parchment paper or silicone baking mats for easy cleanup.
- Parchment paper or silicone baking mats — Silpat mats are my go-to because the cookies slide right off and the bottoms brown evenly. Parchment paper works great too.
- Small knife or bench scraper — For scoring the knuckle lines on the fingers. A paring knife with a thin blade gives you the most control.
- Small pastry brush — For brushing the red food coloring onto the almond “nail bed.” A clean paintbrush works in a pinch.
- Cooling rack — Wire racks let the cookies cool evenly so they stay crisp. If you don’t have one, just let them cool on the baking sheet for 5 minutes, then transfer to a plate.
- Plastic wrap or zip-top bag — For chilling the dough. This step is non-negotiable, so make sure you have something to wrap it in.
If you don’t have a mixer, you can cream the butter and sugar with a wooden spoon. It takes about 5 minutes of vigorous stirring, and your arm will get a workout, but the cookies will still turn out great. For the food coloring, I’ve found that gel colors give you a more vibrant “blood” effect without making the dough sticky. Liquid food coloring works too, but you might need more of it.
Preparation Method
Let’s get our hands dirty—literally. Here’s how to make these spooky witch finger cookies with almond nails, step by step. I’ve included all the little details I wish someone had told me the first time I made them.
- Cream the butter and sugar (5 minutes). In your large mixing bowl, beat the softened butter and granulated sugar together until light and fluffy. You’re looking for a pale yellow color and a texture that’s almost like whipped frosting. Scrape down the sides of the bowl halfway through. If you’re using a hand mixer, medium speed works perfectly. If doing it by hand, give it some elbow grease—you want to incorporate air into the mixture.
- Add the wet ingredients (2 minutes). Beat in the egg, vanilla extract, and almond extract (if using) until everything is fully combined. The mixture might look slightly separated at first, but keep mixing until it comes back together into a smooth, glossy paste. This is where you can add a drop of green or gray food coloring if you want witchy-colored skin. I usually skip this, but it’s a fun option for extra creep factor.
- Mix the dry ingredients (3 minutes). In a separate small bowl, whisk together the all-purpose flour, salt, and baking powder. Gradually add this to the wet mixture, mixing on low speed (or stirring gently by hand) until just combined. Stop as soon as you don’t see any more streaks of flour. Overmixing at this stage can make the cookies tough, and nobody wants a tough witch finger.
- Chill the dough (30 minutes minimum). This step is absolutely critical. The dough will be soft and sticky right after mixing, and trying to shape it into fingers without chilling will result in a sticky, frustrating mess. Wrap the dough in plastic wrap or put it in a zip-top bag and flatten it into a disc. Refrigerate for at least 30 minutes, or up to 3 days. I’ve even frozen it for a month and it worked perfectly—just thaw in the fridge overnight before using.
- Preheat and prep (10 minutes). While the dough chills, preheat your oven to 325°F (163°C). Line two baking sheets with parchment paper or silicone mats. Take your blanched almonds out of the bag and have them ready. This is also a good time to get your red food coloring and a small brush set up.
- Shape the fingers (15-20 minutes). Here’s where the fun begins. Take about 1 tablespoon of dough (roughly the size of a walnut) and roll it into a log about 3 inches long and 3/4 inch thick. Here’s the trick: one end should be slightly thicker (the base of the finger where it would attach to the hand), and the other end should taper slightly. Press the tapered end flat with your finger to create a “nail bed.” Use the back of a small knife to score 2-3 knuckle lines across the finger—not too deep, just enough to leave an impression. You can also gently squeeze the sides of the finger to create a more irregular, realistic shape. Real fingers aren’t perfectly cylindrical, after all.
- Attach the almond nails (2 minutes per cookie). Press one blanched almond onto the flattened nail bed at the tapered end. Press firmly enough that it stays in place, but not so hard that the almond sinks into the dough. The rounded end of the almond should point toward the tip of the finger. Use a tiny bit of red food coloring on your brush to paint a thin line at the base of the almond, where it meets the dough. This creates the “cuticle” or “blood” effect. Don’t go overboard—a subtle streak looks way creepier than a giant red blob.
- Bake the cookies (12-15 minutes). Place the shaped fingers on your prepared baking sheets, spacing them about 1 inch apart. They don’t spread much, so you can fit quite a few on one sheet. Bake at 325°F (163°C) for 12-15 minutes, or until the edges are just barely golden brown. The centers should still look pale and slightly soft. They’ll firm up as they cool. Pro tip: bake one test cookie first to see how your oven handles them. My oven runs hot, so I check at the 11-minute mark.
- Cool and set (10 minutes on the sheet, then transfer). Let the cookies cool on the baking sheet for 5-10 minutes. They’re very fragile when hot, so don’t try to move them right away. After 10 minutes, transfer them to a wire rack to cool completely. As they cool, the almond nails will set firmly into the dough. If any almonds fell off during baking (it happens), just press a fresh one into the warm cookie—it’ll stick as it cools.
- Add final touches (optional). Once the cookies are completely cool, you can add a few more drops of red food coloring to the “cuticle” area for extra drama. Some people like to press a tiny bit of red jam or jelly at the base for a glossy “blood” effect. I’ve tried both, and honestly, the food coloring is simpler and looks just as good.
A few notes from my many batches: if your dough is too sticky to shape, pop it back in the fridge for 15 minutes. If it’s cracking as you roll it, let it sit at room temperature for 5 minutes to soften slightly. The first finger you shape will probably look terrible—that’s normal. By the third one, you’ll have the hang of it. And don’t worry if they look a little weird. Weird is the whole point.
Cooking Tips & Techniques
After making these spooky witch finger cookies with almond nails at least a dozen times, I’ve collected a few tricks that separate the “okay” batches from the truly creepy ones. Here’s what I’ve learned, often through spectacular failure.
The chilling rule is real. I cannot stress this enough. The first time I made these, I was impatient and only chilled the dough for 10 minutes. The fingers spread into sad, puffy blobs that looked more like deformed sausages than witch fingers. The almonds slid right off during baking. It was a disaster. Now I chill the dough for a full 30 minutes minimum, and I even pop the shaped cookies back in the fridge for 10 minutes before baking if the kitchen is warm. Cold dough holds its shape, keeps the almonds in place, and gives you those nice defined knuckle lines.
Watch your oven temperature. Every oven runs a little differently. I burned my first batch at 350°F because I assumed that was standard for shortbread. At 325°F, the cookies bake more slowly and evenly, which gives them time to set without the almonds getting too dark. If your oven runs hot, try 315°F. If it runs cool, stick with 325°F but check at the 12-minute mark. The cookies should be pale with just the faintest golden edge.
Don’t overwork the dough. When you’re mixing in the flour, stop as soon as it comes together. Overmixing develops gluten, which makes the cookies tough and dense instead of tender and buttery. I learned this the hard way when my second batch came out chewy like bread. Not a good look for a witch finger.
Use your fingers for shaping. I know that sounds obvious, but I mean it literally. Use your own finger as a guide for thickness and length. The cookies should be slightly thinner than your pinky finger, and about the same length. This makes them look more realistic. And don’t be afraid to make them irregular—some fatter, some skinnier, some with a slight bend. Real fingers aren’t all the same shape.
The almond placement matters. Press the almond onto the dough at a slight angle, mimicking how a real fingernail attaches to the nail bed. If you press it straight on, it looks like a hat sitting on top of a finger. If you angle it slightly downward toward the tip, it looks like an actual nail. Also, make sure the almond is centered. I’ve had a few that were off to the side, and they just looked weird.
Multitasking strategy: Make the dough the night before and let it chill overnight. The next day, you can shape and bake all the cookies in about 30 minutes. This makes them perfect for Halloween parties when you’re already busy with costumes and decorations. I’ve also frozen the shaped, unbaked cookies on a baking sheet, then transferred them to a freezer bag. They bake straight from frozen—just add 2-3 minutes to the baking time.
Variations & Adaptations
One of the best things about these spooky witch finger cookies with almond nails is how easy they are to adapt. Here are a few variations I’ve tried, along with some ideas you might want to experiment with.
Gluten-Free Version: Substitute the all-purpose flour with a 1:1 gluten-free baking flour blend. I’ve used Bob’s Red Mill Gluten-Free 1-to-1 Baking Flour with great results. The texture is slightly more crumbly, but the cookies still hold together and look just as creepy. Add an extra tablespoon of butter to compensate for the dryness of gluten-free flour.
Vegan Witch Fingers: Use vegan butter (I like Miyoko’s or Earth Balance) and a flax egg (1 tablespoon ground flaxseed mixed with 3 tablespoons water, let sit for 5 minutes). The cookies will be a bit more fragile, so handle them gently. The almond nails work perfectly for vegans since they’re plant-based. Just skip the egg wash entirely.
Chocolate-Dipped Fingers: After the cookies have cooled completely, dip the “broken” ends (the thick base) into melted dark chocolate. Let the chocolate set on parchment paper. This adds a delicious layer of flavor and makes them look like they’ve been dipped in something sinister. I did this for a Halloween party once, and they were the first cookies to disappear.
Spiced Witch Fingers: Add 1 teaspoon of pumpkin pie spice or cinnamon to the dry ingredients. The warm spices give the cookies a cozy fall flavor that pairs surprisingly well with the almond nails. This is my personal favorite variation for November baking, when I’m not quite ready to let go of Halloween.
Different “Nail” Options: If you don’t have blanched almonds, you can use whole raw almonds with the skins on (they’ll look slightly darker and less realistic), sliced almonds (press two together for a wider nail), or even small pieces of white chocolate shaped into ovals. For a truly terrifying version, use candy corn as the nails—the orange color is deeply unsettling on a finger-shaped cookie.
Color Variations: Instead of red “blood” at the base, try green for a more swamp-witch vibe, or purple for a magical, otherworldly look. I’ve also seen versions where the entire cookie is dyed green or gray using food coloring in the dough. If you go this route, add the color when you cream the butter and sugar for the most even distribution.
Serving & Storage Suggestions
These spooky witch finger cookies with almond nails are at their best when served with a bit of theatrical flair. Here’s how to present them for maximum impact.
Serving Temperature: Serve them at room temperature. The shortbread texture is at its peak when the cookies have cooled completely—crisp on the outside, tender on the inside. If you’re serving them at a party, arrange them on a platter like a hand reaching up from the grave. Spread them out so they look like individual fingers, or cluster them together for a more gruesome effect. I like to scatter a few loose almonds around the platter to look like “fallen nails.”
Complementary Dishes: These cookies pair beautifully with a warm cup of apple cider or a mug of hot chocolate. For a full Halloween spread, serve them alongside pumpkin-shaped sugar cookies, ghost meringues, or a bowl of candy corn. If you’re feeling extra, set up a “witches’ brew” punch bowl with dry ice for a truly spooky tablescape.
Storage Instructions: Store the cookies in an airtight container at room temperature for up to 5 days. Layer them between sheets of parchment paper to prevent the almonds from scratching the surface of other cookies. Do not refrigerate them—the moisture in the fridge can make the shortbread soft and the almonds lose their crunch.
Freezing Instructions: These cookies freeze beautifully. Place the completely cooled cookies in a single layer in a freezer-safe container, with parchment paper between layers. They’ll keep for up to 3 months. To thaw, let them sit at room temperature for about 30 minutes. The almonds might soften slightly, but the cookies will still taste great.
Reheating Tips: These cookies are best enjoyed at room temperature, but if you want to revive the crunch, pop them in a 300°F (150°C) oven for 3-5 minutes. Let them cool completely before serving again. Do not microwave them—the almonds will become rubbery and the cookies will lose their texture.
Flavor Development: Interestingly, these cookies actually taste better the day after baking. The flavors meld together overnight, and the shortbread becomes more tender. If you can resist eating them all on day one, you’ll be rewarded with an even better cookie on day two. I’ve tested this extensively. For science.
Nutritional Information & Benefits
Let’s be real—these are Halloween cookies, not health food. But here’s a rough breakdown of what you’re working with, along with a few surprising benefits from the ingredients.
Estimated Nutritional Values (per cookie, based on 48 cookies):
- Calories: 95
- Total Fat: 5g
- Saturated Fat: 3g
- Cholesterol: 15mg
- Sodium: 35mg
- Total Carbohydrates: 11g
- Sugars: 5g
- Protein: 1.5g
Health Benefits of Key Ingredients: The almonds in these cookies are actually a nutritional bright spot. Almonds are packed with vitamin E, magnesium, and healthy monounsaturated fats that support heart health. They also provide a small amount of protein and fiber, which helps balance out the sugar rush from the shortbread. The butter, while high in saturated fat, contains butyrate, a fatty acid that supports gut health in moderate amounts.
Dietary Considerations: These cookies are vegetarian and contain no artificial preservatives. They are not gluten-free, vegan, or nut-free as written, but I’ve included variations above for those dietary needs. The main allergens are wheat, dairy, eggs, and tree nuts (almonds). If you’re serving these at a party, consider labeling them clearly so guests with allergies know what they’re eating.
My Personal Perspective: I don’t make these cookies every day, and I don’t pretend they’re a health food. But I do think there’s something valuable about a treat that brings people together, sparks conversation, and creates a memory. One cookie isn’t going to derail anyone’s diet, and the joy of watching someone’s face light up when they realize they’re eating a “witch finger” is worth every calorie. Balance is everything, and Halloween is the perfect time to indulge a little.
Conclusion
These spooky witch finger cookies with almond nails are more than just a Halloween novelty—they’re a genuinely delicious shortbread cookie with a side of theatrical fun. The buttery, tender crumb pairs perfectly with the crunch of the almond “nail,” and the creepy presentation never fails to get a reaction. Whether you’re making them for a costume party, a school bake sale, or just a quiet night in with a scary movie, they deliver on both flavor and spectacle.
I love that this recipe came from an unexpected source—a hardware store cashier with a passion for baking and a grandmother who knew her way around a cookie sheet. It reminds me that the best recipes often come from the most unlikely places. So go ahead, give these a try. Make them your own. Add green food coloring, dip them in chocolate, or leave them perfectly pale and unsettling. However you make them, they’ll be a hit.
I’d love to hear how your witch fingers turn out! Drop a comment below and let me know if you tried any variations, if your kids loved them (or were terrified), or if you have your own spooky cookie tradition. Share this recipe with a friend who loves Halloween as much as you do, and tag me in your photos—I want to see your creepiest creations. Happy Halloween, and happy baking!
Frequently Asked Questions
Can I make these cookies ahead of time?
Absolutely. You can make the dough up to 3 days in advance and keep it wrapped in the fridge. You can also freeze the baked cookies for up to 3 months. Just thaw them at room temperature before serving.
Why did my almond nails fall off during baking?
This usually happens if the dough wasn’t chilled enough before baking, or if the almond wasn’t pressed firmly enough into the dough. Make sure your dough is cold, and press the almond in until it’s slightly embedded in the surface. A little red food coloring at the base also helps “glue” it in place.
Can I use salted butter instead of unsalted?
You can, but reduce the added salt in the recipe to 1/4 teaspoon. Salted butter has varying amounts of salt depending on the brand, so your cookies might turn out a bit saltier than intended. I recommend unsalted for consistent results.
How do I get the knuckle lines to show up better?
Use the back of a thin knife to score the lines after shaping the finger. Go about 1/8 inch deep. Don’t cut all the way through the dough. The lines will deepen slightly as the cookies bake, but they should still be visible after cooling.
Do I have to use almond extract?
Not at all. The almond extract adds a subtle nutty flavor that complements the almond nails, but it’s completely optional. You can substitute it with extra vanilla extract, or leave it out entirely. The cookies will still taste great either way.
Pin This Recipe!
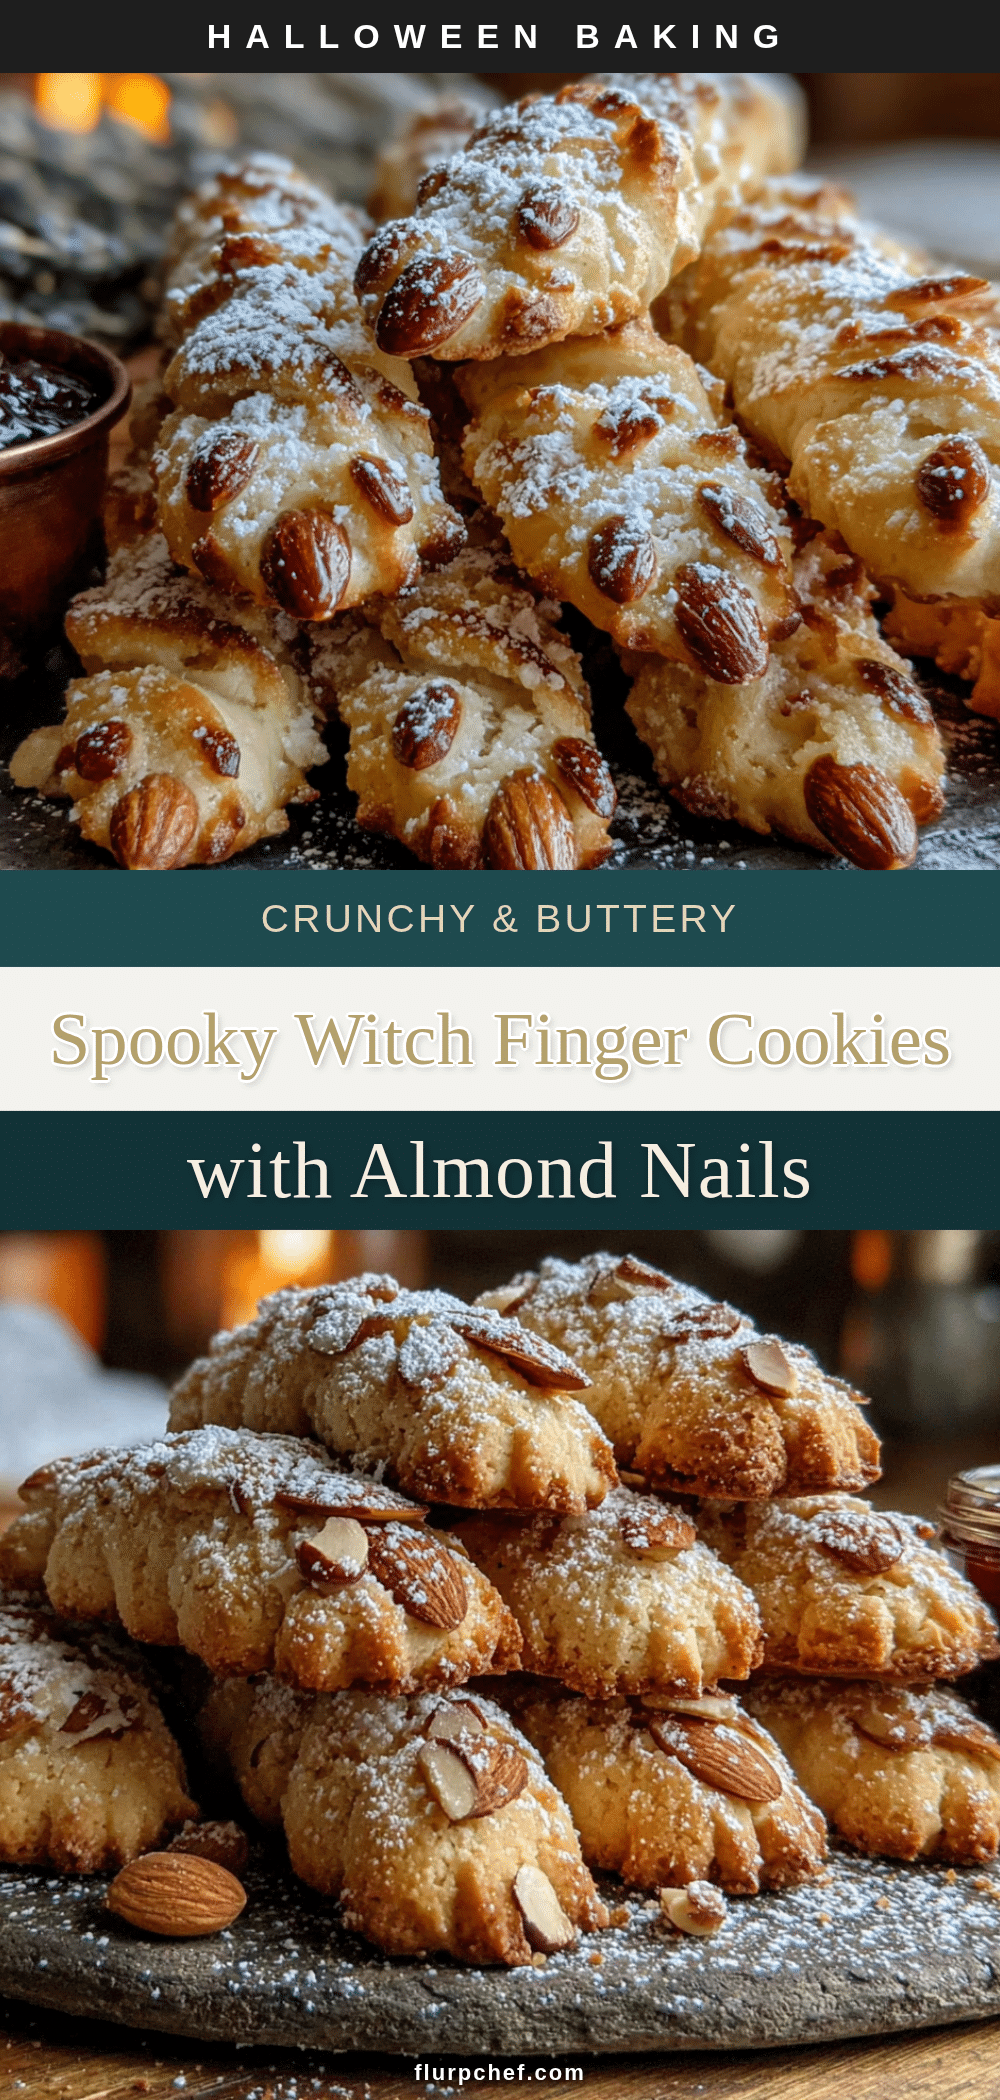
Spooky Witch Finger Cookies with Almond Nails: Easy Halloween Treat

These buttery shortbread cookies shaped like witch fingers with almond nails are a fun and creepy Halloween treat that’s surprisingly easy to make. Perfect for parties, they’re a conversation starter and a genuinely delicious cookie.
- Prep Time: 15 minutes
- Cook Time: 12-15 minutes
- Total Time: 45 minutes
- Yield: 48-60 cookies 1x
- Category: Dessert
- Cuisine: American
Ingredients
- 1 cup (226g) unsalted butter, softened to room temperature
- 1 cup (200g) granulated sugar
- 1 large egg, room temperature
- 1 teaspoon vanilla extract
- 1/2 teaspoon almond extract (optional, but recommended)
- 2 1/2 cups (312g) all-purpose flour
- 1/2 teaspoon salt
- 1/2 teaspoon baking powder
- 48–60 whole blanched almonds (about 1 cup)
- Red food coloring (gel or liquid)
- Optional: Green or gray food coloring
Instructions
- Cream the butter and sugar together until light and fluffy, about 5 minutes.
- Beat in the egg, vanilla extract, and almond extract (if using) until fully combined and smooth.
- In a separate bowl, whisk together the flour, salt, and baking powder. Gradually add to the wet mixture, mixing until just combined.
- Wrap the dough in plastic wrap and refrigerate for at least 30 minutes (or up to 3 days).
- Preheat oven to 325°F (163°C). Line baking sheets with parchment paper or silicone mats.
- Shape about 1 tablespoon of dough into a log about 3 inches long and 3/4 inch thick, tapering one end. Press the tapered end flat to create a nail bed. Score 2-3 knuckle lines with a knife.
- Press a blanched almond onto the flattened nail bed at the tapered end. Paint a thin line of red food coloring at the base of the almond.
- Place shaped cookies on prepared baking sheets, spacing about 1 inch apart. Bake for 12-15 minutes, until edges are just barely golden.
- Let cookies cool on the baking sheet for 5-10 minutes, then transfer to a wire rack to cool completely.
- Optional: Add more red food coloring to the cuticle area for extra drama.
Notes
Chill the dough thoroughly to prevent spreading. Use raw blanched almonds for the most realistic nails. The cookies taste even better the day after baking.
Nutrition
- Serving Size: 1 cookie
- Calories: 95
- Sugar: 5
- Sodium: 35
- Fat: 5
- Saturated Fat: 3
- Carbohydrates: 11
- Protein: 1.5
Keywords: Halloween cookies, witch finger cookies, almond nails, shortbread cookies, spooky treats, easy Halloween recipe