That unmistakable scent of cinnamon, nutmeg, and warm pumpkin filling the air—it’s funny how a simple pumpkin pie can make a chaotic afternoon feel a little more manageable. I remember one evening last fall, juggling work emails and dinner plans, when I grabbed a can of pumpkin puree from the pantry with a skeptical eye. Honestly, I wasn’t aiming for anything fancy, just something quick to appease the craving for that cozy, homey vibe. Yet, as the pie baked and the kitchen filled with that rustic aroma, I realized this “perfect classic pumpkin pie with homemade rustic charm” had quietly turned into a favorite I’d reach for again and again.
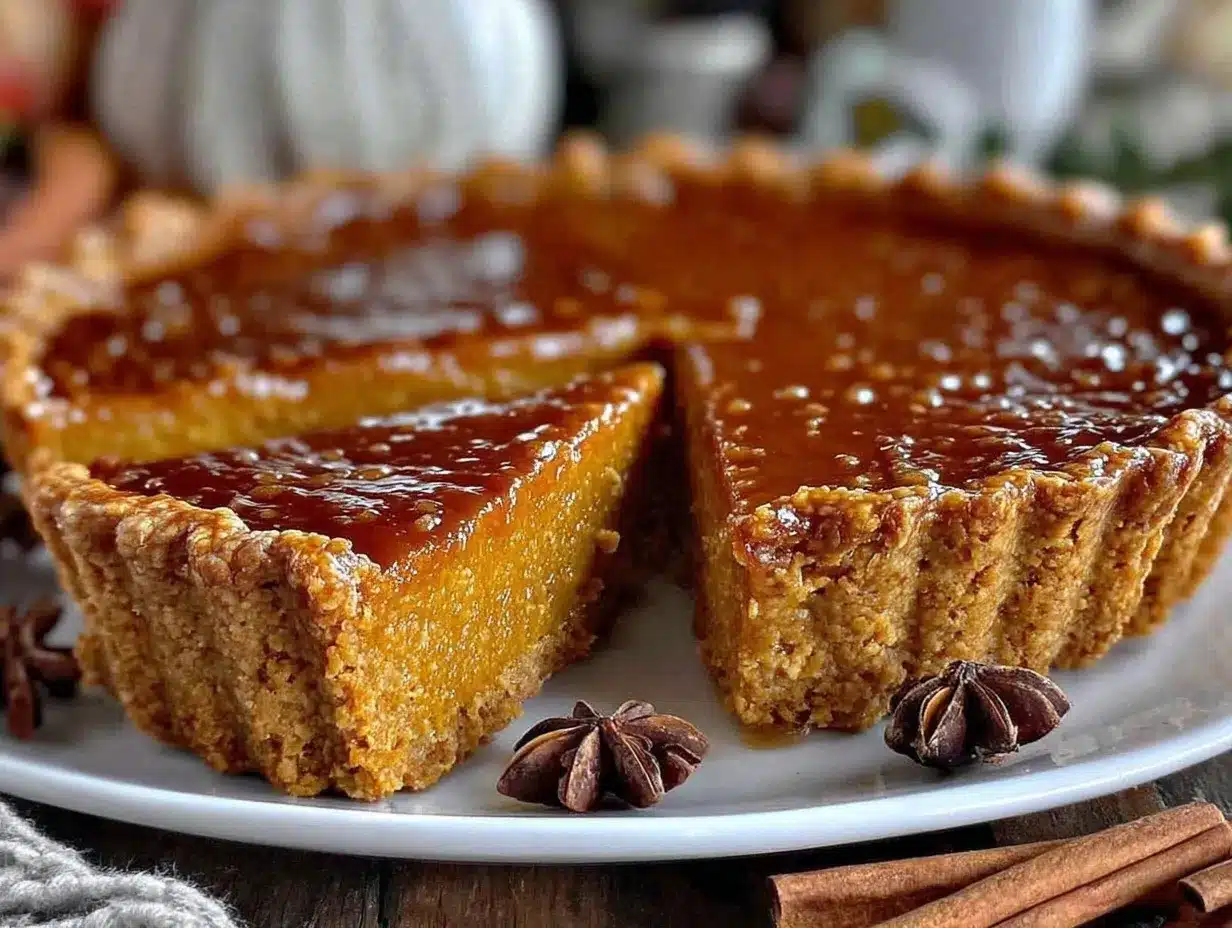
There’s something about the way the flaky, slightly uneven crust cradles that smooth, spiced custard that feels less about perfection and more about comfort. It’s not the kind of pie that demands to be Instagram-famous but whispers “sit down, breathe, and enjoy.” While I’m not usually one who bakes desserts late at night, this recipe found its way onto my table multiple times within a week—each time with a little tweak, a little love, and always the same satisfying result. So, if you’ve ever doubted making pumpkin pie from scratch or worried it might be too tricky, this recipe might just change your mind, too.
It’s a reminder that sometimes, the best recipes are the ones that feel a little unpolished but totally genuine—like a quiet moment shared over a slice of pie and a cup of coffee. And honestly, that’s why this pumpkin pie sticks with me: it’s dependable, comforting, and full of a rustic charm that’s hard to resist.
Why You’ll Love This Recipe
After countless trials and a few modest kitchen mishaps (don’t ask about the crust that went straight to the trash), I landed on this version of the classic pumpkin pie that balances ease with authentic flavor. It’s a recipe that’s been tested over several seasons and always delivers that cozy, homemade feeling without requiring a pastry degree.
- Quick & Easy: Comes together in under 15 minutes prep time, perfect when you’re short on time but craving that warm, indulgent dessert.
- Simple Ingredients: Uses pantry staples like canned pumpkin, basic spices, and eggs—no fancy or hard-to-find components needed.
- Perfect for Holidays & Gatherings: Whether it’s Thanksgiving, a casual fall dinner, or just a Sunday treat, this pie fits right in.
- Crowd-Pleaser: Kids, adults, skeptics—you name it, everyone seems to ask for seconds.
- Unbelievably Delicious: The custard is silky smooth with just the right amount of spice, and the crust’s rustic imperfection adds character and crunch.
What really sets this pumpkin pie apart from the crowded field of recipes? It’s the technique I use for the crust—no rolling pin perfection needed. I patch together the dough by hand, leaving the edges a little rough and charmingly rustic. Plus, I blend the spices freshly ground (if you can, it makes a noticeable difference) to keep the flavors bright and lively. This isn’t just another canned-pumpkin pie; it’s the kind that makes you pause, savor, and maybe even close your eyes after that first bite.
Honestly, it’s a pie that’s as much about the cozy anticipation as it is about the taste—a perfect companion for those moments when you want the comfort of classic recipes but with a homemade twist that feels real.
What Ingredients You Will Need
This perfect classic pumpkin pie recipe leans on simple, wholesome ingredients to create a bold flavor and satisfying texture without fuss. Most of these are pantry staples, and substitutions are easy if needed.
- For the crust:
- All-purpose flour, 1 1/4 cups (150 g) — I like King Arthur for reliable baking results
- Unsalted butter, 1/2 cup (115 g), cold and cubed (adds richness and flakiness)
- Granulated sugar, 1 tablespoon (optional for slight sweetness)
- Cold water, 3-4 tablespoons (keep it ice cold for better dough texture)
- Pinch of salt
- For the filling:
- Canned pumpkin puree, 1 can (15 oz / 425 g) — pure pumpkin, not pumpkin pie filling
- Large eggs, 2, room temperature (helps the custard set nicely)
- Heavy cream, 3/4 cup (180 ml) or whole milk for a lighter option
- Brown sugar, 3/4 cup (150 g) packed (adds depth of flavor)
- Ground cinnamon, 1 1/2 teaspoons (freshly ground if possible)
- Ground ginger, 1/2 teaspoon
- Ground nutmeg, 1/2 teaspoon (freshly grated is best)
- Ground cloves, 1/4 teaspoon
- Salt, 1/4 teaspoon — balances the sweetness
- Pure vanilla extract, 1 teaspoon (adds warmth and complexity)
If you’re feeling adventurous, you can swap the all-purpose flour in the crust for almond flour to make it gluten-free, though the texture will be a bit different. Also, if you prefer a dairy-free version, coconut milk or almond milk can replace cream, but I recommend sticking with heavier cream if you want that classic silky custard feel.
For the spices, fresh grinding or measuring straight from good-quality jars works fine. I have a soft spot for McCormick spices—they’re consistent and flavorful, but you do you. In summer, I sometimes swap the pumpkin for fresh roasted butternut squash puree, which adds a bit more earthiness and a brighter orange hue.
Equipment Needed
- 9-inch (23 cm) pie dish — ceramic or glass works well; I usually grab my trusty glass pie plate for even baking
- Mixing bowls — one large, one medium
- Pastry blender or two forks — for cutting butter into flour; if you don’t have this, clean hands work just fine
- Measuring cups and spoons — precise measurements are key for pie success
- Whisk — to combine filling ingredients smoothly
- Rolling pin — optional if you prefer rolling your dough out; otherwise, pressing dough by hand is perfectly rustic and easy
- Oven thermometer — I swear by this to avoid overbaking or underbaking, especially with custard pies
For budget-friendly options, you can use a sturdy glass or metal pie plate you already have and skip the pastry blender by using your fingers to cut in the butter quickly before chilling. The rolling pin can be improvised with a clean wine bottle if needed. Keeping your butter cold and your dough chilled before baking is more important than fancy tools here.
Preparation Method
- Make the crust dough: In a large bowl, mix together 1 1/4 cups (150 g) all-purpose flour, 1 tablespoon sugar, and a pinch of salt. Add 1/2 cup (115 g) cold, cubed unsalted butter. Use a pastry blender or your fingertips to quickly cut the butter into the flour until it resembles coarse crumbs with pea-sized pieces. This usually takes about 3-4 minutes.
- Add cold water: Sprinkle 3 tablespoons of ice-cold water over the mixture. Toss lightly with a fork. If the dough seems dry, add one more tablespoon of water, but be careful not to overdo it. The dough should just hold together when pressed. Form the dough into a disk, wrap it in plastic, and refrigerate for at least 30 minutes (this step is crucial for that flaky crust).
- Prepare the filling: While the dough chills, preheat your oven to 425°F (220°C). In a medium bowl, whisk together 1 can (15 oz / 425 g) pumpkin puree, 3/4 cup (150 g) packed brown sugar, 2 large eggs, 3/4 cup (180 ml) heavy cream, 1 1/2 teaspoons ground cinnamon, 1/2 teaspoon ground ginger, 1/2 teaspoon ground nutmeg, 1/4 teaspoon ground cloves, 1/4 teaspoon salt, and 1 teaspoon pure vanilla extract until smooth and well combined. This should take about 3-5 minutes with a whisk.
- Roll out the crust: Lightly flour your work surface and roll out the chilled dough into a 12-inch (30 cm) circle, about 1/8 inch (3 mm) thick. Transfer it gently to your 9-inch (23 cm) pie dish. Don’t stress if the edges aren’t perfect; rustic charm is the goal here! Trim excess dough, leaving about 1/2 inch (1.25 cm) overhang, then fold under and crimp or press with your fingers to form a cozy edge.
- Assemble and bake: Pour the pumpkin filling into the crust, smoothing the top with a spatula. Place the pie on the center rack of your oven and bake at 425°F (220°C) for 15 minutes. Then, reduce the heat to 350°F (175°C) and bake for an additional 40-50 minutes. The filling should be set but still slightly jiggly in the center when gently shaken. If the crust edges brown too quickly, cover them with foil or a pie shield.
- Cool completely: Remove the pie from the oven and let it cool on a wire rack for at least 2 hours before slicing. The filling will firm up as it cools, giving you that perfect slice without cracks or sogginess.
- Optional garnish: Serve with a dollop of whipped cream or a sprinkle of cinnamon for an extra cozy touch. This pie pairs wonderfully with a cup of strong coffee or a creamy chai latte.
If you notice bubbling or cracking during baking, that’s normal—just keep an eye on it. And if you’re wondering whether the center is done, a gentle jiggle is your friend; it should move just slightly without looking liquid. Trust me, I’ve learned that the hard way!
Cooking Tips & Techniques
Making pumpkin pie may seem straightforward, but a few insider tips can really make a difference. First, keeping your butter cold when making the crust is key to getting that flaky texture. I’ve learned that rushing this step often leads to a tough crust, which is the last thing you want.
When mixing the filling, be gentle. Overbeating eggs can lead to cracks on the surface, which happens more often than you’d think. I usually whisk just until everything is combined smoothly—no need for a mixer here.
Another tip: blind bake the crust for 5-7 minutes if you want to avoid a soggy bottom, especially if your oven runs cool. But honestly, for this rustic pie, I usually skip that and it still turns out lovely.
Timing is everything. I recommend starting the pie at a higher temperature (425°F / 220°C) to set the crust and then lowering it to finish baking. This little trick keeps the crust crisp without burning and gives the filling that silky custard texture.
Lastly, don’t rush the cooling. It’s tempting to slice into a warm pie, but patience pays off here—the flavors settle and the texture firms up beautifully after a couple of hours.
Variations & Adaptations
This perfect classic pumpkin pie recipe is a great base to customize depending on your mood or diet. Here are some ideas I’ve tried and loved:
- Gluten-Free: Swap the all-purpose flour for a gluten-free blend or almond flour in the crust. Press the dough rather than rolling it out for the best texture.
- Spice Twist: Add a pinch of cardamom or a splash of bourbon to the filling for a deeper, more complex flavor profile.
- Dairy-Free: Use coconut milk or almond milk instead of heavy cream. I’ve done this when cooking for friends and the pie still baked up creamy and delicious.
- Sweetener Swap: Replace brown sugar with maple syrup or coconut sugar for a different sweetness depth and a bit of rustic flair.
- Mini Pies: Make individual pies using a muffin tin or small ramekins—perfect for portion control or a fun presentation.
One personal favorite variation I tried was adding a crumbly oat topping—kind of like a crisp meets pie hybrid. It wasn’t traditional, but it brought a nice texture contrast and made the pie feel even more homemade.
Serving & Storage Suggestions
This pumpkin pie is best served at room temperature or slightly chilled, allowing the flavors to shine without being too firm or too soft. I like to add a generous scoop of whipped cream dusted with a sprinkle of cinnamon on top—makes it feel like a special occasion every time.
For pairing, a warm cup of chai tea or a rich, dark coffee complements the spices beautifully. If you want a lighter option, a simple glass of milk or even a fresh cucumber watermelon feta salad (which balances sweetness with refreshing tang) can be a surprising but delightful contrast.
To store, cover the pie loosely with plastic wrap or foil and keep it in the refrigerator for up to 4 days. It also freezes well—wrap tightly and freeze for up to 2 months. When ready to eat, thaw overnight in the fridge and warm slightly in a low oven if desired.
Over time, the spices mellow and the crust softens a bit, so if you like a crisp crust, enjoy it within the first day or so. But honestly, a slice the next day is just as comforting, especially with a little extra whipped cream.
Nutritional Information & Benefits
Each slice of this classic pumpkin pie (assuming 8 servings) contains approximately:
| Nutrient | Amount |
|---|---|
| Calories | 310 kcal |
| Fat | 18 g |
| Carbohydrates | 35 g |
| Protein | 4 g |
| Fiber | 3 g |
| Sugar | 20 g |
Pumpkin is rich in beta-carotene, a powerful antioxidant that supports eye health and immunity. The warming spices like cinnamon and nutmeg not only add flavor but also have anti-inflammatory properties. While this pie has sugar and butter, the homemade aspect means you control what goes in—no preservatives or artificial ingredients.
For those watching carbs or calories, you can reduce sugar or swap cream for milk to lighten it up. Just a heads-up: this recipe contains eggs, dairy, and gluten (unless adapted), so keep allergies in mind.
Conclusion
This perfect classic pumpkin pie with homemade rustic charm is the kind of recipe that feels like a hug on a plate. It’s approachable, forgiving, and full of the cozy flavors that make pumpkin pie a fall (or anytime) favorite. Whether you’re baking for family, impressing friends at a potluck, or simply treating yourself, this pie invites you to slow down and savor each bite.
Feel free to tweak the spices, try a different crust, or even serve it with a unique side like the fresh cucumber watermelon feta salad for a surprising twist. This recipe isn’t about perfection—it’s about making something delicious your own.
I’d love to hear how you make this pumpkin pie your own or any little secrets you add to the mix. Sharing those stories is what keeps recipes alive and kitchens happy. So go ahead, bake this pie, and enjoy a slice of rustic comfort that’s as real as it gets.
FAQs
Can I use fresh pumpkin instead of canned puree?
Yes! Roast and puree a sugar pumpkin or pie pumpkin until smooth. Use the same amount as canned pumpkin. Just be sure it’s not watery.
How do I prevent the crust edges from burning?
Cover the edges with foil or a pie crust shield about halfway through baking to protect them from over-browning.
Why did my pumpkin pie crack?
Cracking usually happens when the pie is overbaked or the filling is overmixed. Bake until just set and avoid vigorous whisking.
Can I make this pie ahead of time?
Absolutely! Bake the pie and store it covered in the fridge. It tastes great the next day and even up to 4 days later.
What’s the best way to reheat pumpkin pie?
Warm slices gently in a 300°F (150°C) oven for 10-15 minutes or microwave briefly. Avoid overheating to keep the custard creamy.
Pin This Recipe!
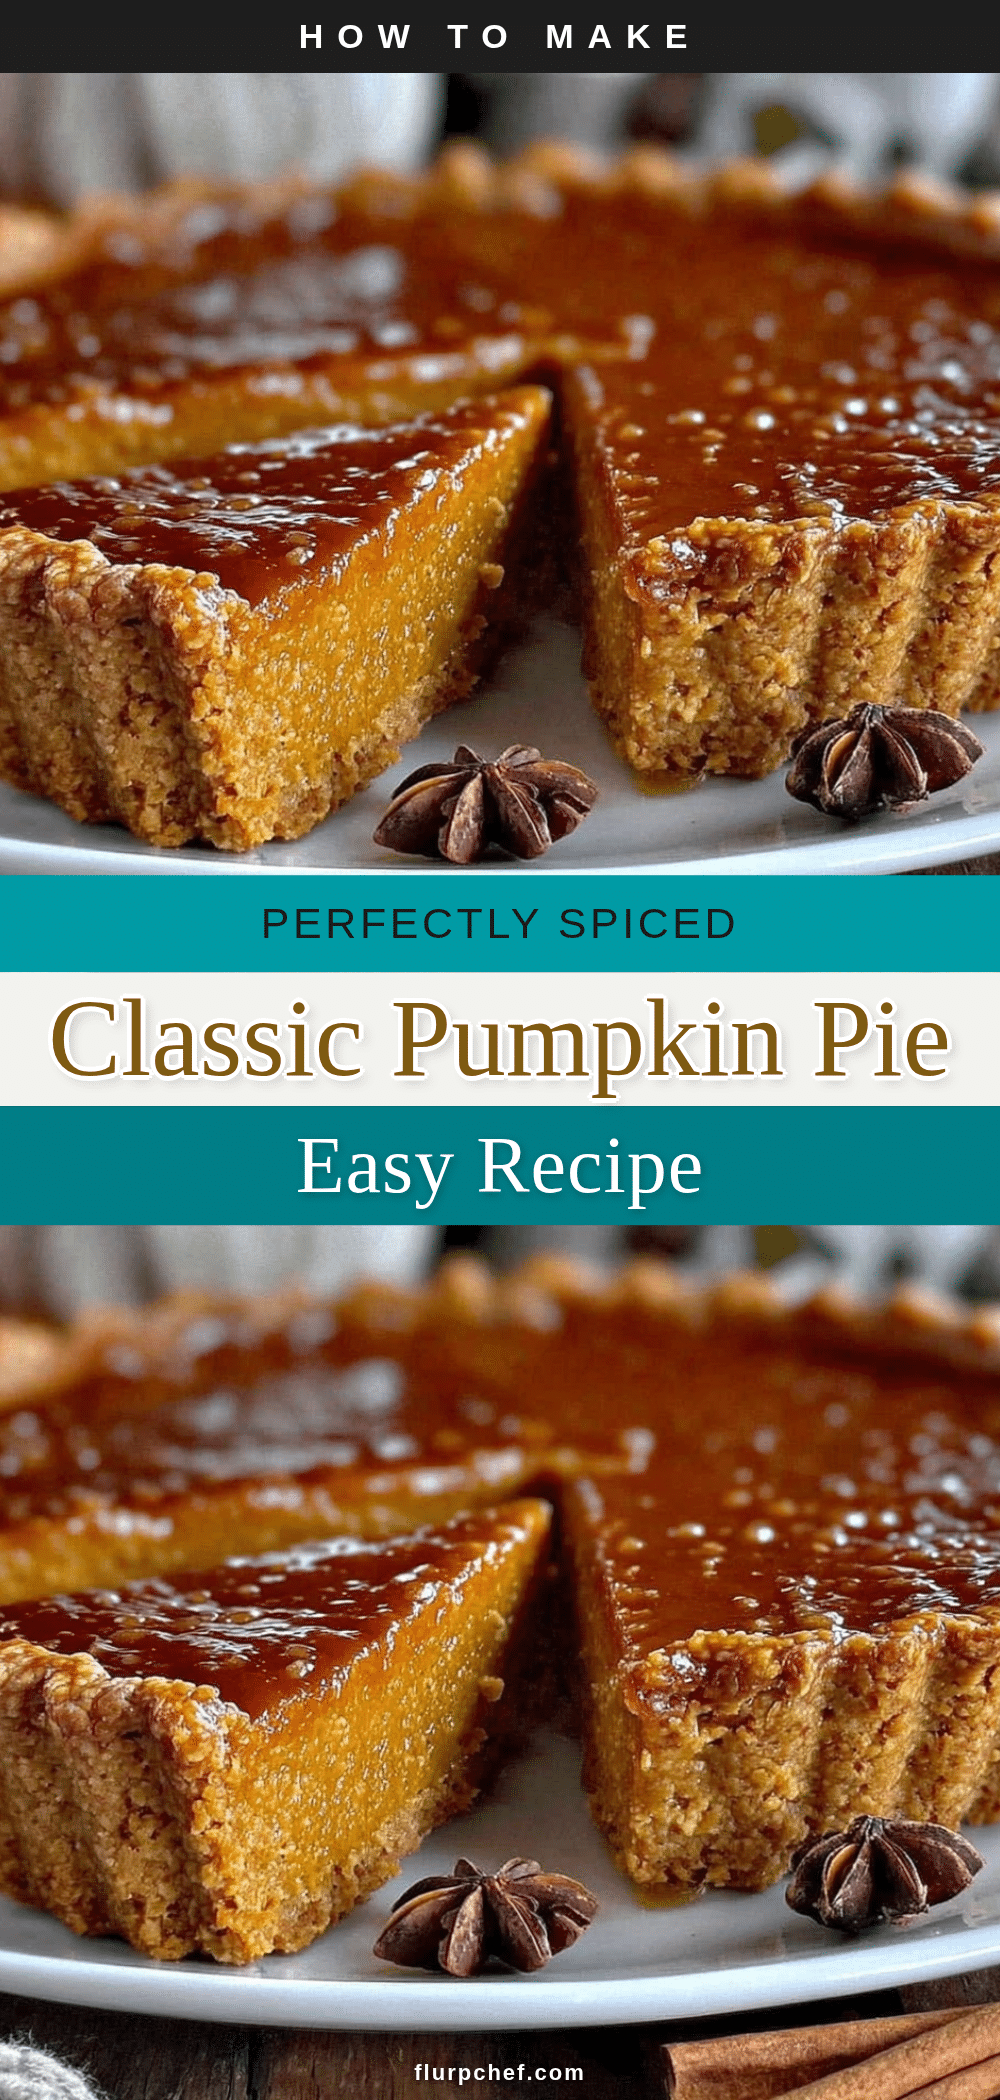
Perfect Classic Pumpkin Pie Recipe Easy Homemade Rustic Charm
A cozy, rustic pumpkin pie with a flaky crust and smooth spiced custard filling, perfect for holidays and gatherings. This easy recipe uses simple pantry staples and delivers a comforting homemade flavor.
- Prep Time: 15 minutes
- Cook Time: 55-65 minutes
- Total Time: 2 hours 15 minutes
- Yield: 8 servings 1x
- Category: Dessert
- Cuisine: American
Ingredients
- 1 1/4 cups (150 g) all-purpose flour
- 1/2 cup (115 g) unsalted butter, cold and cubed
- 1 tablespoon granulated sugar (optional)
- 3–4 tablespoons ice cold water
- Pinch of salt
- 1 can (15 oz / 425 g) canned pumpkin puree (pure pumpkin, not pumpkin pie filling)
- 2 large eggs, room temperature
- 3/4 cup (180 ml) heavy cream or whole milk for lighter option
- 3/4 cup (150 g) packed brown sugar
- 1 1/2 teaspoons ground cinnamon
- 1/2 teaspoon ground ginger
- 1/2 teaspoon ground nutmeg
- 1/4 teaspoon ground cloves
- 1/4 teaspoon salt
- 1 teaspoon pure vanilla extract
Instructions
- Make the crust dough: In a large bowl, mix together 1 1/4 cups all-purpose flour, 1 tablespoon sugar, and a pinch of salt. Add 1/2 cup cold, cubed unsalted butter. Use a pastry blender or your fingertips to cut the butter into the flour until it resembles coarse crumbs with pea-sized pieces, about 3-4 minutes.
- Add cold water: Sprinkle 3 tablespoons of ice-cold water over the mixture. Toss lightly with a fork. If the dough seems dry, add one more tablespoon of water. The dough should just hold together when pressed. Form the dough into a disk, wrap in plastic, and refrigerate for at least 30 minutes.
- Prepare the filling: Preheat oven to 425°F (220°C). In a medium bowl, whisk together pumpkin puree, brown sugar, eggs, heavy cream, cinnamon, ginger, nutmeg, cloves, salt, and vanilla extract until smooth, about 3-5 minutes.
- Roll out the crust: Lightly flour work surface and roll chilled dough into a 12-inch circle about 1/8 inch thick. Transfer to a 9-inch pie dish. Trim excess dough leaving 1/2 inch overhang, then fold under and crimp or press edges.
- Assemble and bake: Pour filling into crust and smooth top. Bake at 425°F for 15 minutes, then reduce heat to 350°F (175°C) and bake for 40-50 minutes more until filling is set but slightly jiggly in center. Cover crust edges with foil if browning too fast.
- Cool completely: Remove pie from oven and cool on wire rack for at least 2 hours before slicing to allow filling to firm up.
- Optional garnish: Serve with whipped cream or a sprinkle of cinnamon.
Notes
Keep butter cold for flaky crust. Chill dough before rolling. Avoid overmixing filling to prevent cracks. Start baking at high temperature then reduce to finish baking. Cool pie completely before slicing. Cover crust edges with foil if browning too fast. Optional blind bake crust for 5-7 minutes to avoid soggy bottom.
Nutrition
- Serving Size: 1 slice (1/8 of pie)
- Calories: 310
- Sugar: 20
- Fat: 18
- Carbohydrates: 35
- Fiber: 3
- Protein: 4
Keywords: pumpkin pie, classic pumpkin pie, homemade pumpkin pie, rustic pumpkin pie, easy pumpkin pie, holiday dessert, Thanksgiving pie


