October had finally stopped pretending to be September. The rain was drumming a steady, insistent rhythm against the kitchen window, and the whole house had that damp, earthy smell that only comes with the first true week of autumn. I had a bag of pumpkin puree in the fridge, a stick of butter softening on the counter, and absolutely nowhere to be. That’s the thing about these cozy pumpkin cinnamon rolls—they aren’t a recipe you rush. They demand a slow, gray afternoon, the kind where you don’t mind waiting for dough to rise because you’re perfectly content listening to the rain and letting the yeast do its quiet work.
I’d been tinkering with a standard cinnamon roll recipe for weeks, trying to get the pumpkin flavor just right without turning the dough into a heavy, gummy mess. Too much puree and they’d be dense. Too little and what was the point? I wanted a roll that tasted like the season, not just a cinnamon roll dyed orange. So I scaled back the liquid, added a touch more spice, and let the dough rest a little longer than usual. The result was soft, pillowy, and kissed with real pumpkin flavor, not just the idea of it. Then came the icing—a simple maple number that doesn’t try too hard. It’s sweet, buttery, and just a little bit salty. Honestly, it’s the kind of breakfast that makes you want to cancel all your plans.
These rolls have become my little October ritual. I make them on the first truly rainy weekend of the month, and they always taste exactly like that moment—warm, slow, and a little bit magical. I think you’re going to love them.
Why You’ll Love This Recipe
Let’s be real for a second. Homemade cinnamon rolls can be a project. But this version is designed to feel doable, even on a busy weekend. It’s forgiving, it’s cozy, and it delivers every single time.
- Perfectly Soft and Fluffy: The pumpkin puree keeps these rolls incredibly moist without making them soggy. You get that pillowy texture you dream about.
- Real Pumpkin Flavor: We’re not just adding pumpkin for color. A precise balance of puree and warm spices gives these rolls an authentic, deep autumn taste.
- Easy Maple Icing: No fussing with cream cheese or powdered sugar that clumps. This maple icing comes together in minutes and tastes like pure liquid gold.
- Make-Ahead Friendly: You can prep these the night before and bake them fresh in the morning. Perfect for holiday mornings or lazy weekends.
- Family-Approved: I’ve made these for brunches, Thanksgiving mornings, and quiet Sundays. They disappear fast, and nobody ever guesses how simple they are.
What really sets these rolls apart is the texture. I spent a lot of time testing the dough to make sure it stayed light and airy despite the pumpkin. The trick is using just enough flour and letting the dough rest properly. The result is a roll that’s tender, not tough, with a swirl of spiced brown sugar that melts into every bite. And that maple icing? It seeps into the warm rolls just enough to make each one perfectly sweet without being overwhelming.
This isn’t just another pumpkin recipe. It’s the one you’ll come back to year after year.
What Ingredients You Will Need
This recipe uses simple, cozy ingredients that come together to create something truly special. Most of these are pantry staples, especially if you love fall baking as much as I do. Let’s break down what you’ll need and why each one matters.
For the Dough
- 1 cup (240ml) whole milk, warm (about 110°F) – Whole milk gives the richest dough, but 2% works fine too. The warmth is key—it wakes up the yeast without killing it.
- 2 ¼ teaspoons (1 packet) active dry yeast – I usually go with Red Star or Fleischmann’s. Both are reliable and easy to find.
- ½ cup (100g) granulated sugar – Feeds the yeast and adds a touch of sweetness to the dough itself.
- ½ cup (120g) pumpkin puree – Not pumpkin pie filling! Make sure you grab 100% pure pumpkin puree. Libby’s is my go-to for its consistent texture.
- 1 large egg, room temperature – Adds richness and helps the dough rise evenly.
- ¼ cup (60g) unsalted butter, melted and slightly cooled – For tenderness and flavor.
- 1 teaspoon vanilla extract – A little warmth that rounds out the pumpkin spice.
- 3 ½ to 4 cups (440g to 500g) all-purpose flour – Start with 3 ½ cups and add more as needed. The dough should be soft but not sticky.
- 1 teaspoon salt – Balances the sweetness and strengthens the dough.
- 1 ½ teaspoons pumpkin pie spice – You can use store-bought or make your own with cinnamon, nutmeg, ginger, and cloves.
For the Filling
- ½ cup (115g) unsalted butter, very soft – Needs to be spreadable, not melted.
- ¾ cup (165g) packed brown sugar – Light or dark works; dark gives a deeper molasses flavor.
- 2 tablespoons ground cinnamon – The star of the show. Use a good quality cinnamon like Saigon or Ceylon for the best flavor.
- ½ teaspoon ground nutmeg – Freshly grated if you have it, but pre-ground is totally fine.
- ¼ teaspoon ground cloves – A little goes a long way, but it adds that classic pumpkin spice warmth.
For the Maple Icing
- 4 tablespoons (60g) unsalted butter – Melted and slightly cooled.
- ¼ cup (60ml) pure maple syrup – Please use the real stuff, not pancake syrup. Grade A dark amber is perfect.
- 1 ½ cups (180g) powdered sugar – Sifted to avoid lumps.
- ¼ teaspoon salt – Flaky sea salt is lovely here, but fine salt works too.
- 2 to 3 tablespoons heavy cream or milk – To thin the icing to your desired consistency.
Equipment Needed
You don’t need a lot of fancy tools to make these rolls, which is part of why I love this recipe. Here’s what you’ll want on hand:
- Large mixing bowl – For the dough. Glass or stainless steel works best.
- Stand mixer with dough hook – Not strictly necessary, but it makes kneading much easier. You can absolutely knead by hand if you prefer.
- 9×13-inch baking dish – Glass or ceramic is ideal. You can also use a cast iron skillet for a rustic look.
- Rolling pin – For rolling out the dough evenly.
- Sharp knife or bench scraper – For cutting the rolls cleanly. Dental floss (unflavored) works surprisingly well too!
- Kitchen towel – To cover the dough while it rises.
- Small saucepan – For warming the milk and butter.
- Whisk – For the icing.
A note on the baking dish: I’ve used everything from a cheap metal pan to a fancy ceramic one, and they all work. Just make sure it’s deep enough to catch any filling that bubbles over during baking—trust me, you don’t want that on the bottom of your oven.
Preparation Method
Alright, let’s get to the good part. This process takes a little time, but most of it is hands-off. Put on some music, pour yourself a cup of coffee, and enjoy the rhythm of it.
Step 1: Activate the Yeast
In the bowl of your stand mixer (or a large bowl if you’re kneading by hand), combine the warm milk and 1 tablespoon of the granulated sugar. Sprinkle the yeast on top and give it a gentle stir. Let it sit for 5 to 10 minutes until it’s foamy and smells like bread. If it doesn’t foam, your yeast might be dead—start over with fresh yeast.
Step 2: Make the Dough
Add the remaining sugar, pumpkin puree, egg, melted butter, and vanilla to the yeast mixture. Stir until combined. In a separate bowl, whisk together 3 ½ cups of flour, salt, and pumpkin pie spice. Gradually add the dry ingredients to the wet, mixing on low speed until a shaggy dough forms. Switch to the dough hook and knead on medium-low for about 6 to 8 minutes, adding more flour a tablespoon at a time if the dough sticks to the sides. The dough should be soft, smooth, and slightly tacky but not sticky. If kneading by hand, turn it out onto a floured surface and knead for 8 to 10 minutes.
Step 3: First Rise
Shape the dough into a ball and place it in a lightly greased bowl, turning once to coat. Cover with a clean kitchen towel and let it rise in a warm, draft-free spot for about 1 to 1 ½ hours, or until doubled in size. I like to put mine in the microwave with the door cracked—it stays warm and cozy in there.
Step 4: Prepare the Filling
While the dough rises, make the filling. In a small bowl, mix the softened butter, brown sugar, cinnamon, nutmeg, and cloves until it forms a smooth paste. Set aside at room temperature.
Step 5: Roll and Fill
Once the dough has doubled, punch it down gently and turn it out onto a lightly floured surface. Roll it into a rectangle about 18×12 inches. Spread the filling evenly over the dough, leaving a ½-inch border on the long edges. Starting from the long side closest to you, roll the dough tightly into a log. Pinch the seam to seal.
Step 6: Cut the Rolls
Using a sharp knife or unflavored dental floss, cut the log into 12 equal rolls, each about 1 ½ inches thick. Place them cut-side up in a greased 9×13-inch baking dish, spacing them evenly. They’ll expand as they rise, so don’t worry if they’re not touching yet.
Step 7: Second Rise
Cover the dish with a towel and let the rolls rise again for 30 to 45 minutes, until they’re puffy and touching each other. If you’re making these overnight, cover the dish tightly with plastic wrap and refrigerate for up to 12 hours. In the morning, let them sit at room temperature for 30 minutes before baking.
Step 8: Bake
Preheat your oven to 350°F (175°C). Bake the rolls for 22 to 28 minutes, until they’re golden brown on top and the filling is bubbly. If the tops are browning too quickly, tent loosely with foil for the last 5 minutes. Let them cool in the pan for about 10 minutes before icing.
Step 9: Make the Icing
While the rolls cool, whisk together the melted butter, maple syrup, powdered sugar, and salt in a small bowl. Add heavy cream or milk a tablespoon at a time until the icing is thick but pourable. Drizzle generously over the warm rolls. Serve immediately.
Cooking Tips & Techniques
I’ve made these rolls more times than I can count, and I’ve learned a few things along the way. Here are my best tips for perfect results every time.
Don’t skip the yeast activation. I know it’s tempting to just dump everything in and hope for the best, but taking those extra 5 minutes to proof the yeast ensures your rolls will be light and fluffy. If your yeast doesn’t foam, it’s dead—don’t risk a dense batch.
Keep the dough soft. It’s easy to add too much flour, especially when you’re nervous about sticky dough. But a softer dough yields a more tender roll. Resist the urge to add flour beyond what’s necessary. The dough should be tacky, not sticky.
Roll it tight. When you’re rolling the dough into a log, keep it snug but not so tight that the filling squishes out. A tight roll gives you those beautiful, defined swirls. If the dough feels a little too elastic, let it rest for 5 minutes before rolling.
Use dental floss to cut. This is my favorite trick. Slide a piece of unflavored dental floss under the log, cross the ends over the top, and pull. It gives you clean cuts without squishing the dough. A sharp chef’s knife works too, but the floss is a game-changer.
Watch the bake time. Ovens vary, so start checking at 22 minutes. You want the tops golden and the center rolls just set. Overbaking dries them out, so err on the side of slightly underdone. They’ll continue cooking in the hot pan.
Variations & Adaptations
One of the best things about this recipe is how flexible it is. Here are some ways to make it your own.
- Gluten-Free Version: Substitute the all-purpose flour with a 1:1 gluten-free baking flour blend. Add an extra tablespoon of milk to the dough, as gluten-free flours tend to absorb more liquid. The texture will be slightly different, but still delicious.
- Dairy-Free Option: Use oat milk or almond milk in the dough, and replace the butter with a good vegan butter stick (not the spreadable kind). Miyoko’s or Country Crock plant butter work well. For the icing, use coconut cream instead of heavy cream.
- Nutty Twist: Add ½ cup of finely chopped pecans or walnuts to the filling for extra crunch. Toast them first for deeper flavor.
- Pumpkin Spice Upgrade: If you’re a spice lover, add an extra teaspoon of cinnamon and a pinch of cardamom to the dough. It gives the rolls a warm, almost chai-like flavor.
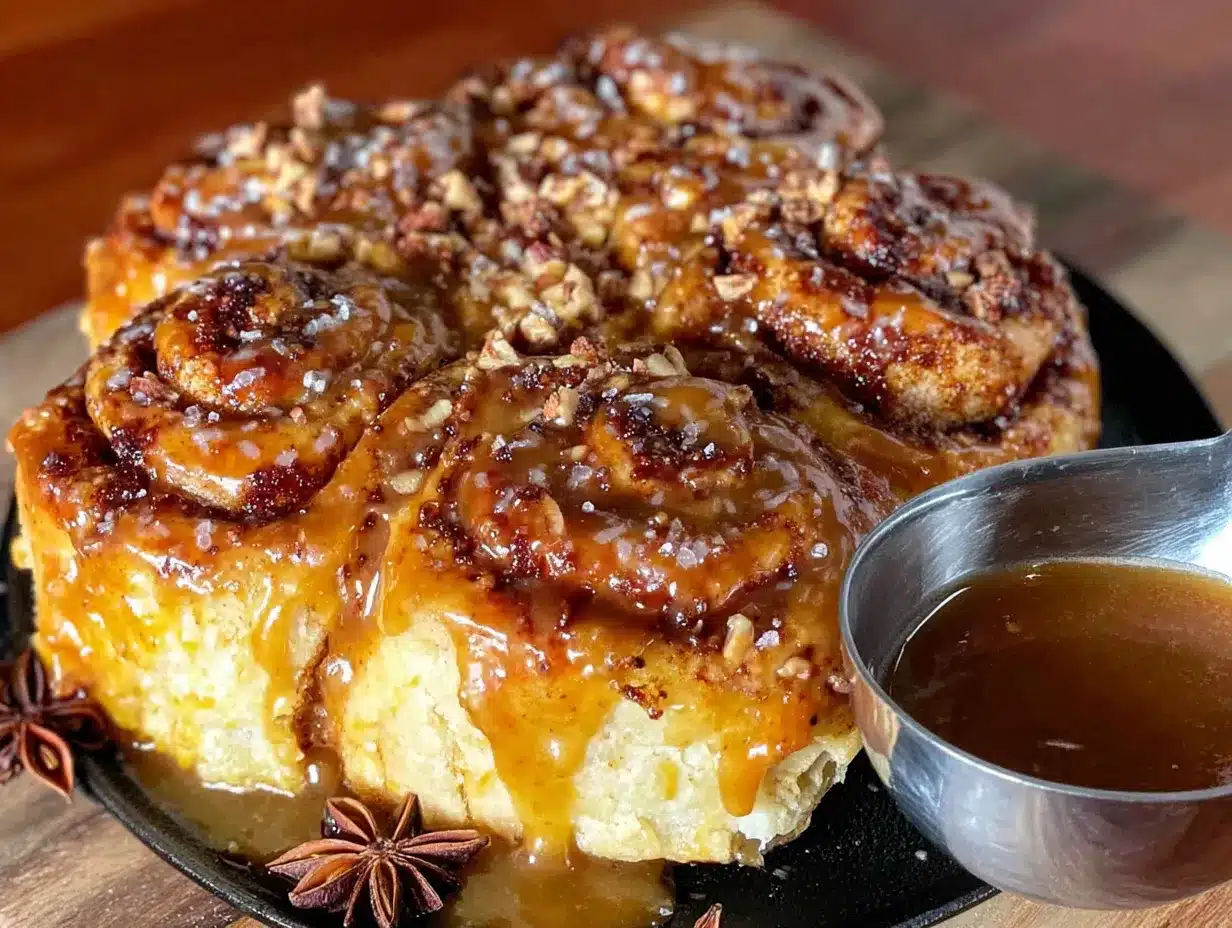
- Caramel Drizzle: Swap the maple icing for a salted caramel sauce for an even richer treat. Just drizzle it over the warm rolls and watch them disappear.
I once made a batch with a brown butter icing instead of maple, and it was incredible. If you’re feeling adventurous, brown the butter for the icing before mixing—it adds a nutty, toasty depth that pairs beautifully with the pumpkin. You can find that version in my cozy pumpkin cinnamon rolls with brown butter icing post.
Serving & Storage Suggestions
These rolls are best served warm, straight from the oven, with the icing still melting into all the nooks and crannies. But they’re also fantastic at room temperature a few hours later—if they last that long.
How to Serve: Place the rolls on a large platter or leave them in the baking dish for a more rustic presentation. I love serving them with a side of crispy bacon or a Greek yogurt parfait with homemade granola for a balanced brunch spread. A hot cup of coffee or spiced chai is the perfect companion.
Storage: Store leftover rolls in an airtight container at room temperature for up to 2 days. They’ll stay soft, but the icing might get a little melty—that’s not a bad thing. For longer storage, refrigerate them for up to 5 days. Reheat individual rolls in the microwave for 15 to 20 seconds, or pop the whole dish in a 300°F oven for 10 minutes.
Freezing: These rolls freeze beautifully. Bake them without the icing, let them cool completely, and wrap the entire pan tightly in plastic wrap and foil. Freeze for up to 3 months. When you’re ready to serve, thaw in the refrigerator overnight, then reheat in a 350°F oven for 10 to 15 minutes. Make the icing fresh and drizzle over the warm rolls.
Flavor Development: Honestly, these rolls are even better the next day. The flavors meld together, and the texture stays soft and tender. If you can resist eating them all at once, you’re in for a treat.
Nutritional Information & Benefits
Let’s be clear: these are a treat, not a health food. But that doesn’t mean they can’t have some redeeming qualities. Here’s a rough estimate per roll (based on 12 servings):
- Calories: ~380
- Fat: 16g
- Carbohydrates: 56g
- Protein: 6g
- Fiber: 2g
- Sugar: 32g
Health Highlights: Pumpkin puree is packed with vitamin A and fiber, which supports eye health and digestion. The cinnamon in the filling has anti-inflammatory properties and can help regulate blood sugar. And while the maple icing is indulgent, real maple syrup contains antioxidants and minerals like zinc and manganese.
Dietary Considerations: This recipe contains dairy, gluten, and eggs. For a dairy-free or gluten-free version, see the variations section above. If you’re watching your sugar intake, you can reduce the sugar in the dough by a couple of tablespoons, but I wouldn’t recommend cutting it further—the yeast needs sugar to rise properly.
Allergen Note: Contains wheat, dairy, and eggs. If you have nut allergies, skip the pecan variation and stick to the classic recipe.
Conclusion
These cozy pumpkin cinnamon rolls with maple icing are everything I want in a fall breakfast—warm, spiced, and just sweet enough to feel like a celebration. They’re the kind of recipe that makes you slow down and savor the season, even if it’s just for one morning. I love that they’re forgiving enough for a beginner baker but impressive enough to serve at a holiday brunch. Honestly, I think they’re going to become a staple in your kitchen too.
I’d love to hear how they turn out for you. Did you add any fun twists? Did you make them for a special occasion? Drop a comment below and let me know—I read every single one. And if you snap a photo, tag me on social media so I can see your beautiful bakes. Until next time, happy baking, and may your kitchen always smell like pumpkin spice and maple.
Frequently Asked Questions
Can I make these pumpkin cinnamon rolls ahead of time?
Absolutely! Assemble the rolls through step 6, cover the dish tightly with plastic wrap, and refrigerate for up to 12 hours. In the morning, let them sit at room temperature for 30 minutes while the oven preheats, then bake as directed.
Why did my cinnamon rolls turn out dense?
Dense rolls usually mean one of three things: the yeast was dead (it didn’t foam), you added too much flour, or the dough didn’t rise long enough. Make sure your milk is warm but not hot (110°F is ideal), and use a light hand when adding flour. The dough should be soft and slightly tacky.
Can I use canned pumpkin pie filling instead of puree?
No, I wouldn’t recommend it. Pumpkin pie filling is pre-sweetened and spiced, which will throw off the balance of the dough. Stick with 100% pure pumpkin puree for the best results.
How do I get clean cuts on my cinnamon rolls?
Use unflavored dental floss! Slide a long piece under the dough log, cross the ends over the top, and pull. It gives you perfect, clean slices without squishing the dough. A sharp serrated knife works too, but the floss is my go-to.
Can I freeze these rolls after baking?
Yes, and they freeze beautifully. Bake without the icing, let them cool completely, and wrap the pan tightly in plastic wrap and foil. Freeze for up to 3 months. Thaw overnight in the fridge, reheat in a 350°F oven, and add fresh icing before serving.
Pin This Recipe!
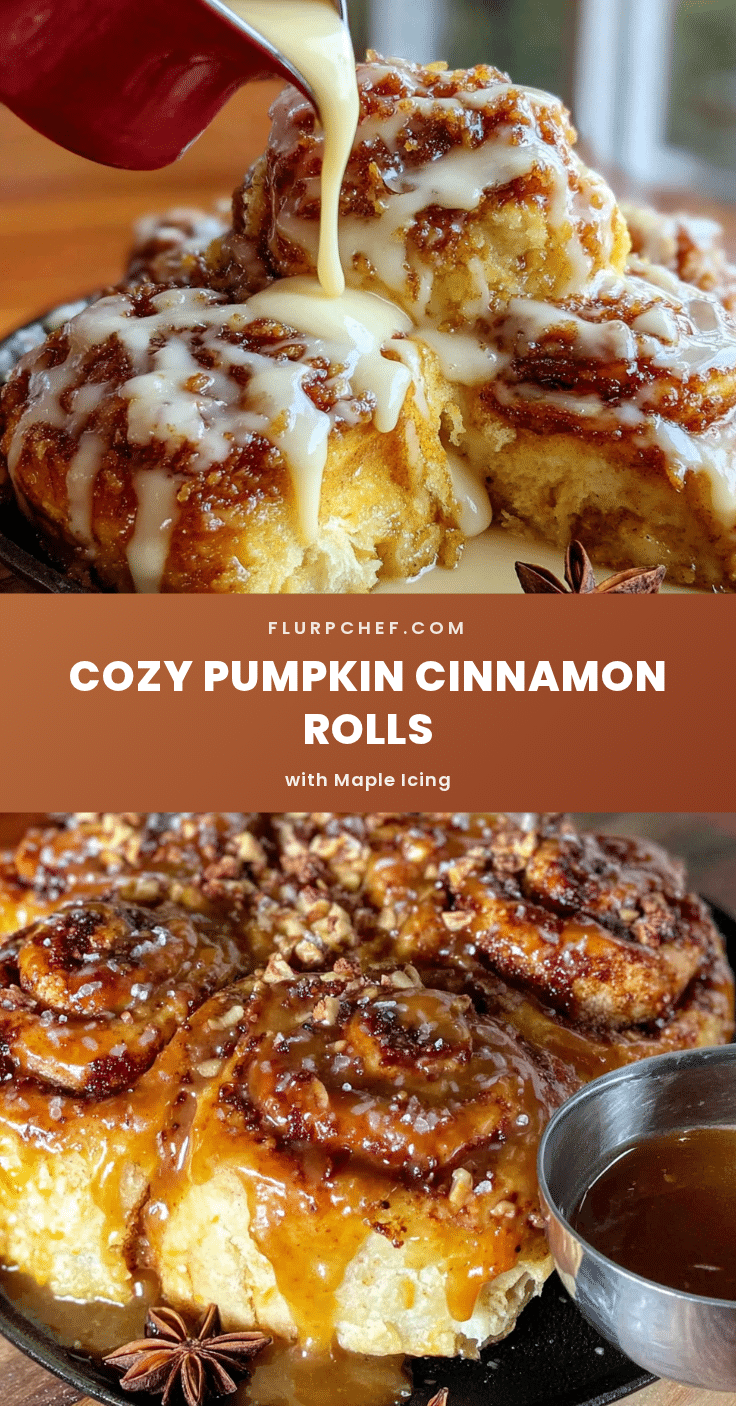
Cozy Pumpkin Cinnamon Rolls with Easy Maple Icing

Soft, pillowy pumpkin cinnamon rolls with a spiced brown sugar filling and a simple maple icing. Perfect for a cozy fall morning or holiday brunch.
- Prep Time: 30 minutes
- Cook Time: 25 minutes
- Total Time: 2 hours 30 minutes
- Yield: 12 servings 1x
- Category: Breakfast
- Cuisine: American
Ingredients
- 1 cup (240ml) whole milk, warm (about 110°F)
- 2 ¼ teaspoons (1 packet) active dry yeast
- ½ cup (100g) granulated sugar
- ½ cup (120g) pumpkin puree
- 1 large egg, room temperature
- ¼ cup (60g) unsalted butter, melted and slightly cooled
- 1 teaspoon vanilla extract
- 3 ½ to 4 cups (440g to 500g) all-purpose flour
- 1 teaspoon salt
- 1 ½ teaspoons pumpkin pie spice
- ½ cup (115g) unsalted butter, very soft
- ¾ cup (165g) packed brown sugar
- 2 tablespoons ground cinnamon
- ½ teaspoon ground nutmeg
- ¼ teaspoon ground cloves
- 4 tablespoons (60g) unsalted butter
- ¼ cup (60ml) pure maple syrup
- 1 ½ cups (180g) powdered sugar
- ¼ teaspoon salt
- 2 to 3 tablespoons heavy cream or milk
Instructions
- In the bowl of a stand mixer, combine warm milk and 1 tablespoon of granulated sugar. Sprinkle yeast on top and let sit for 5-10 minutes until foamy.
- Add remaining sugar, pumpkin puree, egg, melted butter, and vanilla to the yeast mixture. Stir to combine.
- In a separate bowl, whisk together 3 ½ cups flour, salt, and pumpkin pie spice. Gradually add to wet ingredients, mixing on low until a shaggy dough forms.
- Switch to dough hook and knead on medium-low for 6-8 minutes, adding more flour as needed, until dough is soft, smooth, and slightly tacky.
- Shape dough into a ball, place in a greased bowl, cover, and let rise in a warm spot for 1-1 ½ hours until doubled.
- While dough rises, make filling: mix softened butter, brown sugar, cinnamon, nutmeg, and cloves into a smooth paste.
- Punch down dough and roll into an 18×12-inch rectangle on a floured surface. Spread filling evenly, leaving a ½-inch border on long edges.
- Roll dough tightly into a log from the long side, pinch seam to seal. Cut into 12 equal rolls (about 1 ½ inches thick).
- Place rolls cut-side up in a greased 9×13-inch baking dish. Cover and let rise for 30-45 minutes until puffy and touching.
- Preheat oven to 350°F (175°C). Bake rolls for 22-28 minutes until golden brown and filling is bubbly. Cool in pan for 10 minutes.
- For icing: whisk melted butter, maple syrup, powdered sugar, and salt. Add heavy cream or milk a tablespoon at a time until thick but pourable. Drizzle over warm rolls.
Notes
For make-ahead: assemble rolls through step 6, cover and refrigerate up to 12 hours. Let sit at room temperature 30 minutes before baking. Use unflavored dental floss for clean cuts. Rolls are best served warm.
Nutrition
- Serving Size: 1 roll
- Calories: 380
- Sugar: 32
- Sodium: 280
- Fat: 16
- Saturated Fat: 9
- Carbohydrates: 56
- Fiber: 2
- Protein: 6
Keywords: pumpkin cinnamon rolls, maple icing, fall breakfast, homemade cinnamon rolls, pumpkin spice