I have never successfully pulled off a Halloween party without at least one moment of panic. And honestly, that first year I tried making a “spooky” punch? I ended up with a bowl of bright red Kool-Aid with floating gummy worms that looked less like a witch’s brew and more like a science experiment gone wrong. My friends were polite about it, but I knew. The punch was a dud.
It took me three more Halloweens and a lot of trial and error to figure out what actually makes a good party punch. It needs to look dramatic enough that kids gasp when they see it. It has to taste so good that adults go back for seconds (and thirds). And it absolutely cannot require a trip to a specialty store for weird ingredients you will never use again. This Easy Non-Alcoholic Witch’s Brew Halloween Punch checks every single box. It is the kind of drink that makes people stop, stare, and ask for the recipe before they even take a sip.
The secret is in the layering. You get that eerie, bubbling effect without dry ice. The color shifts from deep purple to a glowing green depending on how you mix it. And the flavor? Think tropical punch meets creamy sherbet with a fizzy kick that makes it dangerously drinkable. I have brought this to three Halloween parties now, and every single time, someone tells me it is the best punch they have ever had. Not the best Halloween punch. The best punch, period.
What I love most about this recipe is how forgiving it is. You can tweak the juices based on what you have in your fridge. You can swap the sherbet for a dairy-free option. You can make it extra spooky with floating dry ice “bubbles” or keep it simple for a classroom party. This is not a fussy recipe. This is a recipe that works, that delivers, and that makes you look like you planned way more than you actually did.
Why You’ll Love This Recipe
Let me tell you why this punch has become my go-to for every Halloween gathering. I have tested it on crowds ranging from sugar-crazed six-year-olds to picky adult relatives, and the feedback has been unanimous: this stuff is magic.
- Quick & Easy: This comes together in under 10 minutes. No cooking, no complicated steps, no waiting. You literally pour, stir, and serve. For a recipe that looks this impressive, the effort-to-wow ratio is almost unfair.
- Simple Ingredients: Everything in this punch is available at your regular grocery store. No hunting down obscure syrups or specialty mixers. You probably already have some of these items in your pantry right now.
- Perfect for Halloween Parties: Whether you are hosting a costume party, a trunk-or-treat event, or just making something fun for the family on Halloween night, this punch fits the bill. It is festive without being fussy.
- Crowd-Pleaser: Kids love the color and the fizz. Adults love the balanced sweetness. I have watched people go back for fourth and fifth servings. It is that good.
- Unbelievably Delicious: The combination of pineapple, orange, and lime juices with the creamy sherbet creates a flavor that is somehow both nostalgic and surprising. It is like a tropical vacation crashed into a Halloween party and they decided to become best friends.
What makes this recipe different from every other Halloween punch out there is the texture. Most punches are just juice and soda thrown together. This one gets its creamy, frothy quality from the sherbet melting slowly into the mix. It creates this beautiful, slightly thick consistency that coats your tongue and makes every sip feel indulgent. I have tried versions with ice cream, with sorbet, with frozen yogurt. Nothing works quite like lime sherbet. The tartness balances the sweet juices perfectly, and the green color adds to the witchy vibe.
This is the recipe that made me stop being afraid of hosting Halloween parties. It is reliable. It is impressive. And it tastes like the kind of thing you would pay good money for at a themed restaurant. Now I actually look forward to making it every year.
What Ingredients You Will Need
This recipe uses simple, everyday ingredients that come together to create something genuinely special. The magic is in how they interact with each other, not in any single fancy component.
- Pineapple Juice (4 cups): Use unsweetened pineapple juice for the best results. The natural sweetness is plenty. I recommend Dole or Lakewood for consistent flavor. If you can find cold-pressed pineapple juice, it adds a brightness that really shines through.
- Orange Juice (2 cups): Fresh squeezed if you have the time, but store-bought works perfectly fine. Just make sure it is not from concentrate if you can help it. The pulp is fine, but I prefer pulp-free for a smoother punch.
- Lime Juice (1/2 cup): Fresh lime juice makes a noticeable difference here. Bottled lime juice tends to have a metallic aftertaste that throws off the balance. Roll your limes on the counter before juicing to get the most out of them.
- Lemon-Lime Soda (4 cups): Sprite, 7UP, or any generic brand works. The bubbles are essential for that fizzy, witchy effect. Do not use diet versions unless you want a noticeably different sweetness level.
- Lime Sherbet (1 quart): This is the star of the show. The sherbet melts slowly into the punch, creating a creamy texture and adding that signature green color. I have tried several brands, and Breyers consistently gives the best texture. If you cannot find lime, rainbow sherbet works in a pinch.
- Green Food Coloring (optional, 3-5 drops): This is optional, but it really amps up the witchy green color. Gel food coloring works better than liquid because it does not dilute the punch. Americolor makes a great neon green that looks incredible.
- Ice Ring or Ice Cubes (as needed): A ring of ice keeps the punch cold without watering it down as quickly as cubes. You can make a spooky ice ring by freezing lime slices, gummy worms, or edible glitter into the ice beforehand.
For the garnish, you have options. Gummy worms crawling up the side of the punch bowl look fantastic. Lime slices floating on top add a pop of fresh green. Edible glitter makes the whole thing shimmer like a potion. And if you really want to go all out, dry ice creates that bubbling, smoking effect that makes kids lose their minds. Just be careful with handling dry ice—always use gloves and never let anyone consume it directly.
One substitution note: if you need this to be dairy-free, swap the lime sherbet for a lime sorbet. The texture will be slightly less creamy, but the flavor will still be fantastic. You can also use a dairy-free coconut milk-based ice cream in lime flavor if you can find it.
Equipment Needed
You do not need anything fancy to make this punch. That is part of the beauty of it. Here is what you will need:
- Large Punch Bowl (at least 3 quarts): A glass punch bowl lets everyone see the beautiful green color and the bubbling effect. I found mine at a thrift store for five dollars, and it has been my Halloween MVP ever since. If you do not have a punch bowl, a large glass pitcher works fine.
- Ladle: A large ladle makes serving easy. Look for one with a deep cup so guests can get plenty of the sherbet-infused goodness.
- Measuring Cups (liquid): You will need a 4-cup measure for the pineapple juice and smaller measures for the other ingredients. I prefer Pyrex glass measuring cups because they are easy to clean and do not hold onto odors.
- Citrus Juicer (optional): If you are using fresh limes, a handheld citrus juicer saves time and gets more juice out of each fruit. I have a simple metal one that cost me eight dollars and has lasted for years.
- Large Spoon or Whisk: For stirring everything together. A long-handled spoon works best for reaching the bottom of a deep punch bowl.
- Ice Ring Mold (optional): A Bundt pan makes an excellent ice ring mold. The ring shape maximizes surface area for cooling without diluting the punch too quickly.
If you are using dry ice, you will also need sturdy tongs and thick gloves. Do not skip the gloves—dry ice can cause serious burns if handled incorrectly. I learned this the hard way my first time using it, and my fingers were not happy with me for days.
Preparation Method
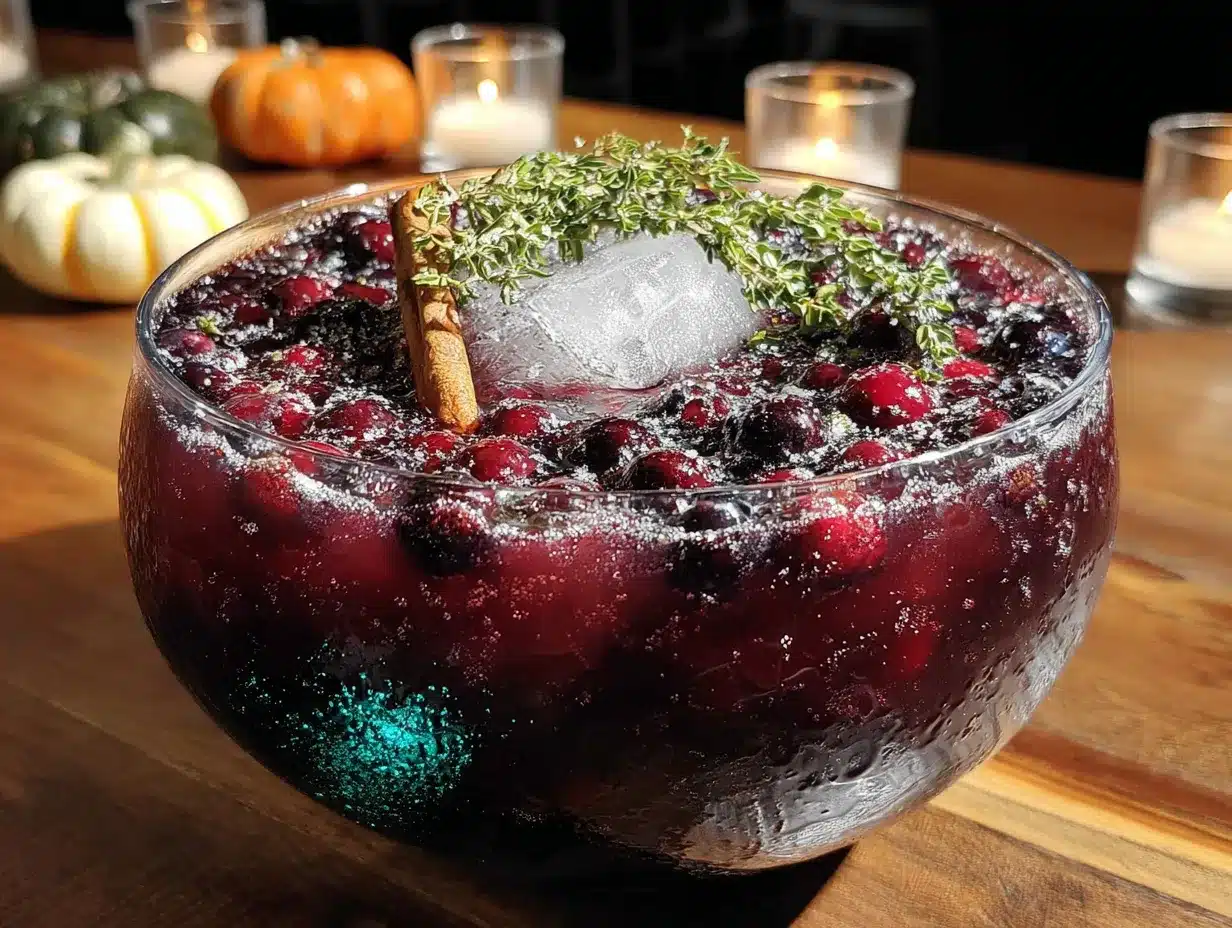
Follow these steps carefully, and you will have a punch that looks and tastes like it came straight from a witch’s cauldron. I have refined this process over several Halloweens to make it as foolproof as possible.
- Prepare your ice ring (optional, but recommended): The night before, fill a Bundt pan halfway with water. Add lime slices, gummy worms, or edible glitter for a spooky effect. Freeze until solid, then add more water to fill the pan completely and freeze overnight. This creates a beautiful ring of ice that cools the punch without diluting it as fast as regular cubes.
- Chill your ingredients: At least 2 hours before serving, put your pineapple juice, orange juice, and lemon-lime soda in the refrigerator. Cold ingredients mean less ice melting, which means a punch that stays flavorful longer. I usually do this first thing in the morning on party day.
- Set out the sherbet: About 15 minutes before you plan to mix the punch, take the lime sherbet out of the freezer. You want it soft enough to scoop but not melted. Letting it sit on the counter while you prep everything else works perfectly.
- Mix the juices: In your punch bowl, combine the chilled pineapple juice, orange juice, and lime juice. Stir gently to combine. The mixture should be a pale yellow-green at this point. This is where you add the green food coloring if you are using it. Start with 3 drops, stir, and add more until you get the shade of green you want. I usually go for something between swamp water and alien slime.
- Add the soda: Pour in the chilled lemon-lime soda slowly. Stir gently to combine without knocking out all the carbonation. You want the fizz to stay active so the punch has that lively, effervescent quality. A gentle folding motion works better than vigorous stirring.
- Scoop in the sherbet: Use a large spoon to scoop generous dollops of lime sherbet into the punch. Do not stir it in completely. Let it float on top and melt naturally. This creates that beautiful frothy layer and keeps the punch looking magical as the sherbet slowly dissolves. I usually use about three-quarters of the carton and save the rest for refills.
- Add the ice ring: If you made an ice ring, run warm water over the outside of the Bundt pan for about 30 seconds to release it. Place the ice ring gently into the punch bowl. It will float and keep everything cold while looking gorgeous.
- Garnish and serve: Add your gummy worms, lime slices, or any other decorations. If you are using dry ice, now is the time to add it. Place small pieces using tongs (never your hands!) and watch the smoke cascade over the sides of the bowl. Serve immediately with your ladle and cups.
A few notes from experience: do not add the sherbet more than 15 minutes before you plan to serve. It will melt completely and you will lose that beautiful creamy texture. Also, if you are making this for a party that lasts several hours, keep extra lemon-lime soda and sherbet on hand to refresh the punch as it gets low. I learned this the hard way when my punch went from magical to sad in about an hour.
The sensory cues to watch for: the punch should look vibrant green and slightly opaque from the melting sherbet. It should smell fruity and sweet with a bright citrus note. When you ladle it into cups, you should see small bubbles rising and bits of sherbet floating. If it looks flat or separated, give it a gentle stir and add more soda to revive it.
Cooking Tips & Techniques
I have made this punch more times than I care to count, and I have made every mistake you can imagine. Here is what I have learned so you do not have to make the same errors.
The biggest mistake people make is using too much ice. I did this my second year, thinking more ice meant a colder punch. What it actually meant was a watery, diluted mess that tasted like vaguely fruity sadness. Use an ice ring instead of cubes, and do not overdo it. The chilled ingredients and the sherbet do most of the cooling work anyway.
Temperature matters more than you think. If your juices are not properly chilled, the sherbet will melt too quickly and the punch will be lukewarm. Nobody wants lukewarm punch. Give yourself enough time to chill everything thoroughly. I have been known to stick my punch bowl in the freezer for 15 minutes before adding the ingredients, just to give it a head start.
Do not skip the lime juice. I tried making this without it once because I was out of limes and felt lazy. The result was a punch that was sweet and one-dimensional. The lime juice adds acidity that cuts through the sweetness and makes the whole thing taste balanced. It is the difference between a good punch and a great one.
For the best texture, add the sherbet in stages. Instead of dumping the whole carton in at once, add a few scoops, let them start melting, then add more. This keeps the punch looking layered and interesting. Plus, it gives you control over the final consistency. Some people like it thicker and creamier, others prefer it lighter and more drinkable.
Multitasking tip: While your ice ring is freezing overnight, use that time to prep your garnishes. Cut lime slices, separate gummy worms, and measure out any other decorations. Store them in airtight containers in the fridge. This makes assembly on party day a five-minute job instead of a frantic scramble.
One more thing: If you are using dry ice, do not add it until right before serving. The smoke effect is dramatic but short-lived. I made the mistake of adding it too early once, and by the time guests arrived, the punch was just sitting there looking sad and un-magical. Timing is everything with dry ice.
Variations & Adaptations
This recipe is endlessly adaptable. Here are some of my favorite variations that I have tried over the years.
Blood Orange Witch’s Brew: Swap the orange juice for blood orange juice. The deep red color mixes with the green to create a dark, mysterious purple that looks genuinely eerie. The flavor is slightly tarter and more complex. I tried this last year for a grown-up Halloween party, and it was a huge hit.
Berry Witches Brew: Add 2 cups of mixed berry juice (cranberry, blueberry, or a blend) to the base. This turns the punch a deep, dark purple that looks like something a real witch would brew. The berry flavor adds a tartness that pairs beautifully with the lime sherbet. My kids actually prefer this version now.
Dairy-Free Version: As I mentioned earlier, swap the lime sherbet for lime sorbet. The texture is less creamy, but the flavor is still fantastic. You can also use a dairy-free coconut ice cream in lime flavor if you can find it. I have made this for friends with dairy allergies, and they always appreciate being included in the fun.
Sparkling Witch’s Brew: Replace half the lemon-lime soda with ginger ale or club soda for a less sweet version. The ginger ale adds a subtle warmth that is surprisingly good with the citrus flavors. This is my go-to when I want something a little less sugary but still festive.
Frozen Witch’s Brew (Slushy Version): Freeze the juice mixture in ice cube trays, then blend the frozen cubes with the lemon-lime soda and sherbet in a blender until slushy. This creates a thick, frosty version that is perfect for warm Halloween nights. I did this for an outdoor trunk-or-treat event, and the kids went absolutely wild for it.
Adult Version (optional, for 21+ only): Add 1 cup of coconut rum or white rum to the juice mixture before adding the soda. The coconut flavor complements the tropical notes beautifully. You can also add a splash of blue curacao for an even more vibrant color. Just make sure to clearly label the adult version so nobody accidentally gets served something they did not expect.
Serving & Storage Suggestions
This punch is best served immediately, but there are ways to make it work for different situations.
Serving Temperature: Serve this punch as cold as possible. The ideal temperature is just above freezing, around 34-38°F. The cold temperature keeps the sherbet from melting too quickly and maintains that beautiful layered look. If your punch starts to warm up, add more ice or pop the bowl in the freezer for 10 minutes.
Presentation: A clear glass punch bowl is ideal because guests can see the color and the bubbles. If you do not have one, a large glass trifle dish works beautifully. For a truly dramatic effect, serve the punch in individual mason jars or plastic cauldrons. I found mini plastic cauldrons at a party supply store, and they were a huge hit with the kids.
Complementary Dishes: This punch pairs wonderfully with other Halloween treats. Serve it alongside a platter of smoked queso dip with chorizo for a savory contrast to the sweet punch. The creamy, spicy dip balances the fruity sweetness perfectly. For a complete Halloween spread, add some loaded pulled pork nachos for a hearty option that keeps guests coming back for more.
Storage: This punch does not store well because the carbonation fades and the sherbet separates. However, you can store the juice mixture (without the soda and sherbet) in the refrigerator for up to 3 days. When you are ready to serve, just add the soda and sherbet fresh. I often make the juice base the night before a party to save time.
Reheating: You do not reheat this punch. If it has been sitting out and has lost its chill, add more ice or pop it in the freezer for a few minutes. If the sherbet has completely melted, add a few fresh scoops to revive the texture.
Flavor Development: Interestingly, the juice mixture actually tastes better after sitting in the fridge overnight. The flavors meld together and become more cohesive. So making the base ahead of time is not just convenient—it actually improves the final result.
Nutritional Information & Benefits
Let’s be honest: this is a treat, not a health food. But it does have some redeeming qualities.
Estimated Nutritional Values (per 8 oz serving):
- Calories: 180-220
- Total Fat: 2-3g
- Saturated Fat: 1-2g
- Carbohydrates: 40-45g
- Sugar: 35-40g
- Protein: 1-2g
- Vitamin C: 60-80% of daily value
- Calcium: 4-6% of daily value
Health Benefits: The pineapple juice contains bromelain, an enzyme that can aid digestion. Orange juice is packed with immune-boosting vitamin C. And lime juice provides antioxidants that support overall health. So while this is certainly a sugary indulgence, it is not completely devoid of nutritional value.
Dietary Considerations: This recipe is naturally nut-free and egg-free. To make it dairy-free, use sorbet instead of sherbet. To reduce sugar, use diet lemon-lime soda and reduce the sherbet to half a carton. The punch will still be sweet from the fruit juices, just less intensely so.
Potential Allergens: The sherbet contains dairy and may contain traces of other allergens depending on the brand. Always check labels if serving to guests with allergies. The fruit juices are generally safe, but some people have citrus allergies.
My Personal Take: I do not make this punch every day, and I do not pretend it is healthy. But for a special occasion, it brings so much joy that I think the sugar is worth it. I would rather my kids have a few glasses of this at a Halloween party than a bunch of individually wrapped candies. At least this has real fruit juice in it.
Conclusion
This Easy Non-Alcoholic Witch’s Brew Halloween Punch has become a non-negotiable part of my Halloween celebrations. It is the recipe that transformed me from a party host who panics to one who actually enjoys the process. The first time I served it, I watched my then-five-year-old nephew’s eyes go wide as saucers when he saw the green, bubbling concoction. He whispered, “Is this real magic?” And honestly? It kind of is.
The beauty of this recipe is that it works for everyone. Kids love the color and the fizz. Adults love the balanced flavor and the nostalgic feel. You can dress it up with dry ice and gummy worms for a dramatic party centerpiece, or keep it simple for a family movie night. It is forgiving, it is flexible, and it delivers every single time.
I encourage you to make this your own. Add your favorite juices. Experiment with different sherbet flavors. Try the slushy version on a warm night. The best recipes are the ones that evolve with you, and this one has plenty of room for your personal touch.
If you make this punch, I would love to hear about it. Drop a comment below and tell me how it turned out, what variations you tried, and whether the kids in your life thought it was real magic. And if you are looking for other cozy fall treats to round out your Halloween spread, check out these pumpkin cream cheese swirl muffins or this spiced pumpkin apple cider mocktail for even more festive fun. Happy Halloween, and happy brewing!
Frequently Asked Questions
Can I make this punch ahead of time?
You can prepare the juice mixture up to 3 days in advance and store it in the refrigerator. However, do not add the lemon-lime soda or sherbet until right before serving. The carbonation will fade and the sherbet will melt if you add them too early. For best results, mix everything together no more than 30 minutes before your guests arrive.
Can I use frozen juice concentrate instead of bottled juice?
Yes, but you will need to reconstitute it according to the package directions first. Frozen concentrate can actually work well because it is often more flavorful than bottled juice. Just make sure it is fully mixed with water before adding it to the punch bowl. I have used frozen orange juice concentrate in a pinch, and it worked perfectly fine.
How do I make the punch less sweet?
There are several ways to reduce the sweetness. Use diet lemon-lime soda instead of regular. Reduce the sherbet by half. Add an extra 1/4 cup of lime juice for more acidity to balance the sugar. Or replace some of the pineapple juice with club soda. I find that the lime juice trick works best because it keeps the flavor profile intact while cutting through the sweetness.
Can I use this recipe for a non-Halloween party?
Absolutely! Just change the color scheme. Skip the green food coloring and use red or blue instead for a different theme. Swap the gummy worms for fresh fruit slices. The base recipe is delicious enough to work for any occasion. I have made this for summer barbecues (using rainbow sherbet) and for New Year’s Eve parties (adding some sparkling wine for the adults).
How do I clean my punch bowl after using food coloring?
Food coloring can stain plastic bowls, so glass or ceramic is preferred. To remove green stains, soak the bowl in a solution of warm water and baking soda for 30 minutes, then wash with dish soap. A paste of baking soda and water applied directly to stubborn stains works well too. For really tough stains, try a small amount of rubbing alcohol on a soft cloth. Avoid using abrasive scrubbers that could scratch the surface.
Pin This Recipe!
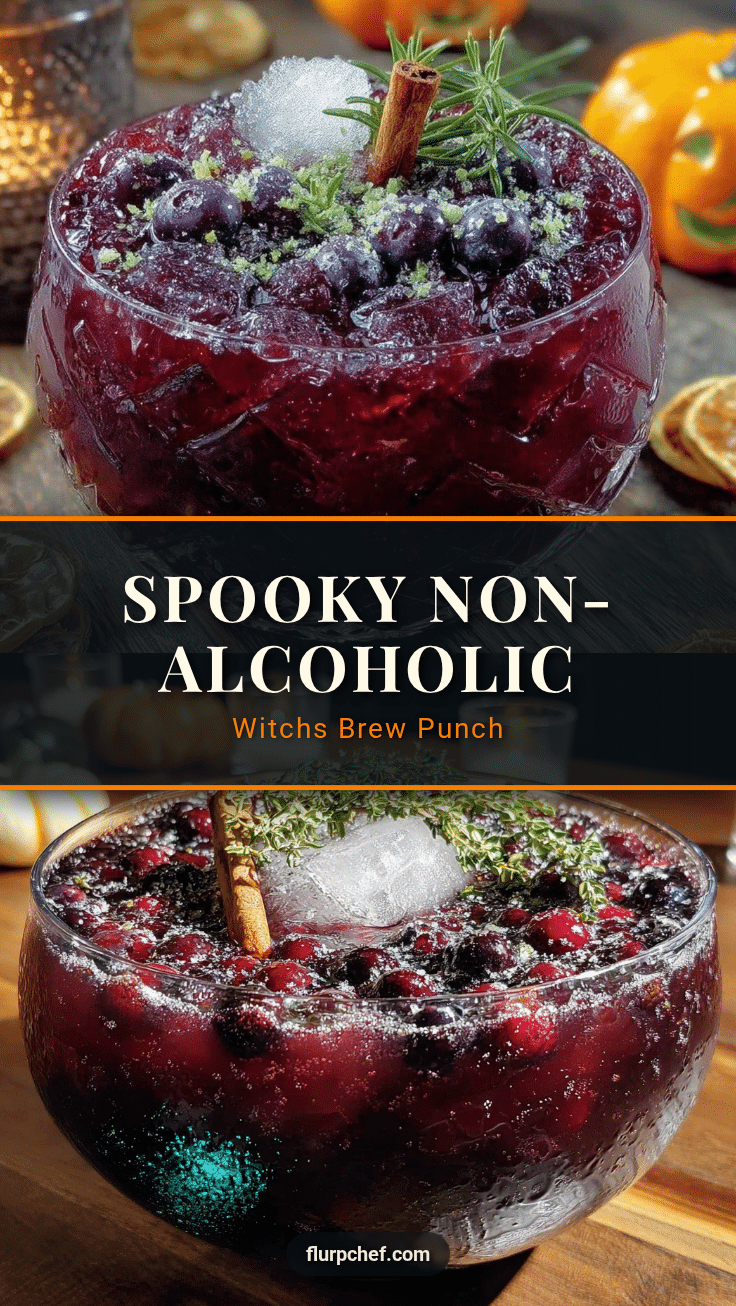
Easy Non-Alcoholic Witchs Brew Halloween Punch
This Easy Non-Alcoholic Witch’s Brew Halloween Punch is a dramatic, delicious, and simple party drink that looks like magic with its eerie green color and fizzy, creamy texture. Made with pineapple, orange, and lime juices, lemon-lime soda, and lime sherbet, it’s a crowd-pleaser for kids and adults alike.
- Prep Time: 10 minutes
- Cook Time: 0 minutes
- Total Time: 10 minutes (plus chilling and optional ice ring freezing time)
- Yield: 12 servings 1x
- Category: Beverage
- Cuisine: American
Ingredients
- 4 cups pineapple juice (unsweetened)
- 2 cups orange juice (preferably not from concentrate)
- 1/2 cup lime juice (fresh)
- 4 cups lemon-lime soda (e.g., Sprite or 7UP)
- 1 quart lime sherbet (e.g., Breyers)
- 3–5 drops green food coloring (optional, gel preferred)
- Ice ring or ice cubes (as needed)
- Gummy worms, lime slices, edible glitter, or dry ice for garnish (optional)
Instructions
- Prepare your ice ring (optional, but recommended): The night before, fill a Bundt pan halfway with water. Add lime slices, gummy worms, or edible glitter for a spooky effect. Freeze until solid, then add more water to fill the pan completely and freeze overnight.
- Chill your ingredients: At least 2 hours before serving, put your pineapple juice, orange juice, and lemon-lime soda in the refrigerator.
- Set out the sherbet: About 15 minutes before you plan to mix the punch, take the lime sherbet out of the freezer to soften slightly.
- Mix the juices: In your punch bowl, combine the chilled pineapple juice, orange juice, and lime juice. Stir gently. Add green food coloring if using, starting with 3 drops and adjusting to desired shade.
- Add the soda: Pour in the chilled lemon-lime soda slowly and stir gently to combine without losing carbonation.
- Scoop in the sherbet: Use a large spoon to add generous dollops of lime sherbet into the punch. Do not stir it in completely; let it float and melt naturally.
- Add the ice ring: If you made an ice ring, run warm water over the outside of the Bundt pan for about 30 seconds to release it. Place the ice ring gently into the punch bowl.
- Garnish and serve: Add gummy worms, lime slices, or other decorations. If using dry ice, add small pieces with tongs (never hands) right before serving. Serve immediately with a ladle and cups.
Notes
For best results, do not add sherbet more than 15 minutes before serving. Keep extra lemon-lime soda and sherbet on hand to refresh the punch as it gets low. If using dry ice, handle with gloves and never consume directly. The juice mixture can be made up to 3 days ahead and stored in the refrigerator; add soda and sherbet just before serving.
Nutrition
- Serving Size: 8 oz
- Calories: 200
- Sugar: 37
- Sodium: 30
- Fat: 2.5
- Saturated Fat: 1.5
- Carbohydrates: 42
- Protein: 1.5
Keywords: Halloween punch, non-alcoholic punch, witch's brew, party punch, Halloween drink, kid-friendly punch, lime sherbet punch


