I did not trust a dessert made for two people.
It felt like a gimmick, you know? A scaled-down recipe that promised all the comfort of the full-sized version but usually delivered a sad, dry, or just plain disappointing little dish. I’d been burned before by tiny cakes and undersized cobblers that somehow took just as much effort as the real thing. So when a friend raved about this brown sugar apple crisp for two, I smiled and nodded, but I had no intention of making it. It sounded like a solution to a problem I didn’t have—I was perfectly fine making a giant crisp and eating it for breakfast.
Then, a random Tuesday night happened. It was cold, drizzly, and I had two apples sitting on the counter that were about to turn. I didn’t want a whole baking project. I didn’t want leftovers. I just wanted something warm, something sweet, something that felt like a hug in a bowl. And honestly? I didn’t want to share. That’s the real truth. I wanted a dessert that was mine, all mine, from the first crunchy bite to the last spoonful of tender, spiced apple.
So I caved. I grabbed the apples, the brown sugar, the oats, and I made the brown sugar apple crisp for two. And somewhere between the smell of cinnamon filling my kitchen and the first bite of that buttery, crunchy topping, I became a believer. It wasn’t just good. It was perfect. It was the exact amount of comfort I needed, without the guilt of a half-eaten dish staring at me from the fridge the next day. This recipe is a quiet little secret weapon for anyone who wants a special, cozy dessert without the fanfare. It’s just for you. Or you and one other lucky person.
Why You’ll Love This Recipe
This isn’t just another apple crisp recipe. This is the one you’ll turn to when you want something that feels special but takes almost no effort. It’s the kind of dessert that makes a regular Tuesday night feel like a mini celebration.
- Perfectly Portioned: No more leftover crisp sitting in the fridge for a week. This recipe makes exactly two generous servings, so there’s no waste and no temptation to overindulge. It’s the ideal size for a date night, a self-care evening, or a quiet night in.
- Incredibly Easy: We’re talking 10 minutes of prep time. Seriously. You don’t need a mixer, a food processor, or any special skills. Just a bowl, a spoon, and a baking dish.
- Simple, Pantry-Friendly Ingredients: You probably have everything you need right now. Apples, brown sugar, oats, butter, flour, and cinnamon. That’s it. No hunting for obscure ingredients at the store.
- That Perfect Topping: The star of the show is the brown sugar and oat crumble. It gets perfectly golden, buttery, and crunchy in the oven. It’s the kind of topping you’ll want to eat by the spoonful before it even hits the apples. I won’t judge.
- The Coziest Dessert: Warm, tender, spiced apples under a blanket of crunchy, sweet crumble. It’s the definition of comfort food. Serve it with a scoop of vanilla ice cream or a dollop of whipped cream, and you’ve got a dessert that rivals any fancy restaurant offering.
This recipe is different because it’s been tested and tweaked to get that perfect balance. The apple filling is sweet but not cloying, with a hint of lemon to brighten it up. The topping is the ideal ratio of crispy to chewy, and it doesn’t sink into the apples. It sits right on top, like a golden crown. I’ve made this recipe more times than I can count, and it never lets me down. It’s the kind of dessert you make for someone you want to impress, but it’s so easy you’ll feel like you’re cheating.
What Ingredients You Will Need
This recipe uses simple, wholesome ingredients to create something truly special. The magic is in the combination of textures and flavors, not in a long list of hard-to-find items. Here’s what you’ll need to gather.
For the Apple Filling
- 2 medium apples – I recommend a mix of sweet and tart apples. Honeycrisp and Granny Smith are my favorite combo. The Honeycrisp adds sweetness and holds its shape, while the Granny Smith gives a nice tang. You can also use Fuji, Gala, or Braeburn.
- 2 tablespoons brown sugar – Packed. This adds a deep, molasses-like sweetness that pairs perfectly with the apples. I use light brown sugar, but dark brown sugar will give an even richer flavor.
- 1 tablespoon all-purpose flour – This helps thicken the juices released by the apples as they bake, creating a luscious syrup instead of a watery sauce.
- 1/2 teaspoon ground cinnamon – The essential warm spice. Don’t skip it.
- 1/4 teaspoon ground nutmeg – Freshly grated is best, but pre-ground works just fine. It adds a subtle warmth.
- 1 teaspoon lemon juice – Freshly squeezed. This brightens the flavors and prevents the apples from browning too much.
- Pinch of salt – Sounds weird, but it balances the sweetness and makes all the flavors pop.
For the Brown Sugar Crumble Topping
- 1/3 cup all-purpose flour – The base of our crumble. You can substitute with a gluten-free 1:1 baking flour if needed.
- 1/3 cup old-fashioned rolled oats – Don’t use quick oats here. Old-fashioned oats give the best texture—chewy and hearty. They toast up beautifully in the oven.
- 1/3 cup brown sugar – Packed. This is what gives the topping its signature caramel-like flavor and crunch.
- 1/4 cup unsalted butter – Cold and cut into small cubes. Using cold butter is the secret to a crumbly, not greasy, topping. If you only have salted butter, just reduce the added salt in the filling.
- 1/2 teaspoon ground cinnamon – Because you can never have too much cinnamon.
- Pinch of salt – To balance the sweetness.
I personally like to use Kerrygold unsalted butter for this recipe. Its high butterfat content makes the crumble extra rich and flaky. For the oats, Bob’s Red Mill old-fashioned oats are my go-to. They have a great texture and toast up perfectly. If you’re out of lemons, you can substitute the lemon juice with a splash of apple cider vinegar. It’s not quite the same, but it works in a pinch. And honestly, if you only have one type of apple, don’t stress. It will still be delicious. Just use two of your favorite apples.
Equipment Needed
You don’t need a fancy kitchen to make this brown sugar apple crisp for two. The equipment list is short and sweet, just like the recipe itself.
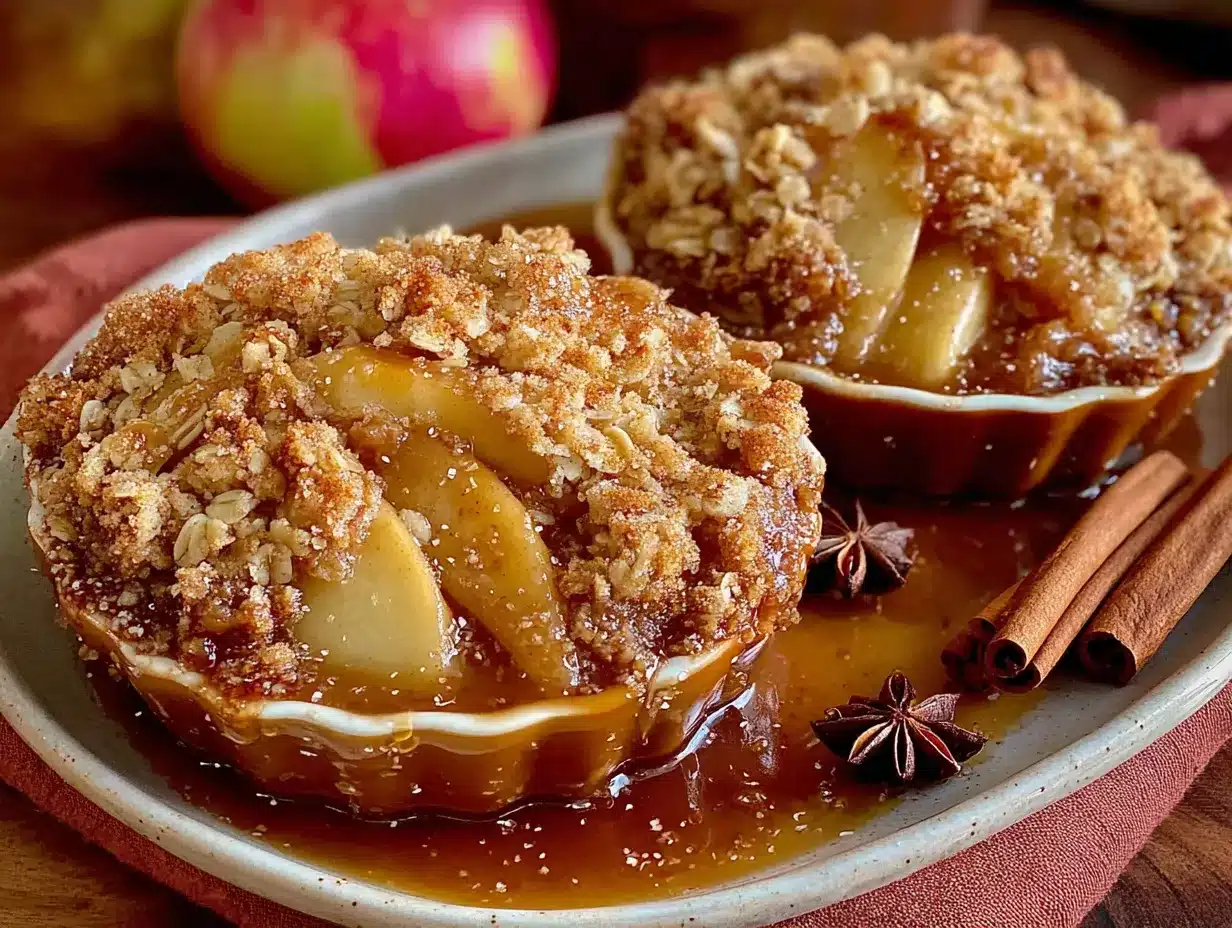
- Two 8-ounce ramekins or one small baking dish – Ramekins are perfect for individual servings. You can also use a small 6-inch cast iron skillet, a small baking dish, or even a couple of oven-safe bowls. Just make sure they are oven-safe.
- Mixing bowls – You’ll need one medium bowl for the apple filling and one small bowl for the crumble topping.
- Measuring cups and spoons – For accurate measurements. Baking is a science, but this recipe is forgiving. I still recommend using proper measuring tools for the best results.
- A sharp knife and cutting board – For peeling and chopping the apples.
- A spoon or spatula – For mixing.
- A pastry cutter or two forks – For cutting the cold butter into the dry ingredients for the crumble. If you don’t have a pastry cutter, you can use your fingertips. Just work quickly so the butter doesn’t get too warm.
- A baking sheet – Place your ramekins or dish on a baking sheet to catch any bubbling juices. It saves you from a messy oven cleanup.
I’ve made this recipe in my trusty 6-inch Lodge cast iron skillet, and it works beautifully. The skillet holds the heat well and gives the crumble an extra-crispy bottom. If you’re using ramekins, I recommend the classic white porcelain ones. They’re inexpensive, easy to find, and they look so charming on the table. For a budget-friendly option, a small 8×8 inch baking dish will work, but the crisp will be thinner and might cook a little faster. Just keep an eye on it.
Preparation Method
Let’s get to the fun part. This recipe comes together in a flash, so preheat your oven first. Set it to 375°F (190°C).
Step 1: Prep the Apples
Peel, core, and chop your 2 medium apples into 1/2-inch chunks. Don’t slice them too thin, or they’ll turn to mush. You want nice, bite-sized pieces that will hold their shape during baking. I like to leave the peel on one of the apples for a little extra texture and fiber, but that’s entirely up to you. If you’re a peel-off purist, go for it.
Step 2: Make the Apple Filling
In a medium bowl, combine the chopped apples, 2 tablespoons brown sugar, 1 tablespoon flour, 1/2 teaspoon cinnamon, 1/4 teaspoon nutmeg, 1 teaspoon lemon juice, and a pinch of salt. Stir everything together until the apples are evenly coated. Set the bowl aside while you make the topping. This gives the apples a few minutes to release their juices, which is exactly what we want.
Step 3: Make the Brown Sugar Crumble
In a separate small bowl, whisk together 1/3 cup flour, 1/3 cup rolled oats, 1/3 cup brown sugar, 1/2 teaspoon cinnamon, and a pinch of salt. Add the 1/4 cup of cold, cubed butter. Using a pastry cutter, two forks, or your fingertips, cut the butter into the dry ingredients until the mixture resembles coarse crumbs with some pea-sized butter pieces remaining. It should look a bit shaggy and uneven. Don’t overwork it. You want those little pockets of butter to melt in the oven and create steam, which makes the crumble light and crispy.
Step 4: Assemble the Crisps
Divide the apple mixture evenly between your two 8-ounce ramekins or your small baking dish. Don’t pack them down; just let them sit naturally. Now, sprinkle the brown sugar crumble topping evenly over the apples. Use all of it. Pile it high. It will look like a lot, but it will settle and bake down. Trust the process. Place the ramekins or dish on a baking sheet to catch any drips.
Step 5: Bake to Golden Perfection
Bake for 25 to 30 minutes, or until the topping is deep golden brown and the apple filling is bubbling up around the edges. The smell in your kitchen right now is pure magic. If the topping is browning too quickly after 20 minutes, loosely tent the ramekins with a piece of aluminum foil for the remaining time. My oven runs a little hot, so I usually check at the 22-minute mark.
Step 6: Cool and Serve
Let the crisps cool on a wire rack for at least 10 to 15 minutes. This is crucial. The filling will be molten hot straight out of the oven, and letting it rest allows the juices to thicken up into a beautiful syrup. If you serve it immediately, it will be runny. After 10 minutes, it’s still warm but much more stable. Top with a scoop of vanilla ice cream or a dollop of whipped cream, and dig in. The contrast between the hot, tender apples and the cold, creamy ice cream is a thing of beauty.
Cooking Tips & Techniques
I’ve made this brown sugar apple crisp for two more times than I can count, and I’ve learned a few things along the way. Here are my best tips to make sure yours turns out perfect every time.
Use Cold Butter for the Topping. This is the single most important tip for a crumbly, crunchy topping. Warm butter will get absorbed into the flour and oats, creating a dense, paste-like layer. Cold butter, when cut into the dry ingredients, creates little pockets of fat. As the crisp bakes, these pockets melt and release steam, which creates those light, crispy, and irresistible crumbs. If your butter softens while you’re working with it, pop the bowl in the fridge for 5 minutes before you assemble the crisps.
Don’t Overmix the Crumble. You want the mixture to be uneven. Some big clumps, some smaller crumbs, some loose flour. That variety in texture is what makes the topping so good. If you mix it until it’s totally uniform, you’ll end up with a more homogeneous, less interesting topping.
Choose the Right Apples. I cannot stress this enough. Using a mix of firm, tart apples (like Granny Smith) and sweet apples (like Honeycrisp or Fuji) gives you the best flavor and texture. If you use only soft apples like McIntosh, they will break down into applesauce. If you use only tart apples, the filling might be too sour. The combination is the sweet spot.
Let It Rest. I know it’s hard to wait, but letting the crisp cool for 10 to 15 minutes is non-negotiable. The filling needs time to set. If you dig in too soon, you’ll end up with a soupy mess. The resting time allows the natural pectin in the apples and the flour to thicken the juices into a beautiful, glossy syrup.
Toast Your Oats (Optional, but Amazing). For an even deeper, nuttier flavor in your crumble, you can toast the rolled oats in a dry skillet over medium heat for 2 to 3 minutes before adding them to the dry ingredients. Let them cool completely before using. It’s a small extra step that makes a big difference in the final flavor.
One time, I forgot to add the flour to the apple filling. I was rushing, and I just tossed the apples with sugar and spices and threw the topping on. The result was a delicious but very watery crisp. The juices didn’t thicken at all. It was still tasty, but it was more of an apple soup with a crumble island. So, yes, don’t skip the flour in the filling. It’s there for a reason.
Variations & Adaptations
This recipe is a fantastic base, and it’s incredibly easy to adapt to your tastes or what you have on hand. Here are a few of my favorite variations.
Gluten-Free Version: This is a simple swap. Use a good quality gluten-free 1:1 baking flour blend (like Bob’s Red Mill or King Arthur) in both the filling and the topping. Make sure your oats are certified gluten-free as well. The texture will be slightly different, but it will still be deliciously crunchy and satisfying.
Seasonal Fruit Swaps: Apple crisp is amazing, but it’s not the only game in town. In the summer, swap the apples for an equal amount of sliced peaches, nectarines, or plums. In the fall, you can use a mix of apples and pears. In the winter, try it with sliced firm pears and a handful of dried cranberries. The same brown sugar crumble works beautifully with almost any fruit.
Add Some Warmth: The spice profile is classic, but you can easily change it up. Add a pinch of cardamom for a more floral, complex flavor. A dash of ground ginger or allspice would also be lovely. For a grown-up twist, stir a tablespoon of bourbon or dark rum into the apple filling. It adds a lovely warmth that pairs perfectly with the brown sugar.
Nutty Crumble: For extra crunch and flavor, add 1/4 cup of chopped pecans or walnuts to the crumble topping. Toast them lightly in a dry pan first to bring out their oils, then let them cool before mixing them in with the flour and oats. It adds a wonderful texture and a rich, nutty flavor.
Make it a Crisp for One: This recipe is for two, but it’s easy to halve. Just use one apple, halve all the ingredient amounts, and bake it in a single ramekin. The baking time might be reduced by a few minutes, so start checking at the 20-minute mark.
My personal favorite variation is adding a tablespoon of bourbon to the apples and using dark brown sugar in the topping. The molasses notes in the dark brown sugar and the warmth from the bourbon create a deeply complex and adult dessert. It’s my go-to for a cozy night in when I want something a little extra special.
Serving & Storage Suggestions
This brown sugar apple crisp for two is best served warm, straight from the oven. But how you serve it can make all the difference.
Serving Temperature: Serve it warm, not hot. Let it rest for 10 to 15 minutes. The contrast between the warm crisp and a cold topping is a textural masterpiece.
The Perfect Topping: A scoop of high-quality vanilla bean ice cream is the classic choice. The cold, creamy ice cream melting into the warm, spiced apples is pure heaven. A dollop of lightly sweetened whipped cream is a lighter option. For an extra touch, drizzle a little caramel sauce over the top. A pinch of flaky sea salt on top of the ice cream is also amazing—it cuts through the sweetness and makes everything pop.
What to Serve With It: This crisp is a star on its own, but it pairs beautifully with a cup of hot coffee or a mug of spiced chai tea. If you’re feeling really indulgent, serve it alongside a slice of our cozy pumpkin banana bread for a full dessert spread. For a different kind of cozy treat, you might also enjoy our sourdough discard cinnamon sugar pop tarts.
Storage Instructions: If you have any leftovers (which is rare in my house), let the crisp cool completely to room temperature. Cover the ramekins tightly with plastic wrap or aluminum foil, or transfer the leftovers to an airtight container. Store in the refrigerator for up to 3 days.
Reheating Methods: The best way to reheat this crisp is in the oven. Preheat your oven to 350°F (175°C) and bake the crisp for 10 to 15 minutes, or until warmed through. This will help re-crisp the topping. You can also use a toaster oven or air fryer. The microwave will work in a pinch, but the topping will lose its crunch and become soft. If you must use the microwave, do it in 30-second bursts on 50% power.
Honestly, the flavors are even better the next day. The apples have more time to meld with the spices, and the syrup gets even thicker and more luscious. It’s a wonderful breakfast treat if you’re feeling rebellious.
Nutritional Information & Benefits
While this is definitely a dessert, it’s made with whole, recognizable ingredients. It’s a treat you can feel good about enjoying. Here’s a general estimate for one serving (1/2 of the recipe, without ice cream).
- Calories: ~380
- Fat: ~16g
- Carbohydrates: ~58g
- Fiber: ~6g
- Sugar: ~38g
- Protein: ~4g
Health Benefits: Apples are a fantastic source of fiber and vitamin C. The fiber helps with digestion and keeps you feeling full. Oats are also a great source of soluble fiber, which can help lower cholesterol. The cinnamon in this recipe is a powerful antioxidant and has anti-inflammatory properties. So, while this is a treat, it’s not empty calories. It’s a dessert that offers a little something back.
Dietary Considerations: This recipe can easily be made gluten-free (as noted in the variations). It is naturally vegetarian. To make it vegan, use a plant-based butter substitute (like Miyoko’s or Earth Balance) in the crumble. The texture might be slightly different, but it will still be delicious.
Potential Allergens: This recipe contains wheat (gluten) and dairy (butter). It is nut-free as written, but can easily be made with nuts if you choose.
I love that this dessert feels indulgent but is made with ingredients I feel good about. It’s a way to satisfy a sweet craving without resorting to processed, packaged foods. It’s real food, made with love, and that always tastes better.
Conclusion
This brown sugar apple crisp for two is more than just a dessert. It’s a small, quiet act of self-care. It’s the perfect way to end a long day, to celebrate a small win, or to simply enjoy a cozy night in. It’s proof that you don’t need a big occasion or a long list of ingredients to create something truly special.
I love this recipe because it’s forgiving, it’s fast, and it always delivers. It’s the kind of dessert you can make without a recipe after the first time, because the ratios are so simple to remember. It’s a recipe that becomes a habit, a little ritual you look forward to.
I encourage you to make it your own. Swap the fruit, change the spices, add some nuts. Make it for yourself, or make it for someone you love. The best part about this recipe is the moment you take that first bite—the crunch of the topping, the warmth of the apples, the cold creaminess of the ice cream. It’s pure, uncomplicated joy.
I’d love to hear how it turns out for you. Did you try a fun variation? Did you serve it with something unexpected? Drop a comment below and let me know. And if you’re looking for another cozy dessert to try, you might also love our easy apple fritter bread or our brown butter banana bread. Happy baking!
Frequently Asked Questions
Can I use quick oats instead of old-fashioned oats?
You can, but I don’t recommend it. Quick oats are more finely processed and will break down during baking, resulting in a softer, less textured topping. Old-fashioned rolled oats give the crumble its signature chewy, hearty texture. If you only have quick oats, the crisp will still be tasty, but the topping will be more like a soft granola.
Can I make this apple crisp ahead of time?
Yes, but with one important caveat. You can assemble the entire crisp (the apple filling and the crumble topping) in the ramekins, cover them, and store them in the refrigerator for up to 24 hours before baking. When you’re ready to bake, you may need to add 5 to 10 minutes to the baking time since you’ll be starting from a cold dish. I do not recommend baking it fully and then reheating it, as the topping will lose some of its crunch.
My topping came out soggy. What did I do wrong?
This usually happens for one of two reasons. First, your butter might have been too warm when you mixed the topping. Make sure it’s straight from the fridge and cut into small cubes. Second, you might have overmixed the topping, which can cause the butter to melt into the flour. Work quickly and stop when the mixture looks like coarse crumbs. Also, make sure your oven is fully preheated. A hot oven creates steam quickly, which helps the topping crisp up.
Can I use a different sweetener instead of brown sugar?
Brown sugar is key to the flavor and texture of this recipe. Its molasses content adds a deep, caramel-like flavor that white sugar just can’t replicate. You could substitute with coconut sugar for a less refined option, but the flavor will be different and slightly less sweet. If you use a liquid sweetener like maple syrup or honey, the topping will be much wetter and will not crisp up properly. I strongly recommend sticking with brown sugar for the best results.
How do I know when the apple crisp is done?
There are two visual cues. First, the topping should be a deep, golden brown color. Second, you should see the apple filling bubbling up around the edges of the ramekin. The bubbles should be thick and syrupy, not watery. If the topping is brown but the filling isn’t bubbling, give it a few more minutes. If the topping is browning too quickly, tent it loosely with foil for the remainder of the baking time.
Pin This Recipe!
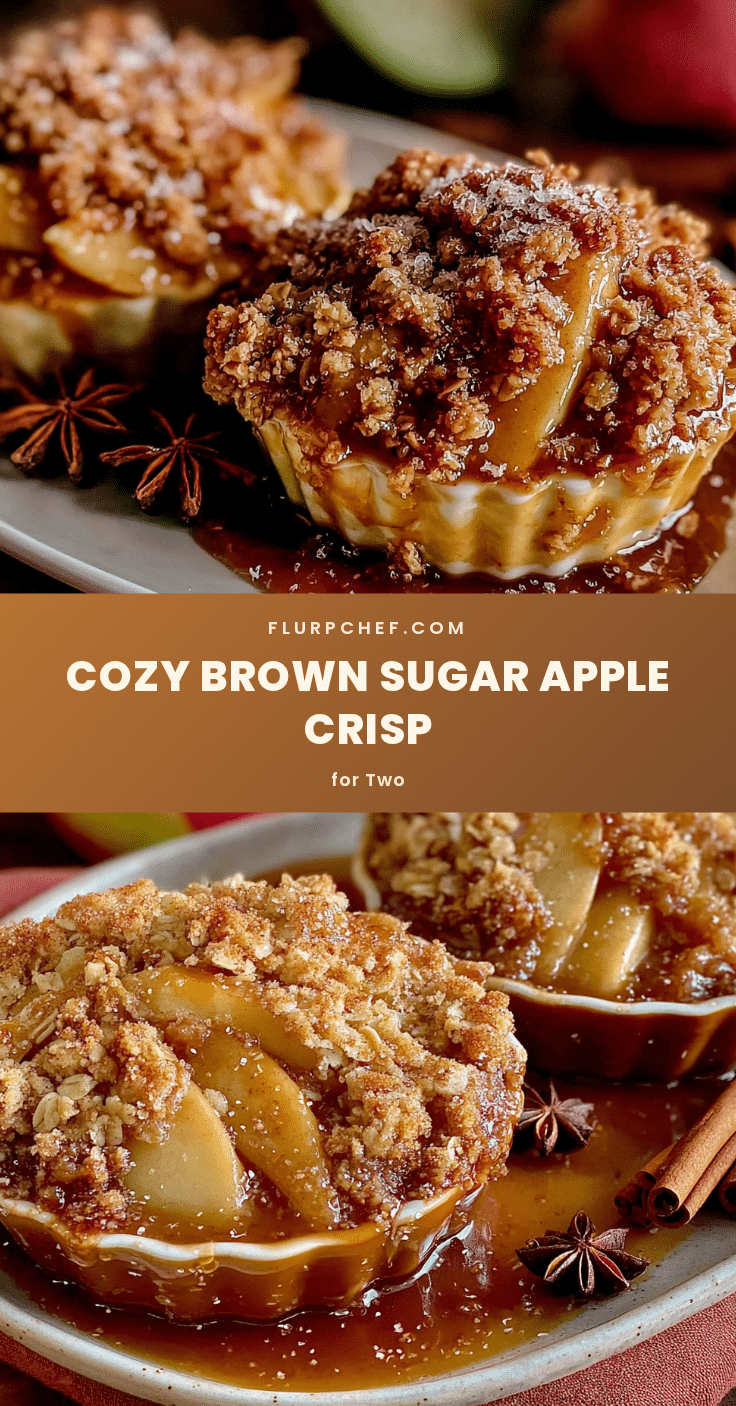
Easy Brown Sugar Apple Crisp for Two – Best Cozy Dessert

This perfectly portioned brown sugar apple crisp for two is an incredibly easy, cozy dessert made with simple pantry ingredients. It features tender, spiced apples under a buttery, crunchy oat crumble, ready in just 10 minutes of prep.
- Prep Time: 10 minutes
- Cook Time: 25 minutes
- Total Time: 35 minutes
- Yield: 2 servings 1x
- Category: Dessert
- Cuisine: American
Ingredients
- 2 medium apples (mix of sweet and tart, like Honeycrisp and Granny Smith)
- 2 tablespoons brown sugar, packed
- 1 tablespoon all-purpose flour
- 1/2 teaspoon ground cinnamon
- 1/4 teaspoon ground nutmeg
- 1 teaspoon lemon juice
- Pinch of salt
- 1/3 cup all-purpose flour
- 1/3 cup old-fashioned rolled oats
- 1/3 cup brown sugar, packed
- 1/4 cup unsalted butter, cold and cubed
- 1/2 teaspoon ground cinnamon
- Pinch of salt
Instructions
- Preheat oven to 375°F (190°C).
- Peel, core, and chop apples into 1/2-inch chunks.
- In a medium bowl, combine chopped apples, 2 tablespoons brown sugar, 1 tablespoon flour, 1/2 teaspoon cinnamon, 1/4 teaspoon nutmeg, 1 teaspoon lemon juice, and a pinch of salt. Stir until apples are evenly coated. Set aside.
- In a separate small bowl, whisk together 1/3 cup flour, 1/3 cup rolled oats, 1/3 cup brown sugar, 1/2 teaspoon cinnamon, and a pinch of salt.
- Add cold, cubed butter to the dry ingredients. Using a pastry cutter, two forks, or your fingertips, cut the butter into the dry mixture until it resembles coarse crumbs with some pea-sized butter pieces. Do not overmix.
- Divide the apple mixture evenly between two 8-ounce ramekins or a small baking dish. Do not pack down.
- Sprinkle the brown sugar crumble topping evenly over the apples, using all of it.
- Place ramekins or dish on a baking sheet. Bake for 25 to 30 minutes, until topping is deep golden brown and apple filling is bubbling around the edges. If topping browns too quickly, tent loosely with foil after 20 minutes.
- Let cool on a wire rack for at least 10 to 15 minutes before serving. Serve warm with vanilla ice cream or whipped cream.
Notes
Use cold butter for a crumbly topping. Let the crisp rest for 10-15 minutes after baking to allow the filling to thicken. For a gluten-free version, use a 1:1 gluten-free baking flour blend and certified gluten-free oats. For a vegan version, use plant-based butter.
Nutrition
- Serving Size: 1/2 of recipe (witho
- Calories: 380
- Sugar: 38
- Sodium: 150
- Fat: 16
- Saturated Fat: 10
- Carbohydrates: 58
- Fiber: 6
- Protein: 4
Keywords: apple crisp for two, brown sugar apple crisp, easy apple crisp, small batch apple crisp, cozy dessert, apple dessert for two


