“You know, this is the best chili I’ve ever had,” my brother-in-law said, pushing his empty bowl forward for a third helping. “But where are the beans?”
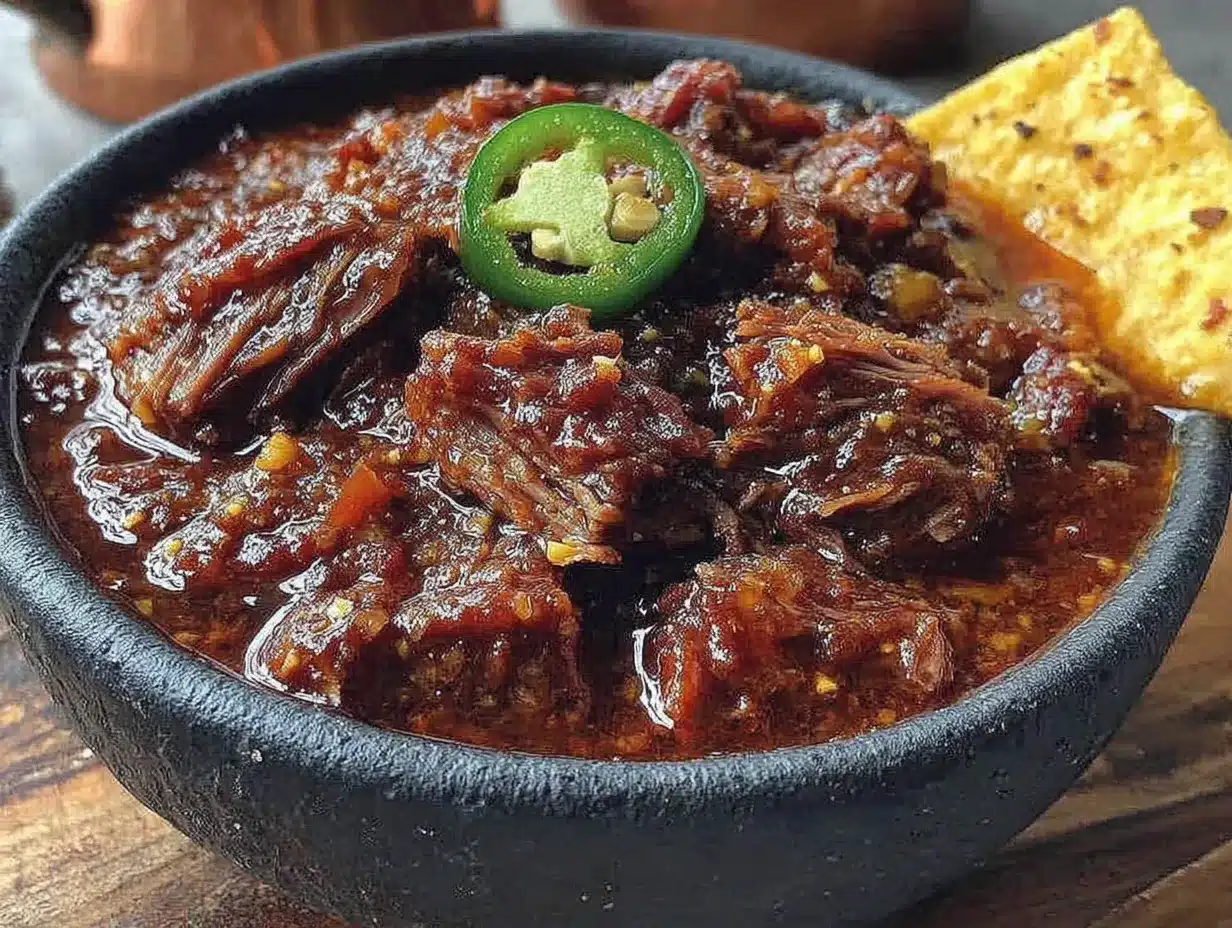
I just smiled. That question happens every single time I make this Smoked Brisket Texas Chili No Beans recipe. And every single time, I get to watch someone discover what real Texas chili is supposed to taste like. No beans, no tomatoes in chunks, no weird fillers. Just tender, smoky chunks of brisket swimming in a rich, dark, almost gravy-like sauce that’s been simmering with dried chiles and spices until it’s basically meat candy.
The thing is, I didn’t grow up making chili this way. My mom made the kind with ground beef and kidney beans and a packet of seasoning mix. It was fine. It was comfort food. But the first time I had real Texas chili at a tiny roadside joint outside of Austin, I honestly felt a little cheated. Like, all those years I thought I knew chili and I had no idea what it could actually be.
That bowl changed something in me. The meat wasn’t ground—it was cut into actual chunks that fell apart when you looked at them. The broth was dark and glossy and had this deep, smoky warmth that stuck to your tongue. There were no beans hiding in there, stretching things out. It was just meat and chiles and patience, and it was the most satisfying thing I’d ever eaten.
So I went home and spent the next few weekends trying to recreate it. I burned chiles. I made chili that was too watery, too thick, too spicy, not spicy enough. I used the wrong cut of meat and ended up with something chewy and sad. But eventually, after a lot of trial and error (and one particularly memorable batch that I’m pretty sure could’ve stripped paint), I landed on this version.
And honestly? It’s the one I keep coming back to. It’s the one I make for game days and cold winter nights and anytime I want to remind myself that simple food, done right, is better than anything fancy.
Why You’ll Love This Recipe
This isn’t just another chili recipe. This is the kind of chili that makes people close their eyes after the first bite. It’s the kind that gets requested for every gathering, the kind that people text you about days later saying “hey, can you send me that recipe?”
- Deep, Smoky Flavor : Using smoked brisket gives this chili a flavor you just can’t get from ground beef or even chuck roast. The smoke from the meat infuses the entire pot, creating layers of complexity that develop even more as it sits.
- No Beans, No Apologies : This is authentic Texas-style chili. The meat is the star, and there’s nothing diluting that rich, beefy goodness. It’s chili purists’ dream come true.
- Perfect for Meal Prep : Like most great chilis, this one actually gets better after a day or two in the fridge. Make it on a Sunday and enjoy it all week long.
- Crowd-Pleaser : I’ve served this at Super Bowl parties, backyard barbecues, and casual weeknight dinners. It disappears every single time, no matter who’s eating it.
- Comfort Food at Its Finest : There’s something deeply satisfying about a bowl of tender, smoky brisket in a rich, spicy broth. It’s the kind of meal that makes you forget about everything else for a while.
What makes this recipe different from the dozens of other chili recipes out there? It’s the combination of smoked meat and a carefully balanced chile paste. Most recipes rely on chili powder from a jar, which can taste flat and one-dimensional. Here, we’re using whole dried chiles that we toast and rehydrate ourselves. It takes an extra ten minutes, but the difference is night and day. Plus, using leftover smoked brisket (or smoking a fresh one just for this purpose) adds a layer of flavor that no amount of liquid smoke can replicate.
What Ingredients You Will Need
This recipe uses simple, straightforward ingredients to build something truly special. Most of these are pantry staples or easy to find at any grocery store, but a few might require a quick trip to a Mexican market or the international aisle.
- Smoked Brisket : The star of the show. You’ll need about 2 to 3 pounds of already-smoked brisket. This can be leftover from a previous smoke, or you can pick some up from your favorite BBQ joint. If you don’t have access to smoked brisket, you can smoke a brisket flat specifically for this recipe, or use a combination of smoked chuck roast and smoked short ribs. The key is that the meat is already cooked and has that beautiful smoke ring and bark.
- Dried Chiles : This is where the real flavor comes from. You’ll need a mix of chiles for depth and heat. I use 4 to 5 dried guajillo chiles (for fruity, mild heat), 2 to 3 dried ancho chiles (for rich, raisiny sweetness), and 1 to 2 dried chiles de árbol (for heat, adjust based on your tolerance).
- Beef Broth : Use a good quality low-sodium beef broth. The broth forms the base of the chili, so you want something with real beef flavor. I prefer Pacific Foods or Swanson for store-bought options.
- Tomato Paste : A small can of tomato paste adds depth and umami without making the chili taste like tomato soup. It also helps thicken the sauce.
- Onion and Garlic : One large yellow onion and 4 to 5 cloves of garlic, finely diced. These build the aromatic foundation of the chili.
- Vegetable Oil : For sautéing the aromatics. Use a neutral oil like canola or avocado oil.
- Spices : You’ll need ground cumin, smoked paprika, dried oregano (Mexican oregano if you can find it), and a touch of cayenne pepper for extra heat. Salt and black pepper, of course.
- Masa Harina : This is the secret to thickening Texas chili without using flour or cornstarch. It adds a subtle corn flavor and a silky texture. You can find it in the baking aisle or the international section.
- Optional Toppings : Shredded cheddar cheese, diced white onion, sliced jalapeños, sour cream, fresh cilantro, and lime wedges. These are non-negotiable in my house, but feel free to customize.
Ingredient Selection Tips : When choosing your dried chiles, look for ones that are pliable and smell fruity, not dusty. If they’re brittle and cracked, they’re old and won’t have as much flavor. For the brisket, if you’re smoking it yourself, aim for an internal temperature of around 200°F to 205°F for that perfect pull-apart tenderness. If you’re buying it from a BBQ joint, ask for the fatty end if you can—it adds so much richness to the chili.
Equipment Needed
You don’t need a ton of fancy equipment to make this chili, but a few key tools will make the process much smoother.
- Large Dutch Oven or Heavy-Bottomed Pot : A 6 to 8-quart Dutch oven is ideal. It holds heat evenly and is perfect for simmering chili for hours. I use my Lodge enameled cast iron dutch oven and it’s never let me down.
- Cutting Board and Sharp Knife : You’ll be dicing onions and garlic, and cutting the brisket into chunks. A good chef’s knife makes this much easier.
- Skillet or Comal : For toasting the dried chiles. A dry cast iron skillet works perfectly.
- Blender or Food Processor : For pureeing the rehydrated chiles into a smooth paste. A high-speed blender like a Vitamix works best, but any blender will do.
- Wooden Spoon or Spatula : For stirring and scraping up any browned bits from the bottom of the pot.
- Measuring Cups and Spoons : Accuracy matters, especially with the spices and masa harina.
- Fine-Mesh Strainer : Optional, but helpful for straining the chile puree if you want an extra-smooth sauce.
If you don’t have a Dutch oven, a large heavy-bottomed stockpot will work fine. Just keep an eye on the heat to make sure nothing scorches on the bottom. And if you don’t have a blender, you can finely mince the rehydrated chiles with a knife, though the texture won’t be quite as smooth.
Preparation Method
Alright, let’s get cooking. This recipe takes a little time, but most of it is hands-off simmering. The actual active work is maybe 30 to 40 minutes.
- Prepare the Dried Chiles : Start by wiping the dried chiles clean with a damp paper towel. Cut off the stems and shake out the seeds. You can leave some seeds in if you want more heat, but I usually remove most of them. In a dry skillet over medium heat, toast the chiles for about 30 to 60 seconds per side, until they become fragrant and slightly puffy. Be careful not to burn them, or they’ll turn bitter. Transfer the toasted chiles to a bowl and cover with hot water. Let them soak for 20 to 30 minutes until they’re soft and pliable.
- Sauté the Aromatics : While the chiles are soaking, heat 2 tablespoons of vegetable oil in your Dutch oven over medium heat. Add the diced onion and cook for 5 to 7 minutes, until it’s soft and translucent. Add the minced garlic and cook for another minute until fragrant. The smell at this point is already incredible.
- Bloom the Spices : Add the cumin, smoked paprika, dried oregano, and cayenne pepper to the pot. Stir constantly for about 30 seconds until the spices are fragrant and toasted. This step wakes up the flavors and makes them much more potent.
- Make the Chile Paste : Transfer the soaked chiles to your blender, along with about 1 cup of the soaking water. Blend on high until you have a smooth, thick paste. If it’s too thick, add a little more soaking water, a tablespoon at a time. Strain the paste through a fine-mesh strainer into the pot with the onions and spices, pressing on the solids to extract as much liquid as possible. Discard the solids.
- Build the Sauce : Add the tomato paste to the pot and stir it into the chile mixture. Cook for 2 to 3 minutes, stirring constantly, until the tomato paste darkens slightly. Pour in 4 cups of beef broth and stir well to combine. Bring the mixture to a simmer, then reduce the heat to low.
- Prepare the Brisket : While the sauce is simmering, cut your smoked brisket into 1/2-inch to 3/4-inch cubes. Don’t make them too small—you want nice, meaty chunks that hold their shape. If there’s a fat cap on the brisket, you can leave some of it attached for flavor, but trim off any large, unrendered pieces.
- Add the Meat : Add the cubed brisket to the pot. Stir everything together so the meat is fully coated in the sauce. Bring the chili back to a gentle simmer, then reduce the heat to low, cover the pot, and let it cook for 1.5 to 2 hours. Stir occasionally to prevent sticking.
- Thicken the Chili : After the chili has simmered for about 1.5 hours, it’s time to thicken it. In a small bowl, whisk together 3 tablespoons of masa harina with 1/4 cup of warm water until it forms a smooth slurry. Stir the slurry into the chili. It will thicken almost immediately. Let the chili simmer, uncovered, for another 15 to 20 minutes, stirring occasionally, until it reaches your desired consistency. It should be thick enough to coat the back of a spoon, but still slightly soupy.
- Season and Adjust : Taste the chili and adjust the seasoning. You’ll likely need a good amount of salt—start with 1 teaspoon and go from there. Add black pepper to taste. If you want more heat, add a pinch of cayenne or some chopped fresh jalapeño. If it’s too spicy, a splash of beef broth or a pinch of sugar can help balance it out.
- Rest and Serve : Turn off the heat and let the chili rest for at least 15 minutes before serving. This allows the flavors to meld and the texture to settle. Serve hot with your favorite toppings.
Sensory Cues : At each stage, pay attention to what you see and smell. When the chiles are toasting, you should smell a fruity, almost smoky aroma. When the spices bloom, the kitchen should smell warm and earthy. The chili is ready when the meat is incredibly tender and the sauce has darkened to a deep, rich mahogany color.
Cooking Tips & Techniques
I’ve made this chili more times than I can count, and I’ve learned a few things along the way. Here are my best tips for getting it right every time.
Don’t Skip Toasting the Chiles : I know it’s an extra step, but toasting the dried chiles is what unlocks their full flavor potential. It brings out their natural oils and adds a subtle smokiness that you just can’t get from rehydrating them raw. Just keep a close eye on them—they go from fragrant to burnt in about 15 seconds.
Use the Right Meat : This is probably the most important tip. Smoked brisket is ideal because it’s already tender and packed with smoke flavor. But if you can’t get brisket, smoked chuck roast is a great alternative. Whatever you use, make sure it’s already cooked and tender. Adding raw meat to this chili will change the cooking time and the flavor profile significantly.
Let It Simmer Low and Slow : This isn’t a recipe you can rush. The low, gentle simmer allows the flavors to meld and the meat to absorb all that chile goodness. If you boil it, the meat can become tough and the sauce can become bitter. Keep the heat low and be patient.
Adjust the Heat to Your Taste : The beauty of using whole dried chiles is that you have complete control over the heat level. For a milder chili, use only guajillo and ancho chiles and skip the chiles de árbol entirely. For a spicier version, add another chile de árbol or two, or throw in a dried chipotle chile for extra smokiness and heat.
Make It Ahead : This chili is one of those rare dishes that actually tastes better the next day. The flavors have time to meld and deepen, and the texture becomes even more luxurious. I often make this a day ahead of time and reheat it gently on the stove before serving.
My Biggest Failure : The first time I made this, I used way too many chiles de árbol because I thought I could handle the heat. I could not. The chili was so spicy that even I could barely eat it, and I love spicy food. I ended up having to make a second batch of sauce without the hot chiles and mix them together to salvage it. Lesson learned—always err on the side of caution with heat, because you can always add more, but you can’t take it out.
Variations & Adaptations
This recipe is pretty perfect as is, but that doesn’t mean you can’t play around with it. Here are a few variations I’ve tried and loved.
Smoked Turkey Chili : For a lighter version, substitute the brisket with smoked turkey legs or thighs. The flavor is still smoky and delicious, but the chili is much leaner. You might need to add a little extra oil to compensate for the lack of brisket fat.
Beer-Infused Chili : Add a bottle of dark beer, like a stout or a porter, along with the beef broth. The beer adds a wonderful depth and a slight bitterness that pairs beautifully with the smoky meat. I’ve used Guinness and Shiner Bock with great results.
Smoked Pork Chili : If you have leftover smoked pork shoulder or pulled pork, this works surprisingly well. The chili will be a little different in texture—more shredded than chunky—but the flavor is fantastic. It’s a great way to use up leftovers from a big barbecue.
Vegetarian Version : Okay, this isn’t really Texas chili anymore, but if you want a smoky, meatless version, try using smoked mushrooms (like portobello or shiitake) and smoked tofu. The texture won’t be the same, but the smoky, spicy broth is still incredibly satisfying.
Extra Smoky Chili : For those who can’t get enough smoke flavor, add a dried chipotle chile to the mix. Chipotles are smoked, dried jalapeños, and they add an intense, almost bacon-like smokiness. Just be careful—they can also add significant heat.
Serving & Storage Suggestions
This chili is incredibly versatile when it comes to serving. Here’s how I like to do it.
Serving Temperature : Serve the chili piping hot. I like to ladle it into deep bowls and let everyone add their own toppings. The classic Texas chili toppings are shredded sharp cheddar cheese, diced white onion, and fresh or pickled jalapeños. A dollop of sour cream or crema helps cool things down, and a squeeze of fresh lime juice brightens everything up.
What to Serve With It : You can’t go wrong with some good cornbread or saltine crackers on the side. I also love serving this chili over a bowl of crispy sourdough discard cinnamon sugar pop tarts for a sweet and savory combo (just kidding—stick with the cornbread). For a heartier meal, try it over a bed of creamy crockpot garlic butter chicken and rice—wait, that’s a different meal. Just serve it with warm tortillas or over Fritos for a classic Frito pie.
Storage Instructions : Store leftover chili in an airtight container in the refrigerator for up to 5 days. The flavors will continue to meld and improve, so don’t be surprised if it tastes even better on day two or three. This chili also freezes beautifully. Let it cool completely, then transfer it to freezer-safe bags or containers. It will keep for up to 3 months. Thaw overnight in the refrigerator before reheating.
Reheating Tips : Reheat the chili gently on the stovetop over low heat, adding a splash of beef broth or water if it’s too thick. You can also reheat individual portions in the microwave, but the stovetop method yields better texture. Avoid boiling the chili when reheating, as it can make the meat tough.
How Flavors Develop : Like many braised dishes, this chili’s flavor profile deepens and becomes more complex over time. The initial heat mellows, the smokiness becomes more integrated, and the individual spice notes blend into a harmonious whole. It’s one of those rare dishes where the leftovers are actually the best part.
Nutritional Information & Benefits
While this chili is definitely a treat, it does have some nutritional benefits worth noting. The exact values will vary based on the specific ingredients and portion sizes, but here’s a general estimate per serving (about 1.5 cups, without toppings).
- Calories : Approximately 450-550
- Protein : 35-40 grams
- Fat : 28-35 grams (varies based on brisket fat content)
- Carbohydrates : 15-20 grams
- Fiber : 4-6 grams
- Sugar : 5-7 grams
- Sodium : 800-1000 mg (can be reduced with low-sodium broth and careful salting)
Health Benefits : The beef brisket is an excellent source of high-quality protein, iron, and B vitamins, particularly B12, which is essential for energy production and nervous system health. The dried chiles are packed with vitamins A and C, as well as capsaicin, which has anti-inflammatory properties and can boost metabolism. The garlic and onions provide prebiotic fibers that support gut health. And the cumin and oregano are rich in antioxidants.
Dietary Considerations : This chili is naturally gluten-free (as long as you use certified gluten-free broth) and low-carb. It’s also keto-friendly if you skip the masa harina or use a very small amount. It contains no dairy in the base recipe, though the toppings often do. If you’re watching your sodium, use low-sodium broth and go easy on the salt.
Potential Allergens : This recipe is free of the top eight allergens except for corn (from the masa harina). If you have a corn allergy, you can thicken the chili with a slurry of arrowroot powder or tapioca starch instead.
Conclusion
This Smoked Brisket Texas Chili No Beans is more than just a recipe—it’s an experience. It’s the kind of meal that brings people together, that sparks conversations, that makes you slow down and actually enjoy what you’re eating. It’s rich and smoky and deeply satisfying in a way that only something cooked low and slow can be.
I love this recipe because it reminds me that the best food doesn’t need to be complicated. It just needs to be made with care and good ingredients. Whether you’re making it for a game day crowd, a cold winter night, or just because you deserve something incredible, this chili delivers every single time.
I’d love to hear how it turns out for you. Did you add extra heat? Serve it with something unexpected? Leave a comment below and let me know—I read every single one. And if you’re looking for another cozy, crowd-pleasing meal, you might enjoy this cozy crockpot Mississippi pot roast sandwiches recipe. It’s got that same low-and-slow magic, just in sandwich form.
Now go make some chili. Your taste buds will thank you.
Frequently Asked Questions
Can I use ground beef instead of brisket?
You can, but it won’t be the same. Ground beef will give you a much different texture and won’t have that smoky flavor. If you’re in a pinch, use ground chuck and add a teaspoon of liquid smoke to the sauce. It’s not ideal, but it’ll work in a pinch.
How spicy is this chili?
That depends entirely on the chiles you use. With the recipe as written (using 1-2 chiles de árbol), it has a moderate, warm heat that builds slowly. It’s not blow-your-head-off spicy, but it has a definite kick. For a milder version, skip the chiles de árbol entirely. For a spicier version, add more.
Can I make this in a slow cooker?
Absolutely. After you’ve toasted the chiles, made the paste, and sautéed the aromatics, transfer everything to a slow cooker. Add the broth, chile paste, and brisket, and cook on low for 6 to 8 hours or on high for 3 to 4 hours. Thicken with the masa harina slurry during the last 30 minutes of cooking.
What’s the best way to reheat leftover chili?
The stovetop is your best bet. Reheat the chili in a saucepan over low heat, stirring occasionally. Add a splash of beef broth or water if it’s too thick. The microwave works in a pinch, but it can make the meat a little tough.
Can I freeze this chili?
Yes, and it freezes beautifully. Let the chili cool completely, then transfer it to freezer-safe containers or bags. It will keep for up to 3 months. Thaw overnight in the refrigerator before reheating. The texture and flavor hold up really well.
Pin This Recipe!
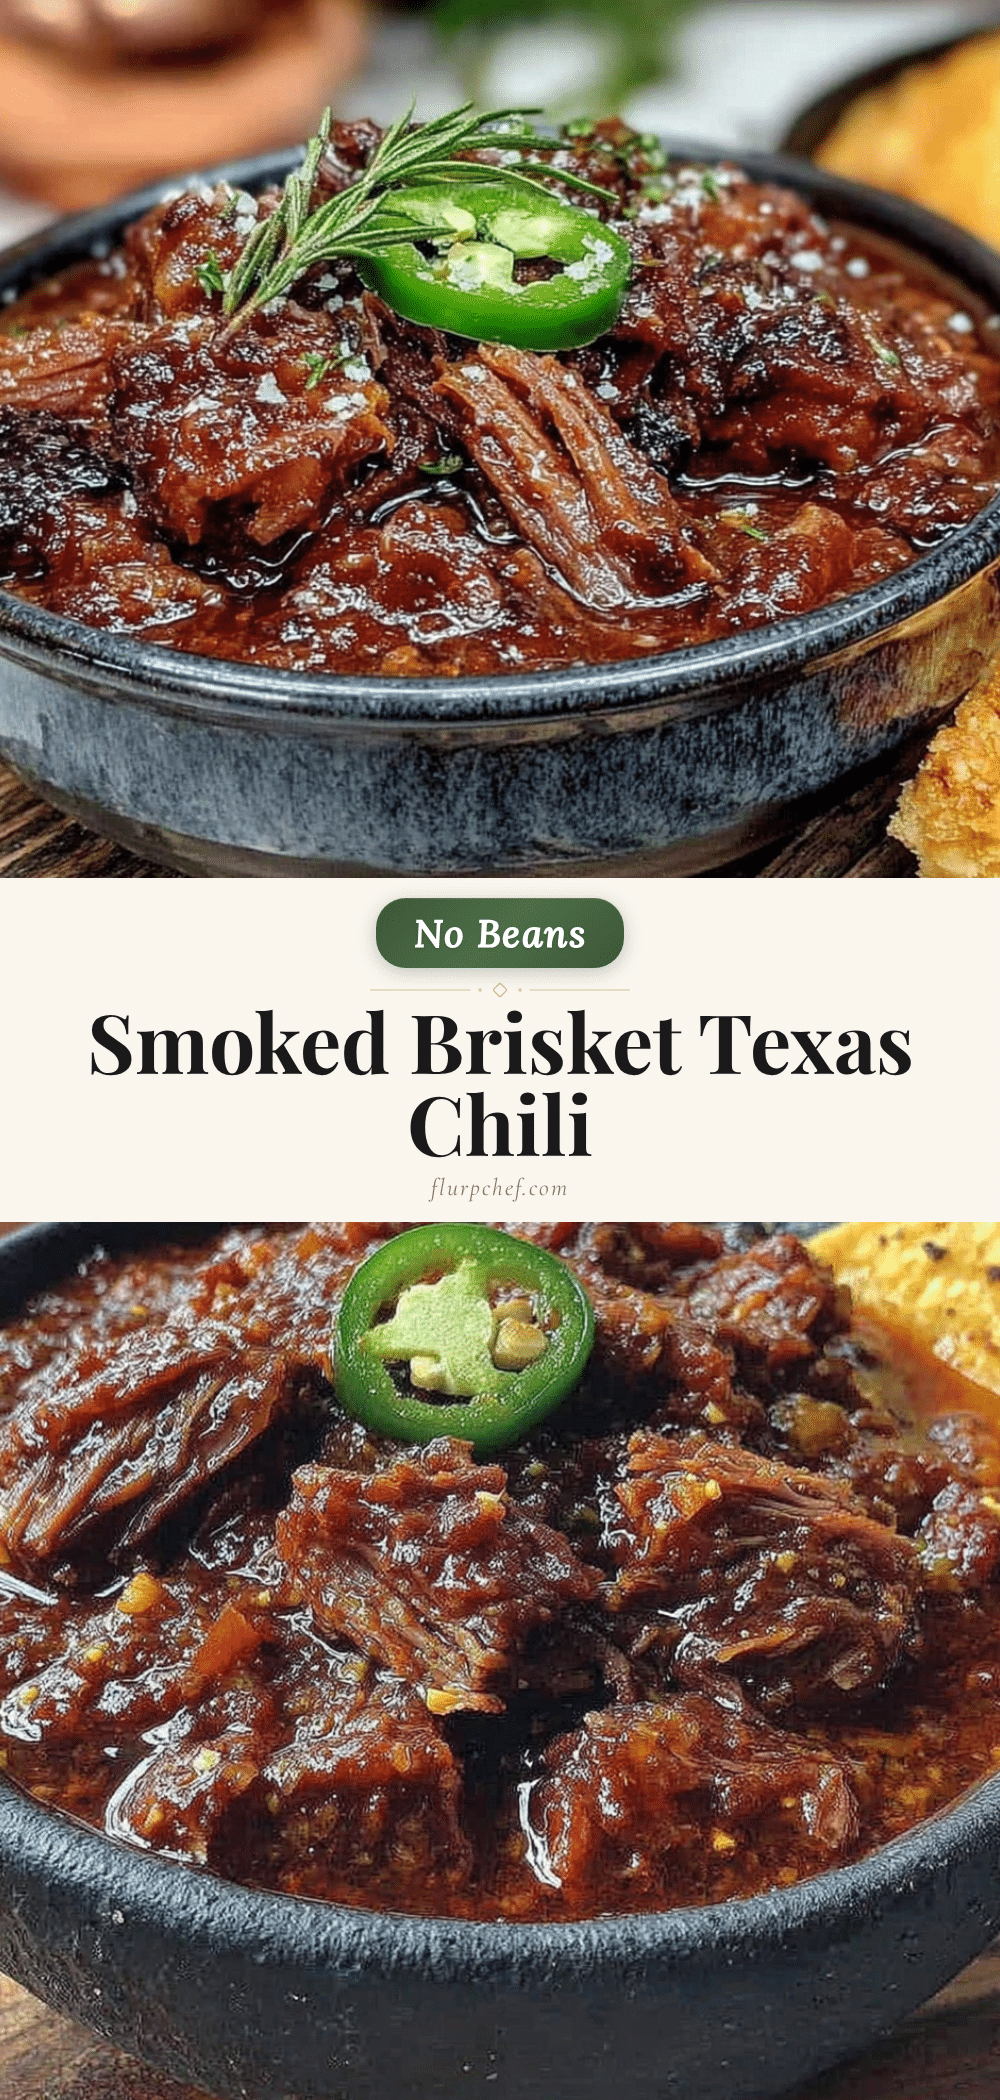
Smoked Brisket Texas Chili: The Best Easy No Bean Recipe
This Smoked Brisket Texas Chili is a rich, smoky, and deeply satisfying no-bean chili made with tender smoked brisket and a homemade dried chile paste. It’s the authentic Texas-style chili that will make you forget about beans forever.
- Prep Time: 30 minutes
- Cook Time: 2 hours 30 minutes
- Total Time: 3 hours
- Yield: 8 servings 1x
- Category: Main Course
- Cuisine: Tex-Mex
Ingredients
- 2 to 3 pounds smoked brisket, cut into 1/2-inch to 3/4-inch cubes
- 4 to 5 dried guajillo chiles
- 2 to 3 dried ancho chiles
- 1 to 2 dried chiles de árbol
- 4 cups low-sodium beef broth
- 1 small can (6 oz) tomato paste
- 1 large yellow onion, finely diced
- 4 to 5 cloves garlic, minced
- 2 tablespoons vegetable oil
- 2 teaspoons ground cumin
- 2 teaspoons smoked paprika
- 1 teaspoon dried oregano (preferably Mexican oregano)
- 1/2 teaspoon cayenne pepper (adjust to taste)
- Salt and black pepper to taste
- 3 tablespoons masa harina
- 1/4 cup warm water
- Optional toppings: shredded cheddar cheese, diced white onion, sliced jalapeños, sour cream, fresh cilantro, lime wedges
Instructions
- Prepare the Dried Chiles: Wipe the dried chiles clean with a damp paper towel. Cut off the stems and shake out most of the seeds. In a dry skillet over medium heat, toast the chiles for 30 to 60 seconds per side until fragrant and slightly puffy. Transfer to a bowl and cover with hot water. Let soak for 20 to 30 minutes until soft.
- Sauté the Aromatics: While chiles soak, heat 2 tablespoons vegetable oil in a large Dutch oven over medium heat. Add the diced onion and cook for 5 to 7 minutes until soft and translucent. Add the minced garlic and cook for 1 minute until fragrant.
- Bloom the Spices: Add the cumin, smoked paprika, dried oregano, and cayenne pepper to the pot. Stir constantly for about 30 seconds until fragrant.
- Make the Chile Paste: Transfer the soaked chiles to a blender with about 1 cup of the soaking water. Blend until smooth. Strain through a fine-mesh strainer into the pot with the onions and spices, pressing on solids. Discard solids.
- Build the Sauce: Add the tomato paste to the pot and stir into the chile mixture. Cook for 2 to 3 minutes, stirring constantly. Pour in 4 cups of beef broth and stir well. Bring to a simmer, then reduce heat to low.
- Prepare the Brisket: While sauce simmers, cut the smoked brisket into 1/2-inch to 3/4-inch cubes.
- Add the Meat: Add the cubed brisket to the pot and stir to coat. Bring to a gentle simmer, then reduce heat to low, cover, and cook for 1.5 to 2 hours, stirring occasionally.
- Thicken the Chili: In a small bowl, whisk together 3 tablespoons masa harina with 1/4 cup warm water until smooth. Stir the slurry into the chili. Simmer uncovered for 15 to 20 minutes, stirring occasionally, until desired consistency is reached.
- Season and Adjust: Taste and add salt (start with 1 teaspoon) and black pepper. Adjust heat with more cayenne or fresh jalapeño if desired. If too spicy, add a splash of broth or a pinch of sugar.
- Rest and Serve: Turn off heat and let chili rest for at least 15 minutes before serving. Serve hot with desired toppings.
Notes
For best flavor, use leftover smoked brisket or smoke a brisket flat specifically for this recipe. The chili tastes even better the next day. Adjust heat by varying the number of chiles de árbol. For a milder chili, omit them entirely. For extra smokiness, add a dried chipotle chile. The masa harina slurry thickens the chili; if you have a corn allergy, substitute with arrowroot powder or tapioca starch.
Nutrition
- Serving Size: 1.5 cups
- Calories: 500
- Sugar: 6
- Sodium: 900
- Fat: 31
- Saturated Fat: 11
- Carbohydrates: 18
- Fiber: 5
- Protein: 38
Keywords: smoked brisket chili, Texas chili, no bean chili, brisket chili recipe, smoked chili, game day chili, comfort food, gluten-free chili, low-carb chili


