For years, my holiday cookie platter had a glaring hole. You know the one. It wasn’t that the gingerbread men lacked charm or that the sugar cookies weren’t perfectly iced. It was that I was missing something portable, something that didn’t require a plate, something that felt a little more… celebratory. I had been looking for a Christmas dessert that actually stayed neat on a dessert table and didn’t leave a trail of crumbs across the living room rug. The solution, it turned out, wasn’t a new cookie recipe at all.
It was a cake pop.
Honestly, I resisted the trend for a long time. I thought they were finicky, prone to falling off their sticks, and more trouble than they were worth. But after one particularly chaotic holiday party where I watched a perfectly constructed yule log topple sideways, I decided to give them a real shot. The first batch was a disaster—lopsided, crumbly, and the chocolate coating looked like it had been through a snowstorm. But I tweaked, I tested, and I figured out the tricks. Now, these festive Christmas cake pops with white chocolate drizzle are the first thing to disappear from my holiday spread, every single year.
They are the answer to that unspoken holiday dessert problem. They are sturdy, they are beautiful, and they taste like a little piece of Christmas cheer on a stick.
Why You’ll Love This Recipe
Let’s be real for a second. The holidays are busy enough without a complicated dessert project. This recipe is designed to be your secret weapon. It looks incredibly impressive—like something from a fancy bakery—but the process is surprisingly straightforward once you know the few crucial steps.
- Foolproof and Forgiving: Unlike some finicky cake recipes, this one starts with a simple boxed cake mix (or your favorite homemade recipe). The magic happens when you mix it with frosting to create a dough that is endlessly moldable.
- Perfect for Parties and Gifting: These cake pops are the ultimate finger food. No forks, no plates, no mess. They are ideal for cookie exchanges, holiday parties, or tying up in little cellophane bags for neighbors and teachers.
- Kid-Friendly Fun: This is one of those rare recipes where the kids can actually help without making a huge disaster. Rolling the cake balls is a perfect task for little hands, and they love dipping them in the white chocolate.
- Make-Ahead Magic: You can prep the cake balls a day or two in advance and keep them in the fridge. Then, all you have to do on the day of your party is dip and drizzle. It takes so much stress out of holiday hosting.
- Endlessly Customizable: The base is a blank canvas. You can change the cake flavor, the frosting, the color of the drizzle, and the sprinkles to match any holiday theme or personal preference. It’s your recipe now.
I have made these for four different Christmas parties now, and I have yet to bring a single one home. People hover around the tray. They ask for the recipe. It is that kind of dessert—the kind that makes you look like a holiday hero without spending all day in the kitchen.
What Ingredients You Will Need
This recipe uses simple, wholesome ingredients to deliver that classic cake pop texture—dense, moist, and perfectly sweet without being overwhelming. The ingredient list is short, and most of it is probably already in your pantry or fridge.
- 1 box (15.25 oz) vanilla or white cake mix: This is your shortcut to success. I prefer Betty Crocker or Duncan Hines for a consistent, fluffy crumb. You can absolutely use a homemade vanilla cake recipe, but the box mix gives you a reliable texture that holds up well to being crumbled and reformed. Plus, it saves you time when you are already busy with holiday prep.
- Ingredients listed on the cake mix box: Typically eggs, vegetable oil, and water. Follow the instructions on the back of the box for the best results. I always use room-temperature eggs for a smoother batter.
- 1/2 cup (120g) vanilla or cream cheese frosting: This is the glue that holds everything together. I use store-bought for convenience—Pillsbury Cream Cheese Frosting is my go-to because it has a nice tang that balances the sweetness of the cake. If you want to go homemade, a simple buttercream or cream cheese frosting works beautifully.
- 24 oz (680g) white almond bark or white chocolate melting wafers: This is crucial. Do not use regular white chocolate chips—they contain stabilizers that make them hard to melt smoothly and they seize up easily. Almond bark or candy melts are formulated to melt into a silky, pourable consistency that coats the cake pops perfectly. I like the Ghirardelli White Melting Wafers for a premium taste.
- 1 tablespoon coconut oil or vegetable shortening: This is optional but highly recommended. A tiny bit of oil or shortening thins the melted white chocolate just enough to make dipping effortless and gives the coating a beautiful, glossy sheen.
- Green and red gel food coloring: For making the drizzle festive. Gel coloring is much more concentrated than liquid drops, so you only need a tiny dab to get vibrant colors without thinning the chocolate. I use Americolor brand.
- Festive sprinkles: Red and green nonpareils, holiday jimmies, edible glitter, or sanding sugar. The options are endless. I love a mix of red, green, and white sprinkles for a classic Christmas look.
- Lollipop sticks: You can find these at any craft store or online. They are about 6 inches long and give you a good handle for dipping and holding the finished pops.
- A styrofoam block or a cardboard box: You need something to stick the finished cake pops into while the coating sets. A styrofoam block from a craft store works perfectly, or you can poke holes in a cardboard box and use that.
Equipment Needed
You don’t need a lot of fancy equipment for this recipe, but a few specific tools make the process much smoother.
- Large mixing bowls: One for the cake and one for the frosting mixture.
- 9×13 inch baking pan: For baking the cake. A standard metal pan works best for even baking.
- Fork or pastry cutter: For crumbling the baked cake into fine crumbs. A fork works great, but a pastry cutter makes it even faster.
- Cookie scoop (about 1.5 tablespoons): This is my number one tip for uniform cake balls. A small cookie scoop ensures every pop is the same size, which means they will all dip evenly and look professional. I use a #60 scoop.
- Baking sheet lined with parchment paper: For holding the rolled cake balls while they chill.
- Microwave-safe bowl or double boiler: For melting the white chocolate. A microwave is faster, but a double boiler gives you more control and prevents scorching.
- Tall, narrow glass or mug: For dipping the cake pops. A deep, narrow container lets you submerge the entire pop in one smooth motion.
- Small piping bags or zip-top bags: For drizzling the colored chocolate.
- Paring knife or toothpick: For making a small hole in the cake ball before inserting the stick. This helps the stick go in straight and reduces cracking.
I have tried using a cheap styrofoam block from the dollar store, and it works just fine. You don’t need to spend a lot on specialized cake pop stands.
Preparation Method
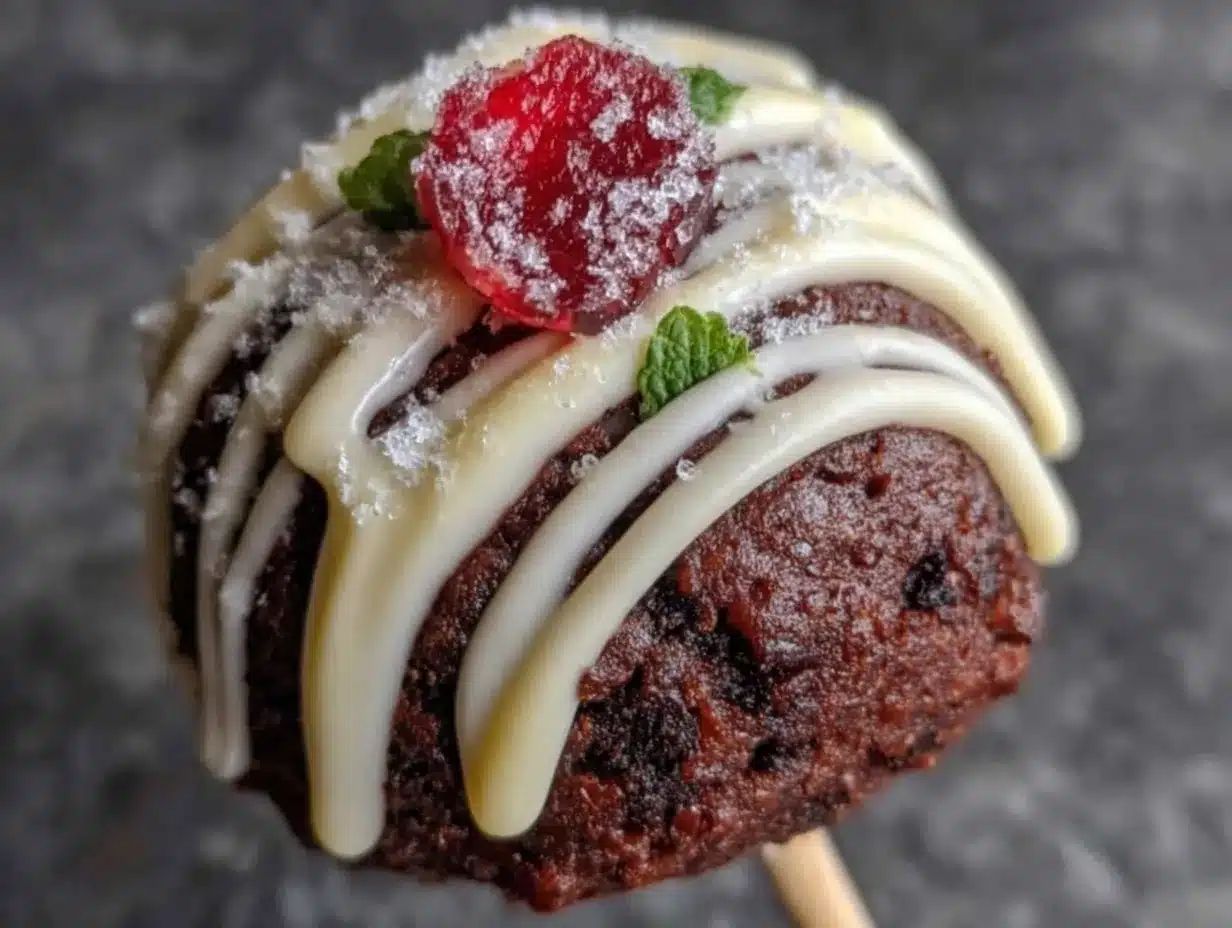
Let’s walk through this step by step. Trust me, if you follow these instructions, you will have perfect cake pops on your first try.
- Bake the cake. Preheat your oven to 350°F (175°C). Grease your 9×13 inch pan. Prepare the cake mix according to the package directions. Bake until a toothpick inserted in the center comes out clean, about 25-30 minutes. Let the cake cool completely in the pan on a wire rack. This is critical. A warm cake will make the frosting melt and create a sticky, unworkable mess.
- Crumble the cake. Once the cake is completely cool, break it into large chunks and place them in a large mixing bowl. Use your hands or a fork to crumble the cake into fine, even crumbs. You want it to look like wet sand. There should be no large pieces of cake left.
- Add the frosting. Add the 1/2 cup of frosting to the cake crumbs. Use a spatula or your hands to mix it together until the mixture holds together when you squeeze it. It should feel like a soft, pliable dough. If it is too dry, add a teaspoon more of frosting. If it is too wet and sticky, add a few more cake crumbs. The texture should be similar to play-dough.
- Roll the cake balls. Using your cookie scoop, portion out the cake mixture. Roll each portion between your palms into a smooth, round ball. Place the balls on the parchment-lined baking sheet. You should get about 30-35 balls.
- Chill the cake balls. Place the baking sheet in the refrigerator for at least 1 hour, or up to 24 hours. Chilling is non-negotiable. It firms up the balls so they don’t fall apart when you dip them in the warm chocolate. For best results, chill them for 2 hours.
- Melt the white chocolate. Place the white almond bark or melting wafers in a microwave-safe bowl. Microwave in 30-second intervals, stirring well after each interval, until the chocolate is completely smooth and melted. Be careful not to overheat it, or it will seize. Stir in the coconut oil or shortening if using, which will give you a thinner, glossier coating.
- Prepare the sticks. Remove the chilled cake balls from the fridge. Dip the tip of a lollipop stick into the melted white chocolate, then insert it about halfway into a cake ball. This acts as glue and helps the stick stay in place. Repeat with all the cake balls.
- Dip the cake pops. Hold a cake pop by the stick and submerge it completely into the melted white chocolate. Gently tap the stick on the edge of the bowl to allow excess chocolate to drip off. You can also gently spin the pop to help the chocolate self-level. Do not swirl it around, as this can cause the cake ball to break off.
- Add sprinkles and set. Before the chocolate sets, immediately sprinkle your festive sprinkles over the top. Then, stick the lollipop stick into your styrofoam block or cardboard box. Repeat with all the cake pops. Let them set completely at room temperature, about 30 minutes. Do not refrigerate them to speed this up, as condensation can form on the chocolate.
- Make the drizzle. Once the cake pops are completely set, it is time for the drizzle. Divide about 1/4 cup of the remaining melted white chocolate into two small bowls. Add a tiny dab of green gel food coloring to one bowl and red to the other. Stir well until the color is uniform. Transfer each color to a small piping bag or a zip-top bag with a tiny corner snipped off.
- Drizzle the pops. Hold a cake pop over a piece of parchment paper. Drizzle the red and green chocolate back and forth over the top in a zigzag pattern. You can also do a simple line or a few dots. Let the drizzle set at room temperature for another 15 minutes.
Cooking Tips & Techniques
I learned most of these the hard way, so you don’t have to. My first batch of cake pops looked like sad, lumpy monsters. Here is what I figured out.
The number one mistake is not chilling the cake balls long enough. I cannot stress this enough. If they are even slightly warm, they will fall apart in the warm chocolate. Give them a full two hours in the fridge, or even pop them in the freezer for 30 minutes if you are short on time. They need to be firm to the touch.
Another common issue is the chocolate being too thick. This is where the coconut oil or shortening comes in. It thins the chocolate just enough to make dipping effortless. If your chocolate is too thick, the cake pop will have a heavy, clunky coating. If it is too thin, it will drip off completely. Aim for the consistency of heavy cream.
When you are dipping, do not twist or swirl the cake pop. This is a surefire way to snap the cake ball right off the stick. Instead, submerge it straight down, lift it straight up, and let the excess drip off. A gentle tap on the side of the bowl is all you need.
If a cake ball does fall off the stick into the chocolate, don’t panic. Just fish it out with a fork, let the excess chocolate drip off, and place it back on the baking sheet. You can eat it as a “cake pop fail” later. They taste just as good.
Work in small batches. Keep the cake balls you are not currently dipping in the fridge. This prevents them from warming up and getting soft. I usually take out 5-6 at a time.
Finally, be patient with the drizzle. If your colored chocolate is too thick to drizzle smoothly, add a tiny drop of coconut oil to thin it out. And if you make a mess, that is okay. The imperfections make them look homemade and charming.
Variations & Adaptations
This base recipe is incredibly versatile. Once you master the technique, you can adapt it for any occasion or dietary need.
- Chocolate Lovers’ Version: Use a chocolate cake mix and chocolate frosting for the base. Dip the cake pops in dark or milk chocolate instead of white. Drizzle with white chocolate for a beautiful contrast. It is like a little chocolate truffle on a stick.
- Gluten-Free Adaptation: Use your favorite gluten-free vanilla cake mix. Most gluten-free mixes work well for this recipe because the crumb is already a bit denser, which actually helps the cake balls hold together. Just make sure your frosting and white chocolate are also certified gluten-free.
- Peppermint Twist: Crush up a few peppermint candies or candy canes and mix them into the cake crumb mixture before adding the frosting. Then, after dipping, sprinkle crushed peppermint on top of the white chocolate along with your sprinkles. The minty crunch is a classic Christmas flavor.
- Red Velvet Cake Pops: Use a red velvet cake mix and cream cheese frosting for the interior. The red crumb peeking through the white chocolate coating is stunning. Drizzle with dark chocolate for a black-and-white effect that is perfect for Valentine’s Day or Christmas.
- Funfetti Celebration Pops: Use a funfetti cake mix and vanilla frosting. Dip in white chocolate and top with rainbow sprinkles. These are perfect for New Year’s Eve, birthday parties, or any celebration that calls for a little extra joy.
I once made a batch with pumpkin banana bread that I had leftover from another project. I crumbled it up, mixed it with a little cream cheese frosting, and made fall-themed cake pops with orange drizzle. They were a huge hit at a Halloween party. The possibilities are truly endless.
Serving & Storage Suggestions
These cake pops are best served at room temperature. The white chocolate coating is firm but not hard, and the interior is soft and fudgy. If you have made them ahead of time, take them out of the fridge about 20 minutes before serving to let them come to room temperature.
They look absolutely stunning arranged in a tall glass jar or a festive mug. You can also stand them upright in a styrofoam block and place it on a cake stand for a more dramatic presentation. For a holiday party, I like to arrange them in a small wreath shape on a platter.
For storage, place the finished cake pops in an airtight container. If they are on sticks, you can carefully lay them in a single layer. If they are not on sticks, just store the cake balls in the container. They will keep in the refrigerator for up to a week. I actually think they taste even better on the second day, as the flavors have a chance to meld together.
You can also freeze them. Place the undipped cake balls on a baking sheet and freeze them solid. Then, transfer them to a freezer-safe bag. They will keep for up to 3 months. When you are ready to serve, thaw them in the refrigerator overnight, then dip them in the melted white chocolate as directed. This is a great way to get ahead on your holiday baking.
If you are looking for other easy holiday treats to make alongside these, these graveyard brownie trifle is a fun and spooky option for a Halloween party, or you can try these mummy crescent roll hotdogs for a savory snack that kids will love.
Nutritional Information & Benefits
Let’s be honest—cake pops are a treat. They are not health food. But knowing what is in them helps you enjoy them mindfully. The nutritional values below are estimates based on the ingredients listed and will vary depending on the specific brands you use.
| Nutrient | Per Cake Pop (approx.) |
|---|---|
| Calories | 180-220 |
| Fat | 10-12g |
| Saturated Fat | 6-8g |
| Carbohydrates | 24-28g |
| Sugar | 18-22g |
| Protein | 2-3g |
One small benefit: white chocolate does contain some calcium from the milk solids. And the festive sprinkles? They are pure joy, and sometimes that is the most important nutrient of all. If you are looking for a slightly healthier holiday breakfast to balance out all the sugar, these chocolate chip pumpkin protein muffins are a fantastic make-ahead option.
Conclusion
These festive Christmas cake pops with white chocolate drizzle are more than just a dessert. They are a little piece of holiday magic that you can hold in your hand. They are the treat that makes everyone at the party smile, the gift that shows you put thought into it, and the project that brings a little bit of calm to the chaos of the season.
I love this recipe because it is forgiving. It is patient. It lets you make mistakes and still end up with something beautiful. And when you see that tray of perfectly dipped, drizzled, and sprinkled cake pops, you will feel a quiet sense of accomplishment. You made that. You brought a little bit of joy into the world, one cake pop at a time.
So go ahead. Give it a try. And when you do, I would love to hear about it. Leave a comment below and tell me how your cake pops turned out. What sprinkles did you use? Did you try a fun variation? Share a photo on social media and tag me—I cannot wait to see your holiday creations. Happy baking, and Merry Christmas!
Frequently Asked Questions
Can I use a homemade cake recipe instead of a box mix?
Absolutely. You can use any vanilla or white cake recipe you like. Just make sure it is completely cool before you crumble it. Homemade cakes can sometimes be a bit more delicate, so you may need to adjust the amount of frosting slightly to get the right consistency. The goal is a mixture that holds together like play-dough.
Why did my cake pops crack when I dipped them?
This is the most common issue, and it almost always comes down to temperature. If your cake balls are too cold, the sudden heat from the melted chocolate can cause them to crack. If they are too warm, they will fall apart. The sweet spot is a well-chilled cake ball (1-2 hours in the fridge) and melted chocolate that is not too hot. Let the chocolate cool for a minute or two after melting before you start dipping.
Can I use chocolate chips instead of almond bark?
I do not recommend it. Regular white chocolate chips contain stabilizers that prevent them from melting smoothly. They often seize up and become grainy. Almond bark or candy melting wafers are formulated specifically for dipping and will give you a much smoother, more professional result. It is worth the small extra cost.
How far in advance can I make these cake pops?
You have a lot of flexibility here. You can make the undipped cake balls up to 3 days in advance and keep them in the fridge. You can also freeze the undipped balls for up to 3 months. Once they are dipped and decorated, they will keep in the fridge for up to a week. Just store them in an airtight container to prevent them from drying out.
My white chocolate drizzle is too thick. What do I do?
If your colored chocolate is too thick to drizzle smoothly, add a tiny drop of coconut oil or vegetable shortening. Stir it in well. If it is still too thick, add another tiny drop. You want the consistency of a thick syrup. If you accidentally make it too thin, just let it sit for a few minutes and it will thicken up naturally as it cools.
Pin This Recipe!
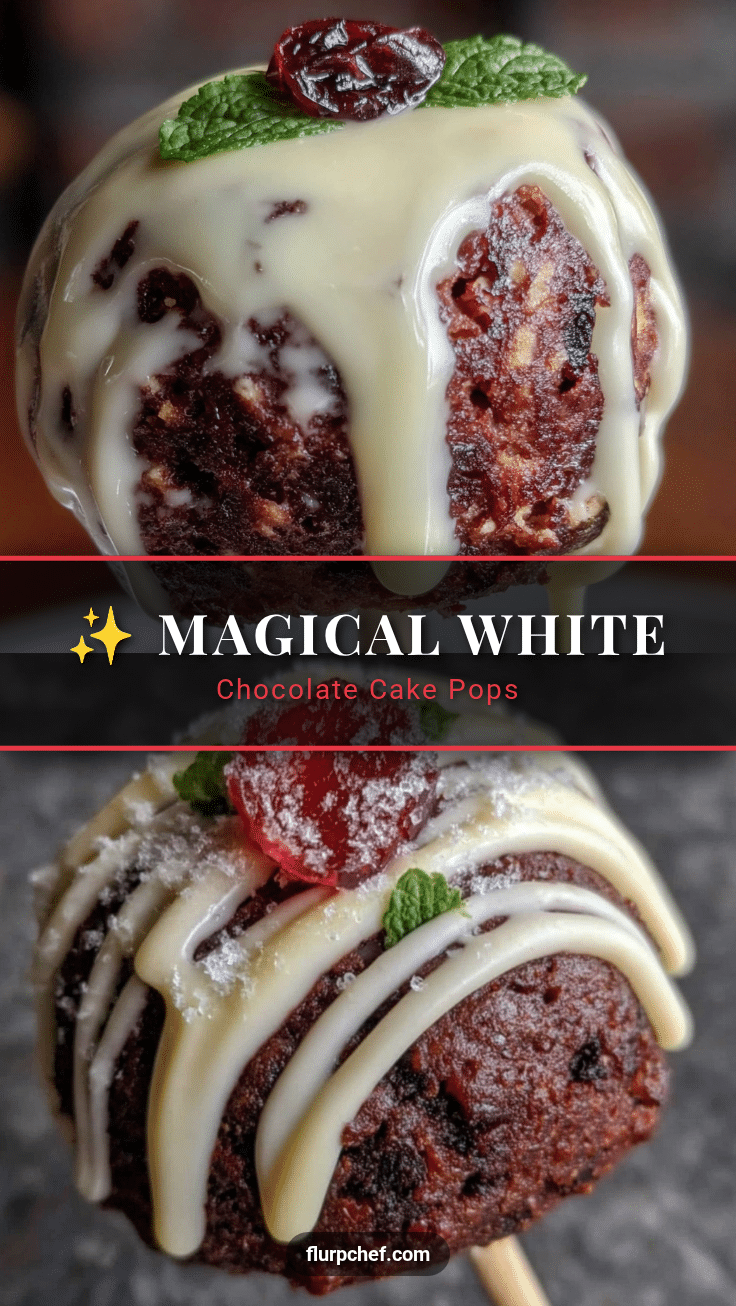
Festive Christmas Cake Pops with Easy White Chocolate Drizzle

These festive Christmas cake pops with white chocolate drizzle are the perfect holiday dessert—sturdy, beautiful, and taste like a little piece of Christmas cheer on a stick. They are easy to make, kid-friendly, and ideal for parties and gifting.
- Prep Time: 30 minutes
- Cook Time: 30 minutes
- Total Time: 2 hours 30 minutes (includes chilling time)
- Yield: 30-35 cake pops 1x
- Category: Dessert
- Cuisine: American
Ingredients
- 1 box (15.25 oz) vanilla or white cake mix
- Ingredients listed on the cake mix box (typically eggs, vegetable oil, and water)
- 1/2 cup (120g) vanilla or cream cheese frosting
- 24 oz (680g) white almond bark or white chocolate melting wafers
- 1 tablespoon coconut oil or vegetable shortening
- Green and red gel food coloring
- Festive sprinkles
- Lollipop sticks
- A styrofoam block or a cardboard box
Instructions
- Preheat your oven to 350°F (175°C). Grease a 9×13 inch pan. Prepare the cake mix according to the package directions. Bake until a toothpick inserted in the center comes out clean, about 25-30 minutes. Let the cake cool completely in the pan on a wire rack.
- Once the cake is completely cool, break it into large chunks and place them in a large mixing bowl. Use your hands or a fork to crumble the cake into fine, even crumbs, like wet sand.
- Add the 1/2 cup of frosting to the cake crumbs. Mix together until the mixture holds together when squeezed, like a soft, pliable dough. If too dry, add a teaspoon more of frosting; if too wet, add a few more cake crumbs.
- Using a cookie scoop (about 1.5 tablespoons), portion out the cake mixture. Roll each portion between your palms into a smooth, round ball. Place the balls on a parchment-lined baking sheet. You should get about 30-35 balls.
- Place the baking sheet in the refrigerator for at least 1 hour, or up to 24 hours. For best results, chill for 2 hours.
- Place the white almond bark or melting wafers in a microwave-safe bowl. Microwave in 30-second intervals, stirring well after each, until completely smooth and melted. Stir in the coconut oil or shortening if using.
- Remove the chilled cake balls from the fridge. Dip the tip of a lollipop stick into the melted white chocolate, then insert it about halfway into a cake ball. Repeat with all the cake balls.
- Hold a cake pop by the stick and submerge it completely into the melted white chocolate. Gently tap the stick on the edge of the bowl to allow excess chocolate to drip off. Do not swirl.
- Before the chocolate sets, immediately sprinkle festive sprinkles over the top. Then, stick the lollipop stick into a styrofoam block or cardboard box. Let set completely at room temperature, about 30 minutes.
- Divide about 1/4 cup of the remaining melted white chocolate into two small bowls. Add a tiny dab of green gel food coloring to one bowl and red to the other. Stir well. Transfer each color to a small piping bag or a zip-top bag with a tiny corner snipped off.
- Hold a cake pop over a piece of parchment paper. Drizzle the red and green chocolate back and forth over the top in a zigzag pattern. Let the drizzle set at room temperature for another 15 minutes.
Notes
Chill the cake balls for at least 2 hours to prevent them from falling apart when dipping. Use almond bark or candy melting wafers instead of regular white chocolate chips for a smooth coating. Do not swirl the cake pop while dipping to avoid breaking it off the stick. Work in small batches, keeping unused cake balls in the fridge.
Nutrition
- Serving Size: 1 cake pop
- Calories: 200
- Sugar: 20
- Sodium: 150
- Fat: 11
- Saturated Fat: 7
- Carbohydrates: 26
- Protein: 2.5
Keywords: Christmas cake pops, white chocolate drizzle, holiday dessert, easy cake pops, festive treats


