There used to be a tiny bakery tucked inside a vintage gas station on the edge of town that made the most incredible breakfast treats. They weren’t fancy—just honest, homey things like oat bars and coffee cake—but their pumpkin chocolate chip oatmeal cups were something else entirely. When the owner retired and the gas station became a car wash, I actually felt a little pang of grief. After 11 tries—some too dry, some that fell apart, one that my toddler refused to touch—I finally cracked the code. These little cups are my love letter to that bakery, and honestly, they might be even better than the original.
I remember the first batch I made after the bakery closed. I was so determined to get it right that I forgot to preheat the oven. Classic move, right? The batter sat there looking at me, and I just stood in my messy kitchen feeling defeated. But I scraped it together, preheated, and baked anyway. The result? Edible, but not memorable. My three-year-old ate one and asked for a banana instead. That was my “okay, time to get serious” moment. I started taking notes, measuring obsessively, and testing different ratios of pumpkin to oats. Let me tell you, the ratio matters more than you’d think. Too much pumpkin and they’re mushy; too little and they’re dry. But when you hit that sweet spot? Pure magic.
You know that feeling when you take a bite of something and it tastes exactly like a memory? That’s what these oatmeal cups do for me. The pumpkin makes them impossibly soft, the chocolate chips melt into little pockets of sweetness, and the oats give them just enough chew to feel substantial. They’re not a cupcake and they’re not a muffin—they’re something better. Something you can hold in your hand and eat on the way to school drop-off, something that makes the house smell like fall even in February, something that my kids actually fight over. I mean, when was the last time your kids fought over breakfast? For me, it was last Tuesday. These cups are the reason.
Why You’ll Love This Recipe
Look, I’ve tested a lot of breakfast recipes over the years. Some are healthy but taste like cardboard. Others are delicious but loaded with sugar. These oatmeal cups hit that rare middle ground where everyone wins. My kids think they’re getting a treat, and I know they’re getting fiber, protein, and actual vegetables for breakfast. It’s the kind of win that makes you feel like a parenting genius.
- Quick & Easy: From bowl to oven in under 15 minutes. Mix everything in one bowl, scoop into a muffin tin, and bake. No stand mixer, no complicated steps, no crying over spilled flour.
- Simple Ingredients: You probably have most of these in your pantry right now. Canned pumpkin, oats, chocolate chips, eggs, a few spices. No weird health food store finds required.
- Perfect for Busy Mornings: Make a batch on Sunday and you’ve got breakfast sorted for the week. They reheat in 20 seconds in the microwave. Game changer for those 6 AM chaos sessions.
- Crowd-Pleaser: I brought these to a playdate and three different moms asked for the recipe. Even the picky eaters went back for seconds. My neighbor’s kid who “doesn’t like oatmeal” ate three.
- Unbelievably Delicious: The texture is what gets you. Soft and tender from the pumpkin, chewy from the oats, with melty chocolate in every bite. They’re not too sweet, not too heavy, just perfectly balanced.
What makes this recipe different from every other pumpkin oatmeal cup out there? It’s the ratio, honestly. Most recipes use too much liquid and you end up with soggy cups. I spent weeks tweaking the pumpkin-to-oat ratio until I found the exact point where the oats absorb just enough moisture to become tender without turning into mush. The secret is letting the batter rest for five minutes before baking. That little pause lets the oats start soaking up the pumpkin, so everything bakes up evenly. Trust me on this one.
What Ingredients You Will Need
This recipe uses simple, wholesome ingredients that work together to create something truly special. Nothing fancy here—just smart combinations that deliver big flavor without the fuss.
- Rolled oats, 2 cups (180g) – Not quick oats! Rolled oats give the cups structure and that perfect chewy texture. Quick oats break down too much and make everything mushy. I use Bob’s Red Mill Old-Fashioned Rolled Oats for consistent results.
- Pumpkin puree, 1 cup (245g) – Make sure you’re buying 100% pure pumpkin, not pumpkin pie filling. The filling has added sugar and spices that will throw off the whole recipe. Libby’s is my go-to brand because it’s consistently thick and not watery.
- Large eggs, 2 – Room temperature if you remember, but straight from the fridge works too. I’ve tested both ways and the difference is minimal. Don’t stress about it.
- Milk, 1/2 cup (120ml) – Any milk works here. I usually use whole milk because that’s what we have, but I’ve made these with oat milk and almond milk and they turned out great. Use whatever you’ve got.
- Maple syrup, 1/3 cup (80ml) – Real maple syrup adds a depth of flavor that honey just can’t match. But honestly, honey works in a pinch. I’ve also used brown sugar dissolved in a little warm water when I ran out of syrup.
- Coconut oil, 2 tablespoons (30ml), melted – Or any neutral oil. Melted butter works beautifully too. I like coconut oil because it adds a subtle sweetness that pairs well with the pumpkin.
- Vanilla extract, 1 teaspoon – Pure vanilla is best, but imitation works fine. Don’t skip it—vanilla makes everything taste more complete.
- Pumpkin pie spice, 1 1/2 teaspoons – Store-bought is fine, but I make my own with 1 teaspoon cinnamon, 1/2 teaspoon ginger, 1/4 teaspoon nutmeg, and a pinch of cloves. It’s cheaper and you can adjust it to your taste.
- Baking powder, 1 teaspoon – Check the expiration date! Old baking powder won’t give you the lift you need.
- Salt, 1/4 teaspoon – Just a pinch to balance the sweetness and bring out the pumpkin flavor.
- Chocolate chips, 1/2 cup (90g) – Semi-sweet is my favorite because it’s not too sweet against the pumpkin. But milk chocolate works if your kids prefer it. I’ve also used dark chocolate chunks when I wanted something more grown-up.
Equipment Needed
You don’t need a fancy kitchen to make these. Here’s what you’ll actually use:
- Muffin tin (12-cup) – Standard size works best. Mini muffin tins work too, but you’ll need to adjust the baking time to about 10-12 minutes.
- Muffin liners – I prefer parchment paper liners because nothing sticks to them. But regular paper liners work fine too. If you’re out of liners, grease the tin well with butter or cooking spray.
- Large mixing bowl – Any bowl works. I use a ceramic one because it doesn’t slide around on the counter.
- Whisk – For mixing the wet ingredients. A fork works in a pinch.
- Rubber spatula – For folding everything together and scraping the bowl clean.
- Measuring cups and spoons – Accurate measurements matter here, especially for the oats and pumpkin.
- Cookie scoop (optional) – A 2-tablespoon scoop makes filling the muffin cups so much easier and gives you evenly sized cups. Not essential, but nice to have.
Preparation Method
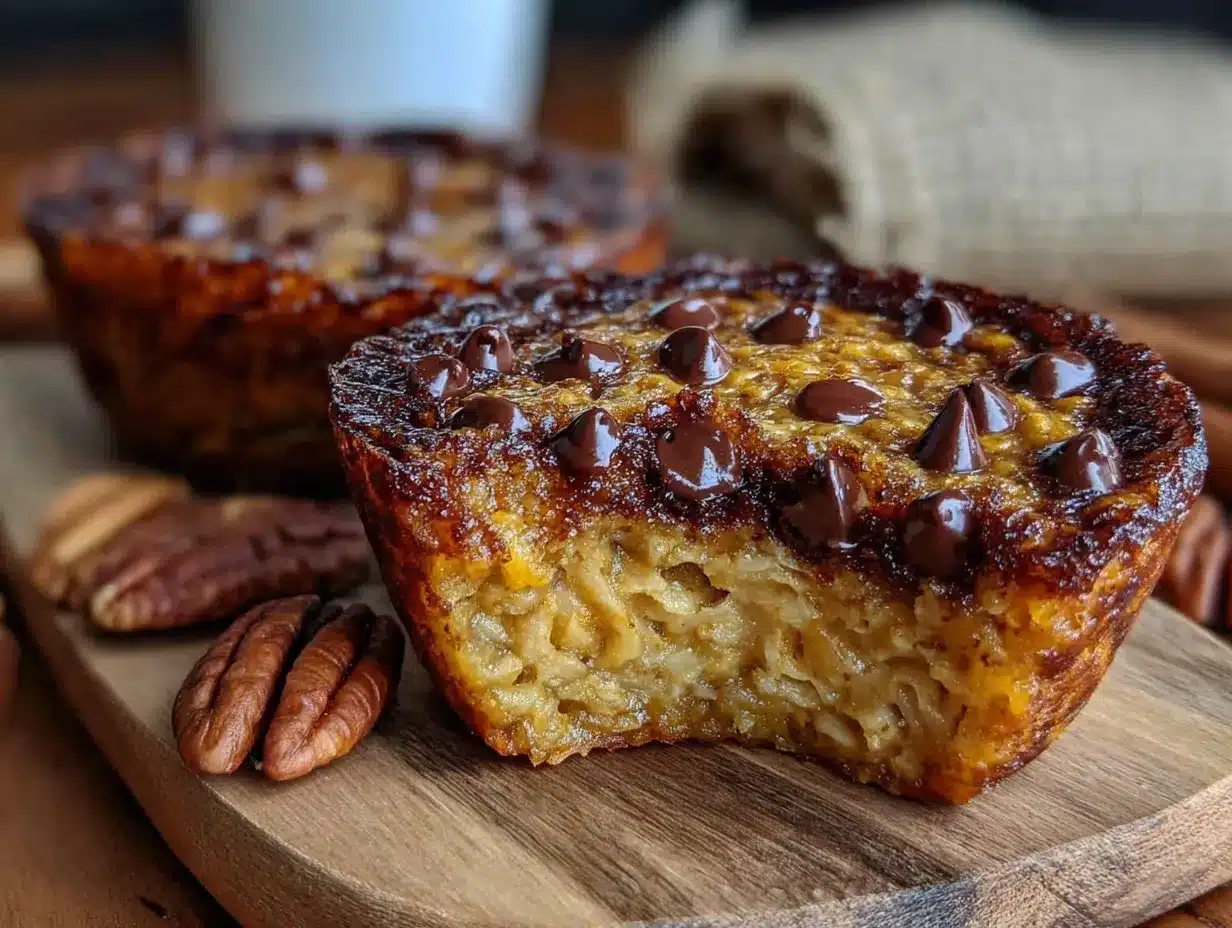
Alright, let’s get cooking. This is straightforward, but I’ll walk you through every step so you nail it on the first try.
- Preheat your oven to 350°F (175°C). Line a 12-cup muffin tin with paper liners or grease it well. I like to do this first so the oven is ready when I am.
- Mix the dry ingredients. In a large bowl, whisk together the rolled oats, pumpkin pie spice, baking powder, and salt. Make sure everything is evenly distributed. Sometimes the baking powder clumps up, so break those up with your fingers.
- Mix the wet ingredients. In a separate bowl (or the same one if you’re lazy like me), whisk together the pumpkin puree, eggs, milk, maple syrup, melted coconut oil, and vanilla extract. Whisk until smooth and well combined. It should look like a thick, creamy orange sauce.
- Combine wet and dry. Pour the wet ingredients into the dry ingredients and stir with a rubber spatula until just combined. Don’t overmix! A few streaks of flour are fine. Overmixing makes the cups tough.
- Fold in the chocolate chips. Gently fold them in until they’re evenly distributed. I save a few to press on top of each cup before baking—that way every cup has a visible chocolate chip on top, which makes them look prettier and ensures every bite has chocolate.
- Let the batter rest for 5 minutes. This is the secret step! The oats need time to absorb some of the liquid so the cups bake up tender, not soggy. Set a timer if you need to. Use this time to wash a few dishes or pour yourself a coffee.
- Scoop the batter into the muffin cups. Fill each cup about 3/4 full. A cookie scoop makes this easy and gives you evenly sized cups. The batter will be thick and scoopable, like a very chunky cookie dough.
- Press a few extra chocolate chips on top. This is optional but highly recommended. It makes the cups look bakery-worthy and ensures that first bite has chocolate in it.
- Bake for 18-22 minutes. The cups are done when the edges are golden brown and a toothpick inserted in the center comes out clean or with a few moist crumbs. Every oven runs differently, so start checking at 18 minutes. My oven takes exactly 20 minutes.
- Cool in the pan for 5 minutes. This is important! The cups need time to set up. If you try to remove them too soon, they might fall apart. After 5 minutes, transfer them to a wire rack to cool completely.
Cooking Tips & Techniques
I’ve made these cups probably 30 times by now, and I’ve learned a few things the hard way. Let me save you the trouble.
Don’t skip the rest time. I know it feels like an unnecessary step, but it’s crucial. The oats need those 5 minutes to absorb the pumpkin and milk. Without it, the cups will be watery and won’t hold together. I learned this the hard way when I was rushing one morning and skipped the rest. The cups came out of the oven looking flat and sad. Never again.
Use a cookie scoop for even sizing. This isn’t just about aesthetics—evenly sized cups bake evenly. If some are bigger than others, you’ll end up with some overcooked and some undercooked. A 2-tablespoon scoop is perfect for standard muffin cups.
Check for doneness with your finger. The toothpick test is good, but I also like to gently press the top of a cup. If it springs back, it’s done. If it leaves an indent, give it another 2 minutes. This method has never let me down.
Let them cool completely before storing. I know it’s tempting to pack them away while they’re still warm, but that traps steam and makes them soggy. Let them cool completely on a wire rack—about 30 minutes—before transferring to an airtight container.
Double the batch. These freeze beautifully, so I always make a double batch. One for now, one for later. Future you will thank you on a chaotic Wednesday morning when you have zero time and a hungry kid staring at you.
Variations & Adaptations
This recipe is endlessly adaptable. Here are some of my favorite variations:
Vegan version: Replace the eggs with flax eggs (2 tablespoons ground flaxseed mixed with 6 tablespoons water, let sit for 5 minutes). Use plant-based milk and maple syrup instead of honey. The texture will be slightly denser but still delicious. My vegan friend couldn’t tell the difference.
Gluten-free option: Use certified gluten-free rolled oats. That’s it. Oats are naturally gluten-free, but they’re often processed in facilities that also process wheat, so check the label if you’re sensitive. I’ve tested this with gluten-free oats and the texture is exactly the same.
Nut-free version: This recipe is naturally nut-free as written, but double-check your chocolate chip label. Some brands are processed on shared equipment with nuts. Enjoy Life makes great nut-free chocolate chips.
Lower sugar option: Reduce the maple syrup to 1/4 cup and use sugar-free chocolate chips. The cups will be less sweet but still have plenty of flavor from the pumpkin and spices. My kids didn’t even notice the difference.
Add mix-ins: Try chopped pecans, walnuts, dried cranberries, or shredded coconut. I once added a handful of hemp seeds for extra protein and it worked great. Just keep the total mix-ins to about 1/2 cup so the batter doesn’t get too crowded.
Savory version: Okay, this is weird but hear me out. Omit the maple syrup and chocolate chips, add 1/2 cup shredded cheddar cheese and 1/4 cup chopped green onions. Bake as directed. They’re like savory oatmeal muffins and they’re incredible with soup. My husband thinks I’m crazy, but he ate four of them.
Serving & Storage Suggestions
These oatmeal cups are incredibly versatile when it comes to serving. Here’s how I handle them:
Serving temperature: They’re delicious at room temperature, warm, or even straight from the fridge. My kids prefer them warm, so I microwave them for 15-20 seconds. The chocolate gets all melty and it’s pure heaven.
Presentation ideas: For breakfast, I serve them on a plate with a side of yogurt and fresh fruit. For snacks, I pack them in lunchboxes or set them out on a platter for playdates. They look beautiful on a cake stand if you’re feeling fancy.
What to serve with them: A glass of cold milk is the classic pairing. But they’re also great with coffee, tea, or a smoothie. For a more substantial breakfast, serve them alongside scrambled eggs and fruit.
Storage instructions: Store in an airtight container at room temperature for up to 3 days. In the refrigerator, they’ll last up to a week. The texture stays soft and tender the whole time.
Freezing instructions: These freeze like a dream. Let them cool completely, then place them in a single layer on a baking sheet and freeze for 1 hour. Transfer to a freezer-safe bag or container. They’ll keep for up to 3 months. To reheat, microwave for 20-30 seconds or pop them in a 350°F oven for 5-7 minutes.
How flavors develop: Honestly, these are even better the next day. The flavors meld together overnight and the texture becomes more uniform. I often make them the day before I plan to serve them. The spices deepen and the pumpkin flavor becomes more pronounced. It’s like magic.
Nutritional Information & Benefits
Here’s the approximate nutritional breakdown for one oatmeal cup (based on 12 servings):
| Nutrient | Amount per cup |
|---|---|
| Calories | 185 |
| Total Fat | 7g |
| Saturated Fat | 4g |
| Cholesterol | 31mg |
| Sodium | 95mg |
| Total Carbohydrates | 28g |
| Dietary Fiber | 4g |
| Sugars | 12g |
| Protein | 5g |
Health benefits: These aren’t just tasty—they’re actually good for you. The oats provide soluble fiber that helps keep kids full and focused at school. Pumpkin is packed with vitamin A for healthy eyes and immune function. The eggs add high-quality protein for sustained energy. And the chocolate chips? Well, they’re good for the soul.
Dietary considerations: This recipe is naturally vegetarian and can easily be made vegan, gluten-free, and nut-free. It’s also relatively low in added sugar compared to most breakfast baked goods. If you’re watching your sugar intake, use the lower sugar variation above.
Allergen notes: Contains eggs and milk (if using dairy milk). May contain traces of nuts depending on your chocolate chip brand. Always check labels if you’re serving someone with allergies.
Conclusion
Look, I’m not going to tell you these oatmeal cups will change your life. But they might change your mornings. They’re the kind of recipe that makes you feel like you’ve got it together, even on days when you’re running on three hours of sleep and your coffee is cold. They’re forgiving, adaptable, and genuinely delicious. My kids ask for them by name, and honestly, so do I.
I’d love to hear how they turn out for you. Did your kids love them? Did you add any fun mix-ins? Did you make them for a holiday brunch or just a regular Tuesday? Drop a comment below and let me know. And if you tweak the recipe to make it your own, even better—that’s what cooking is all about. Until next time, happy baking, and may your kitchen always smell like pumpkin and chocolate.
Frequently Asked Questions
Can I use quick oats instead of rolled oats?
I don’t recommend it. Quick oats are more processed and break down too much during baking, resulting in a mushy texture. Rolled oats give the cups structure and that satisfying chew. If you only have quick oats, reduce the milk to 1/3 cup and expect a softer, more porridge-like texture.
Can I make these without eggs?
Yes! Use flax eggs as described in the variations section. The texture will be slightly denser, but they’ll still hold together beautifully. I’ve also used 1/4 cup unsweetened applesauce in place of each egg with good results.
How do I prevent the cups from sticking to the liners?
Use parchment paper liners—they’re non-stick and peel away cleanly every time. If you’re using regular paper liners, spray them lightly with cooking spray before filling. Let the cups cool completely before peeling off the liners.
Can I use fresh pumpkin instead of canned?
Absolutely! Just make sure to cook and puree the pumpkin first, then drain off any excess liquid. Fresh pumpkin tends to be more watery than canned, so you might need to reduce the milk by 1-2 tablespoons. I’ve done this with roasted sugar pumpkin and it was divine.
How long do these keep in the freezer?
Up to 3 months in an airtight container. I like to freeze them individually on a baking sheet first, then transfer to a freezer bag. That way I can grab one or two at a time without them sticking together. They thaw quickly at room temperature or in the microwave.
Pin This Recipe!
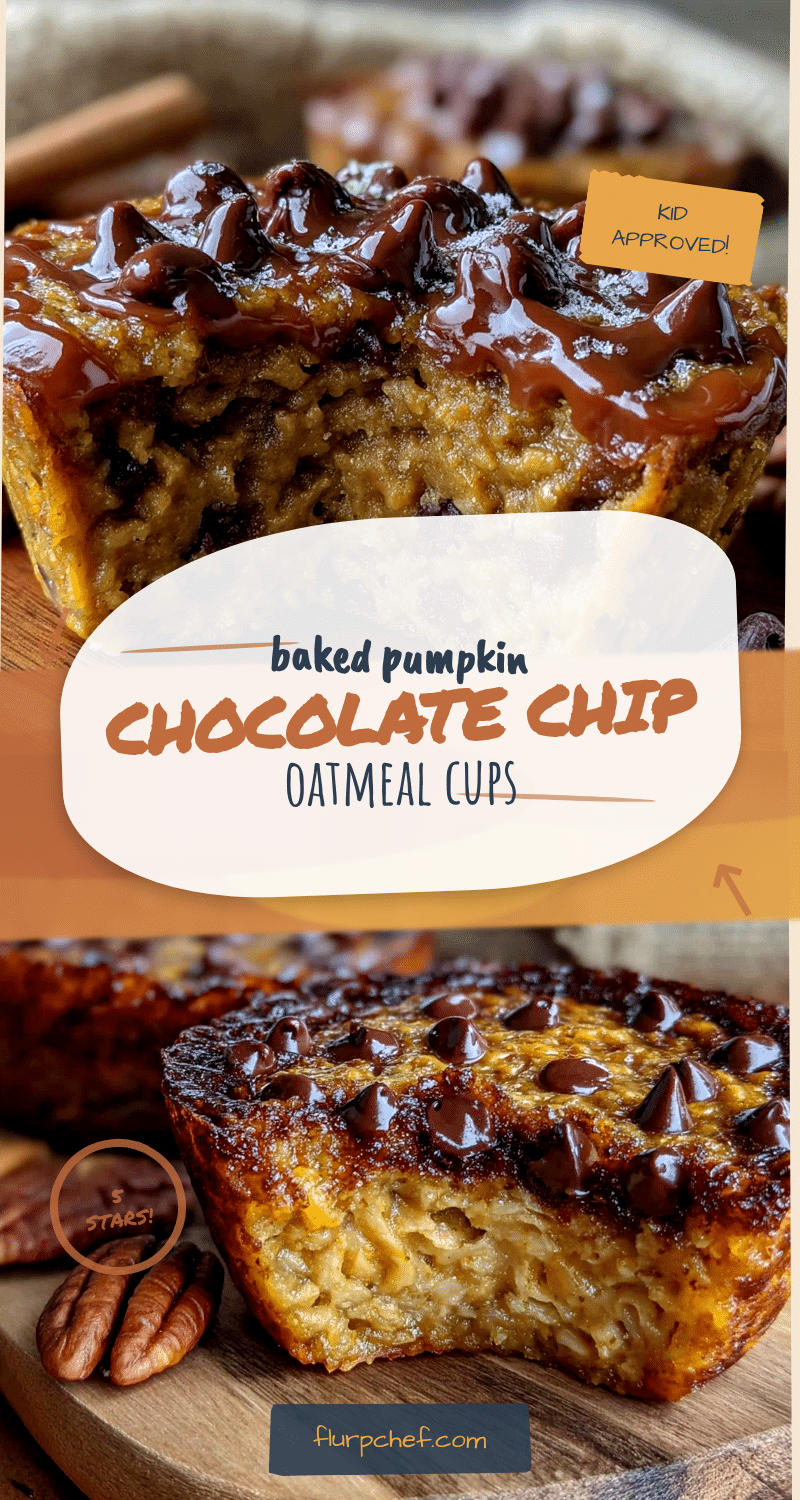
Best Kid-Approved Baked Pumpkin Chocolate Chip Oatmeal Cups
Soft, tender pumpkin oatmeal cups with melty chocolate chips that are perfect for busy mornings. Made with simple ingredients in one bowl, these freezer-friendly cups are a healthy breakfast treat that kids and adults love.
- Prep Time: 15 minutes
- Cook Time: 20 minutes
- Total Time: 40 minutes
- Yield: 12 servings 1x
- Category: Breakfast
- Cuisine: American
Ingredients
- 2 cups (180g) rolled oats
- 1 cup (245g) pumpkin puree (100% pure, not pumpkin pie filling)
- 2 large eggs (room temperature preferred)
- 1/2 cup (120ml) milk (any kind)
- 1/3 cup (80ml) maple syrup
- 2 tablespoons (30ml) coconut oil, melted
- 1 teaspoon vanilla extract
- 1 1/2 teaspoons pumpkin pie spice
- 1 teaspoon baking powder
- 1/4 teaspoon salt
- 1/2 cup (90g) chocolate chips (semi-sweet recommended)
Instructions
- Preheat oven to 350°F (175°C). Line a 12-cup muffin tin with paper liners or grease well.
- In a large bowl, whisk together rolled oats, pumpkin pie spice, baking powder, and salt.
- In the same bowl, whisk together pumpkin puree, eggs, milk, maple syrup, melted coconut oil, and vanilla extract until smooth.
- Pour wet ingredients into dry ingredients and stir with a rubber spatula until just combined. Do not overmix.
- Fold in chocolate chips until evenly distributed. Reserve a few to press on top of each cup before baking.
- Let the batter rest for 5 minutes to allow oats to absorb liquid.
- Scoop batter into muffin cups, filling each about 3/4 full. Press extra chocolate chips on top if desired.
- Bake for 18-22 minutes, until edges are golden brown and a toothpick inserted in center comes out clean or with a few moist crumbs.
- Cool in the pan for 5 minutes, then transfer to a wire rack to cool completely.
Notes
Don’t skip the 5-minute rest time—it’s crucial for texture. Let cups cool completely before storing to prevent sogginess. These freeze beautifully for up to 3 months. For best results, use rolled oats, not quick oats. The cups are even better the next day as flavors meld.
Nutrition
- Serving Size: 1 oatmeal cup
- Calories: 185
- Sugar: 12
- Sodium: 95
- Fat: 7
- Saturated Fat: 4
- Carbohydrates: 28
- Fiber: 4
- Protein: 5
Keywords: pumpkin oatmeal cups, chocolate chip oatmeal cups, healthy breakfast, kid-friendly breakfast, freezer-friendly breakfast, pumpkin recipes, oatmeal cups


