The little old lady who runs the corner bakery, Mrs. Kowalski, watched me staring at her display case last October. I was trying to figure out how she got her meringues to look so perfectly pillowy, you know? She didn’t say anything at first. Then she just tapped the glass and pointed to a tiny, misshapen ghost she’d piped onto a parchment-lined tray. “Too much sugar makes them weep,” she said with a shrug. “And you have to talk to them nicely.” I laughed, thinking she was joking. But honestly? I’ve repeated that line to myself every single time I’ve made these light ghost meringue cookies since. It sounds silly, but there’s a real gentleness to the process that changes the result. Let me tell you, I messed up my first batch completely—opened the oven door too fast and they all cracked like little haunted eggs. It was a mess. But Mrs. Kowalski’s words stuck with me, and this version, the one I’m sharing now, is the result of that lesson in patience. Maybe you’ve been there, standing over a bowl of egg whites, wondering if they’ll ever get stiff enough. These little ghosts are worth the wait.
Why You’ll Love This Recipe
These aren’t just any Halloween treat. They are a little bit of kitchen magic that feels surprisingly doable, even for a beginner baker. I’ve tested this recipe about four times now, tweaking the sugar ratio and the oven temperature, and I can honestly say this version is the one that works every single time.
- Naturally Light & Airy: These cookies are basically clouds of sweet, vanilla-scented air. They melt on your tongue, which is a nice break from all the heavy candy and cake that shows up this time of year.
- Simple Ingredients: You only need four things—egg whites, sugar, cream of tartar, and vanilla. Chances are you already have them in your pantry.
- Perfect for Halloween Parties: They look spooky and cute on a dessert table, and kids absolutely love the ghost shape. They’re also gluten-free and dairy-free, which makes them a great option for guests with dietary restrictions.
- Crowd-Pleaser: Even people who say they don’t like meringues end up grabbing two or three. They’re just so fun and light.
- Unbelievably Delicious: The outside is crisp and shattery, while the inside stays soft and marshmallowy. It’s a texture combo that feels way more special than the effort it takes to make them.
What makes this recipe different from the rest? It’s the method. I use a super slow, low-temperature oven that dries the meringues out without browning them, keeping them ghostly white. Plus, I add a tiny pinch of salt to balance the sweetness, which is a trick I picked up from a pastry chef friend. This recipe isn’t just good—it’s the kind that makes you close your eyes after the first bite. It’s comfort food reimagined for a spooky night, and it fits perfectly into a balanced lifestyle without feeling like a sacrifice.
What Ingredients You Will Need
This recipe uses simple, wholesome ingredients to deliver that perfect, melt-in-your-mouth texture. Most of these are pantry staples, which is part of the beauty of making these light ghost meringue cookies on a whim.
- 4 large egg whites, at room temperature (room temp is crucial—cold eggs won’t whip up as high or as stable)
- 1 cup (200g) granulated white sugar (I prefer regular white sugar; superfine works too, but regular is fine if you whisk it long enough)
- 1/2 teaspoon cream of tartar (this stabilizes the egg whites and helps them hold their shape—don’t skip it)
- 1 teaspoon vanilla extract (pure vanilla is best, but imitation works in a pinch)
- Pinch of fine sea salt (just a tiny pinch to balance the sweetness and enhance the vanilla flavor)
- Mini chocolate chips or black gel food coloring, for decorating the ghost faces (optional, but highly recommended for the cute factor)
Ingredient Tips: For the best results, make sure your mixing bowl and whisk are completely clean and free of any grease. Even a tiny bit of fat can prevent the egg whites from whipping up properly. I like to wipe my bowl down with a little lemon juice or white vinegar on a paper towel before I start—it’s an old baker’s trick that really works. If you don’t have cream of tartar, you can substitute it with 1 teaspoon of lemon juice or white vinegar, but the cream of tartar gives the most reliable results. I recommend using organic sugar if you can, as it dissolves a bit more cleanly, but any granulated sugar will do.
Equipment Needed
You don’t need a ton of fancy gear for this recipe, which is part of its charm. Here’s what you’ll need to make these light ghost meringue cookies come to life.
- Electric mixer (a stand mixer is ideal, but a hand mixer works perfectly fine—your arm will thank you)
- Large mixing bowl (glass or metal is best; avoid plastic as it can retain grease)
- Piping bag with a large round tip (or a sturdy zip-top bag with the corner snipped off—I’ve done both, and the zip-top bag is totally fine for ghosts)
- Baking sheet lined with parchment paper (parchment is non-negotiable; wax paper will stick and ruin everything)
- Rubber spatula for folding
- Cooling rack
If you don’t have a piping bag, don’t stress. A zip-top bag works like a charm, though you might get slightly less uniform ghosts. I actually kind of love the wonky ones—they look more like real ghosts, you know? Just make sure to not overfill the bag, or it gets messy. Also, a good baking sheet that doesn’t warp in the oven is worth its weight in gold for even baking.
Preparation Method
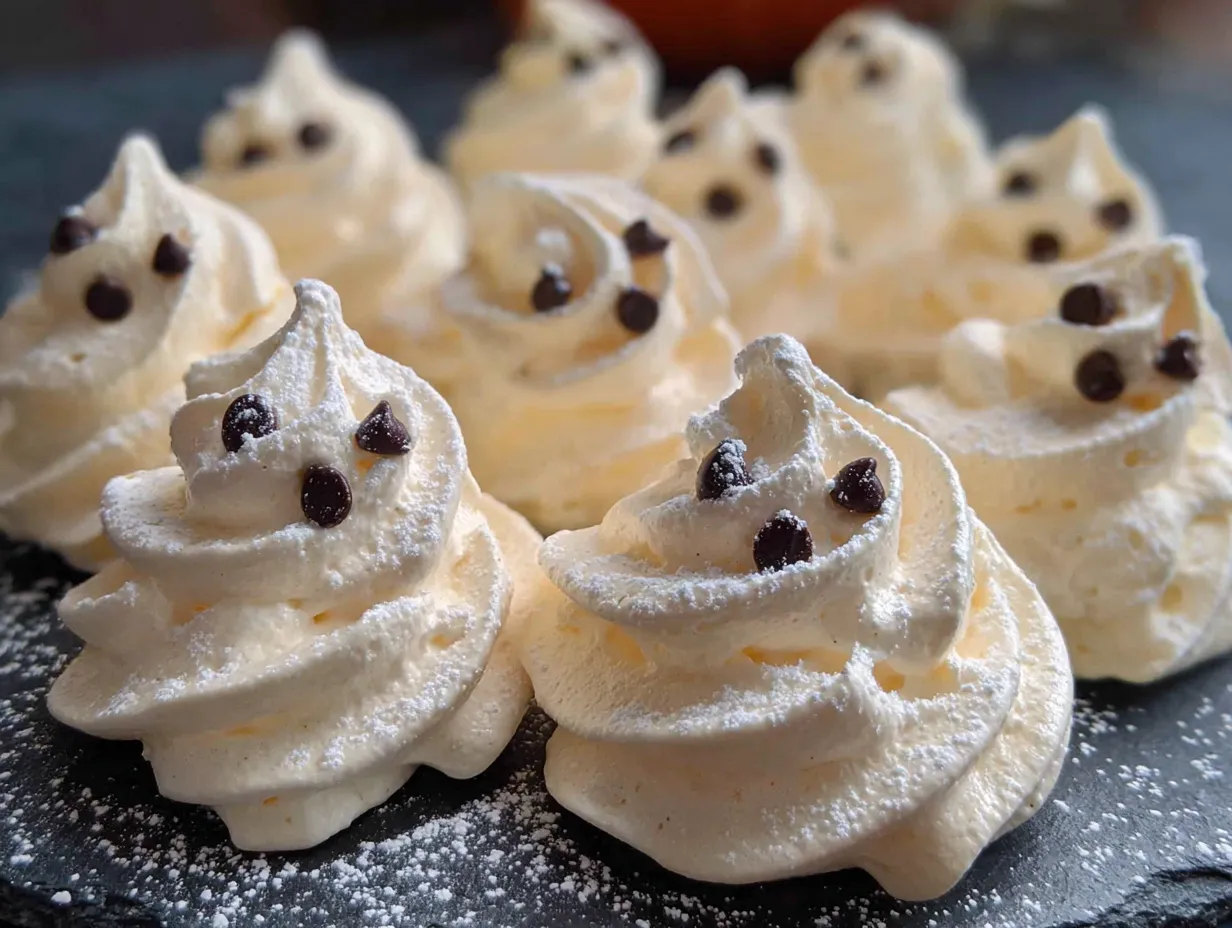
Making these light ghost meringue cookies is a bit of a meditation. It requires patience, but the payoff is huge. Follow these steps carefully, and you’ll have a tray of adorable, spooky ghosts in no time.
- Preheat your oven to 200°F (93°C). Yes, it’s low. That’s the secret. Line a large baking sheet with parchment paper and set it aside.
- Prepare your egg whites. Separate the eggs while they’re cold—it’s easier to keep the yolks intact. Then let the whites sit in your mixing bowl for about 20 minutes to come to room temperature. This is important for maximum volume.
- Start whipping. Add the cream of tartar and the pinch of salt to the egg whites. Begin whipping on medium speed until the mixture becomes frothy and starts to look like soap bubbles, about 1-2 minutes.
- Add the sugar slowly. With the mixer running on medium-low, start adding the sugar one tablespoon at a time. I know it feels tedious, but this gradual addition helps the sugar dissolve properly. If you dump it all in at once, your meringue will be grainy. Take your time—about 2-3 minutes for all the sugar.
- Whip to stiff peaks. Once all the sugar is in, increase the speed to medium-high and whip until the mixture is thick, glossy, and holds stiff peaks. This means when you lift the whisk, the meringue stands up straight without drooping. It should feel smooth between your fingers, not gritty. This usually takes 5-7 minutes with a stand mixer, a bit longer with a hand mixer.
- Add the vanilla. Gently fold in the vanilla extract with a rubber spatula. Be careful not to deflate the meringue. Just a few gentle folds until it’s combined.
- Pipe the ghosts. Transfer the meringue to your piping bag fitted with a large round tip (or your zip-top bag with a snipped corner). Hold the bag perpendicular to the baking sheet, about an inch above the parchment. Pipe a tall, round blob for the body, then lift the bag straight up to create a little pointy head. For a more traditional ghost shape, you can also pipe a teardrop shape. Leave about an inch between each ghost—they don’t spread much, but they need a little breathing room.
- Decorate the faces. If you’re using mini chocolate chips, gently press two into each ghost for eyes and one for a mouth. If you’re using black gel food coloring, wait until the ghosts are baked and cooled, then paint on the faces with a small brush. I personally prefer the chocolate chips because they add a little chocolate crunch.
- Bake low and slow. Place the baking sheet in the preheated oven and bake for 60-75 minutes. The ghosts should be completely dry to the touch and easily peel off the parchment paper. They should not be browned at all—if they start to color, your oven is too hot.
- Cool in the oven. This is the most important step. Turn off the oven and leave the door slightly ajar (prop it open with a wooden spoon). Let the meringues cool completely inside the oven for at least 1 hour, or even overnight. This prevents them from cracking from the temperature shock.
Sensory Cue: When they’re done, the ghosts should feel light as a feather and sound hollow if you tap one gently. The texture should be crisp on the outside with a slight marshmallow chew on the inside. If they feel sticky or soft, they need more time.
Cooking Tips & Techniques
I’ve made my fair share of mistakes with meringues, and I’m here to save you from them. Here are the things I wish I’d known from the start.
The Humidity Enemy: Meringues are notoriously finicky in humid weather. If it’s a rainy or super muggy day, these cookies might turn out sticky or chewy instead of crisp. Try to make them on a dry day if you can. I once made a batch during a summer thunderstorm, and they never fully dried out—they were like sad, sticky ghosts. Not a good look.
Don’t Overwhip: It’s possible to overwhip meringue, which causes it to become grainy and separate. If you see the mixture start to look curdled or watery, you’ve gone too far. Stop as soon as you reach stiff, glossy peaks. When in doubt, stop a little early—it’s better to have soft peaks than a broken meringue.
The Sugar Test: Rub a tiny bit of the meringue between your thumb and forefinger. If it feels smooth, the sugar is dissolved. If it feels gritty, keep whipping. Gritty meringues will “weep” (release moisture) and lose their shape in the oven. This is a non-negotiable step for perfect results.
Multitasking Strategy: While the meringues are baking, you can clean up your kitchen or prep other Halloween treats. The long, slow bake time is actually a blessing—it frees you up to do other things. Just don’t forget about them! Set a timer for the minimum time and check them then.
Consistency is Key: For uniform ghosts, try to pipe them all the same size. I like to use a small cookie scoop to portion the meringue into the piping bag, which helps keep things consistent. But honestly, a little variation makes them look more charming and handmade.
Variations & Adaptations
This recipe is super adaptable, so don’t be afraid to make it your own. Here are a few ways I’ve tweaked it over the years.
- Pumpkin Spice Ghosts: Add 1/2 teaspoon of pumpkin pie spice to the sugar before whipping. It gives the ghosts a warm, fall flavor that’s perfect for Halloween. I tried this last year and they were gone in minutes.
- Chocolate-Dipped Ghosts: After the meringues are baked and cooled, dip the bottoms in melted dark chocolate. Let them set on parchment paper. The chocolate adds a rich, decadent contrast to the airy meringue. This is my personal favorite variation.
- Vegan Option: You can use aquafaba (the liquid from a can of chickpeas) instead of egg whites. Use 1/2 cup of aquafaba for every 4 egg whites. Whip it the same way, adding cream of tartar and sugar. It works surprisingly well, though the texture is slightly different—a bit more marshmallowy.
- Peppermint Ghosts: Swap the vanilla extract for 1/2 teaspoon of peppermint extract. Add a drop of green food coloring for a fun twist, or leave them white for a classic look. They taste like a light, airy version of a peppermint patty.
- Different Shapes: You don’t have to make ghosts. Pipe the meringue into little pumpkins (using a star tip), bats (using a leaf tip for wings), or simply round kisses. The recipe works for any shape you can dream up.
Serving & Storage Suggestions
These light ghost meringue cookies are best served at room temperature, right after they’ve cooled. They make a stunning centerpiece on a Halloween dessert table, especially if you arrange them on a black platter or a bed of dark chocolate shavings.
Serving Ideas: Serve them alongside a warm cup of hot apple cider or a pumpkin spice latte. They’re also fantastic crumbled over vanilla ice cream for a spooky sundae. For a fun party trick, arrange them on a plate with a little dry ice (safely, of course!) to create a fog effect. Kids absolutely lose their minds over that.
Storage: Store the baked meringues in an airtight container at room temperature for up to 2 weeks. Do not refrigerate them—the moisture in the fridge will make them sticky and soft. If you live in a humid climate, add a silica gel packet to the container to keep them crisp. I learned this the hard way after a batch went soft overnight.
Freezing: You can freeze baked meringues in an airtight container for up to 3 months. Let them thaw at room temperature for about 15 minutes before serving. They won’t be quite as crisp as fresh, but they’re still delicious.
Flavor Development: These cookies actually taste best the day after they’re made. The flavors meld together, and the texture becomes perfectly uniform. So don’t stress about making them at the last minute—they’re a great make-ahead treat.
Nutritional Information & Benefits
Each ghost meringue cookie (without chocolate chips) contains approximately:
- Calories: 25-30
- Fat: 0g
- Carbohydrates: 6g
- Sugar: 6g
- Protein: 0.5g
These cookies are naturally gluten-free and dairy-free, making them a great option for guests with common dietary restrictions. They’re also fat-free and very low in calories, which is a nice change of pace from heavy Halloween desserts.
Health Benefits: Egg whites are a good source of high-quality protein and contain no cholesterol. They’re also low in calories and fat, which makes these cookies a guilt-free indulgence. The sugar content is moderate compared to many other treats, especially if you use mini chocolate chips sparingly.
Dietary Considerations: If you’re watching your sugar intake, you can reduce the sugar to 3/4 cup (150g), but the texture will be slightly less stable. I don’t recommend going lower than that for the best results. For a sugar-free version, you can try using a granulated monk fruit sweetener, but I haven’t tested that myself, so proceed with caution.
Conclusion
These light ghost meringue cookies are more than just a Halloween treat—they’re a little piece of kitchen magic that anyone can make. They’re light, airy, and surprisingly simple, yet they look like something from a fancy bakery. I love making them because they remind me of that conversation with Mrs. Kowalski and the lesson in patience she shared. Every time I pipe a ghost, I think about talking to them nicely, and honestly, it makes the whole process feel a bit special.
I’d love to see your version of these ghosts! Tag me in your photos or leave a comment below telling me how they turned out. Did you try a fun variation? Did your kids help pipe the faces? Share your stories—I read every single one. And if you’re looking for another easy Halloween treat, you might also enjoy my spider web cupcakes for a completely different vibe. Happy haunting, and happy baking!
Frequently Asked Questions
Can I make these meringue cookies ahead of time?
Absolutely! These cookies store beautifully. Bake them up to two weeks in advance and keep them in an airtight container at room temperature. They actually taste better after a day or two as the flavors settle.
Why did my meringue turn out sticky?
Sticky meringue is usually a sign of humidity or underbaking. Make sure your oven is at the correct low temperature (200°F) and that you’re baking on a dry day. Also, ensure the meringues are completely dry to the touch before turning off the oven.
Can I use a hand mixer instead of a stand mixer?
Yes, a hand mixer works perfectly fine. It might take a few minutes longer to reach stiff peaks, but the results are the same. Just be patient and keep whipping until the sugar is fully dissolved.
How do I get the ghost shape right?
Practice makes perfect! Hold the piping bag straight up and down, not at an angle. Squeeze gently to create a tall, round base, then lift the bag straight up to form the head. If you mess up, just scrape the meringue back into the bowl and try again—it’s very forgiving.
Can I add food coloring to the meringue?
Yes, you can add gel food coloring (not liquid, which can deflate the meringue) after you’ve reached stiff peaks. Fold it in gently with a spatula. For Halloween, try a few drops of orange or purple for a fun twist. Just be careful not to overmix.
Pin This Recipe!
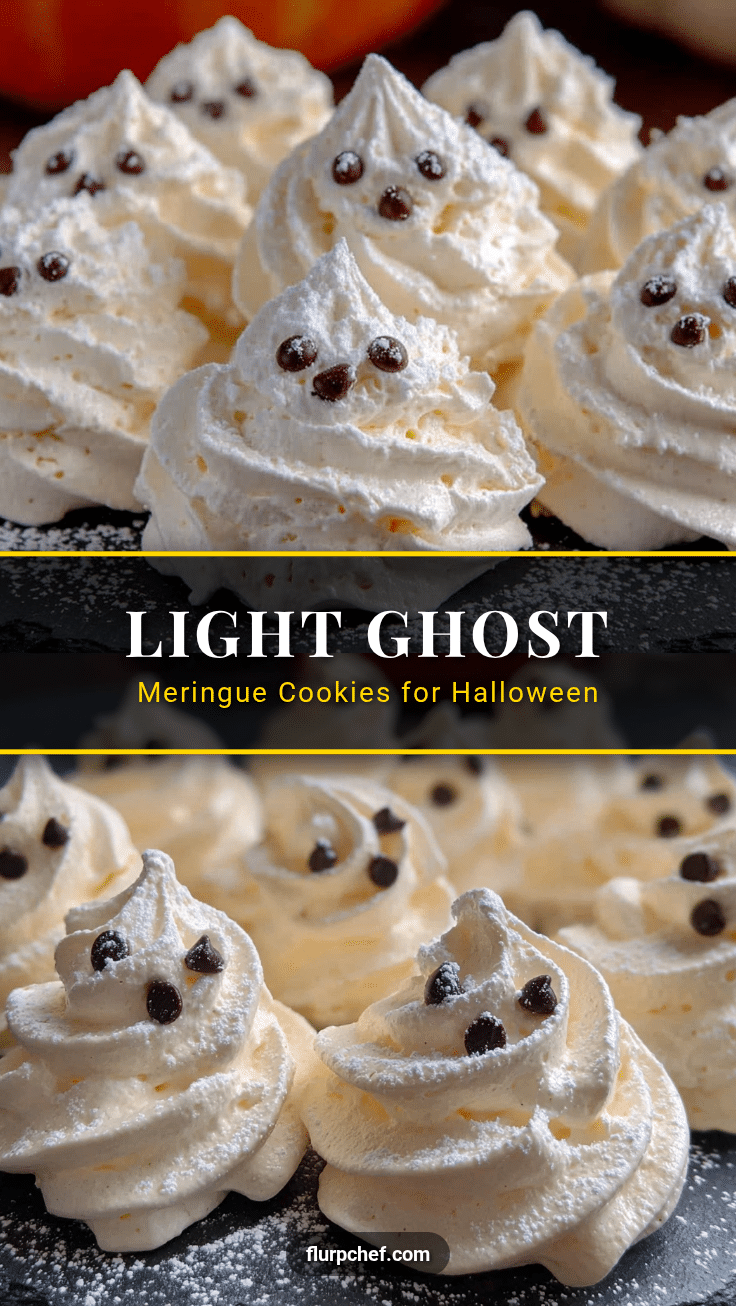
Light Ghost Meringue Cookies: Easy Halloween Treat
These light and airy ghost-shaped meringue cookies are a perfect Halloween treat. Made with just a few simple ingredients, they are gluten-free, dairy-free, and melt in your mouth with a crisp exterior and marshmallowy interior.
- Prep Time: 20 minutes
- Cook Time: 60-75 minutes
- Total Time: 1 hour 35 minutes to 1 hour 50 minutes (plus cooling time)
- Yield: 24 servings 1x
- Category: Dessert
- Cuisine: American
Ingredients
- 4 large egg whites, at room temperature
- 1 cup (200g) granulated white sugar
- 1/2 teaspoon cream of tartar
- 1 teaspoon vanilla extract
- Pinch of fine sea salt
- Mini chocolate chips or black gel food coloring, for decorating (optional)
Instructions
- Preheat your oven to 200°F (93°C). Line a large baking sheet with parchment paper and set it aside.
- Separate the eggs while they’re cold, then let the whites sit in your mixing bowl for about 20 minutes to come to room temperature.
- Add the cream of tartar and the pinch of salt to the egg whites. Begin whipping on medium speed until frothy, about 1-2 minutes.
- With the mixer running on medium-low, add the sugar one tablespoon at a time, taking about 2-3 minutes for all the sugar.
- Increase speed to medium-high and whip until thick, glossy, and stiff peaks form, about 5-7 minutes. The mixture should feel smooth between your fingers.
- Gently fold in the vanilla extract with a rubber spatula until combined.
- Transfer the meringue to a piping bag fitted with a large round tip (or a zip-top bag with a snipped corner). Pipe tall, round blobs with pointy heads onto the prepared baking sheet, leaving about an inch between each.
- If using mini chocolate chips, gently press two into each ghost for eyes and one for a mouth. If using black gel food coloring, wait until after baking and cooling.
- Bake for 60-75 minutes, until the ghosts are completely dry to the touch and easily peel off the parchment paper. They should not be browned.
- Turn off the oven and leave the door slightly ajar (prop it open with a wooden spoon). Let the meringues cool completely inside the oven for at least 1 hour, or overnight.
Notes
Make meringues on a dry day to avoid stickiness. Do not over whip; stop at stiff, glossy peaks. Rub a bit of meringue between fingers to check if sugar is dissolved (should be smooth). Cool in the oven with door ajar to prevent cracking. Store in an airtight container at room temperature for up to 2 weeks; do not refrigerate.
Nutrition
- Serving Size: 1 ghost cookie
- Calories: 2530
- Sugar: 6
- Sodium: 10
- Carbohydrates: 6
- Protein: 0.5
Keywords: Halloween cookies, meringue cookies, ghost cookies, gluten-free dessert, dairy-free dessert, easy Halloween treat, light meringue


