The church bake sale was in twelve hours and I’d completely forgotten. Everyone else would be bringing their grandmother’s legendary seven-layer cakes or those perfectly piped French macarons that look like they belong in a Parisian patisserie window. I had a can of pumpkin puree, a brick of cream cheese, and a box of gingersnap cookies that I’d bought on a whim last Tuesday. Honestly, I almost just grabbed a bag of store-bought cookies on the way out the door. But then I remembered my neighbor, Mrs. Gable, who always wins the “Best Dessert” ribbon with her fussy, multi-step pies. There was no way I was showing up empty-handed.
So, I did what any reasonable, slightly panicked person would do. I threw the gingersnaps into a ziploc bag and started whacking them with a rolling pin. It was a mess, crumbs flying everywhere, and I’m pretty sure I got some in my coffee. But you know what? That desperate, last-minute hustle turned into my absolute favorite fall recipe. These easy pumpkin cheesecake bars with gingersnap crust were born from a moment of sheer baking panic. And let me tell you, they didn’t just win the bake sale—they caused a minor scandal. People were actually asking if I had secretly hired a caterer. I mean, the irony was not lost on me.
The best part? This isn’t a story about fancy techniques or rare ingredients. It’s about how a simple, no-fuss recipe can absolutely steal the show. The spicy crunch of the gingersnap crust against that silky, creamy pumpkin cheesecake filling? It’s a match made in autumn heaven. Maybe you’ve been there, staring into your pantry with zero time and a lot of pressure. This recipe is your secret weapon. It’s the one that makes you look like a hero without the stress. And that’s why I keep making it, season after season.
Why You’ll Love This Recipe
Let’s be real—finding a dessert that feels special but doesn’t require a culinary degree is a win. After testing this recipe about a dozen times (and eating the evidence), I can confidently say these bars deliver on every level. They’re the kind of treat that makes you close your eyes after the first bite.
- Quick & Easy : You can have these in the oven in under 20 minutes. No water bath, no complicated rolling of dough. Perfect for those “I need dessert now” weeknight cravings.
- Simple Ingredients : You probably have most of these in your kitchen right now. No hunting for obscure spices or expensive extracts.
- Perfect for Fall Gatherings : Whether it’s a Thanksgiving potluck, a Friendsgiving, or just a cozy Sunday, these bars are the star of the show.
- Crowd-Pleaser : I’ve served these to kids, adults, and picky in-laws. They disappear every single time. The gingersnap crust is a total game-changer.
- Unbelievably Delicious : The texture is what gets me. The creamy, almost mousse-like filling against that crunchy, spiced crust is pure comfort food magic.
What makes this different from every other pumpkin cheesecake bar out there? It’s the crust, hands down. Using store-bought gingersnaps isn’t just a shortcut—it’s a flavor bomb. The molasses and ginger in the cookies create a deeper, more complex spice profile than a standard graham cracker crust ever could. It’s a chef-tested trick that saves you time and delivers a wow factor. This is comfort food reimagined—faster, easier, but with the same soul-soothing satisfaction.
What Ingredients You Will Need
This recipe relies on a handful of pantry staples to create something truly special. Each ingredient plays a key role in building that perfect flavor and texture without any unnecessary fuss.
For the Gingersnap Crust
- 2 cups gingersnap cookie crumbs (about 8 ounces or 225g of cookies, crushed finely. I prefer Nabisco or a store brand with a strong ginger kick)
- 5 tablespoons unsalted butter (melted. Adds richness and helps the crust hold together)
- 1 tablespoon granulated sugar (just a touch to balance the spice)
- Pinch of salt (to enhance all the flavors)
For the Pumpkin Cheesecake Filling
- 16 ounces cream cheese (two 8-ounce blocks, softened to room temperature. Full-fat is best for that luxurious texture)
- 1 cup granulated sugar (200g)
- 1/2 cup packed light brown sugar (100g, adds moisture and a hint of molasses)
- 1 cup canned pumpkin puree (not pumpkin pie filling. Libby’s is my go-to for consistent results)
- 3 large eggs (room temperature, for a smooth, lump-free batter)
- 1 teaspoon vanilla extract
- 1 1/2 teaspoons pumpkin pie spice (or a mix of cinnamon, nutmeg, ginger, and cloves)
- 1/2 teaspoon ground cinnamon (for an extra warm kick)
- 1 tablespoon all-purpose flour (helps stabilize the cheesecake and prevent cracking)
Substitution Guidance
If you’re in a pinch, you can use gluten-free gingersnaps for the crust. For a dairy-free version, use a high-quality vegan butter and dairy-free cream cheese, though the texture will be slightly less firm. I’ve tried it with Neufchâtel cheese (lower fat), and it works, but the filling is a bit less creamy.
Equipment Needed
You don’t need a fancy kitchen to pull these off, which is part of their beauty. Here’s what you’ll need:
- 9×9-inch baking pan (An 8×8 works too, but your bars will be a bit thicker and may need an extra 5 minutes of baking time)
- Parchment paper (for easy lifting—this is non-negotiable for clean bars)
- Mixing bowls (one medium, one large)
- Electric hand mixer or stand mixer (a whisk and some elbow grease works, but a mixer makes the filling silky smooth)
- Ziploc bag and rolling pin (for crushing the cookies. A food processor is faster, but the bag method is more satisfying and causes less cleanup)
- Spatula
Preparation Method
- Preheat and Prep (5 minutes): Preheat your oven to 350°F (175°C). Line your 9×9 baking pan with parchment paper, leaving a 2-inch overhang on two opposite sides. This creates “handles” to lift the bars out later. I learned this the hard way after a crumbly mess.
- Make the Crust (10 minutes): Place the gingersnap cookies in a ziploc bag and crush them into fine crumbs using a rolling pin. You want a uniform texture—no big chunks. Pour the crumbs into a medium bowl, add the melted butter, sugar, and salt. Stir with a fork until the mixture looks like wet sand and holds together when pinched.
- Press and Par-Bake (10 minutes): Press the crumb mixture firmly and evenly into the bottom of your prepared pan. Use the bottom of a flat measuring cup to get it nice and tight. Bake for 8-10 minutes, until it’s fragrant and just slightly darker. Set aside to cool while you make the filling.
- Beat the Cream Cheese (5 minutes): In a large bowl, beat the softened cream cheese with an electric mixer on medium speed until it’s completely smooth and fluffy—about 2 minutes. Scrape down the sides of the bowl. This step is crucial; lumps now mean lumps later.
- Add the Sugars (3 minutes): Add the granulated sugar and brown sugar to the cream cheese. Beat on medium speed until well combined and no graininess remains. Scrape the bowl again.
- Incorporate Pumpkin and Eggs (5 minutes): Add the pumpkin puree, vanilla, pumpkin pie spice, and cinnamon. Mix on low speed until just combined. Add the eggs one at a time, mixing on low after each addition just until the yolk disappears. Over-mixing at this stage adds too much air, which can cause cracks. Finally, sprinkle in the flour and mix on low for 15 seconds.
- Assemble and Bake (45-55 minutes): Pour the filling over the pre-baked crust. Gently spread it into an even layer. Bake for 45-55 minutes, or until the edges are set and the center jiggles slightly like set Jell-O. A toothpick inserted an inch from the edge should come out clean.
- Cool Down (Crucial Step): Turn off the oven, crack the door open, and let the bars cool inside for 1 hour. This gentle cooling helps prevent the dreaded crack down the middle. Then, transfer the pan to a wire rack to cool completely to room temperature.
- Chill for Best Results (4 hours or overnight): Cover the pan with plastic wrap and refrigerate for at least 4 hours, preferably overnight. This is the hardest part, but it’s non-negotiable for clean, neat slices.
- Slice and Serve: Use the parchment slings to lift the entire block out of the pan. Use a sharp, clean knife to slice into 16 bars. Wipe the knife clean between cuts for picture-perfect edges.
Cooking Tips & Techniques
I’ve made this recipe so many times that I’ve collected a few battle scars—and a few key lessons. Here’s how to nail it every time.
The Room Temperature Rule: Seriously, let your cream cheese and eggs sit out for 30 minutes. Cold cream cheese creates lumpy batter, and cold eggs can seize the mixture. I once rushed this step and ended up with a filling that looked like cottage cheese. Not cute.
Don’t Over-Bake: The center will look a little wobbly when you pull it out. That’s a good thing. Over-baking is the number one cause of dry, cracked cheesecake. The residual heat will finish the cooking process as it cools.
The Water Bath Hack: I know some recipes call for a water bath, but for these bars, it’s totally unnecessary. The shallow pan and the pre-baked crust do a great job of distributing heat evenly. Just don’t bake them on the top rack.
Crush Evenly: Make sure your gingersnap crumbs are fine and uniform. Big chunks of cookie will create weak spots in the crust that fall apart when you cut the bars. A food processor gives the most consistent result, but a bag and a rolling pin work perfectly if you’re patient.
Variations & Adaptations
This recipe is a fantastic base for experimentation. Here are a few ways I’ve played with it over the years:
- Bourbon Pumpkin Cheesecake Bars: Add 2 tablespoons of good bourbon to the filling along with the vanilla. The warmth of the bourbon pairs beautifully with the pumpkin and ginger. I tried this for a guys’ night, and it was a massive hit.
- Gluten-Free Adaptation: Use gluten-free gingersnap cookies for the crust. The rest of the ingredients are naturally gluten-free, but always double-check your pumpkin puree and spice labels. The texture is identical.
- Chocolate Swirl Pumpkin Bars: Melt 1/2 cup of semi-sweet chocolate chips and drizzle it over the filling before baking. Use a knife to gently swirl it into the pumpkin. It adds a rich, decadent layer that’s perfect for chocolate lovers.
- Vegan Version: Use a high-quality vegan cream cheese (like Kite Hill or Tofutti) and a flax egg (1 tablespoon ground flaxseed + 3 tablespoons water, let sit for 5 minutes). The texture will be slightly softer, but the flavor is still incredible.
Serving & Storage Suggestions
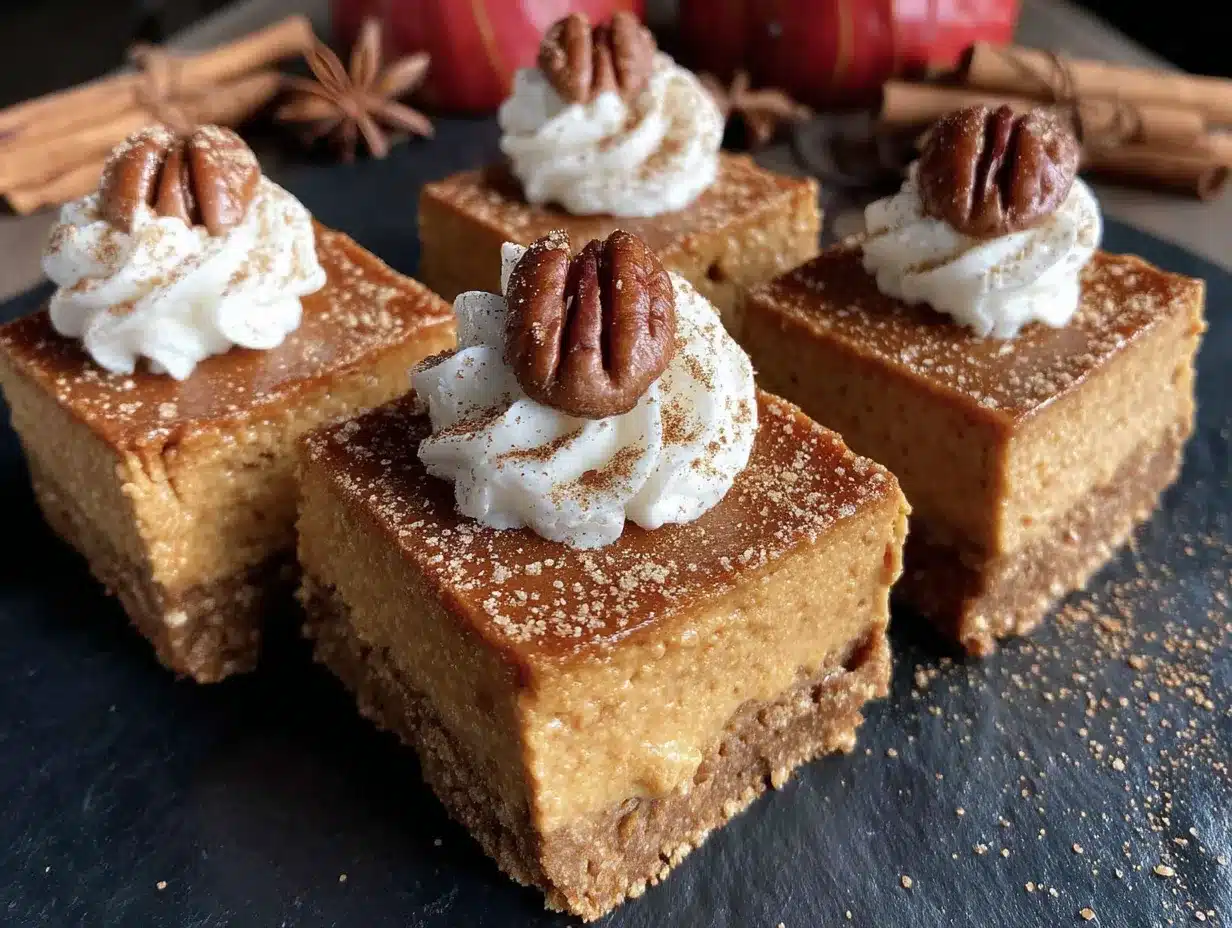
These bars are best served cold, straight from the fridge. The texture is firm, creamy, and utterly satisfying. For a truly decadent experience, let them sit at room temperature for about 10 minutes before serving to take the chill off.
Presentation: A dollop of freshly whipped cream and a light dusting of cinnamon or nutmeg is all you need. For a fall-themed dessert board, arrange the bars on a platter with candied pecans, apple slices, and a drizzle of caramel sauce.
Storage: Store leftover bars in an airtight container in the refrigerator for up to 5 days. The flavors actually meld and deepen over time, making day-two bars even better. I honestly think they peak on day three.
Freezer Instructions: These freeze like a dream. Wrap individual bars tightly in plastic wrap, then place them in a freezer-safe bag. They will keep for up to 3 months. Thaw overnight in the refrigerator before serving. Perfect for when you need a last-minute dessert.
Nutritional Information & Benefits
While these are definitely a treat, using real pumpkin puree does offer some surprising benefits. Pumpkin is packed with Vitamin A (great for your eyes and immune system) and fiber. The cream cheese provides a good dose of calcium and protein. Here’s an approximate breakdown per bar (based on 16 servings):
| Nutrient | Amount |
|---|---|
| Calories | 285 |
| Fat | 16g |
| Carbohydrates | 32g |
| Protein | 5g |
| Sugar | 22g |
| Vitamin A | 80% DV |
Dietary Considerations: This recipe is vegetarian. As noted above, it can be adapted for gluten-free and vegan diets. It contains dairy and gluten in its standard form.
Conclusion
So, there you have it. The recipe that turned a bake sale panic into a personal triumph. These easy pumpkin cheesecake bars with gingersnap crust are proof that you don’t need hours in the kitchen or a list of exotic ingredients to create something truly memorable. They’re forgiving, they’re fast, and they taste like a hug on a crisp autumn day.
I love this recipe because it feels like a secret. It’s my go-to for every fall gathering, and I never get tired of seeing the look on people’s faces when they take that first bite. The crunchy, spicy crust. The silky, spiced filling. It’s simple perfection.
Now, I want to see your creations! Did you try a fun variation? Did these save you from a last-minute dessert emergency? Drop a comment below and tell me about it. And if you loved them as much as I do, share this post with a friend who needs a little fall baking magic in their life. Happy baking!
Frequently Asked Questions
Can I use a different type of cookie for the crust?
Absolutely! While gingersnaps are the star here, you can use graham crackers, shortbread cookies, or even vanilla wafers. Just keep in mind that the flavor profile will change. For a fall twist, speculoos cookies are also a fantastic choice.
My cheesecake cracked. What did I do wrong?
Don’t worry, it happens to the best of us! Cracks are usually caused by over-baking, over-mixing the batter (which adds too much air), or a sudden temperature change. Make sure you cool the bars slowly in the oven with the door cracked open. A dollop of whipped cream hides any cracks beautifully!
Can I make these bars ahead of time?
Yes, and I actually recommend it. These bars need at least 4 hours to chill, but they are even better after 24 hours. You can make them up to 2 days in advance and store them in the refrigerator.
Do I have to use a water bath?
No, you don’t! Unlike a full-sized cheesecake, these bars are shallow enough that a water bath isn’t necessary. The pre-baked crust and gentle cooling method are enough to prevent major cracking.
How do I get clean, neat slices?
Use a sharp, large knife. Run it under hot water, dry it off, and make one clean cut. Wipe the blade clean with a damp paper towel and re-warm it under hot water before each cut. This gives you those bakery-perfect edges.
Pin This Recipe!
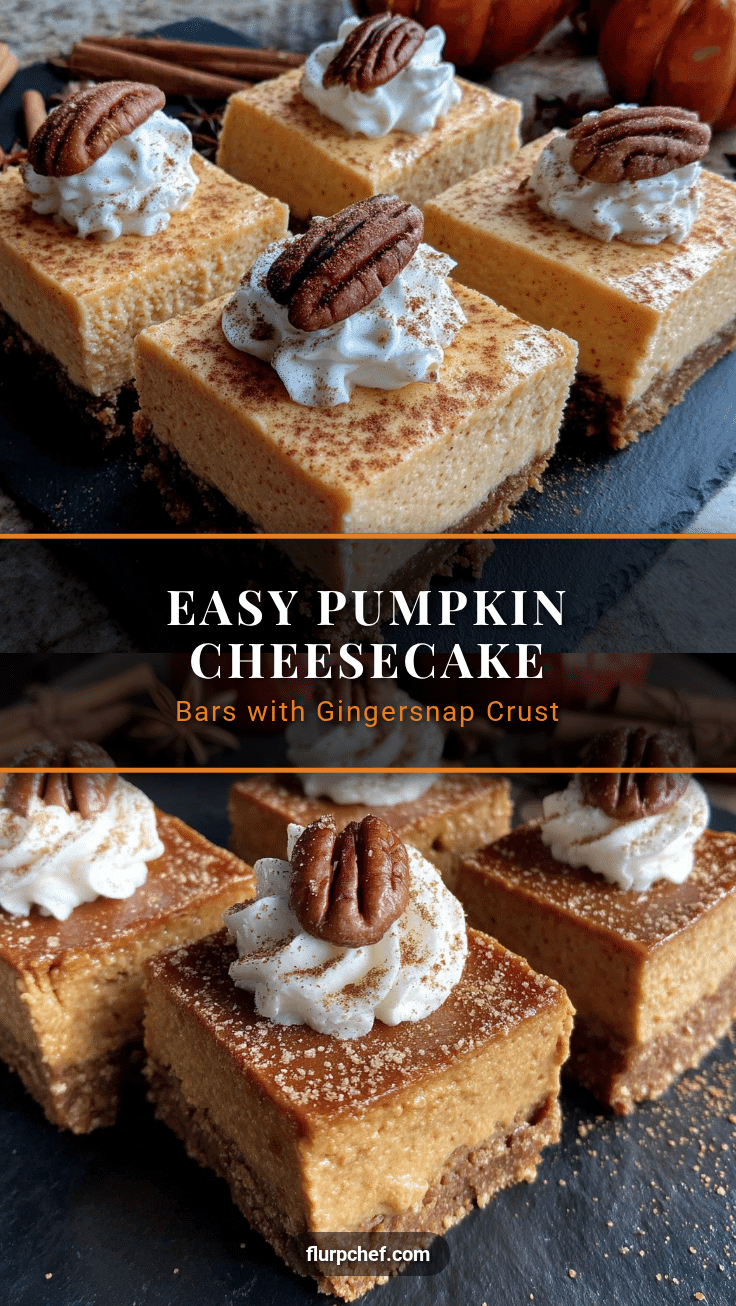
Easy Pumpkin Cheesecake Bars Best Gingersnap Crust Recipe
These easy pumpkin cheesecake bars with a spicy gingersnap crust are the perfect last-minute fall dessert. They’re quick to make, use simple ingredients, and deliver a creamy, crunchy texture that will steal the show at any gathering.
- Prep Time: 20 minutes
- Cook Time: 55 minutes
- Total Time: 5 hours 15 minutes (includes chilling time)
- Yield: 16 servings 1x
- Category: Dessert
- Cuisine: American
Ingredients
- 2 cups gingersnap cookie crumbs (about 8 ounces or 225g of cookies, crushed finely)
- 5 tablespoons unsalted butter (melted)
- 1 tablespoon granulated sugar
- Pinch of salt
- 16 ounces cream cheese (two 8-ounce blocks, softened to room temperature)
- 1 cup granulated sugar (200g)
- 1/2 cup packed light brown sugar (100g)
- 1 cup canned pumpkin puree (not pumpkin pie filling)
- 3 large eggs (room temperature)
- 1 teaspoon vanilla extract
- 1 1/2 teaspoons pumpkin pie spice
- 1/2 teaspoon ground cinnamon
- 1 tablespoon all-purpose flour
Instructions
- Preheat your oven to 350°F (175°C). Line a 9×9-inch baking pan with parchment paper, leaving a 2-inch overhang on two opposite sides.
- Place the gingersnap cookies in a ziploc bag and crush them into fine crumbs using a rolling pin. Pour the crumbs into a medium bowl, add the melted butter, sugar, and salt. Stir with a fork until the mixture looks like wet sand and holds together when pinched.
- Press the crumb mixture firmly and evenly into the bottom of your prepared pan. Use the bottom of a flat measuring cup to get it nice and tight. Bake for 8-10 minutes, until fragrant and just slightly darker. Set aside to cool.
- In a large bowl, beat the softened cream cheese with an electric mixer on medium speed until completely smooth and fluffy—about 2 minutes. Scrape down the sides of the bowl.
- Add the granulated sugar and brown sugar to the cream cheese. Beat on medium speed until well combined and no graininess remains. Scrape the bowl again.
- Add the pumpkin puree, vanilla, pumpkin pie spice, and cinnamon. Mix on low speed until just combined. Add the eggs one at a time, mixing on low after each addition just until the yolk disappears. Sprinkle in the flour and mix on low for 15 seconds.
- Pour the filling over the pre-baked crust. Gently spread it into an even layer. Bake for 45-55 minutes, or until the edges are set and the center jiggles slightly like set Jell-O.
- Turn off the oven, crack the door open, and let the bars cool inside for 1 hour. Then, transfer the pan to a wire rack to cool completely to room temperature.
- Cover the pan with plastic wrap and refrigerate for at least 4 hours, preferably overnight.
- Use the parchment slings to lift the entire block out of the pan. Use a sharp, clean knife to slice into 16 bars. Wipe the knife clean between cuts for picture-perfect edges.
Notes
For best results, ensure cream cheese and eggs are at room temperature. Do not over-bake; the center should jiggle slightly. Chilling overnight yields the cleanest slices. For a gluten-free version, use gluten-free gingersnaps. For a dairy-free version, use vegan butter and dairy-free cream cheese.
Nutrition
- Serving Size: 1 bar
- Calories: 285
- Sugar: 22
- Sodium: 220
- Fat: 16
- Saturated Fat: 9
- Carbohydrates: 32
- Fiber: 1
- Protein: 5
Keywords: pumpkin cheesecake bars, gingersnap crust, fall dessert, easy cheesecake bars, pumpkin dessert, Thanksgiving dessert, bake sale recipe


