I was at the community garden last October, helping to clean up the last of the summer squash, when my neighbor, a retired baker named Margot, watched me struggle to untangle a stubborn vine from the tomato cage. She didn’t say anything at first. Then she just handed me a pair of her own garden shears, the good ones with the orange handles, and said, “You’re fighting it too hard. Snip it at the base.” We got to talking, and I mentioned I was already dreading the sugar rush that comes with Halloween. She laughed and told me about a trick she used to do with her own kids—making meringue cookies that looked like little ghosts. “It’s all about the air,” she said, winking. “And a steady hand for the eyes.” Honestly, I almost didn’t try it. I mean, meringue can be fussy, right? But the way she described it—just egg whites, sugar, and a bit of vanilla—sounded so simple. I went home that afternoon, cracked three eggs, and made a huge mess on my counter. I forgot to separate the yolks cleanly on the first try, and I had to start over. But when those little white puffs came out of the oven, looking all lopsided and cheerful, I knew I had found our new Halloween tradition. Maybe you’ve been there, looking for a treat that feels special but doesn’t require a trip to the store for weird ingredients. This is that recipe.
Why You’ll Love This Recipe
These ghost meringue cookies are more than just a cute Halloween snack. They’ve become a staple in my house because they solve the classic holiday problem: how to give the kids something fun without a mountain of artificial colors and sticky candy. I’ve tested this recipe about six times now, trying different piping tips and baking times, and I can tell you this version is the most forgiving for home cooks. Here is why you will love it:
- Quick & Easy: From start to finish, you are looking at about 2 hours, but most of that is hands-off baking time. The actual prep is only about 15 minutes.
- Simple Ingredients: You need exactly four things: egg whites, sugar, vanilla, and cream of tartar. That’s it. No fancy extracts, no gel food coloring, no corn syrup.
- Perfect for Halloween: These are light, airy, and naturally white—they look like little ghosts floating on the tray. Kids love the shape, and adults love that they aren’t loaded with fat.
- Crowd-Pleaser: I’ve brought these to school parties and potlucks. They disappear faster than the chocolate bars every single time.
- Unbelievably Delicious: The texture is like a marshmallow that melted into a cloud. They are sweet, but not cloying, with a hint of vanilla that lingers.
What makes this recipe different from the rest is the technique. Most meringue recipes tell you to beat the eggs until stiff peaks form, but they don’t tell you what that actually feels like. I’ll walk you through the sensory cues—how the bowl should feel, what the mixture should look like when it’s ready. This isn’t just another version of a meringue cookie; it’s the one that actually works for busy parents who don’t have time for finicky baking.
What Ingredients You Will Need
This recipe relies on a few pantry staples to create that light, crisp texture. The magic is in the ratio of egg whites to sugar, and the stabilizing power of cream of tartar. Here is what you need to gather:
- 3 large egg whites, at room temperature (this is important—cold eggs won’t whip up as high)
- ¾ cup (150g) granulated sugar (I use regular white sugar; avoid superfine or powdered sugar for this)
- ½ teaspoon cream of tartar (this stabilizes the egg whites and helps them hold their shape)
- ½ teaspoon vanilla extract (pure vanilla is best, but imitation works in a pinch)
- A pinch of salt (just a tiny bit to balance the sweetness)
For the ghost faces, you will need a small piping bag or a zip-top bag with the corner snipped off. I also recommend using a baking sheet lined with parchment paper—not wax paper, which can stick. If you want to get fancy, you can add a few drops of orange or black gel food coloring to a separate batch, but I prefer keeping them plain white for the ghost effect. The cream of tartar is non-negotiable here. I learned that the hard way when I tried to skip it once and ended up with flat, weepy meringues. You can substitute it with a teaspoon of lemon juice or white vinegar in a pinch, but the cream of tartar gives the most reliable results.
Equipment Needed
You do not need a fancy kitchen to pull these off. Here is what I use every time:
- Electric hand mixer or stand mixer (you can whisk by hand, but your arm will hate you—trust me, I’ve tried)
- Large glass or metal mixing bowl (plastic bowls can hold grease, which ruins meringue)
- Piping bag with a round tip (I use a Wilton #12 tip, but a zip-top bag with the corner cut off works perfectly)
- Baking sheet (a standard half-sheet pan is ideal)
- Parchment paper (do not skip this—it makes cleanup a breeze)
- Cooling rack (for letting the cookies cool completely)
If you don’t have a piping bag, you can use a sturdy zip-top bag. Just fill it with the meringue, seal it, and snip off a tiny corner. The hole should be about ¼ inch wide. I’ve also used a spoon to dollop the meringue into ghost shapes, and while they look more like blobs than ghosts, they still taste great. For the eyes, you can use a toothpick dipped in melted chocolate, or just leave them plain—kids don’t seem to mind either way.
Preparation Method
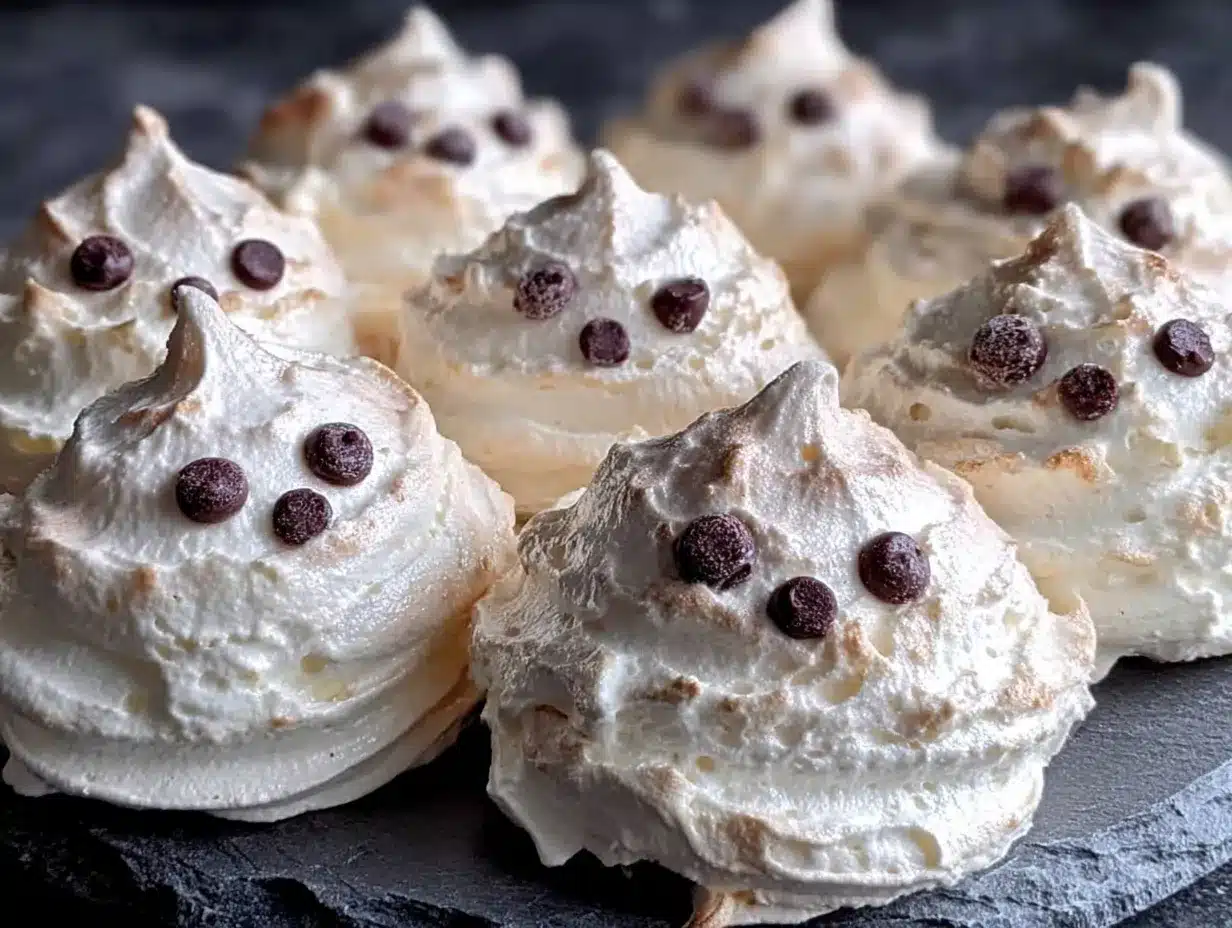
Making meringue is all about patience and paying attention to the texture. Here is how I do it, step by step:
- Preheat and prep. Preheat your oven to 200°F (95°C). Line a baking sheet with parchment paper. This low temperature is what dries the meringues out without browning them.
- Separate the eggs. Crack your eggs when they are cold—it’s easier to separate the yolks that way. Let the whites sit in your mixing bowl for about 15 minutes to come to room temperature. Cold egg whites don’t whip as high, and you want maximum volume here.
- Start whipping. Add the cream of tartar and salt to the egg whites. Begin beating on medium speed until the mixture becomes frothy and bubbly, about 1 minute. You should see small bubbles covering the surface.
- Add the sugar slowly. With the mixer running on medium-high, start adding the sugar one tablespoon at a time. I know it’s tedious, but adding it all at once will deflate the whites. Keep beating until the sugar dissolves completely. To test this, rub a tiny bit of the mixture between your fingers. If it feels gritty, keep beating. This usually takes about 5-7 minutes with a hand mixer.
- Whip to stiff peaks. Once the sugar is dissolved, increase the speed to high and beat until the meringue is thick, glossy, and forms stiff peaks. You know it’s ready when you lift the beater and the meringue stands up straight without drooping. The bowl should feel cool to the touch. Add the vanilla extract and beat for another 30 seconds to combine.
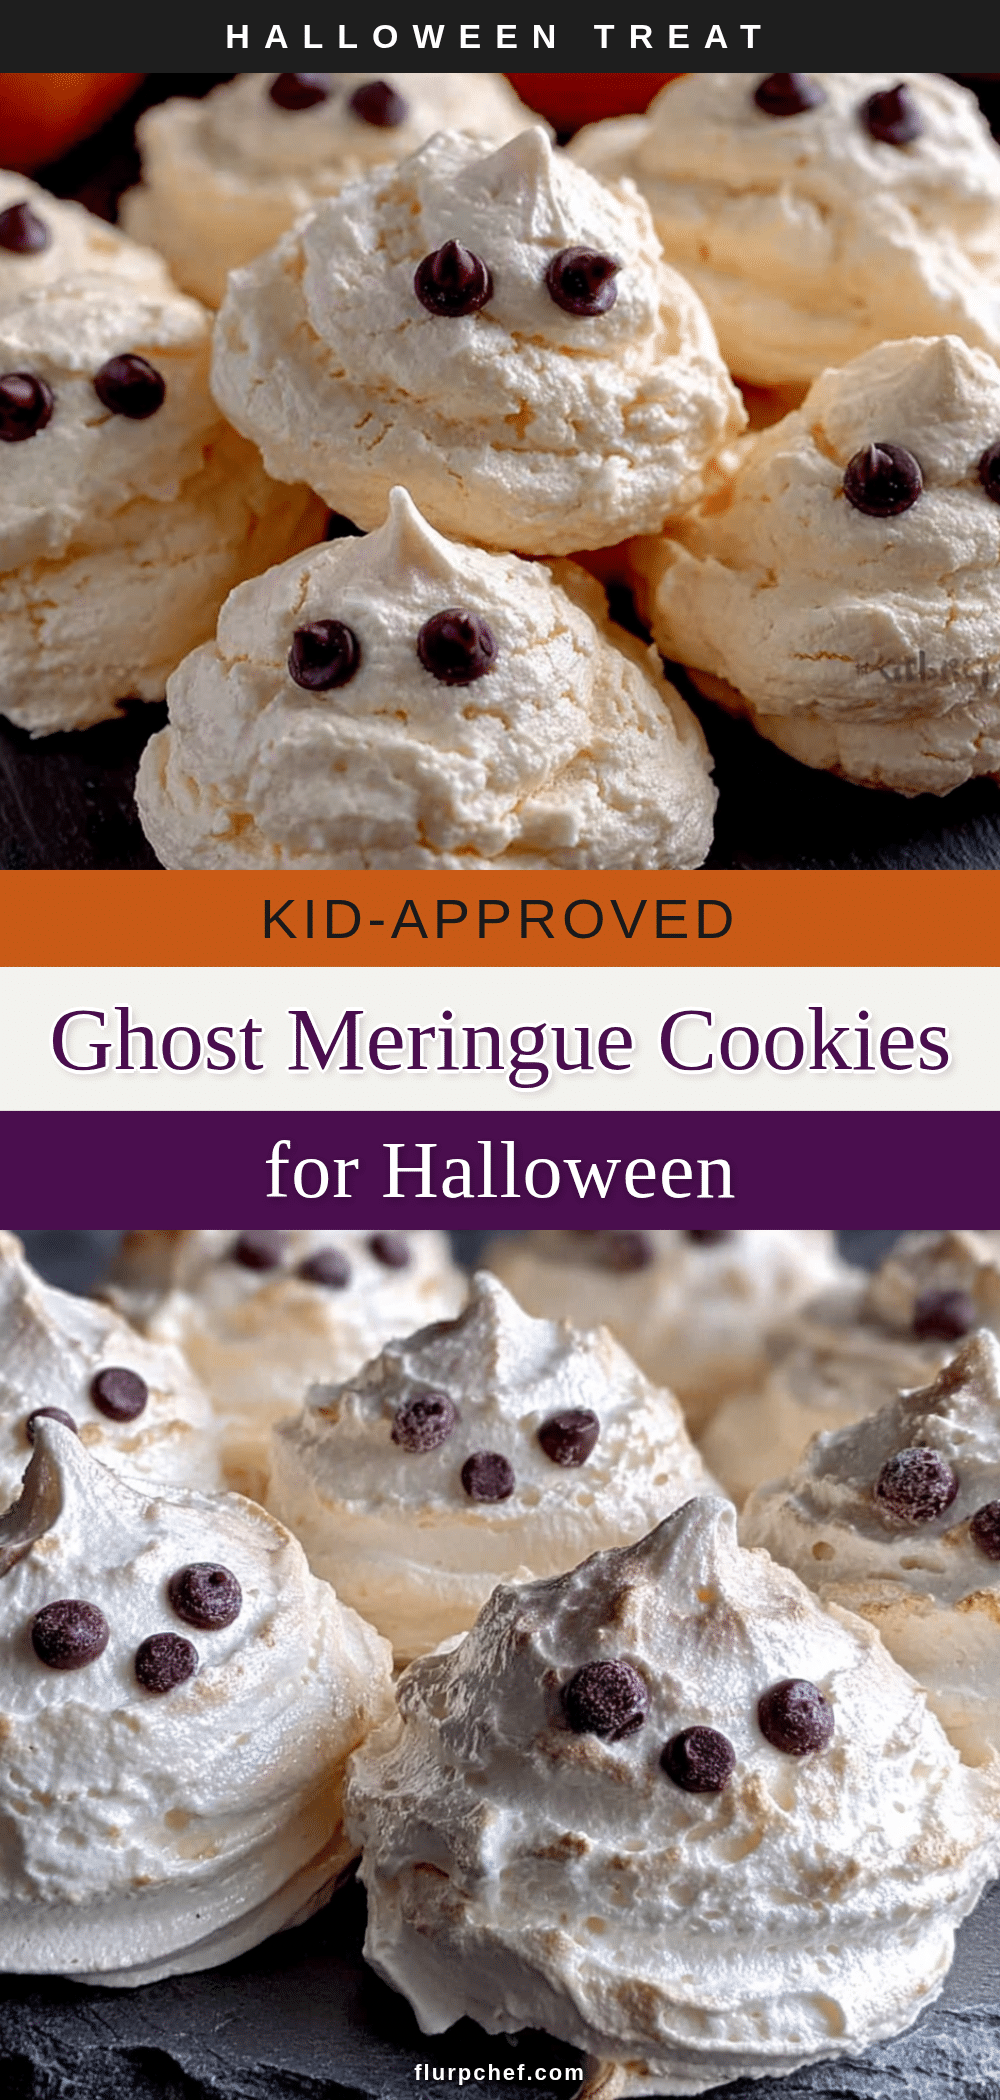
- Pipe the ghosts. Transfer the meringue to your piping bag. Hold the bag straight up and down, about ½ inch above the baking sheet. Pipe a small mound, about 1.5 inches wide, then pull the bag straight up to create a little peak on top. This peak will look like the ghost’s head. Leave about 1 inch of space between each ghost.
- Add the faces (optional). If you want to add eyes and mouths, use a toothpick dipped in melted chocolate to dot them on before baking. You can also use mini chocolate chips, but they might sink a bit during baking.
- Bake low and slow. Place the baking sheet in the preheated oven and bake for 1 hour. Do not open the oven door during this time. After 1 hour, turn off the oven but leave the cookies inside for another 30 minutes to dry out completely. They are done when they lift easily off the parchment paper.
- Cool completely. Transfer the cookies to a cooling rack and let them sit for at least 10 minutes before serving. They will be fragile, so handle them gently.
One thing I always do is check the oven temperature with an oven thermometer. My oven runs hot, and the first batch I made came out slightly tan instead of pure white. If your cookies start to brown, your oven is too hot—lower the temperature by 10-15 degrees next time.
Cooking Tips & Techniques
I have made more batches of failed meringue than I care to admit. Here are the lessons I learned the hard way so you don’t have to:
Make sure your bowl is completely clean. Any trace of grease or yolk will prevent the egg whites from whipping up. I wipe my bowl with a paper towel dipped in lemon juice or vinegar before I start. It sounds extra, but it works.
Humidity is the enemy. Meringue is basically sugar and air, and sugar loves water. If you try to make these on a rainy or humid day, the cookies will end up sticky and chewy instead of crisp. Pick a dry day, or run your air conditioner to dry out the kitchen a bit.
Don’t overbeat. Once you reach stiff peaks, stop. If you keep beating, the meringue will start to look grainy and curdled. I did this once while I was distracted by a phone call, and the mixture turned into a watery mess. There is no saving it at that point, so watch closely.
Use a timer for the sugar. I set a timer for one minute between each tablespoon of sugar. It keeps me from rushing and ensures the sugar dissolves properly. If you dump it all in at once, your meringue will be gritty and may collapse in the oven.
Let them rest in the oven. The hardest part is waiting. That extra 30 minutes with the oven off is what gives the cookies their crisp, melt-in-your-mouth texture. If you pull them out too early, they will be chewy and stick to your teeth.
Variations & Adaptations
These ghost meringues are forgiving enough to play around with. Here are a few ways I’ve changed them up:
Chocolate-dipped ghosts. After the cookies have cooled completely, melt some dark chocolate and dip the bottoms. Let them set on parchment paper. The contrast between the sweet meringue and the bitter chocolate is fantastic.
Peppermint ghosts. Swap the vanilla extract for ¼ teaspoon of peppermint extract. This turns them into a winter holiday treat. I’ve made these for Christmas parties, and they look like little snowmen.
Gluten-free and dairy-free. This recipe is naturally gluten-free and dairy-free, so it’s perfect for kids with allergies. Just double-check your vanilla extract to make sure it doesn’t contain any gluten-based additives.
Colored ghosts. If you want to get festive, add a drop of orange or purple gel food coloring to the meringue before piping. Swirl it in gently with a spatula to create a marbled effect. I did this for a Halloween party, and the kids went wild for the “tie-dye ghosts.”
Spiced ghosts. Add ¼ teaspoon of pumpkin pie spice to the sugar before you start whipping. It gives the cookies a subtle autumn flavor without overpowering the vanilla.
Serving & Storage Suggestions
These cookies are best served at room temperature, right after they have cooled. I like to arrange them on a platter with some orange and black sprinkles scattered around for a festive look. They pair beautifully with a cup of hot cocoa or a warm apple cider—the sweetness of the meringue balances the tartness of the drink.
For storage, place the cookies in an airtight container at room temperature. Do not refrigerate them, as the moisture in the fridge will make them sticky. They will stay crisp for up to 5 days, though they rarely last that long in my house. If you live in a humid climate, add a silica gel packet (the kind you find in shoe boxes) to the container to absorb excess moisture.
You can also freeze these cookies. Place them in a single layer in a freezer-safe container, with parchment paper between layers. They will keep for up to 3 months. To serve, let them thaw at room temperature for about 15 minutes. The texture might be slightly softer, but they will still be delicious.
One thing I love about these cookies is that the flavor actually improves after a day. The vanilla mellows out, and the texture becomes even more delicate. So if you can resist eating them all on day one, you will be rewarded on day two.
Nutritional Information & Benefits
These ghost meringue cookies are surprisingly light compared to most Halloween treats. Here is the estimated nutrition for one cookie (based on a batch of 24):
| Nutrient | Amount per Cookie |
|---|---|
| Calories | 25 |
| Total Fat | 0g |
| Sodium | 10mg |
| Total Carbohydrates | 6g |
| Sugars | 6g |
| Protein | 0.5g |
The main health benefit here is that these cookies are fat-free and very low in calories. They are a great option for kids who want something sweet without the heavy load of butter and flour. Egg whites are a good source of protein, though the amount per cookie is small. If you are watching your sugar intake, you can reduce the sugar to ½ cup, but the texture will be slightly less crisp. These cookies are gluten-free, dairy-free, and nut-free, making them a safe choice for school parties where allergies are a concern.
Conclusion
These ghost meringue cookies have become our go-to Halloween treat for a reason. They are simple enough for a weeknight baking session, but special enough to bring to a party. I love that they give my kids the thrill of a sugary snack without the guilt of handing them a candy bar. Plus, watching them pipe their own little ghosts—some with three eyes, some with lopsided smiles—is a memory I will keep forever. I hope you give these a try and make them your own. Maybe you will add a pinch of cinnamon, or dip them in chocolate, or just leave them plain and perfect. Whatever you do, I would love to hear about it. Drop a comment below and tell me how your ghosts turned out. Did the kids help? Did you make a mess? I promise, it is worth it.
Frequently Asked Questions
Can I use liquid egg whites from a carton?
Yes, you can, but they don’t whip up as high as fresh egg whites. If you use carton egg whites, make sure they are at room temperature and add an extra tablespoon of cream of tartar to help stabilize them.
Why are my meringues sticky?
Sticky meringues usually mean they weren’t baked long enough or the humidity was too high. Make sure you let them cool completely in the oven with the door closed. If your kitchen is humid, try running a dehumidifier or baking on a dry day.
Can I use a different type of sugar?
I recommend using regular granulated sugar. Superfine sugar dissolves too quickly, and powdered sugar contains cornstarch, which can make the meringue grainy. Brown sugar has too much moisture and will make the cookies soft.
How do I store leftover meringues?
Place them in an airtight container at room temperature. Do not refrigerate. They will stay crisp for up to 5 days. If they get soft, you can re-crisp them in a 200°F oven for 10 minutes.
Can I make these ahead of time?
Absolutely. These cookies actually taste better after a day. You can bake them up to 3 days in advance and store them in an airtight container. Just keep them away from moisture, and they will be perfect for your Halloween party.
Pin This Recipe!
Easy Ghost Meringue Cookies: Best Halloween Recipe
These ghost meringue cookies are light, airy, and naturally white, making them a perfect Halloween treat. With just four simple ingredients, they are quick to prepare and a crowd-pleaser for both kids and adults.
- Prep Time: 15 minutes
- Cook Time: 1 hour 30 minutes
- Total Time: 2 hours
- Yield: 24 servings 1x
- Category: Dessert
- Cuisine: American
Ingredients
- 3 large egg whites, at room temperature
- 3/4 cup (150g) granulated sugar
- 1/2 teaspoon cream of tartar
- 1/2 teaspoon vanilla extract
- A pinch of salt
Instructions
- Preheat your oven to 200°F (95°C). Line a baking sheet with parchment paper.
- Separate the eggs when cold, then let the whites sit in your mixing bowl for about 15 minutes to come to room temperature.
- Add the cream of tartar and salt to the egg whites. Begin beating on medium speed until frothy and bubbly, about 1 minute.
- With the mixer running on medium-high, add the sugar one tablespoon at a time, beating until the sugar dissolves completely (test by rubbing a bit between your fingers; if gritty, keep beating). This takes about 5-7 minutes with a hand mixer.
- Increase speed to high and beat until the meringue is thick, glossy, and forms stiff peaks. The bowl should feel cool to the touch. Add the vanilla extract and beat for another 30 seconds.
- Transfer the meringue to a piping bag fitted with a round tip (or a zip-top bag with a corner snipped off). Pipe small mounds about 1.5 inches wide, pulling straight up to create a peak on top. Leave 1 inch of space between each ghost.
- Optional: Use a toothpick dipped in melted chocolate to dot eyes and mouths on the ghosts before baking.
- Bake for 1 hour without opening the oven door. After 1 hour, turn off the oven and leave the cookies inside for another 30 minutes to dry out completely.
- Transfer the cookies to a cooling rack and let them sit for at least 10 minutes before serving.
Notes
Make sure your bowl is completely clean and free of grease. Avoid making meringue on humid days. Do not overbeat the meringue; stop once stiff peaks form. Let the cookies rest in the oven after baking for a crisp texture.
Nutrition
- Serving Size: 1 cookie
- Calories: 25
- Sugar: 6
- Sodium: 10
- Carbohydrates: 6
- Protein: 0.5
Keywords: ghost meringue cookies, Halloween cookies, meringue cookies, easy Halloween recipe, gluten-free cookies, dairy-free cookies


