I was standing in the baking aisle of my local grocery store last October, staring at a display of canned pumpkin that was already picked clean, when a woman next to me let out this frustrated sigh. “I just want to make one decent fall dessert without turning on my oven,” she muttered, more to herself than to me. And just like that, I was ten years old again, sitting on the cold linoleum floor of my Aunt Lena’s tiny apartment kitchen, watching her crush graham crackers with a rolling pin because she didn’t own a food processor. She’d laugh and say the uneven crumbs gave the crust “character.” I remember the way the butter and cinnamon smelled when they hit those crumbs, and how she’d let me lick the spoon clean even though she’d just used it to stir the cream cheese filling. She passed away three years ago, and I still catch myself trying to recreate that specific feeling—the one where everything feels safe and warm and like maybe nothing bad can touch you. That woman in the grocery store probably had no idea she’d send me down memory lane, but honestly, I think that’s how comfort recipes work. They find you when you least expect it.
These Cozy No-Bake Pumpkin Cheesecake Bars are my attempt to bottle that exact feeling. They’re the dessert you make when you want something decadent and seasonal but don’t want to deal with a hot kitchen or a complicated water bath. The filling is silky smooth, the pumpkin flavor is warm and spiced without being overwhelming, and that buttery graham cracker crust—well, let me tell you, it holds up beautifully without any baking. I’ve made these bars for three Thanksgivings now, and they’ve become the thing people ask me to bring. Maybe you’ve been there, standing in front of your fridge at 10 PM, craving something sweet and cozy but too tired to commit to a full baking project. These bars are for those moments.
Why You’ll Love This Recipe
I’ve tested this recipe about seven times to get it just right, and here’s what I’ve learned: you don’t need to be a pastry chef to pull this off. Honestly, if you can stir and pour, you’ve got this handled.
- No Oven Required — This is the whole point, really. The crust sets in the fridge, and the filling firms up beautifully without any heat. Perfect for those warm fall days when you still want pumpkin spice everything but can’t stand the thought of turning on your oven.
- Simple Ingredients — You probably already have most of these in your pantry. Cream cheese, pumpkin puree, graham crackers, butter, sugar, and pumpkin pie spice. No weird specialty items that you’ll use once and forget about.
- Perfect for Fall Gatherings — These bars travel well, slice cleanly, and look gorgeous on a dessert table. I’ve brought them to Friendsgiving dinners, potlucks, and even a casual book club meeting where everyone pretended to talk about the book but really just wanted dessert.
- Crowd-Pleaser — I’ve yet to meet someone who doesn’t like these. Kids love the creamy texture, adults appreciate the sophisticated pumpkin flavor, and everyone loves that they’re not too sweet.
- Make-Ahead Friendly — You can prep these a day or two in advance, which is basically a lifesaver during the holiday season. The flavors actually get better after they’ve had time to meld together in the fridge.
What makes these different from other no-bake pumpkin desserts I’ve tried? It’s the texture. So many no-bake cheesecakes end up either too dense or too soft, but this one hits that perfect middle ground—firm enough to slice cleanly but still luxuriously creamy on your tongue. I use a combination of cream cheese and a stabilizer trick that keeps the bars from getting weepy, which is a common problem with no-bake pumpkin desserts. Trust me, I’ve had my share of soggy crusts and watery fillings before I figured this out.
These bars are the kind of dessert that makes you close your eyes after the first bite. They’re comfort food in its purest form—easy to make, impossible to resist, and somehow exactly what you needed on a chilly autumn evening.
What Ingredients You Will Need
This recipe uses straightforward ingredients that work together to create something truly special. The magic is in the proportions and the quality of what you choose.
For the Crust
- 2 cups (200g) graham cracker crumbs — You can buy pre-crushed crumbs, but I honestly prefer crushing my own. It gives you more control over the texture, and the uneven bits add character. About 14-16 full graham cracker sheets will get you there.
- 1/2 cup (115g) unsalted butter, melted — Use real butter here, not margarine. It makes a huge difference in flavor and helps the crust hold together better. I like using a good quality European-style butter for extra richness.
- 1/4 cup (50g) granulated sugar — Just enough to sweeten the crust without making it candy-like.
- 1/2 teaspoon ground cinnamon — This is optional, but I think it adds a lovely warmth that complements the pumpkin filling.
- Pinch of salt — Don’t skip this. Salt balances the sweetness and makes the crust taste more buttery.
For the Pumpkin Cheesecake Filling
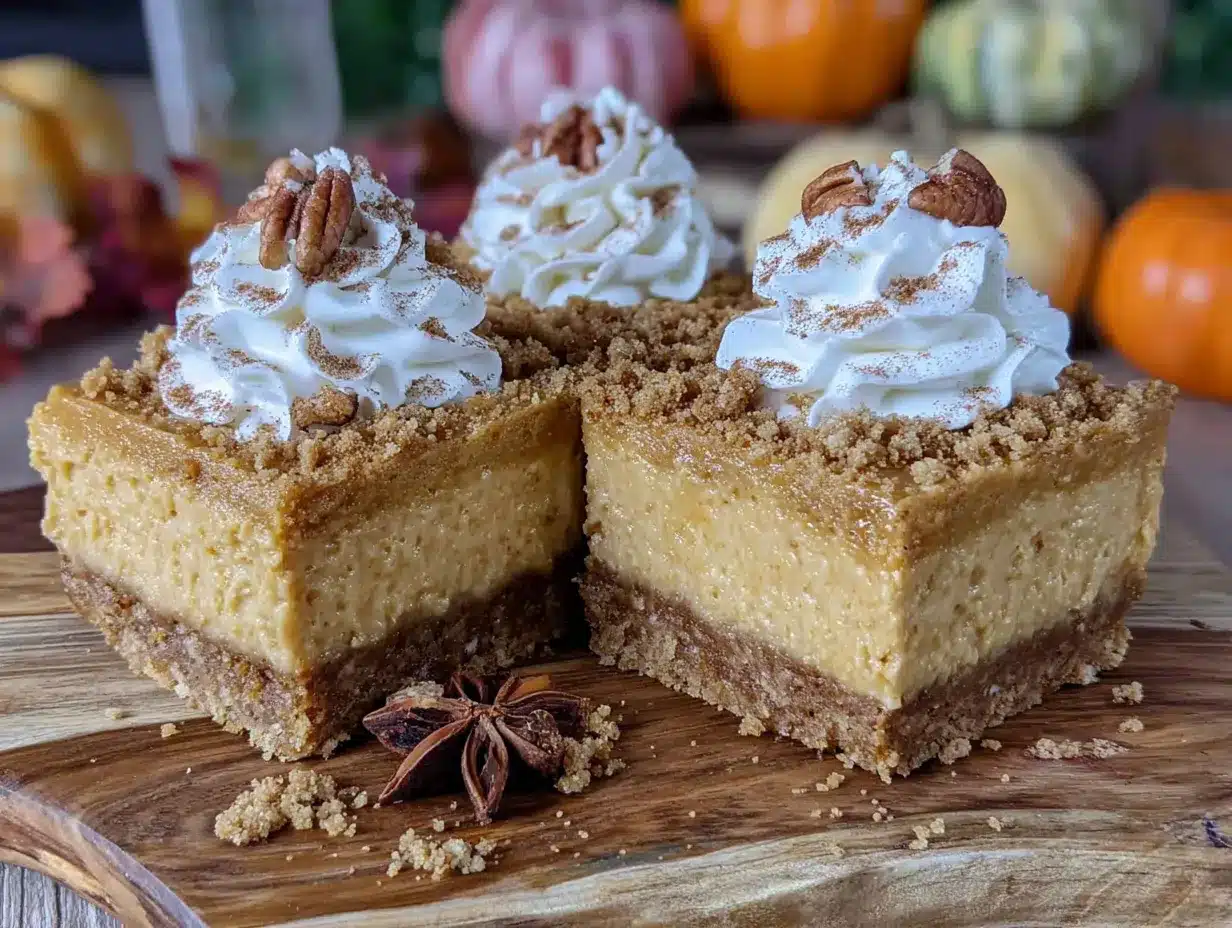
- 16 oz (450g) cream cheese, softened to room temperature — This is crucial. Cold cream cheese will give you a lumpy filling no matter how hard you beat it. Let it sit on the counter for at least an hour before you start. I recommend Philadelphia brand for consistent results.
- 1 cup (200g) granulated sugar — Regular white sugar works perfectly here. It dissolves easily and doesn’t compete with the pumpkin flavor.
- 1 cup (240g) pumpkin puree — Make sure you’re buying pure pumpkin puree, not pumpkin pie filling. They’re different products, and pie filling has added sugar and spices that will throw off your proportions. Libby’s is my go-to brand.
- 1 teaspoon vanilla extract — Pure vanilla extract tastes better than imitation, but honestly, in a recipe with this much going on, either works fine.
- 2 teaspoons pumpkin pie spice — You can buy this pre-mixed, or make your own with 1 teaspoon cinnamon, 1/2 teaspoon ginger, 1/4 teaspoon nutmeg, 1/4 teaspoon allspice, and a pinch of cloves.
- 1/4 teaspoon salt — Again, don’t skip it. Salt makes the flavors pop.
- 1 cup (240ml) heavy whipping cream, cold — This is what gives the filling its light, airy texture. Make sure it’s well-chilled before you whip it.
- 2 tablespoons (15g) powdered sugar — This helps stabilize the whipped cream and adds a touch of sweetness.
For the Topping (Optional but Recommended)
- 1/2 cup (120ml) heavy whipping cream — For making fresh whipped cream to dollop on top.
- 1 tablespoon (8g) powdered sugar — To sweeten the whipped cream.
- 1/4 teaspoon vanilla extract — For flavor.
- Ground cinnamon or pumpkin pie spice, for dusting — This makes the bars look prettier and adds a little extra flavor punch.
- Optional: caramel sauce, chopped pecans, or candied ginger — These are fun add-ons if you want to get fancy.
Equipment Needed
You don’t need a fancy kitchen to pull these off. Here’s what I use:
- 9×9-inch square baking pan — This is the perfect size for getting nice, thick bars. If you only have an 8×8, that works too, but your bars will be slightly taller and you might need to increase the chilling time. A 9×13 will give you thinner bars that set faster.
- Parchment paper — Line your pan with this, leaving some overhang on two sides. It makes lifting the bars out so much easier. I’ve tried using foil, but parchment is less likely to tear.
- Food processor or zip-top bag and rolling pin — For crushing graham crackers. The food processor is faster, but honestly, the bag-and-rolling-pin method is oddly satisfying and gives you more control over the texture.
- Medium mixing bowl — For the crust ingredients.
- Large mixing bowl — For the cream cheese mixture.
- Another large mixing bowl — For whipping the cream. Glass or metal bowls work best for this because they hold cold temperatures better.
- Electric hand mixer or stand mixer — You can technically do this by hand, but your arm will get tired. A hand mixer is perfect for this recipe.
- Rubber spatula — For scraping down the sides of the bowl and folding in the whipped cream.
- Measuring cups and spoons — Accuracy matters in baking, even no-bake baking.
- Plastic wrap — To cover the pan while it chills.
If you don’t have a food processor, don’t stress. I’ve made these bars using a zip-top bag and a wine bottle as a rolling pin (desperate times, you know). The crumbs won’t be perfectly uniform, but that’s actually a good thing—it gives the crust more texture and character.
Preparation Method
Let me walk you through this step by step. I’ve included all the little details I wish someone had told me the first time I made these.
Step 1: Prepare Your Pan
Line your 9×9-inch baking pan with parchment paper, leaving about 2 inches of overhang on two opposite sides. This creates little handles that make it easy to lift the bars out later. If you don’t have parchment, you can use aluminum foil, but make sure to grease it lightly with butter or cooking spray so the crust doesn’t stick.
Step 2: Make the Crust
In a medium bowl, combine 2 cups graham cracker crumbs, 1/4 cup sugar, 1/2 teaspoon cinnamon, and a pinch of salt. Pour in 1/2 cup melted butter and stir with a fork until all the crumbs are evenly moistened. The mixture should look like wet sand and hold together when you squeeze it in your fist. If it seems too dry, add another tablespoon of melted butter. If it seems too wet, add a few more crumbs. Transfer the mixture to your prepared pan and press it down firmly and evenly. I use the bottom of a measuring cup to really pack it in. Pop this in the refrigerator to firm up while you make the filling.
Step 3: Whip the Cream
In a large bowl, combine 1 cup cold heavy whipping cream, 2 tablespoons powdered sugar, and 1/2 teaspoon vanilla extract. Using an electric mixer with the whisk attachment, beat on medium-high speed until stiff peaks form. This takes about 3-4 minutes. You’ll know it’s ready when you lift the beaters and the cream holds its shape without drooping. Be careful not to over-whip, or you’ll end up with butter. Set this aside in the refrigerator while you work on the cream cheese mixture.
Step 4: Make the Cream Cheese Base
In another large bowl, beat 16 oz softened cream cheese with 1 cup granulated sugar until smooth and creamy. This takes about 2 minutes on medium speed. Scrape down the sides and bottom of the bowl with a rubber spatula to make sure everything is incorporated. Add 1 cup pumpkin puree, 1 teaspoon vanilla extract, 2 teaspoons pumpkin pie spice, and 1/4 teaspoon salt. Beat on medium speed until everything is combined and smooth. The mixture should be a beautiful orange color and smell like fall in a bowl.
Step 5: Fold Everything Together
Take your whipped cream out of the refrigerator. Add about one-third of it to the cream cheese mixture and fold it in gently with your rubber spatula. This first addition lightens the mixture and makes it easier to incorporate the rest. Add the remaining whipped cream and fold until just combined. You want to see a uniform color with no white streaks, but don’t over-mix, or you’ll deflate all that air you worked so hard to create. The filling should be light, fluffy, and almost mousse-like in texture.
Step 6: Assemble and Chill
Take the crust out of the refrigerator. Pour the filling over the crust and spread it evenly with your spatula. Give the pan a few gentle taps on the counter to release any air bubbles. Cover the pan with plastic wrap and refrigerate for at least 6 hours, but preferably overnight. I know the waiting is the hardest part, but trust me, this is where the magic happens. The bars need time to set properly so they slice cleanly.
Step 7: Make the Topping
When you’re ready to serve, make the whipped cream topping. In a medium bowl, combine 1/2 cup cold heavy whipping cream, 1 tablespoon powdered sugar, and 1/4 teaspoon vanilla extract. Whip until soft peaks form. You want it to be spreadable but still hold its shape.
Step 8: Slice and Serve
Use the parchment handles to lift the bars out of the pan. Place them on a cutting board and use a sharp knife to slice them into 9 or 16 squares, depending on how big you want them. For clean slices, wipe the knife clean between cuts. Top each bar with a dollop of whipped cream and a dusting of cinnamon or pumpkin pie spice. If you’re feeling extra fancy, drizzle with caramel sauce and sprinkle with chopped pecans.
Cooking Tips & Techniques
I’ve made these bars enough times to have a few tricks up my sleeve. Here are the things I wish I’d known from the beginning:
Room temperature cream cheese is non-negotiable. I learned this the hard way when I tried to rush the process and ended up with lumpy filling. Let your cream cheese sit out for at least an hour before you start. If you’re short on time, you can microwave it in 10-second bursts, but be careful not to melt it. You want it soft, not warm.
Don’t skip the whipped cream. Some no-bake cheesecake recipes use condensed milk or more cream cheese to thicken the filling, but whipping cream separately and folding it in gives you a much lighter, airier texture. It’s the difference between a dense brick and a cloud-like dream.
Patience with chilling is everything. I know it’s tempting to dig in after a few hours, but 6 hours is the minimum. Overnight is better. The bars need time to fully set, and the flavors need time to meld. I once served these after only 4 hours, and they were still a bit soft in the middle. They tasted good, but they didn’t slice cleanly.
Press the crust firmly. This is one area where you can’t be shy. Use the bottom of a measuring cup or a flat-bottomed glass to really pack those crumbs down. A loosely pressed crust will crumble when you try to cut the bars.
If your filling looks grainy, you over-mixed. This happened to me once when I got distracted by my phone. Over-mixing can cause the cream cheese to break down and become grainy. Mix just until everything is combined, then stop.
Variations & Adaptations
One of the best things about this recipe is how easy it is to customize. Here are some variations I’ve tried and loved:
Gluten-Free Version: Swap the graham crackers for gluten-free graham crackers or use crushed gluten-free shortbread cookies. I’ve also used crushed gluten-free ginger snaps, which add a lovely spicy kick to the crust. Just check the package to make sure everything else in the recipe is gluten-free.
Dairy-Free Version: Use dairy-free cream cheese (I like Violife or Kite Hill) and replace the heavy cream with full-fat coconut cream. Chill the can of coconut cream overnight and scoop out the solid part to whip. The texture will be slightly different, but it’s still delicious. Use a vegan butter alternative for the crust.
Pumpkin Spice Latte Twist: Add 1 tablespoon of instant espresso powder dissolved in 1 tablespoon of hot water to the filling along with the pumpkin puree. This gives the bars a subtle coffee flavor that pairs beautifully with the pumpkin spice. Top with chocolate shavings for extra indulgence.
Gingersnap Crust: Replace the graham crackers with crushed gingersnap cookies. The spicy, molasses-y flavor of the gingersnaps complements the pumpkin filling perfectly. This is my personal favorite variation for holiday gatherings.
Mini Version: Make these in a muffin tin lined with paper liners for individual servings. They set faster (about 3-4 hours) and are perfect for parties or portion control. Just press about 2 tablespoons of crust mixture into each liner and top with filling.
Serving & Storage Suggestions
These bars are best served cold, straight from the refrigerator. The texture is firm but creamy, and the flavors are more pronounced when they’re chilled. If you’ve added the whipped cream topping, I recommend adding it right before serving so it stays fresh and fluffy.
For presentation, I like to arrange the bars on a white platter and dust them lightly with cinnamon. A drizzle of caramel sauce and a few candied pecans make them look extra festive. They pair beautifully with a hot cup of coffee, spiced chai, or a glass of cold milk.
Storage: Keep leftover bars covered in the refrigerator for up to 5 days. The crust might soften slightly over time, but they’ll still taste amazing. I don’t recommend freezing these bars because the texture of the cream cheese filling can become grainy when thawed. If you absolutely must freeze them, do so without the whipped cream topping and thaw them in the refrigerator overnight. They’re best enjoyed within the first 2-3 days.
One thing I’ve noticed is that the flavors actually get better after the first day. The pumpkin spice has time to mellow and meld with the cream cheese, creating a more complex, well-rounded flavor. So if you can resist eating them all on day one, you’re in for a treat on day two.
Nutritional Information & Benefits
Here’s the thing about these bars: they’re a dessert, so I’m not going to pretend they’re health food. But they do have some redeeming qualities worth mentioning.
| Nutrient | Per Bar (1/9 of recipe) |
|---|---|
| Calories | 385 |
| Total Fat | 28g |
| Saturated Fat | 17g |
| Carbohydrates | 32g |
| Sugar | 23g |
| Protein | 5g |
| Vitamin A | 95% DV |
| Calcium | 6% DV |
Pumpkin is packed with vitamin A, which is great for eye health and immune function. It’s also a good source of fiber and antioxidants. The cream cheese provides calcium and protein, and the heavy cream adds healthy fats that help keep you full. Of course, there’s sugar and butter in here too, but that’s what makes it a treat worth savoring.
If you’re watching your sugar intake, you can reduce the sugar in the filling to 3/4 cup without significantly affecting the texture. You can also use a sugar substitute like monk fruit sweetener, though I haven’t tested this myself. For a lower-fat version, you can use reduced-fat cream cheese, but the texture won’t be quite as rich and creamy.
Conclusion
These Cozy No-Bake Pumpkin Cheesecake Bars have become my go-to fall dessert for a reason. They’re simple enough for a Tuesday night craving but impressive enough for a holiday table. The combination of that buttery, cinnamon-spiced crust with the silky pumpkin filling is pure comfort in every bite.
What I love most about this recipe is how forgiving it is. You don’t need any special skills or fancy equipment. You just need a little patience while it chills. And honestly, isn’t that the perfect fall activity? Making something cozy, then waiting just long enough to make it even better?
I hope you give these bars a try. Make them for your family, your friends, or just for yourself on a quiet autumn evening. And when you do, I’d love to hear how they turned out. Did you try a variation? Add your own twist? Leave a comment below and let me know. Your feedback helps other readers, and it honestly makes my day to hear about your kitchen adventures.
Until next time, happy no-baking, and may your kitchen always smell like cinnamon and pumpkin spice.
Frequently Asked Questions
Can I use pumpkin pie filling instead of pumpkin puree?
No, I wouldn’t recommend it. Pumpkin pie filling already has sugar and spices added, so it will throw off the sweetness and spice levels in this recipe. Stick with 100% pure pumpkin puree for the best results. If you accidentally buy pie filling, you can still use it, but reduce the sugar to 1/2 cup and skip the pumpkin pie spice.
How long do these bars need to set in the fridge?
At least 6 hours, but overnight is ideal. The longer they chill, the cleaner your slices will be. If you’re in a rush, you can pop them in the freezer for about 2-3 hours, but keep an eye on them so they don’t freeze solid. The texture won’t be quite as creamy if you freeze them, but it works in a pinch.
Can I make these bars ahead of time for a party?
Absolutely! In fact, I recommend it. These bars taste even better after a day or two in the fridge because the flavors have time to meld together. Just wait to add the whipped cream topping until right before serving. You can make the bars up to 2 days in advance.
Why did my crust turn out soggy?
This usually happens when the crust isn’t pressed firmly enough into the pan, or when the bars haven’t chilled long enough. Make sure you pack those crumbs down really well, and give the bars plenty of time to set. Also, make sure your cream cheese and whipped cream are well incorporated into the filling so there aren’t any liquid pockets that can seep into the crust.
Can I use a different type of cookie for the crust?
Yes, definitely! Gingersnaps, shortbread cookies, vanilla wafers, or even chocolate graham crackers all work beautifully. Just keep the proportions the same: 2 cups of crushed cookies to 1/2 cup melted butter and 1/4 cup sugar. If your cookies are already sweet, you might want to reduce the sugar slightly. I’ve made a chocolate version using chocolate graham crackers and it was a huge hit.
Pin This Recipe!
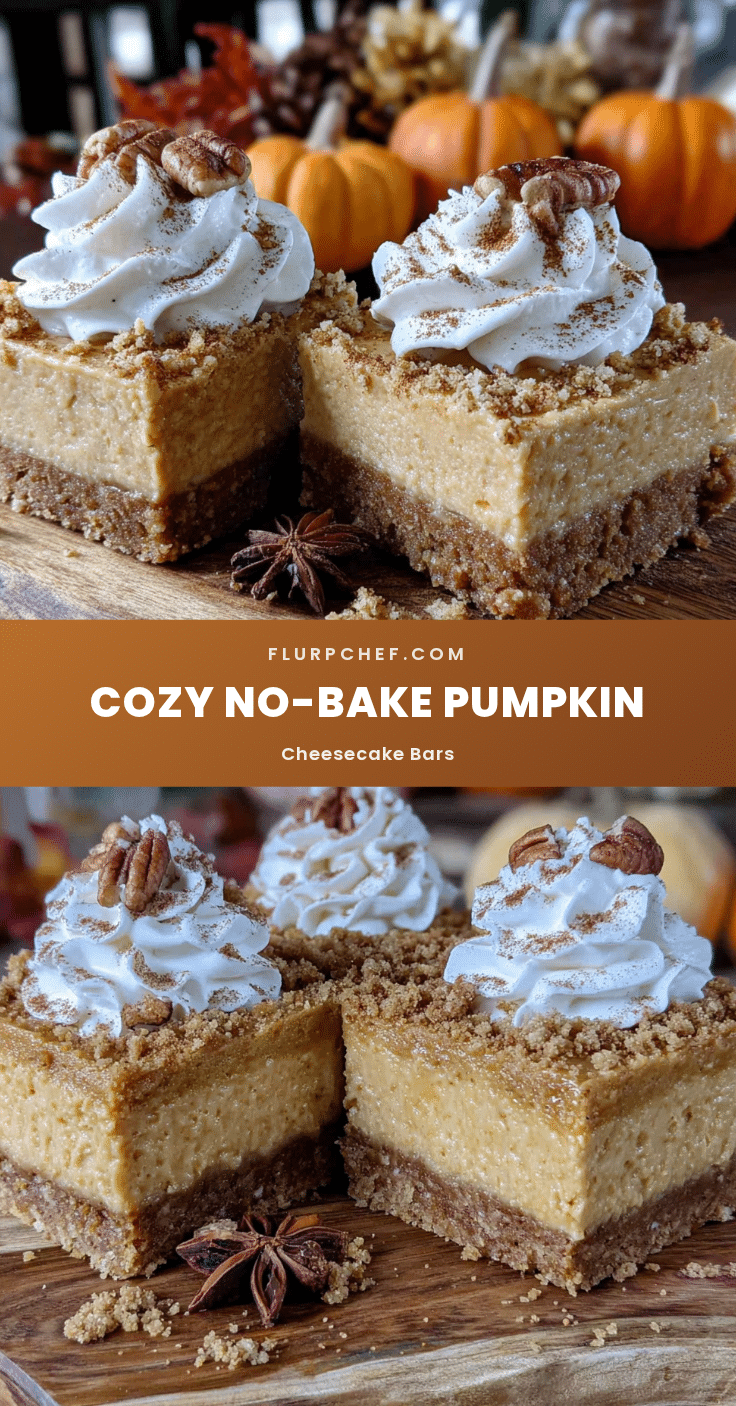
Cozy No-Bake Pumpkin Cheesecake Bars Easy Fall Dessert
These no-bake pumpkin cheesecake bars feature a buttery graham cracker crust and a silky, spiced pumpkin filling. They’re the perfect easy fall dessert that requires no oven and can be made ahead for gatherings.
- Prep Time: 20 minutes
- Cook Time: 0 minutes
- Total Time: 6 hours 20 minutes (includes chilling)
- Yield: 9 servings 1x
- Category: Dessert
- Cuisine: American
Ingredients
- 2 cups (200g) graham cracker crumbs
- 1/2 cup (115g) unsalted butter, melted
- 1/4 cup (50g) granulated sugar
- 1/2 teaspoon ground cinnamon
- Pinch of salt
- 16 oz (450g) cream cheese, softened to room temperature
- 1 cup (200g) granulated sugar
- 1 cup (240g) pumpkin puree
- 1 teaspoon vanilla extract
- 2 teaspoons pumpkin pie spice
- 1/4 teaspoon salt
- 1 cup (240ml) heavy whipping cream, cold
- 2 tablespoons (15g) powdered sugar
- 1/2 cup (120ml) heavy whipping cream (for topping)
- 1 tablespoon (8g) powdered sugar (for topping)
- 1/4 teaspoon vanilla extract (for topping)
- Ground cinnamon or pumpkin pie spice, for dusting
- Optional: caramel sauce, chopped pecans, or candied ginger
Instructions
- Line a 9×9-inch baking pan with parchment paper, leaving overhang on two sides.
- In a medium bowl, combine graham cracker crumbs, 1/4 cup sugar, 1/2 teaspoon cinnamon, and a pinch of salt. Pour in melted butter and stir until all crumbs are evenly moistened. Press firmly into the prepared pan. Refrigerate while making the filling.
- In a large bowl, beat cold heavy whipping cream with 2 tablespoons powdered sugar and 1/2 teaspoon vanilla extract until stiff peaks form. Set aside in the refrigerator.
- In another large bowl, beat softened cream cheese with 1 cup granulated sugar until smooth. Add pumpkin puree, 1 teaspoon vanilla extract, pumpkin pie spice, and 1/4 teaspoon salt. Beat until combined.
- Fold one-third of the whipped cream into the cream cheese mixture to lighten it, then fold in the remaining whipped cream until just combined.
- Pour the filling over the crust and spread evenly. Cover with plastic wrap and refrigerate for at least 6 hours, preferably overnight.
- Before serving, make the topping: whip 1/2 cup heavy whipping cream with 1 tablespoon powdered sugar and 1/4 teaspoon vanilla extract until soft peaks form.
- Use the parchment handles to lift the bars out of the pan. Slice into 9 or 16 squares. Top each bar with whipped cream and a dusting of cinnamon or pumpkin pie spice. Add optional toppings if desired.
Notes
Room temperature cream cheese is essential for a smooth filling. Chill the bars for at least 6 hours, preferably overnight, for clean slices. Press the crust firmly to prevent sogginess. The flavors improve after a day in the fridge.
Nutrition
- Serving Size: 1 bar (1/9 of recipe
- Calories: 385
- Sugar: 23
- Sodium: 280
- Fat: 28
- Saturated Fat: 17
- Carbohydrates: 32
- Fiber: 1
- Protein: 5
Keywords: no-bake pumpkin cheesecake bars, easy fall dessert, pumpkin dessert, no-bake cheesecake, pumpkin spice, graham cracker crust, make-ahead dessert


