“Why can’t you just dump everything in a pan and bake it?” my seven-year-old nephew asked, watching me measure flour for the third time.
I started to explain why that wouldn’t work—something about layering, proper mixing techniques, and the science of baking. Then I stopped. Honestly, I had no good answer. I was just doing things the way I always had, without questioning if there was a simpler path.
So I let him try it. We dumped a can of pumpkin puree into a greased 9×13 pan, sprinkled cake mix on top, and poured melted butter over everything. No mixing bowls. No electric mixer. No dirty spatulas. I was certain it would be a clumpy, uneven disaster.
Forty-five minutes later, I was eating my words—literally. That first bite had this unexpected contrast: a soft, almost pudding-like pumpkin layer underneath a crunchy, golden topping. My nephew looked at me with that “I told you so” grin that only kids can pull off.
This 5-ingredient pumpkin dump cake has become our go-to fall dessert, and let me tell you, I’ve made it more times than I care to admit. It’s the recipe that reminded me that sometimes the simplest approach is the best one—especially when you’re feeding a family on a budget and trying to get dinner on the table without losing your mind.
Maybe you’ve been there, standing in your kitchen, wondering why a simple dessert has to involve so many steps. This one doesn’t. And honestly? It tastes better than half the complicated pumpkin desserts I’ve spent hours making.
Why You’ll Love This Recipe
Let me be real with you—I’ve tested this recipe more times than I can count, and each time I’m shocked at how something so simple can be so good. Here’s why this pumpkin dump cake deserves a permanent spot in your recipe rotation:
- Five Ingredients Only: You probably have most of these in your pantry right now. No special trips to the store, no hunting down obscure items.
- Kid-Approved and Mom-Approved: My nephew isn’t the only one who loves this. Every kid I’ve served it to has asked for seconds, and the adults fight over the last piece.
- Budget-Friendly: With canned pumpkin and boxed cake mix, this dessert costs pennies per serving. Perfect for feeding a family without breaking the bank.
- Comes Together in Minutes: No mixer, no sifting, no fuss. You’re looking at about 5 minutes of hands-on time.
- Reheats Like a Dream: Leftovers warm up beautifully, making this perfect for make-ahead desserts or busy weeknights.
- Customizable: Swap the spice cake mix for yellow cake mix, add chocolate chips, or toss in some nuts—this recipe is forgiving and flexible.
What makes this recipe different from other pumpkin desserts? It’s the texture, honestly. The pumpkin layer stays soft and almost custard-like while the top gets this incredible crunchy, buttery crust. It’s not a cake in the traditional sense—it’s more like a cross between a pudding and a crumble, and that combination is absolutely irresistible.
This isn’t just another pumpkin dessert. It’s the kind that makes you close your eyes after the first bite, the kind that feels like a warm hug on a chilly autumn evening. And when you’re feeding a family on a sensible budget, finding a dessert that pleases everyone without costing a fortune? That’s pure gold.
What Ingredients You Will Need
This recipe uses simple, pantry-friendly ingredients to deliver big flavor without the fuss. You’ll be amazed at how five humble ingredients can transform into something this delicious.
- 1 can (15 oz) pumpkin puree (not pumpkin pie filling—make sure you grab the pure stuff. I prefer Libby’s for consistent results, but store brands work fine too)
- 1 can (12 oz) evaporated milk (adds richness without the expense of heavy cream. You can substitute with whole milk in a pinch, but the texture won’t be quite as luscious)
- 1 box (15.25 oz) spice cake mix (Duncan Hines and Betty Crocker both work great. The spices in the mix are what give this dessert its warm, cozy flavor—don’t skip this!)
- 1/2 cup unsalted butter, melted (salted butter works too, just reduce any added salt. I’ve used both and honestly, salted butter gives it a nice little edge)
- 1 teaspoon pumpkin pie spice (optional but recommended. Adds an extra layer of warmth that makes the kitchen smell incredible)
That’s it. Five ingredients. No eggs, no sugar, no flour. The cake mix does all the heavy lifting, which is honestly genius when you think about it.
Ingredient Tips from My Kitchen to Yours:
When I first made this, I accidentally grabbed pumpkin pie filling instead of pure pumpkin. Big mistake. The filling has sugar and spices already added, which threw off the whole balance. Stick with pure pumpkin puree—your taste buds will thank you.
For the evaporated milk, don’t be tempted to use sweetened condensed milk. They look similar on the shelf, but sweetened condensed milk will make this dessert cloyingly sweet. Evaporated milk adds creaminess without overwhelming sugar.
If you can’t find spice cake mix, yellow cake mix works beautifully. Just add an extra teaspoon of pumpkin pie spice to the pumpkin mixture, and you’ll get similar results. I’ve done this when the store was out of spice cake mix, and my family didn’t notice the difference.
One more thing—let your butter cool slightly after melting. If you pour boiling butter over the cake mix, it can create steam pockets that mess with the texture. I learned this the hard way after one particularly dramatic kitchen incident involving butter splatter and a very confused dog.
Equipment Needed
One of the best things about this recipe is how little equipment you need. Here’s what you’ll want to have on hand:
- 9×13 inch baking dish (glass or metal both work. I prefer glass because I can see the bottom layer browning, but metal conducts heat faster if you’re in a hurry)
- Large mixing bowl (for combining the pumpkin mixture. Nothing fancy needed)
- Whisk or wooden spoon (a whisk works best for smoothing out the pumpkin and milk, but a fork will do in a pinch)
- Measuring cups and spoons (for the butter and optional spice)
- Small saucepan or microwave-safe bowl (for melting butter. I use the microwave because it’s faster and means one less dish to wash)
- Rubber spatula (for scraping every last bit of pumpkin mixture into the pan. Waste not, want not!)
That’s genuinely it. No stand mixer, no hand mixer, no sifter, no pastry cutter. If you have these six items, you’re ready to make this dessert. I’ve made it with just a bowl and a fork when I was camping, and it turned out perfectly.
For budget-friendly options, dollar stores often carry basic baking dishes that work just fine. My favorite 9×13 pan came from a thrift store for three dollars, and it’s been going strong for years.
Preparation Method
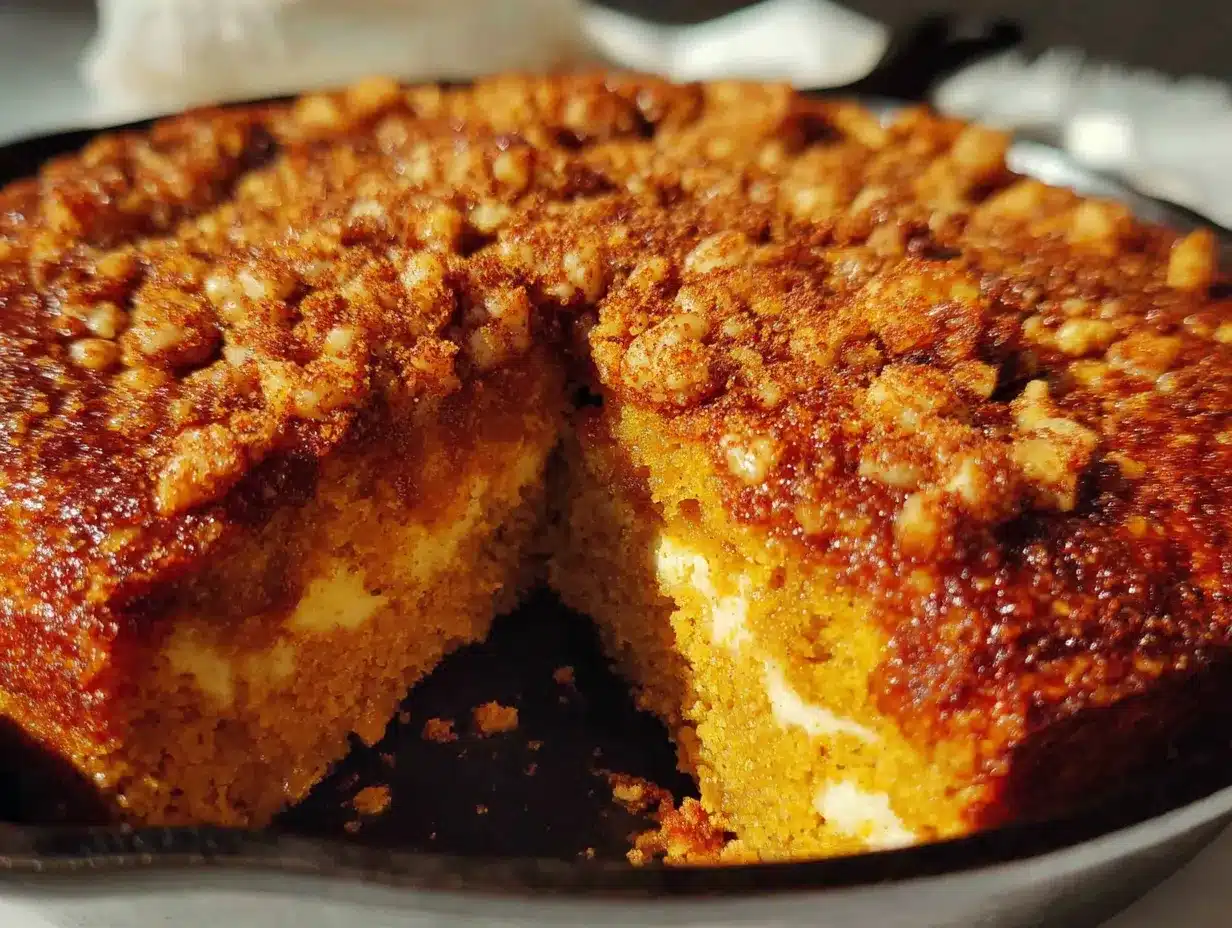
Alright, let’s get to the good part. Here’s how to make this 5-ingredient pumpkin dump cake that’ll have everyone asking for the recipe.
- Preheat your oven to 350°F (175°C). While it’s heating up, grease your 9×13 baking dish with butter or cooking spray. I use butter because it adds flavor, but cooking spray works perfectly fine.
- In your large mixing bowl, combine the pumpkin puree and evaporated milk. Whisk them together until smooth. You’re looking for a uniform, slightly thick mixture that’s the color of a perfect autumn leaf. Don’t worry if there are a few small lumps—they’ll smooth out during baking.
- Pour the pumpkin mixture into your greased baking dish. Use your rubber spatula to spread it evenly across the bottom. The layer should be about half an inch thick. Take a moment to admire that gorgeous orange color—it’s going to smell amazing in about 45 minutes.
- Sprinkle the dry spice cake mix evenly over the pumpkin layer. Here’s where patience matters—don’t just dump it all in one spot. Sprinkle it slowly, covering every inch of the pumpkin mixture. I like to tap the box as I go, letting the mix fall in an even shower. If you dump it all at once, you’ll end up with dry patches that won’t bake properly.
- Drizzle the melted butter over the top. Try to cover as much of the cake mix as possible. I use a spoon to drizzle it in a zigzag pattern, then gently tilt the pan to help it spread. Don’t stir—the magic of a dump cake is in the layers staying separate.
- If using, sprinkle the pumpkin pie spice over the top. This step is optional, but it adds a beautiful specled look and an extra hit of warmth. My kids call it “fairy dust” and insist on sprinkling it themselves.
- Bake for 40-45 minutes, or until the top is golden brown and the edges are bubbly. The center should be set but still slightly jiggly—it will continue to set as it cools. Your kitchen will smell like a pumpkin spice candle come to life.
- Let it cool for at least 15 minutes before serving. I know it’s tempting to dig in right away, but trust me on this. The layers need time to settle, and the pumpkin filling will be lava-hot straight out of the oven. Patience, my friend.
A Note on Timing: The total time from start to serving is about an hour, but you’re only actively working for about 5 minutes. The rest is oven time, which means you can clean up the kitchen or help with homework while dinner finishes.
Troubleshooting Tip: If your dump cake looks too liquidy after 40 minutes, don’t panic. Give it another 5-10 minutes. Ovens vary, and glass dishes take longer than metal ones. The top should be golden and slightly crispy, and you should see bubbles around the edges.
Cooking Tips & Techniques
After making this pumpkin dump cake more times than I can count, I’ve picked up a few tricks that make a real difference. Here’s what I’ve learned:
The Butter Distribution Secret: My first few attempts had dry patches of cake mix on top because I didn’t spread the butter evenly. Now I melt the butter, let it cool slightly, and drizzle it slowly while moving the spoon back and forth. Then I gently shake the pan to help it settle. If you see dry spots, use the back of a spoon to gently press them into the butter.
The Toothpick Test Doesn’t Work Here: Unlike regular cakes, this dump cake will never come out clean on a toothpick because the pumpkin layer stays soft. Instead, look for visual cues: the top should be golden brown, the edges should be bubbling, and the center should look set (not liquidy).
Let It Rest: I once served this straight out of the oven because I couldn’t wait. It was a soupy mess. The 15-minute rest isn’t optional—it’s essential. The pumpkin layer needs time to thicken as it cools. If you can wait 30 minutes, even better.
Room Temperature Ingredients Matter: Cold pumpkin puree straight from the fridge can create temperature shock in the oven. Let your pumpkin and milk sit on the counter for 15 minutes before mixing. This small step helps everything bake more evenly.
Don’t Overbake: The biggest mistake I’ve made (more than once) is leaving it in the oven too long, trying to get the top perfectly crispy. The top will continue to brown after you pull it out, and overbaking dries out the pumpkin layer. Pull it when the edges are bubbly and the top is light golden.
Multitasking Strategy: While the dump cake bakes, whip up some whipped cream or vanilla ice cream for serving. The contrast between warm cake and cold cream is absolutely divine. Plus, it gives you something to do while that incredible smell fills your house.
Variations & Adaptations
One of the best things about this recipe is how adaptable it is. Here are some variations I’ve tried and loved:
Chocolate Lover’s Version: Swap the spice cake mix for chocolate cake mix. The combination of pumpkin and chocolate is surprisingly perfect—think pumpkin-chocolate brownies. My kids beg for this version, and honestly, I prefer it sometimes too.
Gluten-Free Option: Use a gluten-free yellow cake mix. I’ve tested this with King Arthur’s gluten-free yellow cake mix, and it works beautifully. The texture is slightly different—a bit more crumbly on top—but the flavor is spot on.
Nutty Crunch: Sprinkle 1/2 cup of chopped pecans or walnuts over the cake mix before adding the butter. The nuts toast during baking and add an incredible crunch. This is my favorite variation for when company’s coming over.
Dairy-Free Adaptation: Substitute the evaporated milk with full-fat coconut milk (canned, not carton) and use melted coconut oil instead of butter. The coconut flavor is subtle and pairs beautifully with the pumpkin and spice.
Extra Spiced Version: Add 1/2 teaspoon each of ground ginger and ground cloves to the pumpkin mixture. This gives the dessert a deeper, more complex spice profile that tastes like you spent hours on it.
Slow Cooker Method: Yes, you can make this in a slow cooker! Grease the insert, layer the ingredients as directed, and cook on low for 3-4 hours or high for 1.5-2 hours. The top won’t get as crispy, but it’s still delicious and perfect for potlucks.
One of my favorite personal variations came from a happy accident. I was out of spice cake mix, so I used yellow cake mix and added an extra tablespoon of pumpkin pie spice to the pumpkin mixture. My family actually liked it better than the original. Sometimes mistakes turn into masterpieces!
Serving & Storage Suggestions
Serving Temperature: This pumpkin dump cake is best served warm, not hot. After the 15-minute rest, it should be pleasantly warm—the kind of warmth that makes vanilla ice cream melt into creamy puddles on top. If you’re serving it at room temperature, it’s still delicious, just less dramatic.
Presentation Ideas: Scoop it into bowls or onto plates with a large spoon (it’s too soft to cut cleanly into squares). Top with a generous scoop of vanilla ice cream or a dollop of freshly whipped cream. A sprinkle of cinnamon on top adds a beautiful finishing touch.
What to Serve With It: This dessert is rich enough to stand alone, but it pairs beautifully with:
- Vanilla ice cream (the classic choice)
- Freshly whipped cream (lightly sweetened)
- A drizzle of caramel sauce
- A cup of hot coffee or spiced tea
- Fresh apple slices for a contrast in texture
Storage Instructions: Cover the baking dish tightly with plastic wrap or aluminum foil and store in the refrigerator for up to 5 days. The flavors actually deepen and meld together overnight, making leftovers even better.
Reheating Methods:
- Microwave: Individual portions, 30-45 seconds on high. Quick and easy for weekday treats.
- Oven: Cover with foil and warm at 300°F for 10-15 minutes. This method helps restore some of the top’s crunch.
- Toaster Oven: 5-7 minutes at 300°F works beautifully for single servings.
Freezer Instructions: This dump cake freezes surprisingly well. Let it cool completely, then wrap the entire dish (or individual portions) in plastic wrap, followed by aluminum foil. Freeze for up to 3 months. Thaw overnight in the refrigerator and reheat as directed above.
Flavor Development Note: I’ve noticed that this dessert tastes even better on day two. The pumpkin layer firms up slightly, and the spice flavors become more pronounced. If you can resist eating it all in one sitting, you’re in for a treat.
Nutritional Information & Benefits
While this is definitely a treat, there are some nutritional bright spots worth mentioning:
| Nutrient | Per Serving (1/12 of recipe) |
|---|---|
| Calories | 285 |
| Total Fat | 12g |
| Saturated Fat | 7g |
| Carbohydrates | 40g |
| Fiber | 2g |
| Sugar | 24g |
| Protein | 4g |
| Vitamin A | 190% DV |
| Calcium | 10% DV |
Pumpkin is packed with vitamin A, which supports eye health and immune function. It’s also a good source of fiber, which helps keep you feeling satisfied. The evaporated milk adds calcium for strong bones, and the eggs in the cake mix provide a small protein boost.
Dietary Considerations:
- Vegetarian-friendly
- Can be made gluten-free (see variations)
- Can be made dairy-free (see variations)
- Contains wheat and dairy (unless modified)
- Not suitable for vegan diets without significant modification
Look, I’m not going to tell you this is health food. It’s dessert, and it’s meant to be enjoyed. But knowing that you’re getting a solid dose of vitamin A and some fiber while indulging? That’s a win in my book.
Conclusion
This 5-ingredient pumpkin dump cake is proof that you don’t need fancy techniques or expensive ingredients to create something truly special. It’s the dessert that taught me to trust the process—and to listen when a seven-year-old suggests a simpler way.
Whether you’re feeding a family on a budget, looking for a last-minute dessert for a fall gathering, or just craving something warm and comforting, this recipe delivers every single time. It’s forgiving, flexible, and absolutely delicious. Plus, it makes your kitchen smell like autumn heaven.
I’d love to hear how this turns out for you! Did you try any variations? Did your kids love it as much as my nephew did? Drop a comment below and share your experience. And if you snap a photo, tag me—I love seeing your creations.
Go ahead, give this dump cake a try. Your future self (and your family) will thank you.
Frequently Asked Questions
Can I use pumpkin pie filling instead of pumpkin puree?
No, I wouldn’t recommend it. Pumpkin pie filling already contains sugar and spices, which will make this dessert overly sweet and throw off the texture. Stick with 100% pure pumpkin puree for the best results.
Why is my dump cake soupy in the middle?
This usually means it needs more baking time. Every oven runs differently, so give it an extra 5-10 minutes if the center looks liquidy. Also, make sure you let it rest for at least 15 minutes after baking—the pumpkin layer thickens as it cools.
Can I make this in advance for a party?
Absolutely! You can bake it a day ahead, store it covered in the refrigerator, and reheat it in a 300°F oven for 10-15 minutes before serving. It actually tastes even better the next day as the flavors meld together.
What can I substitute for evaporated milk?
You can use whole milk, half-and-half, or even heavy cream in a pinch. The texture will be slightly different—whole milk makes it a bit thinner, while heavy cream makes it richer. I’ve used all three, and they all work fine.
Can I add eggs to this recipe?
You can, but it changes the texture significantly. Adding one beaten egg to the pumpkin mixture will make the bottom layer more custard-like and firm. I’ve tried it, and while it’s good, I prefer the original version—it’s softer and more pudding-like.
Pin This Recipe!
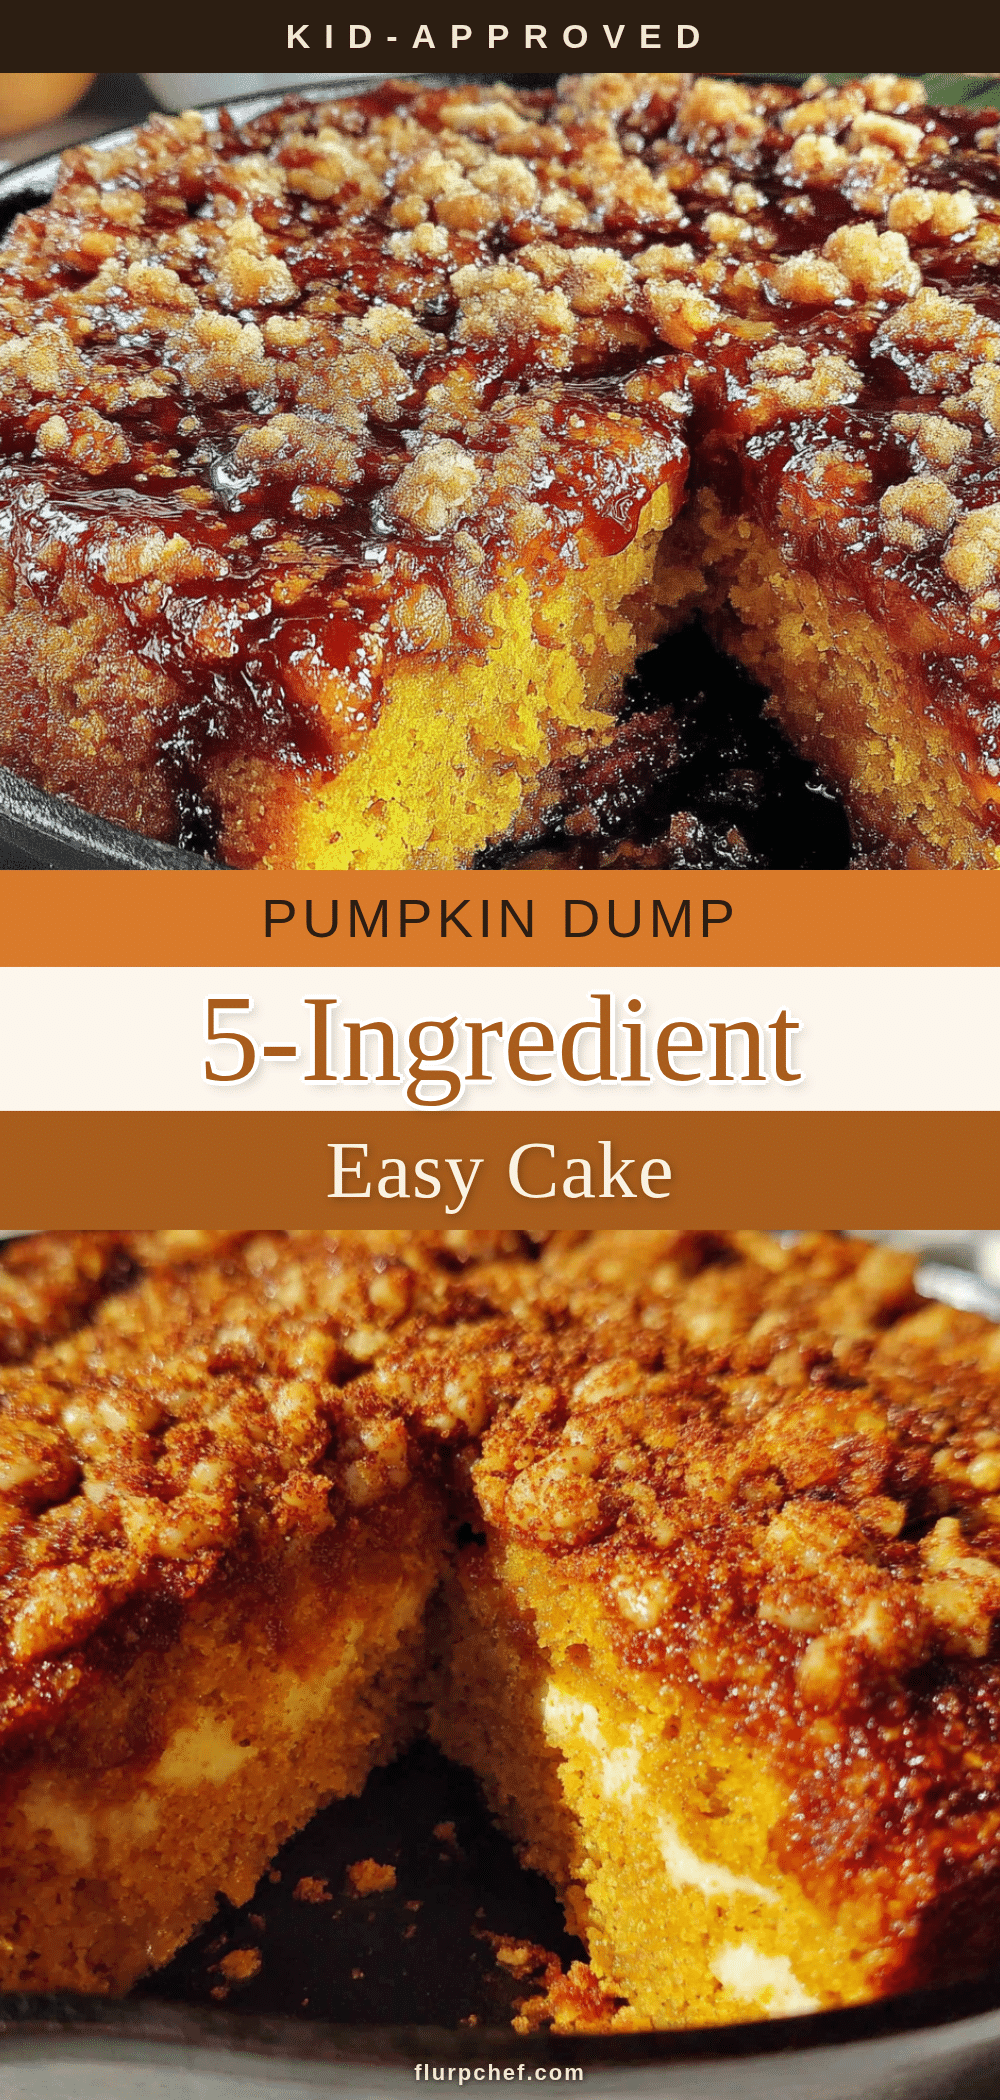
5-Ingredient Pumpkin Dump Cake: Easy Kid-Approved Dessert
This 5-ingredient pumpkin dump cake is a simple, budget-friendly dessert that comes together in minutes. With a soft, pudding-like pumpkin layer and a crunchy, buttery topping, it’s a kid-approved treat that’s perfect for fall.
- Prep Time: 5 minutes
- Cook Time: 45 minutes
- Total Time: 1 hour
- Yield: 12 servings 1x
- Category: Dessert
- Cuisine: American
Ingredients
- 1 can (15 oz) pumpkin puree (not pumpkin pie filling)
- 1 can (12 oz) evaporated milk
- 1 box (15.25 oz) spice cake mix
- 1/2 cup unsalted butter, melted
- 1 teaspoon pumpkin pie spice (optional)
Instructions
- Preheat your oven to 350°F (175°C). Grease a 9×13 baking dish with butter or cooking spray.
- In a large mixing bowl, combine the pumpkin puree and evaporated milk. Whisk until smooth.
- Pour the pumpkin mixture into the greased baking dish and spread evenly.
- Sprinkle the dry spice cake mix evenly over the pumpkin layer.
- Drizzle the melted butter over the top, covering as much of the cake mix as possible. Do not stir.
- If using, sprinkle the pumpkin pie spice over the top.
- Bake for 40-45 minutes, or until the top is golden brown and the edges are bubbly. The center should be set but still slightly jiggly.
- Let it cool for at least 15 minutes before serving.
Notes
Let the butter cool slightly after melting to avoid steam pockets. The toothpick test doesn’t work here; look for visual cues like golden top and bubbly edges. Let the cake rest for at least 15 minutes to allow the pumpkin layer to thicken. Room temperature ingredients help with even baking. For a gluten-free version, use a gluten-free yellow cake mix. For a dairy-free version, substitute evaporated milk with full-fat coconut milk and use melted coconut oil instead of butter.
Nutrition
- Serving Size: 1/12 of recipe
- Calories: 285
- Sugar: 24
- Fat: 12
- Saturated Fat: 7
- Carbohydrates: 40
- Fiber: 2
- Protein: 4
Keywords: pumpkin dump cake, 5-ingredient dessert, easy pumpkin dessert, kid-friendly dessert, fall dessert, budget-friendly dessert


