This was supposed to be a proper dinner. I had it all planned out—a nice, grown-up meal with roasted vegetables and some chicken that I’d spent way too much money on at the fancy grocery store. But then Halloween happened, and by Halloween I mean my kids came home from school buzzing on candy and what I can only describe as pure, chaotic sugar energy. The nice dinner plan went out the window around the same time someone spilled glitter glue on the counter and I realized I’d forgotten to defrost the chicken anyway. I stood there staring into the fridge, defeated, with a package of pizza dough, some mozzarella, and a jar of marinara staring back at me. Not exactly the healthy, balanced meal I had in mind. But honestly? The mummy pizza bites that came out of that moment were better than anything I could have planned. They were fast, they were fun, and my kids actually ate them without a single complaint—which, if you’ve ever tried to feed a child a real meal on Halloween night, you know that’s basically a miracle. I’ve been making them every year since, and they’ve become the official kickoff to our Halloween festivities. Maybe you’ve been there too, standing in your kitchen wondering how to get dinner on the table when all anyone wants is candy and chaos. These mummy pizza bites are your answer.
Why You’ll Love This Recipe
Look, I’ve tested a lot of Halloween recipes over the years. Some are too complicated, some look cute but taste like cardboard, and some just take way too long when you’ve got a house full of excited kids. These mummy pizza bites hit that sweet spot where fun meets actually edible. Here’s why they work:
- Quick & Easy: From start to finish, you’re looking at about 30 minutes. That includes prep, assembly, and baking. Perfect for that witching hour when everyone is hungry and impatient.
- Simple Ingredients: You probably already have most of this stuff in your kitchen. No fancy Halloween-themed ingredients or specialty items. Just pizza dough, cheese, sauce, and olives.
- Perfect for Halloween Night: These are great as a pre-trick-or-treat dinner or as a snack for a Halloween party. They’re hand-held, which means less mess, and they’re easy to eat while running out the door.
- Crowd-Pleaser: I’ve served these to kids, adults, and even picky relatives who “don’t do themed food.” Everyone loves them. There’s something about edible mummies that just makes people happy.
- Unbelievably Delicious: Let’s be real—sometimes Halloween food looks better than it tastes. Not these. The pizza dough gets golden and crispy, the cheese gets melty and gooey, and the marinara dipping sauce ties it all together. They’re basically pizza in a fun costume.
What makes these different from other mummy recipes I’ve seen is the dough situation. A lot of recipes use crescent rolls, which are fine, but they can get a little greasy and don’t hold their shape as well. I use refrigerated pizza dough instead. It bakes up sturdier, has a better chew, and the strips wrap around the cheese like actual mummy bandages. Trust me on this one.
These mummy pizza bites are the kind of recipe that makes you feel like a fun parent without actually having to work that hard. And on Halloween, that’s really all any of us are hoping for.
What Ingredients You Will Need
This recipe uses simple, everyday ingredients to create something that feels special. Most of these are probably already in your fridge or pantry, which is exactly the point. Here’s what you’ll need:
For the Mummy Pizza Bites:
- 1 can (13.8 oz) refrigerated pizza dough – I prefer Pillsbury brand for consistency, but any brand works. You could also use homemade pizza dough if you’re feeling ambitious, but the canned stuff keeps this recipe truly easy.
- 8 mozzarella string cheese sticks – These are the “bodies” of the mummies. String cheese holds its shape well when baked and gets perfectly melty. Look for full-fat mozzarella for the best melt.
- 1/4 cup pizza sauce or marinara sauce – For dipping. You can use jarred or homemade. I like Rao’s marinara because it’s thick and flavorful, but any brand you enjoy works.
- 16 candy eyeballs – These are the mummy eyes. You can find them at most grocery stores in the baking aisle around Halloween, or order them online. If you can’t find candy eyeballs, you can use small dots of black olive or even black sesame seeds.
- 1 tablespoon olive oil – For brushing on top to help the dough get golden and crispy. You can also use melted butter if you prefer.
- 1/2 teaspoon garlic powder – Optional, but adds a nice savory flavor to the dough.
- 1/4 teaspoon salt – Just a pinch to enhance the flavor.
For the Dipping Sauce (Optional but Recommended):
- 1/2 cup pizza sauce or marinara sauce – Warmed up for dipping. You can also use ranch dressing or garlic butter if that’s more your style.
Ingredient Tips and Substitutions:
- Pizza Dough: If you’re gluten-free, look for a gluten-free pizza dough in the refrigerated section. It works similarly, just handle it gently since gluten-free dough can be a bit more fragile.
- String Cheese: You can use regular mozzarella cheese cut into sticks, but string cheese is perfectly portioned and holds its shape better. For a dairy-free version, use vegan mozzarella sticks.
- Candy Eyeballs: If you can’t find them or prefer not to use candy, cut small rounds from black olives. They look a little goofy but still cute!
- Pizza Sauce: Any tomato-based sauce works. If you want a little heat, add a pinch of red pepper flakes to the sauce.
Equipment Needed
You don’t need anything fancy for this recipe, which is part of the beauty. Here’s what you’ll need:
- Baking sheet – A standard half-sheet pan works perfectly. Line it with parchment paper for easy cleanup.
- Parchment paper – Not strictly necessary, but it saves you from scrubbing melted cheese off your pan. Worth it.
- Knife or pizza cutter – For cutting the pizza dough into strips. A pizza cutter makes it faster, but a sharp knife works just fine.
- Pastry brush – For brushing the olive oil onto the dough. If you don’t have one, you can use a paper towel or just drizzle it on and spread with your fingers.
- Small bowl – For mixing the olive oil, garlic powder, and salt.
- Cutting board – For rolling out and cutting the dough.
- Oven – Preheated to 400°F (200°C).
I’ve made these with just a knife and a baking sheet before, and they turned out fine. Don’t overthink the equipment. If you have a basic kitchen setup, you’re good to go.
Preparation Method
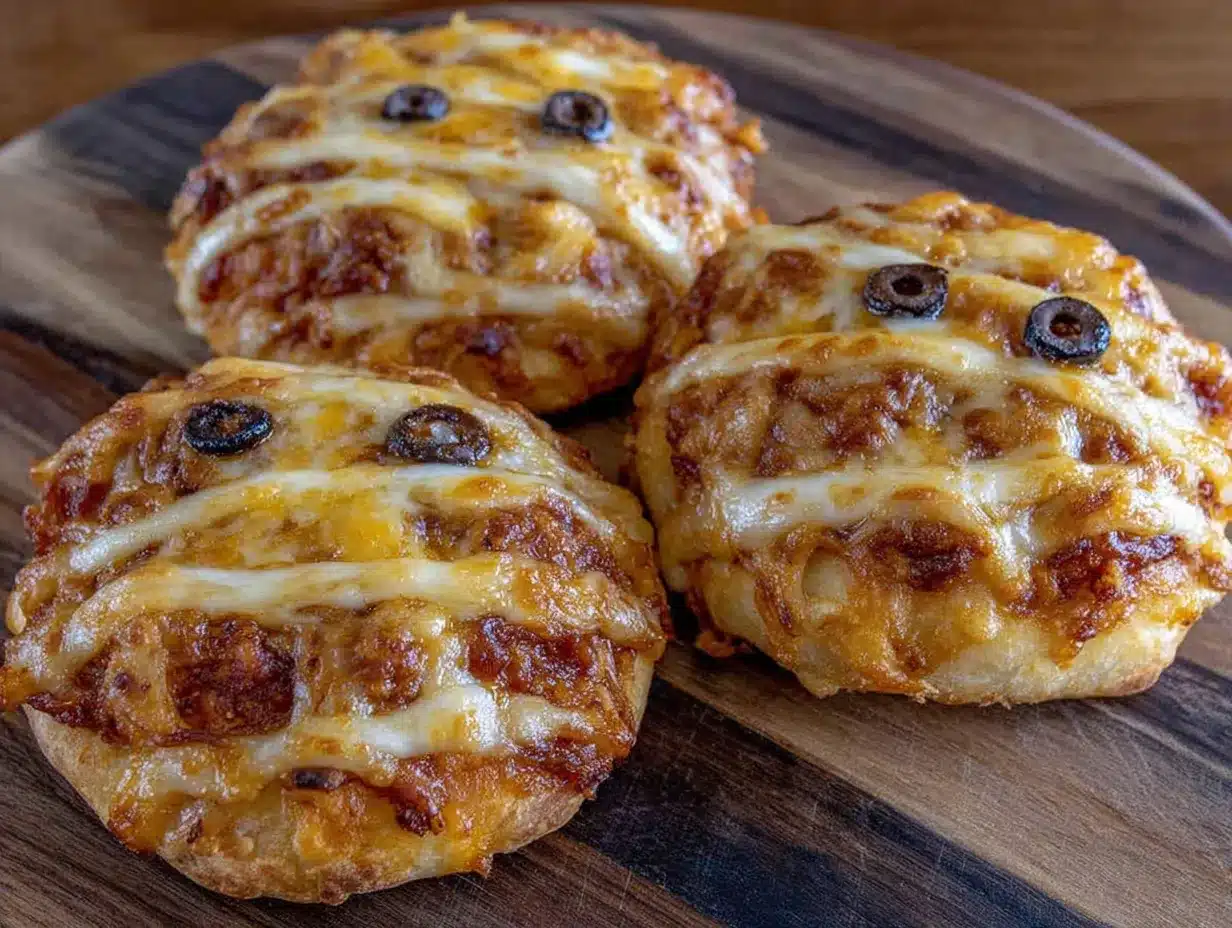
Alright, let’s get these mummies wrapped up. The whole process takes about 30 minutes, and most of that is hands-off baking time.
- Preheat your oven to 400°F (200°C). Line a baking sheet with parchment paper. This is a good time to set out all your ingredients so everything is within reach.
- Prep the dough. Open the can of refrigerated pizza dough and unroll it onto a lightly floured cutting board. If the dough is sticky, dust it with a little flour. Use a rolling pin to gently roll it into a rectangle about 12×8 inches. You don’t need to be super precise here, just get it somewhat even.
- Cut the dough into strips. Using a pizza cutter or knife, cut the dough into thin strips about 1/2 inch wide and 6-8 inches long. You’ll need about 3-4 strips per mummy. Don’t worry if some strips are a little uneven—mummies are supposed to look a bit ragged anyway.
- Cut the string cheese. Cut each mozzarella string cheese stick in half crosswise. You should end up with 16 short cheese sticks. This makes them the perfect size for a two-bite mummy.
- Wrap the mummies. Take one piece of cheese and place it at the end of a dough strip. Wrap the dough strip around the cheese, slightly overlapping as you go, like you’re wrapping a bandage. Leave a small gap near the top for the eyes. Repeat with the remaining cheese pieces and dough strips. Place each wrapped mummy on the prepared baking sheet, seam side down, about 1 inch apart.
- Brush with oil. In a small bowl, mix the olive oil, garlic powder, and salt. Brush this mixture over the tops of the mummies. This helps them get golden and crispy in the oven.
- Bake. Place the baking sheet in the preheated oven and bake for 10-12 minutes, or until the dough is golden brown and the cheese is melted and bubbly. Keep an eye on them—ovens vary, and you don’t want the cheese to leak out completely.
- Add the eyes. Remove the baking sheet from the oven and let the mummies cool for 2-3 minutes. While they’re still warm, press two candy eyeballs into the exposed cheese at the top of each mummy. The warmth of the cheese will help them stick.
- Serve. Transfer the mummy pizza bites to a serving platter. Serve warm with pizza sauce or marinara on the side for dipping.
Sensory Cues: When the dough is properly wrapped, it should look like a messy but intentional bandage job. After baking, the dough should be golden brown and the cheese should be visibly melted but still holding its shape. The smell is pure pizza comfort—warm garlic, tomato, and melted cheese.
Troubleshooting: If the dough strips are too long, just trim them. If they’re too short, press two strips together gently. If the cheese starts to leak during baking, don’t panic—it still tastes great. Just let it cool slightly and the cheese will firm up a bit.
Cooking Tips & Techniques
I’ve made these mummy pizza bites more times than I care to count, and I’ve learned a few things along the way. Here are my best tips:
- Don’t overwork the dough. Pizza dough is forgiving, but if you handle it too much, it can get tough. Roll it out gently and cut it with a sharp tool to avoid dragging the dough.
- Keep the strips thin. Thicker strips take longer to bake and might not get crispy in the center. Aim for about 1/2 inch wide. Thinner strips also look more like actual bandages.
- Leave a gap for the eyes. I learned this the hard way. If you wrap the dough all the way to the top, you won’t have a place to put the eyes. Leave about 1/2 inch of cheese exposed at the top of each mummy.
- Use room temperature cheese. Cold string cheese straight from the fridge can take longer to melt. Let it sit on the counter for 10-15 minutes before wrapping. This helps the cheese and dough bake evenly.
- Watch the bake time. The first time I made these, I left them in the oven too long because I was distracted by a kid asking about costumes. The cheese leaked out and the dough got too dark. Set a timer. 10-12 minutes is usually perfect.
- Press the eyes in gently. If you press too hard, the candy eyeballs can sink into the cheese. Just a gentle press so they stick without disappearing.
- Make ahead tip. You can assemble the mummies up to a day in advance and keep them in the fridge on the baking sheet, covered with plastic wrap. Just add a couple of extra minutes to the bake time since they’ll be cold.
Variations & Adaptations
One of the best things about this recipe is how easy it is to change up. Here are some variations I’ve tried and loved:
- Pepperoni Mummies: Before wrapping the cheese, place a small piece of pepperoni on each cheese stick. The pepperoni adds a nice salty, smoky flavor. My kids call these “zombie mummies.”
- Veggie Mummies: Add a thin strip of roasted red pepper or a small piece of spinach leaf between the dough strips. It adds color and a little extra nutrition without being too obvious.
- Spicy Mummies: Mix a pinch of red pepper flakes into the olive oil mixture before brushing. Or use a spicy marinara for dipping. Great for adults who want a little heat.
- Gluten-Free Mummies: Use a gluten-free pizza dough. I’ve tried this with a few brands, and they all work. Just handle the dough gently since gluten-free dough can be more fragile.
- Dairy-Free Mummies: Use vegan mozzarella sticks or even dairy-free cheese slices cut into strips. The texture will be slightly different, but the flavor is still great.
- Breakfast Mummies: Swap the pizza sauce for a drizzle of honey or maple syrup and use a mild cheese like havarti. These are surprisingly good for a Halloween morning treat.
I once tried a version with pesto instead of marinara, and honestly, it was amazing. The basil flavor goes surprisingly well with the melted cheese and garlicky dough. Just a thought if you want to mix it up.
Serving & Storage Suggestions
These mummy pizza bites are best served warm, straight from the oven. The dough is crispy on the outside, soft on the inside, and the cheese is perfectly melty. Here’s how to serve and store them:
- Serving Temperature: Serve warm. If you’re making them for a party, you can keep them warm in a low oven (200°F) for up to 30 minutes.
- Presentation: Arrange them on a platter with a small bowl of warm marinara sauce in the center. You can sprinkle a little dried parsley or oregano on top for color. For extra Halloween vibes, add some fake spider webs or plastic spiders around the platter.
- Complementary Dishes: These go great with a simple green salad or some raw veggie sticks. If you’re serving them as part of a Halloween spread, add some “witches’ fingers” (breadsticks) or “pumpkin” (cheese ball) for a full theme.
- Storage: Store leftovers in an airtight container in the refrigerator for up to 3 days. The dough will soften slightly, but they’re still tasty.
- Reheating: Reheat in a 350°F oven for 5-7 minutes, or in an air fryer at 350°F for 3-4 minutes. The microwave works in a pinch, but the dough will be soft, not crispy.
- Freezing: You can freeze the baked mummies. Let them cool completely, then place them in a single layer in a freezer-safe bag or container. Freeze for up to 2 months. Reheat directly from frozen in a 350°F oven for 10-12 minutes.
The flavors actually develop a bit overnight, so leftovers are still pretty good the next day. Not that they usually last that long in my house.
Nutritional Information & Benefits
Let’s be honest—these are not health food. But they’re also not as bad as you might think for a fun Halloween treat. Here’s a rough estimate per serving (2 mummy bites with sauce):
- Calories: Approximately 280-320 calories
- Protein: 14-16 grams (thanks to the mozzarella)
- Carbohydrates: 28-32 grams
- Fat: 12-14 grams
- Fiber: 1-2 grams
- Sugar: 4-6 grams
Health Benefits: Mozzarella cheese is a good source of calcium and protein, which are important for bone health and muscle repair. The pizza dough provides energy in the form of carbohydrates, which is helpful if you’re about to walk around the neighborhood for an hour collecting candy. The marinara sauce contains lycopene, an antioxidant found in tomatoes that supports heart health. Plus, you’re getting a small amount of iron and vitamin C from the sauce.
Dietary Considerations: This recipe contains gluten and dairy. For gluten-free or dairy-free options, see the variations section above. The candy eyeballs may contain sugar and artificial colors, so check the label if that’s a concern.
Look, I’m not saying these are a superfood. But for a Halloween treat that actually has some protein and doesn’t involve a sugar crash, they’re a pretty solid choice. And honestly, on Halloween night, anything that gets your kids to eat something before the candy binge is a win in my book.
Conclusion
These easy mummy pizza bites have saved my Halloween dinner situation more times than I can count. They’re quick, they’re fun, and they actually taste good—which is more than I can say for some of the other themed recipes I’ve tried over the years. Whether you’re making them for a Halloween party, a pre-trick-or-treat dinner, or just because you want to eat something that looks like a tiny edible mummy, they deliver.
I love how customizable they are. You can keep them simple or go wild with different fillings and sauces. They’re forgiving, too. If your dough strips are a little uneven or your mummies look a bit lopsided, that’s fine. Mummies aren’t supposed to look perfect. That’s kind of the point.
So go ahead and give them a try. Let me know in the comments how they turned out—especially if you tried a fun variation or if your kids helped with the wrapping. I’d love to hear about it. And if you’re looking for more easy Halloween recipes, I’ve got a few others on the blog that are just as simple and fun. Happy Halloween, and happy eating!
Frequently Asked Questions
Can I use crescent roll dough instead of pizza dough?
You can, but I don’t recommend it. Crescent roll dough is thinner and more delicate, so it doesn’t hold its shape as well during baking. Pizza dough gives you a sturdier, chewier texture that works much better for wrapping mummies. If you’re in a pinch, crescent rolls will work, just expect a more fragile result.
How do I keep the candy eyeballs from falling off?
Press them gently into the melted cheese while the mummies are still warm. The cheese acts like glue. If they still fall off, you can use a tiny dab of frosting or even a bit of cream cheese to stick them on after the mummies have cooled.
Can I make these ahead of time for a party?
Yes! You can assemble the mummies up to 24 hours in advance and keep them in the fridge on the baking sheet, covered with plastic wrap. Bake them just before serving. If baking from cold, add 2-3 minutes to the bake time.
What if I can’t find candy eyeballs?
No problem at all. You can use small slices of black olive, black sesame seeds, or even tiny dots of black food coloring on a toothpick. The olive version looks a little goofy, but in a charming way. You could also just leave them without eyes—they’ll still look like cute little bread rolls.
Can I use homemade pizza dough?
Absolutely. If you have a favorite homemade pizza dough recipe, go for it. Just make sure it’s rolled out thin enough to cut into strips. Homemade dough might be a little stretchier than canned, so let it rest for a few minutes after rolling if it’s snapping back.
Pin This Recipe!
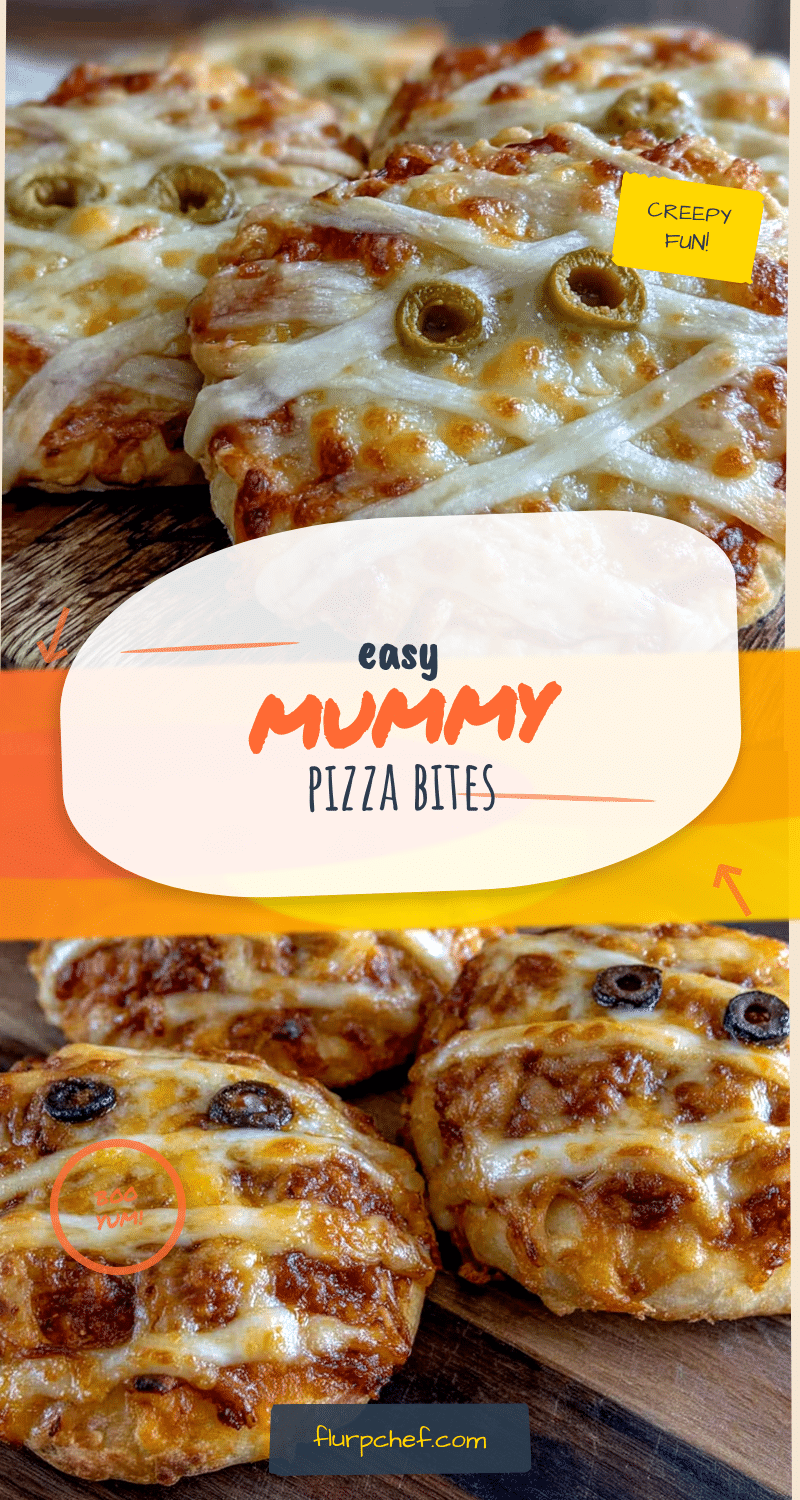
30-Minute Easy Mummy Pizza Bites for a Fun Halloween
Quick and fun mummy-shaped pizza bites made with refrigerated pizza dough, mozzarella string cheese, and candy eyeballs. Perfect for a Halloween dinner or party snack that kids and adults will love.
- Prep Time: 15 minutes
- Cook Time: 12 minutes
- Total Time: 27 minutes
- Yield: 8 servings 1x
- Category: Appetizer
- Cuisine: American
Ingredients
- 1 can (13.8 oz) refrigerated pizza dough
- 8 mozzarella string cheese sticks
- 1/4 cup pizza sauce or marinara sauce (for dipping)
- 16 candy eyeballs
- 1 tablespoon olive oil
- 1/2 teaspoon garlic powder
- 1/4 teaspoon salt
- 1/2 cup pizza sauce or marinara sauce (for serving, optional)
Instructions
- Preheat your oven to 400°F (200°C). Line a baking sheet with parchment paper.
- Open the can of refrigerated pizza dough and unroll it onto a lightly floured cutting board. Roll it into a rectangle about 12×8 inches.
- Cut the dough into thin strips about 1/2 inch wide and 6-8 inches long. You’ll need about 3-4 strips per mummy.
- Cut each mozzarella string cheese stick in half crosswise to make 16 short cheese sticks.
- Take one piece of cheese and place it at the end of a dough strip. Wrap the dough strip around the cheese, slightly overlapping, leaving a small gap near the top for the eyes. Repeat with remaining cheese and dough strips. Place each wrapped mummy on the prepared baking sheet, seam side down, about 1 inch apart.
- In a small bowl, mix the olive oil, garlic powder, and salt. Brush this mixture over the tops of the mummies.
- Bake for 10-12 minutes, or until the dough is golden brown and the cheese is melted and bubbly.
- Remove from the oven and let cool for 2-3 minutes. While still warm, press two candy eyeballs into the exposed cheese at the top of each mummy.
- Serve warm with pizza sauce or marinara on the side for dipping.
Notes
For best results, use room temperature string cheese. Leave a gap at the top of each mummy for the eyes. If dough strips are too long, trim them. If too short, press two strips together gently. Assemble up to 24 hours in advance and refrigerate; add 2-3 minutes to bake time if baking from cold.
Nutrition
- Serving Size: 2 mummy bites with s
- Calories: 300
- Sugar: 5
- Sodium: 600
- Fat: 13
- Saturated Fat: 5
- Carbohydrates: 30
- Fiber: 1.5
- Protein: 15
Keywords: Halloween, mummy pizza bites, easy Halloween recipe, kid-friendly, pizza dough, string cheese, candy eyeballs, 30-minute recipe


