My nephew asked why I couldn’t just use eggnog instead of milk and butter in my snickerdoodle recipe. I started to explain why that wouldn’t work—the fat ratio would be off, the texture would be weird, and besides, it would ruin the classic tang we all love. Then I stopped. Honestly, I had no good reason. I was just being stubborn.
It was the Tuesday before Christmas, and I was making my annual batch of cookies for a neighbor swap. My kitchen was a disaster—flour on the counter, a cracked measuring cup I kept meaning to throw away, and my nephew, Leo, sitting on a stool with way too much confidence for a twelve-year-old who had never baked a cookie from scratch in his life. He’d grabbed the carton of eggnog from the fridge and held it up like he’d just discovered fire. “Just try it,” he said. “What’s the worst that happens?”
So I did. I swapped the butter for a lighter eggnog, cut the sugar by a third, and held my breath as I slid the tray into the oven. When they came out, I was genuinely floored. They were soft, pillowy, and had this subtle, warm spice that made the whole house smell like a holiday hug. They weren’t just good—they were better. And they were lighter, which meant I could eat three without guilt. You know that feeling when you’re proven wrong by a kid who just wanted to help? That’s this cookie. It stayed with me because it taught me something: sometimes the best recipes come from letting go of what you think you know.
Why You’ll Love This Recipe
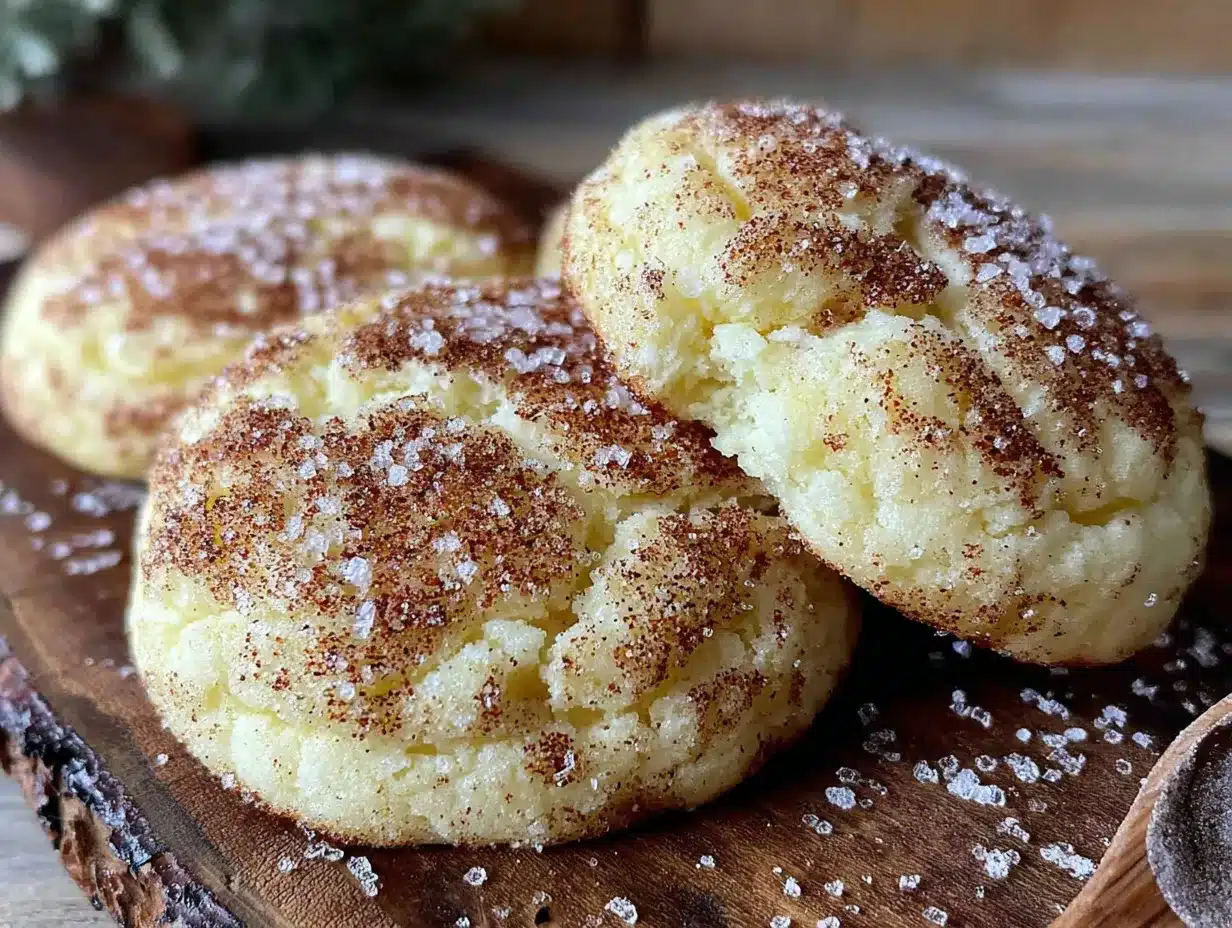
These Lighter Eggnog Snickerdoodle Cookies are the kind of cookie that makes you close your eyes after the first bite. They are soft, chewy, and packed with that classic cinnamon-sugar coating, but with a creamy, spiced twist from the eggnog. And here’s the best part—they are actually healthier than a traditional snickerdoodle, without sacrificing any of the flavor.
- Quick & Easy: Comes together in under 30 minutes, perfect for last-minute holiday cravings or a cozy weeknight treat.
- Simple Ingredients: No fancy grocery trips needed. You likely already have everything in your pantry, plus a carton of eggnog.
- Perfect for the Holidays: Great for cookie swaps, Christmas morning, or a simple dessert after a holiday dinner.
- Crowd-Pleaser: Always gets rave reviews from kids and adults alike. Even my eggnog-skeptic husband asked for seconds.
- Unbelievably Delicious: The texture is soft and tender, with a subtle eggnog warmth that pairs perfectly with the cinnamon sugar.
What makes this recipe different from the rest? It’s not just another version of a snickerdoodle. By using light eggnog and cutting back on the butter and sugar, I’ve created a cookie that feels indulgent but won’t weigh you down. It’s comfort food reimagined—healthier, faster, but with the same soul-soothing satisfaction. Perfect for when you want to eat well without giving up the good stuff.
What Ingredients You Will Need
This recipe uses simple, wholesome ingredients to deliver bold flavor and satisfying texture without the fuss. Most of these are pantry staples, and the eggnog does the heavy lifting for flavor and moisture.
- All-purpose flour: 2 cups (240g) – The base of the cookie. I’ve tested this with whole wheat pastry flour for a fiber boost, but all-purpose gives the softest texture.
- Baking soda: 1 teaspoon – Helps the cookies spread just the right amount and stay tender.
- Baking powder: ½ teaspoon – Adds a little extra lift for a pillowy crumb.
- Salt: ½ teaspoon – Balances the sweetness and enhances the spices.
- Ground cinnamon: 1 teaspoon – For the dough itself, plus extra for the coating.
- Ground nutmeg: ½ teaspoon – This is where the eggnog flavor really shines. Freshly grated is amazing if you have it.
- Light eggnog: ½ cup (120ml) – The star of the show. I use a store-bought light eggnog (like Hood or Organic Valley). It keeps the cookies moist without adding too much fat.
- Unsalted butter, softened: 4 tablespoons (56g) – Just enough for richness, but way less than a traditional recipe.
- Granulated sugar: ¾ cup (150g) – I cut this down from the usual 1 cup, and you honestly won’t miss it. The eggnog adds natural sweetness.
- Large egg: 1 – Binds everything together. Let it come to room temperature for best results.
- Vanilla extract: 1 teaspoon – Rounds out the flavor profile.
For the cinnamon-sugar coating:
- Granulated sugar: 3 tablespoons
- Ground cinnamon: 1 tablespoon
Ingredient tips: If you can’t find light eggnog, regular eggnog works too—just know the cookies will be slightly richer. For a dairy-free option, use a plant-based eggnog (like Califia Farms) and a vegan butter stick. I’ve tried it, and it works beautifully. Also, look for eggnog that’s thick and creamy, not watery, for the best texture.
Equipment Needed
You don’t need anything fancy for these cookies, which is part of their charm. Here’s what you’ll need:
- Mixing bowls: One large and one medium. I use a set of glass nesting bowls, but metal or ceramic works just as well.
- Electric hand mixer or stand mixer: Not strictly necessary—you can do this by hand with a wooden spoon—but it makes creaming the butter and sugar much easier. I’ve done it both ways, and the hand mixer saves about five minutes.
- Baking sheets: Two standard 13×18-inch sheets. I recommend lining them with parchment paper or a silicone baking mat for easy cleanup.
- Cookie scoop: A 1.5-tablespoon scoop gives you perfectly round, evenly sized cookies. If you don’t have one, just use two spoons.
- Cooling rack: Helps the cookies set without getting soggy on the bottom.
- Small bowl: For the cinnamon-sugar coating.
Budget-friendly tip: If you don’t have a cooling rack, you can transfer the cookies to a clean plate or cutting board. They’ll cool fine—just flip them once after a minute or two.
Preparation Method
Let’s get baking. This recipe is straightforward, but I’ll walk you through every step with a few tricks I’ve learned from making these cookies a dozen times.
- Preheat your oven to 350°F (175°C). Line two baking sheets with parchment paper. This is non-negotiable—the parchment prevents sticking and helps the cookies bake evenly.
- Whisk the dry ingredients. In a medium bowl, whisk together the flour, baking soda, baking powder, salt, cinnamon, and nutmeg. Set aside. This step ensures the spices are evenly distributed so you don’t get a mouthful of nutmeg in one bite.
- Cream the butter and sugar. In a large bowl, beat the softened butter and granulated sugar together with an electric mixer on medium speed for about 2 minutes, until light and fluffy. Scrape down the sides of the bowl. You want it to look pale and airy—this is where the texture starts.
- Add the wet ingredients. Beat in the egg, vanilla extract, and light eggnog until combined. The mixture will look a little thin and maybe even a bit curdled—don’t panic. That’s normal. The eggnog is doing its job.
- Combine wet and dry. Gradually add the flour mixture to the wet ingredients, mixing on low speed until just combined. Do not overmix. Stop as soon as you no longer see streaks of flour. Overmixing will make the cookies tough, and nobody wants a tough snickerdoodle.
- Chill the dough (optional but recommended). Cover the bowl with plastic wrap and refrigerate for 20 to 30 minutes. This step firms up the dough so the cookies don’t spread too much in the oven. If you’re in a hurry, you can skip it—the cookies will just be a bit flatter and chewier. Both versions are delicious.
- Make the coating. In a small bowl, stir together the 3 tablespoons of sugar and 1 tablespoon of cinnamon. Set aside.
- Scoop and roll. Use a cookie scoop to portion out rounded tablespoons of dough (about 1.5 tablespoons each). Roll each ball between your palms until smooth, then roll it in the cinnamon-sugar mixture until fully coated. Place the dough balls on the prepared baking sheets, spacing them about 2 inches apart. I fit 12 per sheet.
- Bake. Bake one sheet at a time for 10 to 12 minutes, or until the edges are set and the tops look slightly cracked. The centers will still look soft and puffy—that’s perfect. They will continue to set as they cool. For a softer cookie, pull them at 10 minutes. For a slightly crispier edge, go to 12.
- Cool. Let the cookies rest on the baking sheet for 5 minutes. This is crucial—they are too delicate to move right away. Then transfer them to a wire rack to cool completely. Or, you know, eat one warm. I won’t judge.
Cooking Tips & Techniques
I’ve made these cookies more times than I care to admit, and I’ve learned a few things the hard way. Here are my best tips:
Don’t overmix the dough. I know I said it already, but it’s worth repeating. The moment you stop seeing flour, stop mixing. Overworking the gluten will give you dense, tough cookies instead of soft, pillowy ones. I learned this after a batch that came out like hockey pucks. Not my finest moment.
Use room temperature ingredients. Cold egg or cold eggnog can make the butter seize up, which leads to a lumpy dough. Let your egg and eggnog sit on the counter for 15 minutes before you start. It makes a real difference in how evenly everything comes together.
Chill the dough if you have time. This is the number one tip for cookies that don’t turn into flat discs. The chill time allows the butter to firm up, which means less spread and a thicker, softer cookie. If you’re short on time, you can still bake immediately—just expect a slightly wider, chewier cookie. Both versions are good, but the chilled version is my favorite.
Watch the bake time. Ovens vary wildly. My old oven ran hot, and I burned a batch of these at 11 minutes. Start checking at the 10-minute mark. The cookies are done when the edges are set and the centers are just barely puffed. They will look underdone, but trust the process.
Use a cookie scoop for consistency. It’s not just about looks—evenly sized cookies bake at the same rate. If you’re scooping by hand, try to keep each ball about the same size. Your future self will thank you.
Variations & Adaptations
One of the best things about this recipe is how flexible it is. Here are a few variations I’ve tried and loved:
- Gluten-Free Version: Swap the all-purpose flour for a 1:1 gluten-free baking flour blend (I like Bob’s Red Mill). The texture will be slightly more crumbly, but the flavor is still spot-on. Add an extra tablespoon of eggnog if the dough feels too dry.
- Dairy-Free Version: Use a plant-based eggnog (like Califia Farms) and a vegan butter stick (like Earth Balance). I’ve tested this, and the cookies come out a bit flatter but just as delicious. The cinnamon-sugar coating hides any difference.
- Spiced-Up Version: Add ¼ teaspoon of ground cloves or allspice to the dough for an even more festive flavor. I did this for a Christmas party, and they disappeared in ten minutes.
- Egg-Free Version: Replace the egg with a flax egg (1 tablespoon ground flaxseed + 3 tablespoons water, let sit for 5 minutes). The cookies will be a little denser but still soft and tasty.
- Low-Sugar Version: Use a monk fruit sweetener blend in place of the granulated sugar. I’ve tried this with Lakanto, and the cookies were slightly less tender but still very good. The cinnamon-sugar coating can be made with a monk fruit blend too.
My personal favorite variation? I once added a handful of white chocolate chips to the dough. It felt a little indulgent, but the creamy sweetness paired beautifully with the eggnog spice. Just saying.
Serving & Storage Suggestions
These cookies are best served slightly warm, when the cinnamon-sugar coating is still a little melty and the centers are soft. I love them with a cup of black coffee or a cold glass of milk. They also make a fantastic addition to a holiday cookie platter—they stand out among the chocolate chip and sugar cookies.
Storage: Store the baked cookies in an airtight container at room temperature for up to 5 days. Place a slice of bread in the container to keep them soft—it absorbs excess air and prevents them from drying out. I learned this trick from my grandmother, and it works like a charm.
Freezing: You can freeze the baked cookies for up to 3 months. Place them in a single layer in a freezer-safe bag or container, with parchment paper between layers. To thaw, let them sit at room temperature for about 20 minutes. You can also freeze the unbaked dough balls—just roll them in the cinnamon-sugar coating before freezing, then bake directly from frozen, adding 2 to 3 minutes to the bake time.
Reheating: Pop a cookie in the microwave for 10 to 15 seconds for that fresh-from-the-oven feel. Or, if you’re like me, eat them straight from the freezer—they have a chewy, ice-cream-like texture that’s oddly satisfying.
Nutritional Information & Benefits
Here’s the estimated nutritional breakdown for one cookie (based on a batch of 24):
- Calories: 110
- Total Fat: 3.5g
- Saturated Fat: 2g
- Carbohydrates: 18g
- Sugar: 10g
- Protein: 2g
- Fiber: 0.5g
Compared to a traditional snickerdoodle (which can clock in at 150-180 calories per cookie), these are a solid lighter option. The reduction in butter and sugar, plus the use of light eggnog, cuts the fat and calories without sacrificing flavor. Eggnog itself is a good source of calcium and vitamin D, and the cinnamon has anti-inflammatory properties. Plus, the nutmeg adds a touch of warmth that can help with digestion.
Dietary considerations: This recipe is vegetarian. For gluten-free, dairy-free, or egg-free options, see the variations section above. The cookies contain gluten and dairy in their standard form.
Conclusion
These Lighter Eggnog Snickerdoodle Cookies are proof that you can have your cookie and eat it too. They are soft, spiced, and perfectly sweet—everything you want from a holiday treat, but without the heavy feeling that usually follows. Whether you are making them for a cookie swap, a cozy night in, or just because you have a carton of eggnog that needs using up, I promise they will become a staple in your rotation.
I love this recipe because it reminds me that sometimes the best ideas come from the most unexpected places—like a twelve-year-old with too much confidence and a carton of eggnog. It’s a cookie that feels like a hug, and honestly, who doesn’t need one of those?
Now I want to hear from you. Have you tried these cookies? Did you add your own twist? Drop a comment below and let me know how they turned out. And if you loved them, please share this recipe with a friend who needs a little holiday cheer. Happy baking!
Frequently Asked Questions
Can I use regular eggnog instead of light eggnog?
Absolutely. Regular eggnog will work just fine—the cookies will be slightly richer and a bit more tender. Just keep in mind that the calorie count will go up slightly. I’ve tested both, and both versions are delicious.
Why did my cookies spread too much?
This usually happens if the dough wasn’t chilled long enough or if the butter was too soft. Next time, try chilling the dough for at least 20 minutes before baking. Also, make sure your baking soda and baking powder are fresh—old leavening agents can cause spreading.
Can I make these cookies ahead of time?
Yes! You can make the dough up to 3 days in advance and keep it covered in the fridge. When you’re ready to bake, just scoop, roll in cinnamon sugar, and bake as directed. You may need to add 1 to 2 minutes to the bake time if the dough is very cold.
How do I get a stronger eggnog flavor?
Add an extra ¼ teaspoon of nutmeg to the dough, or use a full-fat eggnog for a richer taste. You can also add a splash of rum extract (about ½ teaspoon) for that classic eggnog kick without the alcohol.
Can I double this recipe?
Definitely. This recipe doubles beautifully. Just make sure you have enough baking sheets to work in batches, and don’t overcrowd the oven. Bake one sheet at a time for the most even results.
Pin This Recipe!

Lighter Eggnog Snickerdoodle Cookies

Soft, chewy snickerdoodle cookies with a creamy eggnog twist, made lighter with less butter and sugar. Perfect for holiday cookie swaps or a cozy treat.
- Prep Time: 15 minutes
- Cook Time: 12 minutes
- Total Time: 27 minutes
- Yield: 24 servings 1x
- Category: Dessert
- Cuisine: American
Ingredients
- 2 cups (240g) all-purpose flour
- 1 teaspoon baking soda
- ½ teaspoon baking powder
- ½ teaspoon salt
- 1 teaspoon ground cinnamon
- ½ teaspoon ground nutmeg
- ½ cup (120ml) light eggnog
- 4 tablespoons (56g) unsalted butter, softened
- ¾ cup (150g) granulated sugar
- 1 large egg, room temperature
- 1 teaspoon vanilla extract
- 3 tablespoons granulated sugar (for coating)
- 1 tablespoon ground cinnamon (for coating)
Instructions
- Preheat oven to 350°F (175°C). Line two baking sheets with parchment paper.
- In a medium bowl, whisk together flour, baking soda, baking powder, salt, cinnamon, and nutmeg. Set aside.
- In a large bowl, beat softened butter and ¾ cup sugar with an electric mixer on medium speed until light and fluffy, about 2 minutes. Scrape down sides.
- Beat in egg, vanilla extract, and light eggnog until combined. Mixture may look thin or slightly curdled.
- Gradually add flour mixture to wet ingredients, mixing on low speed until just combined. Do not overmix.
- Cover dough and refrigerate for 20-30 minutes (optional but recommended for thicker cookies).
- In a small bowl, stir together 3 tablespoons sugar and 1 tablespoon cinnamon for coating.
- Scoop rounded tablespoons of dough (about 1.5 tablespoons each) and roll into balls. Roll each ball in cinnamon-sugar mixture until fully coated.
- Place dough balls on prepared baking sheets, spacing 2 inches apart. Bake one sheet at a time for 10-12 minutes, until edges are set and tops look slightly cracked.
- Let cookies rest on baking sheet for 5 minutes, then transfer to a wire rack to cool completely.
Notes
Chilling the dough is recommended for thicker cookies. For a stronger eggnog flavor, add an extra ¼ teaspoon nutmeg or use full-fat eggnog. Cookies can be stored in an airtight container at room temperature for up to 5 days. Freeze baked cookies for up to 3 months.
Nutrition
- Serving Size: 1 cookie
- Calories: 110
- Sugar: 10
- Sodium: 95
- Fat: 3.5
- Saturated Fat: 2
- Carbohydrates: 18
- Fiber: 0.5
- Protein: 2
Keywords: snickerdoodle, eggnog, lighter, healthy, holiday cookies, cinnamon sugar


