Our accountant, Mr. Henderson, was the last person I expected to school me on dessert. For three years, I’d seen him only in the context of spreadsheets, tax deadlines, and the quiet, methodical way he’d click his pen during our quarterly meetings. He was the kind of man who seemed to live in a world of numbers and order. So, when I walked past his kitchen window last December—he lives three houses down, and I was walking my dog, a frantic beagle named Beans—I was shocked to see him elbow-deep in a bowl of glossy, dark chocolate, a fine dusting of powdered sugar on his cardigan.
I wasn’t expecting cooking advice from my accountant, but there I was, holding a leash that was wrapped around a lamppost for the third time, listening to him describe exactly how to make the perfect hot cocoa bar. He wasn’t just making hot chocolate; he was constructing an experience. He told me about the peppermint marshmallows he was whipping up, the ones that would float like clouds in a mug of rich, velvety cocoa. Honestly, I almost dropped the leash again. Here was the man who handled my quarterly taxes, and he was telling me the secret to a marshmallow that doesn’t just taste like sugar but has that perfect, airy chew. It felt like finding out your librarian moonlights as a rock climber.
He invited me in, and I watched him work. He wasn’t a fancy chef with a TV show; he was a meticulous craftsman. He talked about the “snap” of a good chocolate disk and the way a pinch of salt can make the whole thing sing. He even laughed about the time he accidentally used peppermint extract instead of vanilla in a batch of cookies—a happy accident that led to his signature marshmallow recipe. I left his house that afternoon with a scribbled note on a piece of scrap paper, a new appreciation for my accountant, and the blueprint for the ultimate holiday gathering. This recipe has been my secret weapon for every dinner party and festive get-together since. Trust me, when you serve this, you aren’t just serving a drink; you are serving a moment. A warm, minty, chocolatey moment that makes everyone at the table feel special.
Why You’ll Love This Recipe
This isn’t just another hot chocolate recipe. This is a full-blown, show-stopping hot cocoa bar designed to be the centerpiece of your next gathering. It’s the kind of setup that makes your guests feel like they’ve walked into a high-end café, but you made it right in your own kitchen. Let’s break down why this is the only hot cocoa bar you will ever need.
- Impress Without the Stress: You can prep almost everything a day ahead. The marshmallows need time to set, and the cocoa base can be made and refrigerated. When your guests arrive, you just heat and serve. It’s the ultimate host hack.
- Simple, Real Ingredients: No powdered mixes or artificial flavors here. We are using real chocolate, heavy cream, and pure vanilla. This is the stuff that makes the difference between “good” and “unforgettable.”
- Perfect for a Crowd: This recipe scales beautifully. Whether you are hosting a party for 6 or a holiday open house for 20, you can easily double or triple the batch. It’s the perfect hands-off activity that keeps people mingling.
- Totally Customizable: The bar concept lets everyone be their own mixologist. Some people want a classic cocoa, others want a peppermint explosion. This setup lets them build their perfect mug.
- The Marshmallow Factor: Making your own peppermint marshmallows is a game-changer. They are soft, pillowy, and have that real peppermint kick that store-bought versions just can’t match. It’s the detail that makes people say, “Wait, you made these?”
I’ve tested this setup at a few different parties now. It works for a cozy family movie night, but it absolutely shines at a festive dinner party. It gives people something to do, a reason to gather around the table, and a warm, delicious treat to sip on. It’s not just a drink; it’s an activity. And honestly, that’s the best kind of hosting—the kind where the food does the work, and you get to enjoy your guests.
What Ingredients You Will Need
This recipe uses simple, high-quality ingredients to build layers of flavor. The cocoa base is rich and deeply chocolatey, while the marshmallows add a touch of sweetness and a cool, minty finish. Here is what you will need to gather.
For the Rich Hot Cocoa Base
- 4 cups whole milk: (or 2% for a slightly lighter version). Whole milk gives the cocoa a creamier, more luxurious texture that is key for a bar setting.
- 1 cup heavy cream: This is the secret to that velvety, rich mouthfeel. It makes the cocoa feel truly indulgent.
- 8 oz semi-sweet chocolate, finely chopped: Don’t use chocolate chips here—they have stabilizers that prevent them from melting smoothly. I recommend a good quality bar like Ghirardelli or Guittard. The better the chocolate, the better the drink.
- 4 oz dark chocolate (60-70% cacao), finely chopped: This adds depth and complexity. It keeps the drink from being too sweet and gives it a sophisticated edge.
- 1/2 cup unsweetened cocoa powder: Use a Dutch-process cocoa powder if you can find it. It has a smoother, less acidic flavor that blends beautifully.
- 1/2 cup granulated sugar: You can adjust this to your taste. I find this amount is perfect for balancing the bitterness of the dark chocolate.
- 1 teaspoon vanilla extract: Pure vanilla, not imitation. It rounds out the chocolate flavor perfectly.
- 1/4 teaspoon salt: A small pinch of salt is non-negotiable. It enhances all the other flavors and prevents the drink from tasting flat.
For the Homemade Peppermint Marshmallows
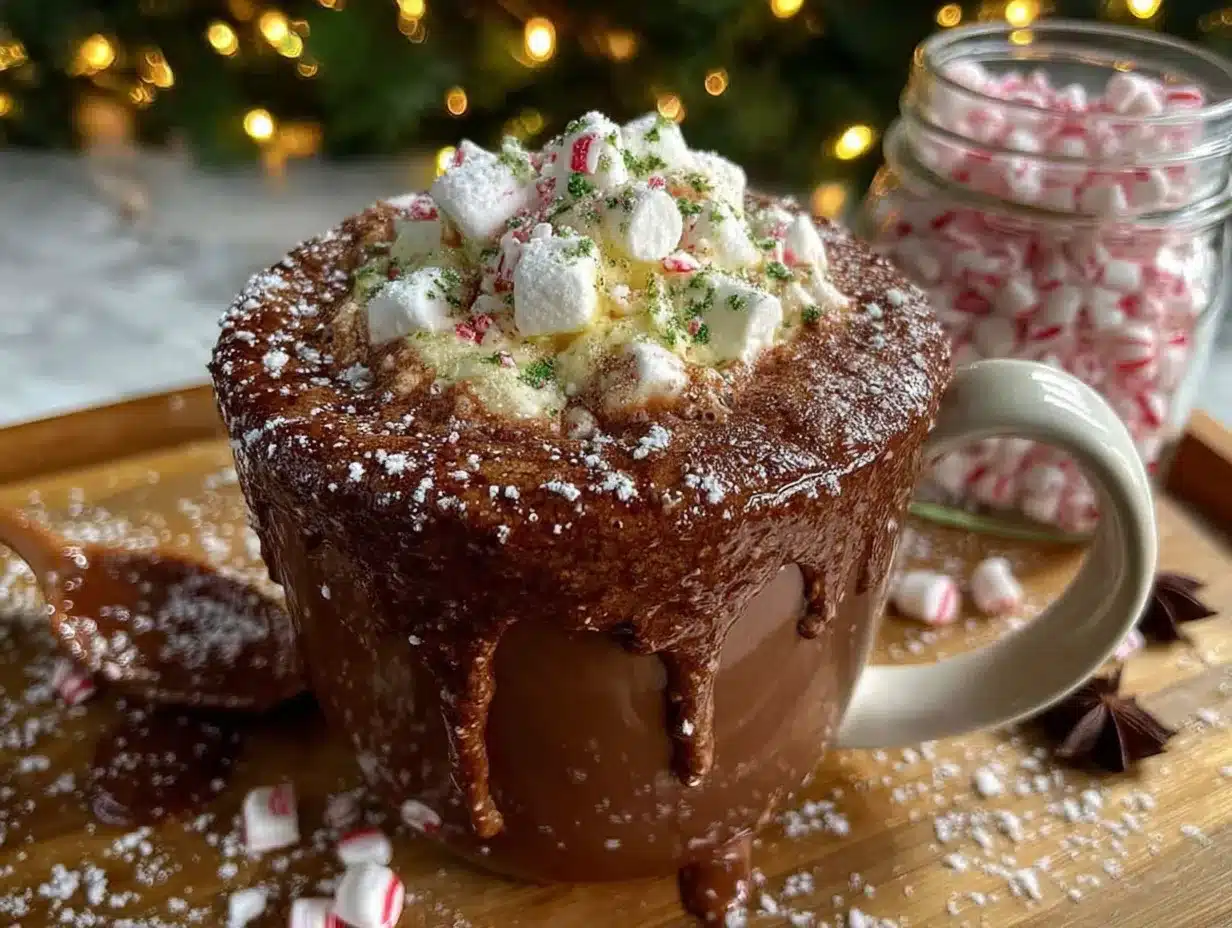
- 3 envelopes (about 3 tablespoons) unflavored gelatin: This is what gives marshmallows their structure. Knox is a reliable brand.
- 1 cup cold water, divided: You will use half to bloom the gelatin and half in the sugar syrup.
- 1 1/2 cups granulated sugar: The base of the marshmallow.
- 1 cup light corn syrup: This prevents the sugar from crystallizing and gives the marshmallow its soft, chewy texture.
- 1/4 teaspoon salt: Again, for balance.
- 1 teaspoon peppermint extract: Start with 1 teaspoon and taste. You want it to be present but not overpowering. I prefer the pure extract over imitation.
- 1/2 cup powdered sugar, for dusting: This keeps the marshmallows from sticking together.
- 1/4 cup cornstarch, for dusting: Mixed with the powdered sugar, this creates the perfect non-stick coating.
- Red food coloring (optional): For that classic peppermint swirl look. Gel food coloring works best as it doesn’t thin the mixture.
For the Hot Cocoa Bar Toppings
- Whipped cream: Homemade is best! Just whip 1 cup of heavy cream with 2 tablespoons of powdered sugar until stiff peaks form.
- Crushed candy canes or peppermint candies: For that festive crunch.
- Chocolate shavings: Use a vegetable peeler on a bar of dark chocolate for elegant curls.
- Mini chocolate chips: For a bit of extra chocolate.
- Caramel sauce or chocolate sauce: For drizzling.
- Pretzel sticks or sea salt flakes: For that sweet-and-salty combo.
Equipment Needed
You don’t need a professional pastry kitchen for this, but a few specific tools will make the process much smoother. Here is what you will want to have on hand.
- Large, heavy-bottomed saucepan or Dutch oven: This is crucial for the hot cocoa base. A heavy bottom prevents the milk from scorching. I use my trusty Le Creuset, but any heavy pot will work.
- Whisk: A good, sturdy whisk is your best friend here for both the cocoa and the marshmallows.
- Candy thermometer: This is non-negotiable for the marshmallows. You need to get the sugar syrup to the exact “soft-ball” stage (240°F) for the marshmallows to set properly. A digital one is easier to read.
- Stand mixer with a whisk attachment: You could use a hand mixer, but it will take a lot longer. The stand mixer is a lifesaver for whipping the marshmallow mixture for a full 10-12 minutes.
- 9×13-inch baking pan: For setting the marshmallows. Line it with parchment paper and leave an overhang for easy removal.
- Fine-mesh sieve: For dusting the marshmallows with the powdered sugar mixture.
- Small bowls and serving vessels: For setting up your hot cocoa bar. Think ramekins for toppings, a small pitcher for the peppermint syrup (if you make one), and a nice carafe or slow cooker for the cocoa.
- Mugs: Pick out your favorite, coziest mugs. This is part of the presentation!
Preparation Method
Let’s get cooking. This project has two main parts: the marshmallows (which need to set overnight) and the cocoa base (which comes together quickly). I recommend making the marshmallows a day before your party.
Step 1: Make the Peppermint Marshmallows (Day Before)
- Prepare the pan: Line a 9×13-inch baking pan with parchment paper, leaving a 2-inch overhang on the long sides. Lightly spray the parchment with non-stick cooking spray. In a small bowl, whisk together the 1/2 cup of powdered sugar and 1/4 cup of cornstarch. Sprinkle about half of this mixture evenly over the bottom of the prepared pan. Set the rest aside.
- Bloom the gelatin: In the bowl of your stand mixer, sprinkle the 3 envelopes of gelatin over 1/2 cup of the cold water. Stir gently to combine and let it sit for 10 minutes. It will become a thick, solid “bloom.”
- Make the sugar syrup: In a medium, heavy-bottomed saucepan, combine the remaining 1/2 cup of cold water, 1 1/2 cups of granulated sugar, and 1 cup of light corn syrup. Stir gently over medium heat until the sugar dissolves. Then, stop stirring and clip your candy thermometer to the side of the pan. Increase the heat to medium-high and bring the mixture to a boil. Cook, without stirring, until the thermometer reads 240°F (soft-ball stage). This will take about 8-10 minutes. Once it hits 240°F, remove it from the heat immediately.
- Whip the marshmallow base: With the whisk attachment on your stand mixer, start beating the bloomed gelatin on low speed. Carefully and slowly, pour the hot sugar syrup into the running mixer. It’s important to pour it down the side of the bowl to avoid splashing. Once all the syrup is in, increase the speed to high. Whip for 10-12 minutes. The mixture will become thick, glossy, and bright white. It will look like a giant cloud. It will also get very warm from the friction of the whisk.
- Add the flavor and color: During the last minute of whipping, add the 1 teaspoon of peppermint extract and the 1/4 teaspoon of salt. If you want a swirl, stop the mixer, drizzle in a few drops of red food coloring, and then pulse the mixer just once or twice to create streaks. Don’t over-mix, or you will lose the swirl.
- Pour and set: Working quickly (the mixture sets fast), scrape the marshmallow mixture into your prepared pan using a lightly oiled spatula. Spread it into an even layer. It will be very sticky. Sprinkle the remaining powdered sugar and cornstarch mixture over the top. Let it sit, uncovered, at room temperature for at least 6 hours, or preferably overnight. Do not refrigerate.
- Cut the marshmallows: Once set, turn the slab of marshmallow out onto a cutting board dusted with more of the powdered sugar mixture. Peel off the parchment paper. Use a large, sharp knife or a pizza cutter (dusted with the sugar mixture) to cut the marshmallows into 1-inch cubes. Toss the cubes in the remaining sugar mixture to coat all sides. Store in an airtight container at room temperature for up to 2 weeks.
Step 2: Make the Rich Hot Cocoa Base (Day of Party)
- Combine the dry ingredients: In your large saucepan, whisk together the 1/2 cup of cocoa powder, 1/2 cup of sugar, and 1/4 teaspoon of salt. This helps prevent lumps.
- Add the liquids: Slowly whisk in about 1/2 cup of the milk to create a smooth paste. Then, whisk in the remaining 3 1/2 cups of milk and the 1 cup of heavy cream. Place the pot over medium heat.
- Heat and melt: Whisk frequently as the mixture heats up. Do not let it boil! You want it to get hot enough to melt the chocolate, but boiling can scald the milk and make the cocoa grainy. Once you see steam rising and small bubbles forming around the edges, remove the pot from the heat.
- Add the chocolate: Add the finely chopped semi-sweet and dark chocolate to the hot milk mixture. Let it sit for 2-3 minutes to soften. Then, whisk gently until the chocolate is completely melted and the mixture is smooth and glossy. If it looks a little separated, a good whisk will bring it back together.
- Finish and serve: Stir in the 1 teaspoon of vanilla extract. Taste it. This is your chance to adjust. Want it sweeter? Add a tablespoon of sugar. Want it more chocolatey? Whisk in another ounce of chopped chocolate. Pour the finished cocoa into a slow cooker on the “warm” setting or a large, heatproof carafe. Set it out with your toppings and the peppermint marshmallows.
Cooking Tips & Techniques
I have messed up this recipe more times than I care to admit. Here are the lessons I learned the hard way so you don’t have to.
- The Marshmallow Thermometer is King: Don’t guess the temperature. If your sugar syrup doesn’t reach 240°F, your marshmallows will be a sticky, runny mess. If it goes over 245°F, they will be tough and hard. A candy thermometer is a cheap investment that guarantees success. I use a digital one for the most accurate reading.
- Don’t Rush the Whipping: The 10-12 minutes of whipping feels like an eternity, but it is essential. This is what incorporates the air and creates that light, fluffy texture. If you stop too early, your marshmallows will be dense. Set a timer and walk away.
- Humidity is the Enemy of Marshmallows: Try not to make these on a rainy or super humid day. The sugar will absorb moisture from the air, and your marshmallows might end up sticky and never fully set. Save this for a crisp, dry day.
- Low and Slow for the Cocoa: Patience is key for the hot cocoa. High heat can scorch the milk and ruin the flavor. Keep it at a gentle medium heat and whisk often. It’s a meditative process, honestly. I like to do this while the marshmallows are setting.
- Make-Ahead Magic: The cocoa base can be made up to 3 days in advance. Just let it cool completely, then store it in an airtight container in the fridge. When you are ready to serve, reheat it gently on the stovetop or in a slow cooker. The flavors actually meld together and get even better overnight.
Variations & Adaptations
This recipe is a fantastic base, but it loves to be played with. Here are a few ways to switch it up for different crowds or cravings.
- Spiked Hot Cocoa: For an adult-only gathering, set out a small bottle of peppermint schnapps, Baileys Irish Cream, or bourbon. A shot of bourbon with the peppermint marshmallow is a surprisingly perfect combination.
- White Chocolate Peppermint Cocoa: Swap the semi-sweet and dark chocolate for 12 oz of high-quality white chocolate. The result is a sweet, creamy, and incredibly decadent drink that pairs beautifully with the peppermint.
- Mexican Hot Chocolate Bar: Add a cinnamon stick and a pinch of cayenne pepper to the milk as it heats. Replace the peppermint marshmallows with regular vanilla ones and offer toppings like a sprinkle of cinnamon, a dash of chili powder, and some toasted almonds.
- Dairy-Free & Vegan Version: Use full-fat oat milk or canned coconut milk in place of the dairy. For the marshmallows, you can buy vegan marshmallows (Dandies are a great brand) or make them with a vegan gelatin alternative like agar-agar (the process is a bit different, so look for a specific recipe).
- Peppermint Mocha Twist: Stir 1-2 teaspoons of instant espresso powder into the dry ingredients for the cocoa base. The coffee doesn’t make it taste like coffee; it just deepens the chocolate flavor and adds a lovely complexity.
Serving & Storage Suggestions
This is where you get to be the host with the most. The presentation of the bar is just as important as the taste.
Setting Up the Bar: Arrange your slow cooker or carafe of hot cocoa at the center of your table. Place a stack of your coziest mugs next to it. Then, create little stations around it. Put the peppermint marshmallows in a cute bowl. Have the whipped cream in another. Line up small ramekins or shot glasses with the crushed candy canes, chocolate shavings, and mini chips. A small pitcher of caramel sauce is a nice touch. Let your guests build their own masterpiece.
What to Serve Alongside: This is a rich drink, so pair it with something light or savory. A plate of buttery shortbread cookies, a platter of fresh fruit, or even some salty, roasted nuts are perfect. For a full-on dessert party, set it out next to a plate of fudgy brownies or a batch of soft gingerbread cookies.
Storage: The hot cocoa base stores beautifully in the fridge for up to 5 days. Reheat it gently on the stovetop or in the microwave in 30-second bursts, stirring in between. The marshmallows will keep in an airtight container at room temperature for up to 2 weeks. Do not refrigerate them, as they will get sticky and hard. The crushed candy canes will lose their crunch if stored, so crush them fresh on the day of your party.
Nutritional Information & Benefits
Let’s be real: this is a treat. It’s not a health drink, but it does have some redeeming qualities, especially when you make it from scratch with real ingredients.
- Estimated per serving (8 oz cocoa with 1 marshmallow): Calories: 380-450, Fat: 22g, Carbohydrates: 45g, Protein: 8g. This will vary based on your toppings.
- Real Chocolate Benefits: Dark chocolate is rich in antioxidants called flavonoids, which can be good for heart health. Using real chocolate means you are getting these benefits, unlike powdered mixes.
- Dairy Goodness: The milk and cream provide a good dose of calcium and vitamin D, which are great for bone health.
- Peppermint Power: Peppermint is known for its digestive properties. A little peppermint after a big meal can help settle your stomach.
- Portion Control: The beauty of a bar setup is that everyone controls their own portion. You can make a small mug with just a tiny marshmallow, or you can go all out. It’s all about mindful indulgence.
Conclusion
This Ultimate Hot Cocoa Bar with Peppermint Marshmallows is more than just a recipe; it is an experience. It is a way to bring people together, to create a warm and welcoming atmosphere, and to offer a little bit of handmade magic during the busy holiday season. The look on your guests’ faces when they see that spread, and especially when they take a bite of that soft, homemade marshmallow, is honestly worth every bit of effort.
I love that this recipe came from such an unexpected source. It reminds me that good ideas can come from anywhere—even from your accountant. So, don’t be afraid to try it. Make the marshmallows a day ahead, set up your bar, and let your guests play. Customize it to your taste, add your favorite toppings, and make it your own. I promise, it will become a new tradition in your home.
Have you tried this? I would love to hear about your hot cocoa bar setup! Drop a comment below and tell me your favorite topping combination, or share a photo of your creation. Happy hosting!
Frequently Asked Questions
Can I use store-bought marshmallows instead of making my own?
Absolutely! Making your own peppermint marshmallows is the star of this show, but if you are short on time, you can absolutely use high-quality store-bought marshmallows. Just add a drop or two of peppermint extract to your mug before pouring the cocoa for that minty kick.
My cocoa came out grainy. What went wrong?
This usually happens if the milk got too hot and boiled, or if the chocolate wasn’t chopped finely enough. Always heat the milk gently and remove it from the heat before adding the chocolate. Make sure your chocolate is chopped into very small, uniform pieces so they melt evenly.
How can I keep the hot cocoa warm for a long party?
The best trick is to use a slow cooker. Make the cocoa base on the stove, then pour it into a clean slow cooker set to the “warm” setting. It will stay perfectly hot for hours without scorching. Just give it a stir every 30 minutes or so.
My marshmallows are too sticky to cut. How do I fix this?
Don’t worry, this is common! The key is to dust your knife or pizza cutter heavily with the powdered sugar and cornstarch mixture. Wipe the blade clean and re-dust it between each cut. If they are still sticky, toss the cut cubes in a bowl with more of the sugar mixture to coat them completely.
Can I make this recipe gluten-free?
Yes, it is naturally gluten-free! The only thing to watch out for is your toppings. Make sure your candy canes and any sauces (like caramel) are certified gluten-free if you are serving someone with celiac disease. Everything else in the recipe is safe.
Pin This Recipe!
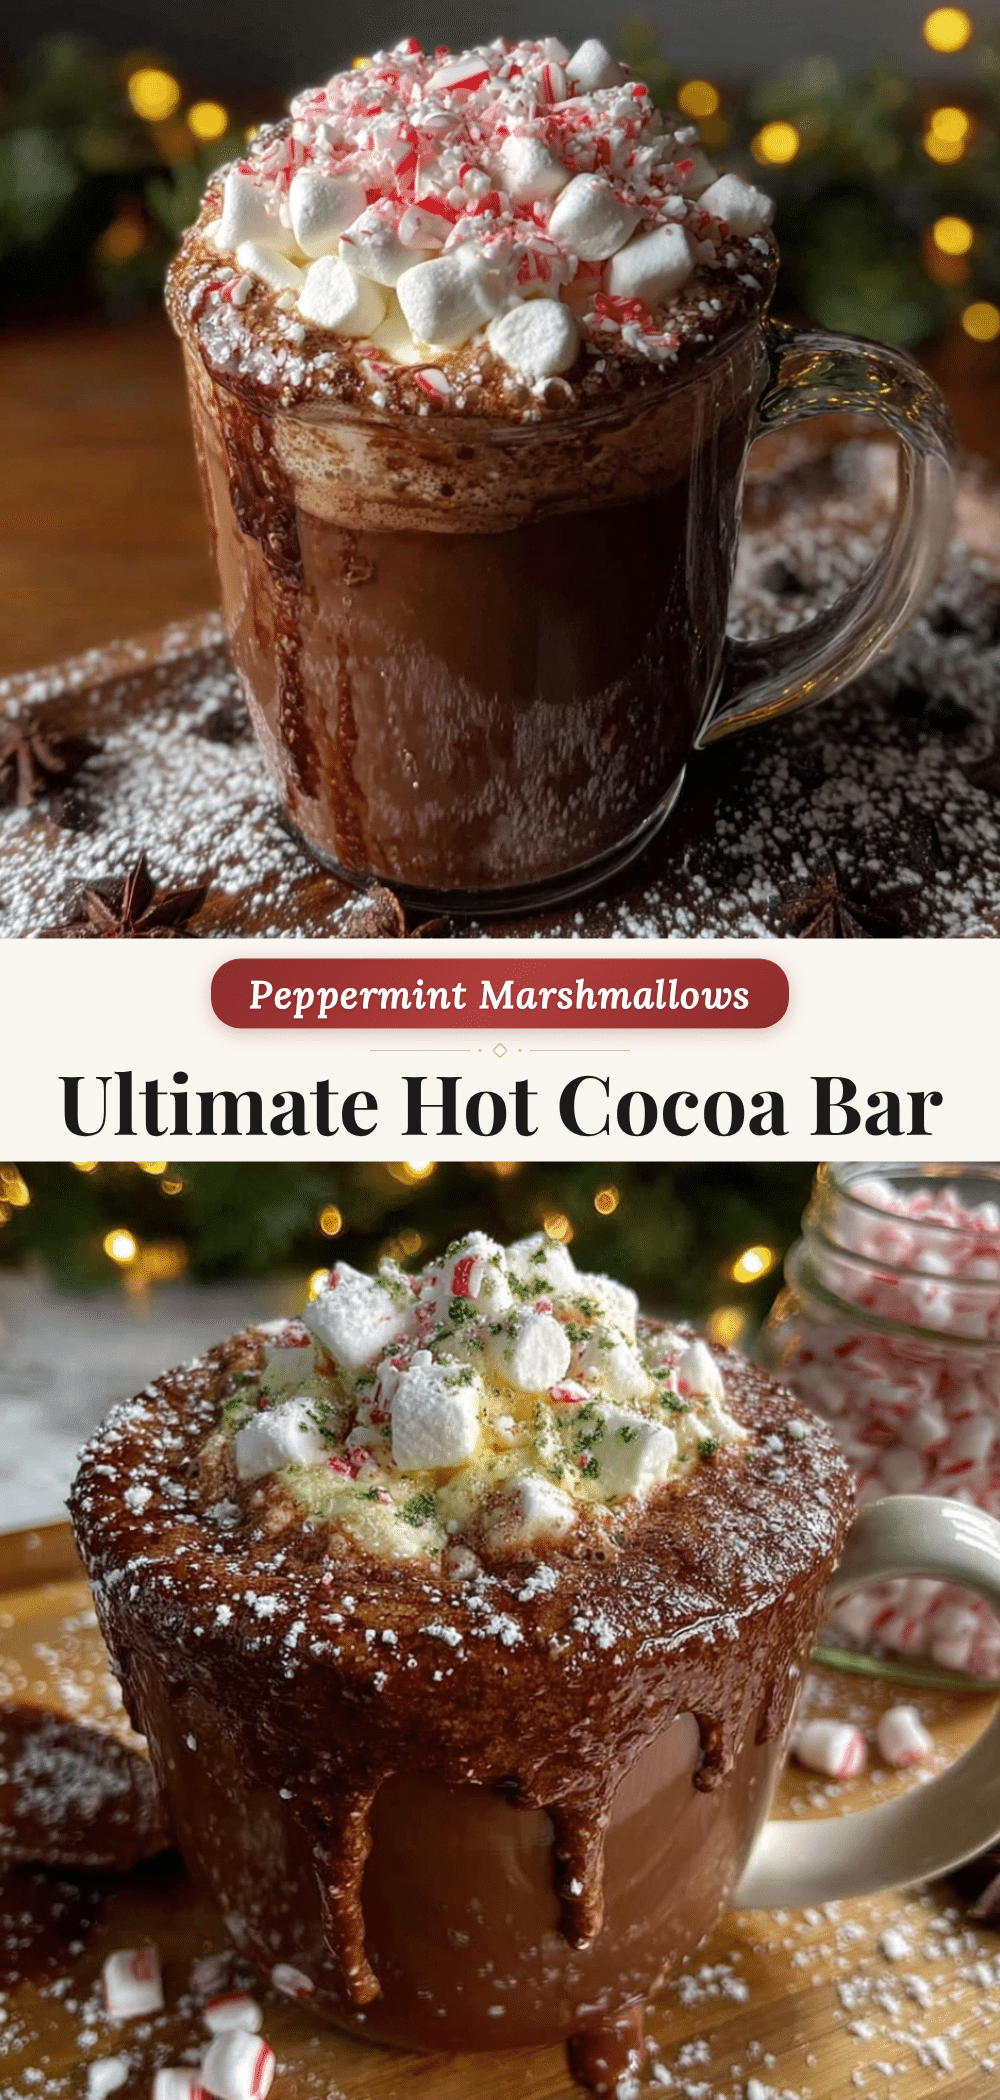
Ultimate Hot Cocoa Bar with Easy Peppermint Marshmallows

This isn’t just another hot chocolate recipe. This is a full-blown, show-stopping hot cocoa bar designed to be the centerpiece of your next gathering, featuring rich, velvety cocoa and soft, homemade peppermint marshmallows.
- Prep Time: 30 minutes
- Cook Time: 20 minutes
- Total Time: 8 hours (includes overnight setting for marshmallows)
- Yield: 8 servings 1x
- Category: Beverage
- Cuisine: American
Ingredients
- 4 cups whole milk (or 2% for a lighter version)
- 1 cup heavy cream
- 8 oz semi-sweet chocolate, finely chopped
- 4 oz dark chocolate (60-70% cacao), finely chopped
- 1/2 cup unsweetened cocoa powder (Dutch-process preferred)
- 1/2 cup granulated sugar
- 1 teaspoon vanilla extract
- 1/4 teaspoon salt
- 3 envelopes (about 3 tablespoons) unflavored gelatin
- 1 cup cold water, divided
- 1 1/2 cups granulated sugar (for marshmallows)
- 1 cup light corn syrup
- 1/4 teaspoon salt (for marshmallows)
- 1 teaspoon peppermint extract
- 1/2 cup powdered sugar, for dusting
- 1/4 cup cornstarch, for dusting
- Red food coloring (optional, for swirl)
- Whipped cream (for serving)
- Crushed candy canes or peppermint candies (for serving)
- Chocolate shavings (for serving)
- Mini chocolate chips (for serving)
- Caramel sauce or chocolate sauce (for serving)
- Pretzel sticks or sea salt flakes (for serving)
Instructions
- Make the Peppermint Marshmallows (Day Before): Line a 9×13-inch baking pan with parchment paper, leaving a 2-inch overhang. Lightly spray with non-stick cooking spray. In a small bowl, whisk together 1/2 cup powdered sugar and 1/4 cup cornstarch. Sprinkle about half of this mixture evenly over the bottom of the prepared pan. Set the rest aside.
- In the bowl of a stand mixer, sprinkle the 3 envelopes of gelatin over 1/2 cup of the cold water. Stir gently and let sit for 10 minutes to bloom.
- In a medium, heavy-bottomed saucepan, combine the remaining 1/2 cup cold water, 1 1/2 cups granulated sugar, and 1 cup light corn syrup. Stir gently over medium heat until the sugar dissolves. Stop stirring, clip a candy thermometer to the side, and increase heat to medium-high. Bring to a boil and cook without stirring until the thermometer reads 240°F (soft-ball stage), about 8-10 minutes. Remove from heat immediately.
- With the whisk attachment on the stand mixer, beat the bloomed gelatin on low speed. Carefully and slowly pour the hot sugar syrup down the side of the bowl. Once all syrup is in, increase speed to high and whip for 10-12 minutes until thick, glossy, and bright white.
- During the last minute of whipping, add 1 teaspoon peppermint extract and 1/4 teaspoon salt. For a swirl, stop the mixer, drizzle in a few drops of red food coloring, and pulse once or twice to create streaks.
- Working quickly, scrape the marshmallow mixture into the prepared pan using a lightly oiled spatula. Spread into an even layer. Sprinkle the remaining powdered sugar and cornstarch mixture over the top. Let sit uncovered at room temperature for at least 6 hours or overnight. Do not refrigerate.
- Once set, turn the slab out onto a cutting board dusted with more sugar mixture. Peel off parchment. Use a large sharp knife or pizza cutter (dusted with sugar mixture) to cut into 1-inch cubes. Toss cubes in remaining sugar mixture to coat. Store in an airtight container at room temperature for up to 2 weeks.
- Make the Rich Hot Cocoa Base (Day of Party): In a large saucepan, whisk together 1/2 cup cocoa powder, 1/2 cup sugar, and 1/4 teaspoon salt.
- Slowly whisk in about 1/2 cup of the milk to create a smooth paste. Then whisk in the remaining 3 1/2 cups milk and 1 cup heavy cream. Place over medium heat.
- Whisk frequently as the mixture heats up. Do not let it boil. Once steam rises and small bubbles form around the edges, remove from heat.
- Add the finely chopped semi-sweet and dark chocolate. Let sit for 2-3 minutes to soften, then whisk gently until completely melted and smooth.
- Stir in 1 teaspoon vanilla extract. Taste and adjust sweetness or chocolate flavor as desired. Pour into a slow cooker on ‘warm’ or a heatproof carafe. Serve with toppings and peppermint marshmallows.
Notes
Make marshmallows a day ahead. Humidity can affect marshmallow setting; avoid making on rainy days. For the cocoa, do not let milk boil to prevent graininess. The cocoa base can be made up to 3 days in advance and reheated.
Nutrition
- Serving Size: 8 oz cocoa with 1 ma
- Calories: 380450
- Sugar: 38
- Sodium: 200
- Fat: 22
- Saturated Fat: 13
- Carbohydrates: 45
- Fiber: 3
- Protein: 8
Keywords: hot cocoa, hot chocolate, peppermint marshmallows, cocoa bar, holiday drink, winter dessert, homemade marshmallows


