This was supposed to be a classic New York-style cheesecake. I had the cream cheese sitting out to soften, the springform pan greased, and a whole plan to impress my book club with something tall, dense, and fancy. But then my oven decided to act up—the temperature gauge has been lying to me for years, honestly—and I was already running late from a work call that ran forty minutes over. So there I was, staring at a bowl of perfectly good cheesecake filling and a package of Biscoff cookies I’d bought on a whim, and I just thought, forget it. I crushed the cookies, pressed them into a square pan, poured the filling on top, and prayed for the best. What came out of that unreliable oven was nothing like the plan—and better. These bars are richer, easier, and somehow more satisfying than the fancy cheesecake I’d intended to make. I mean, the book club devoured them in about five minutes flat, and I’ve been making them ever since. Maybe you’ve been there too—when a kitchen disaster turns into your most-requested recipe. Let me tell you, this is that recipe.
Why You’ll Love This Recipe
Let’s face it—life is busy, and you don’t always have time for a water bath and a springform pan. These Easy Biscoff Cheesecake Bars are the answer to your weeknight dessert prayers. They come together in under 30 minutes of active work, and the oven does the rest. No fuss, no stress, just pure creamy, spiced goodness.
- Quick & Easy: From start to table in about an hour, with only 20 minutes of hands-on prep. Perfect for those evenings when you need dessert fast.
- Simple Ingredients: You probably already have cream cheese, sugar, eggs, and vanilla in your kitchen. The Biscoff cookies and spread are the only special items, and they’re easy to find at most grocery stores.
- Perfect for Weeknights: These bars are great for a casual family dessert, a last-minute potluck contribution, or even a make-ahead treat for the work week.
- Crowd-Pleaser: I’ve served these to kids, adults, picky eaters, and dessert snobs. They disappear every single time. The combination of creamy cheesecake and crunchy, spiced cookie crust is universally loved.
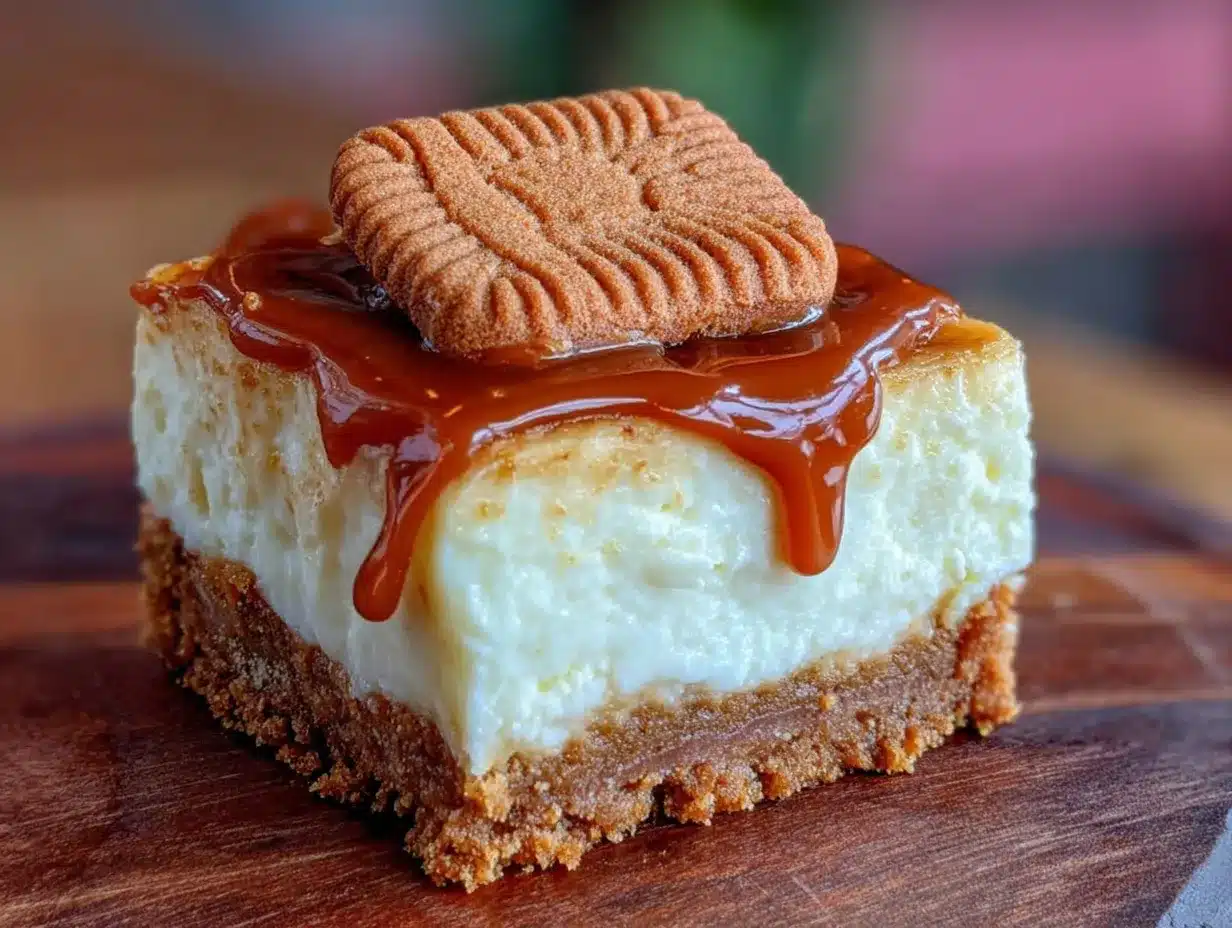
- Unbelievably Delicious: The texture is what gets me every time. The crust stays perfectly crunchy, the filling is silky and smooth, and the Biscoff drizzle on top adds this caramelized, almost butterscotch flavor that’s next-level comfort food.
What makes this recipe different from the rest? It’s the method. Instead of a fussy water bath, we bake these bars low and slow, then let them cool gradually in the oven. This gives you that perfect, crack-free surface without any extra work. Plus, the crushed Biscoff cookies in the crust add a texture and flavor that a plain graham cracker crust just can’t match. This isn’t just another cheesecake bar recipe—it’s your new go-to.
What Ingredients You Will Need
This recipe uses simple, wholesome ingredients to deliver bold flavor and satisfying texture without the fuss. Most of these are pantry staples or easy to find at your local grocery store.
- For the Crust:
- 2 cups (200g) Biscoff cookie crumbs (about 25-30 cookies, finely crushed)
- 5 tablespoons (70g) unsalted butter, melted (I use Land O’Lakes for consistent results)
- 2 tablespoons (25g) granulated sugar (optional, but adds a tiny bit of sweetness)
- For the Cheesecake Filling:
- 16 ounces (450g) full-fat cream cheese, softened to room temperature (Philadelphia is my go-to brand for the smoothest texture)
- 1/2 cup (100g) granulated sugar
- 2 large eggs, at room temperature
- 1 teaspoon vanilla extract (pure, not imitation, if you have it)
- 1/4 cup (60ml) sour cream, at room temperature (adds richness and tanginess)
- 1/4 cup (60g) Biscoff spread (creamy, not crunchy), melted slightly for easier mixing
- For the Topping:
- 1/4 cup (60g) Biscoff spread, melted for drizzling
- 2-3 Biscoff cookies, crushed for garnish (optional, but pretty)
Ingredient Selection Tips:
Make sure your cream cheese is truly at room temperature. Cold cream cheese will give you a lumpy filling, and nobody wants that. Take it out of the fridge at least an hour before you start baking. Same goes for the eggs and sour cream—room temperature ingredients blend together much more smoothly.
If you can’t find Biscoff cookie crumbs, just buy the whole cookies and crush them yourself. A food processor works great, or you can put them in a zip-top bag and go at them with a rolling pin. It’s a tiny bit of extra work, but totally worth it.
Substitution Guidance:
For a gluten-free version, use gluten-free Biscoff cookies (they exist!) or substitute with gluten-free graham crackers. The filling is naturally gluten-free. For a lower-sugar option, you can reduce the sugar in the filling to 1/3 cup, though the texture will be slightly less creamy.
Equipment Needed
You don’t need a lot of fancy equipment for this recipe, which is part of its charm. Here’s what you’ll need:
- 8×8-inch square baking pan: This is the perfect size for these bars. If you only have a 9×9, that works too—just reduce the baking time by about 5 minutes.
- Parchment paper: Line your pan with parchment paper, leaving some overhang on two sides. This makes lifting the bars out so much easier.
- Mixing bowls: One medium bowl for the crust, one large bowl for the filling.
- Electric hand mixer or stand mixer: A hand mixer works perfectly here. You could mix by hand with a whisk, but it takes more elbow grease to get that silky smooth texture.
- Food processor or zip-top bag and rolling pin: For crushing the cookies. I’ve used both methods, and honestly, the bag-and-rolling-pin method is more satisfying—and you get to take out some aggression!
- Spatula: For scraping down the bowl and spreading the filling.
- Measuring cups and spoons: Standard set will do.
Budget-Friendly Options: If you don’t have a food processor, don’t sweat it. The bag-and-rolling-pin method works like a charm. You can also use a simple whisk instead of an electric mixer—just make sure your cream cheese is extra soft.
Preparation Method
- Preheat and Prep (5 minutes): Preheat your oven to 325°F (160°C). Line your 8×8-inch baking pan with parchment paper, leaving about 2 inches of overhang on two opposite sides. This will be your “handle” for lifting the bars out later.
- Make the Crust (10 minutes): In a medium bowl, combine the Biscoff cookie crumbs and sugar (if using). Pour in the melted butter and stir with a fork until all the crumbs are moistened. The mixture should look like wet sand and hold together when you squeeze it. Press this mixture firmly into the bottom of your prepared pan. I use the bottom of a measuring cup to get it really even and compact. Bake for 8 minutes, then set aside to cool slightly while you make the filling.
- Make the Cheesecake Filling (10 minutes): In a large bowl, beat the softened cream cheese with an electric mixer on medium speed until smooth and creamy—about 2 minutes. Scrape down the sides and bottom of the bowl with a spatula. Add the sugar and beat for another minute until well combined. Add the eggs one at a time, beating on low speed after each addition just until incorporated. Don’t overmix here—you don’t want to incorporate too much air, which can cause cracks. Add the vanilla extract, sour cream, and the melted Biscoff spread. Mix on low speed until just combined and smooth. The mixture should be silky and pale.
- Assemble and Bake (40-45 minutes): Pour the cheesecake filling over the pre-baked crust. Spread it evenly with a spatula. Bake at 325°F (160°C) for 35-40 minutes, or until the edges are set and the center is just slightly jiggly—like a firm Jell-O. It will continue to set as it cools. Important: Turn off the oven, crack the door open, and let the cheesecake cool inside the oven for 1 hour. This gradual cooling helps prevent cracks.
- Chill (4 hours or overnight): After the hour in the oven, remove the pan and let it cool completely on a wire rack (about 1 hour). Then cover with plastic wrap and refrigerate for at least 4 hours, but overnight is best. The bars need this time to fully set and develop their flavor.
- Add the Topping and Serve (5 minutes): Once the bars are fully chilled, melt the remaining 1/4 cup of Biscoff spread in the microwave in 15-second bursts, stirring between each. Drizzle it over the top of the cheesecake. Sprinkle with crushed Biscoff cookies if desired. Use the parchment paper overhang to lift the entire block out of the pan. Place it on a cutting board and slice into 16 squares. Run your knife under hot water and wipe it dry between cuts for the cleanest slices.
Cooking Tips & Techniques
I’ve made this recipe more times than I can count, and I’ve learned a few things the hard way. Let me save you some trouble.
The Room Temperature Rule is Real: I once tried to rush this by using cold cream cheese, and my filling was full of tiny lumps. No amount of mixing could fix it. Take the cream cheese, eggs, and sour cream out of the fridge at least an hour before you start. Trust me on this.
Don’t Overmix the Filling: When you add the eggs, beat on low speed and stop as soon as they’re incorporated. Overmixing incorporates too much air, which can cause your cheesecake to puff up and then crack as it cools. We want it dense and creamy, not airy.
The Jiggle Test: After 35 minutes of baking, give the pan a gentle shake. The edges should be set and firm, but the center should still have a slight wobble. If it’s still soupy, give it another 5 minutes. If it’s completely firm, you’ve overbaked it slightly—it’ll still taste great, but the texture might be a bit denser.
Patience with Cooling: I know it’s hard to wait, but the gradual cooling in the oven is the secret to a crack-free surface. If you take it out and put it straight in the fridge, the temperature shock will almost certainly cause cracks. Let it cool in the oven with the door cracked open for a full hour. Go fold laundry, answer some emails, or just stare at the oven door—I’ve done all three.
Slice Cleanly: For those Instagram-worthy slices, use a sharp knife and run it under hot water between cuts. Wipe the blade dry with a paper towel after each slice. This gives you clean, sharp edges instead of smeared cheesecake.
Variations & Adaptations
This recipe is a great base for experimentation. Here are some variations I’ve tried and loved:
- Chocolate Biscoff Cheesecake Bars: Add 1/4 cup of melted dark chocolate to the cheesecake filling along with the Biscoff spread. Drizzle melted chocolate on top instead of—or in addition to—the Biscoff spread. It’s a game-changer for chocolate lovers.
- No-Bake Version: For those hot summer days when you don’t want to turn on the oven, you can make a no-bake version. Use the same crust (just chill it instead of baking), and use a no-bake cheesecake filling: beat 16 oz cream cheese with 1/2 cup powdered sugar, then fold in 1 cup of heavy cream whipped to stiff peaks. Chill for at least 6 hours. The texture is lighter and fluffier, but still delicious.
- Vegan Adaptation: Use vegan cream cheese (like Kite Hill or Violife), vegan butter, and a flax egg (1 tablespoon ground flaxseed mixed with 3 tablespoons water, let sit for 5 minutes). The texture will be slightly less dense, but the flavor is still fantastic. Use vegan Biscoff cookies—they’re accidentally vegan!
- Mini Cheesecake Bites: Press the crust into a mini muffin tin (lined with mini parchment liners if you want to get fancy), fill with the cheesecake mixture, and bake for just 12-15 minutes. These are perfect for parties or portion control.
Serving & Storage Suggestions
These bars are best served cold, straight from the fridge. The texture is firm and creamy, and the flavors are perfectly balanced. If you let them sit at room temperature for more than 20 minutes, they’ll start to soften and lose their clean slice.
Serving Ideas: Serve these bars on a simple plate with a drizzle of extra Biscoff spread and a sprinkle of crushed cookies. They pair beautifully with a cup of strong coffee or a glass of cold milk. For a more indulgent dessert, add a dollop of whipped cream and a few fresh berries—the tartness of raspberries or strawberries cuts through the richness perfectly.
Storage: Store the bars in an airtight container in the refrigerator for up to 5 days. I like to layer them between sheets of parchment paper so they don’t stick together. The flavor actually improves after a day or two as the Biscoff flavor melds with the cheesecake.
Freezing: These bars freeze beautifully. Wrap individual slices tightly in plastic wrap, then place them in a freezer-safe bag or container. They’ll keep for up to 3 months. To thaw, transfer a slice to the fridge overnight. The texture will be just as good as fresh.
Make-Ahead Note: This is the perfect make-ahead dessert for busy weeknights or holiday gatherings. Make them a day or two in advance, and you’ll have a show-stopping dessert ready to go with zero last-minute stress.
Nutritional Information & Benefits
While these bars are definitely a treat, here’s the estimated nutritional breakdown for one bar (based on 16 servings):
- Calories: 285
- Fat: 18g
- Saturated Fat: 10g
- Carbohydrates: 27g
- Sugar: 18g
- Protein: 4g
- Sodium: 190mg
Health Benefits of Key Ingredients: Biscoff cookies are made with brown sugar and cinnamon, which contain antioxidants. Cream cheese provides calcium and protein, while eggs offer high-quality protein and vitamins. Of course, this is still a dessert, so moderation is key.
Dietary Considerations: This recipe contains dairy (cream cheese, butter, sour cream), eggs, and gluten (from the cookies). For a gluten-free version, use gluten-free Biscoff cookies. For a dairy-free version, use vegan alternatives as noted in the variations section. This recipe is not suitable for vegans or those with egg allergies in its standard form.
Personal Wellness Perspective: I believe in enjoying treats without guilt. These bars are rich and satisfying, so one bar is usually enough to hit that dessert spot. I like to serve them after a lighter dinner, or save them for a weekend indulgence. Balance, not restriction, is the name of the game.
Conclusion
These Easy Biscoff Cheesecake Bars are proof that sometimes the best recipes come from happy accidents. They’re creamy, crunchy, spiced, and utterly addictive—yet they come together with minimal fuss and effort. Whether you’re a seasoned baker or a complete beginner, you can make these bars and feel like a rockstar.
I love this recipe because it’s forgiving. Mess up the crust? It still tastes great. Overbake it slightly? Still delicious. Forget to drizzle the topping? Honestly, it’s still amazing. It’s the kind of recipe that builds confidence in the kitchen, and that’s a beautiful thing.
I’d love to hear how yours turn out! Leave a comment below with any tweaks you made, or tag me in your photos on social media—I’m always excited to see your creations. Happy baking, friends!
Frequently Asked Questions
Can I use low-fat cream cheese?
You can, but the texture won’t be as rich and creamy. Full-fat cream cheese gives the best results for this recipe. If you do use low-fat, expect a slightly softer, less dense bar.
How do I know when the cheesecake is done?
The edges should be set and firm, but the center should still jiggle slightly when you gently shake the pan. It will continue to set as it cools. If the center is completely firm, it’s overbaked.
Can I skip the Biscoff spread in the filling?
Yes, you can omit it. The bars will still be delicious—just a classic vanilla cheesecake with a Biscoff crust. You might want to add an extra tablespoon of sour cream to maintain the moisture balance.
Why did my cheesecake crack?
Cracks usually happen from overbaking, overmixing the filling, or cooling too quickly. Make sure you’re not overmixing, bake until just set, and let the bars cool gradually in the oven with the door cracked open.
Can I double this recipe?
Absolutely! Double all the ingredients and bake in a 9×13-inch pan. Increase the baking time to 45-50 minutes, and keep an eye on the jiggle test. You may need to add 5-10 minutes.
Pin This Recipe!
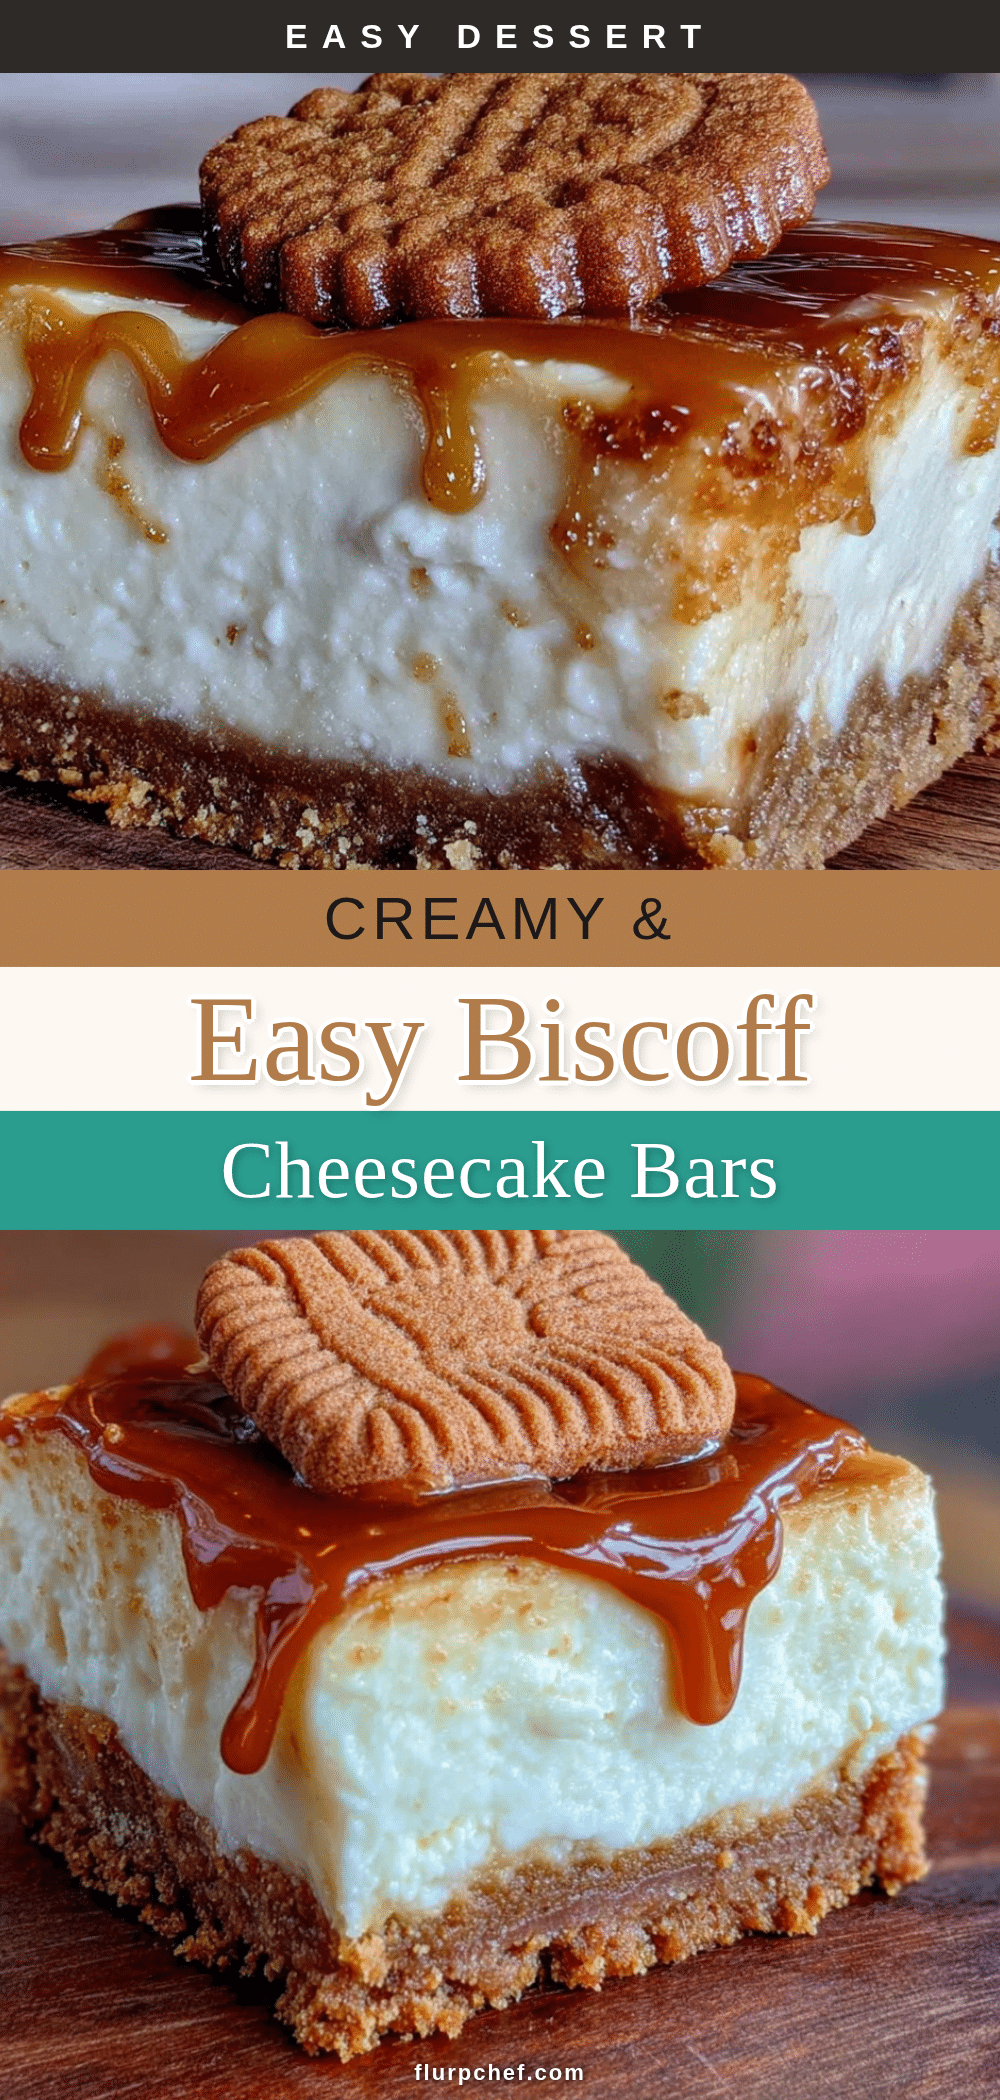
Easy Homemade Biscoff Cheesecake Bars Recipe
These Easy Biscoff Cheesecake Bars are creamy, crunchy, spiced, and utterly addictive—yet they come together with minimal fuss and effort. Perfect for weeknights, potlucks, or any time you need a quick and delicious dessert.
- Prep Time: 20 minutes
- Cook Time: 40 minutes
- Total Time: 1 hour (plus 4 hours chilling)
- Yield: 16 servings 1x
- Category: Dessert
- Cuisine: American
Ingredients
- 2 cups (200g) Biscoff cookie crumbs (about 25–30 cookies, finely crushed)
- 5 tablespoons (70g) unsalted butter, melted
- 2 tablespoons (25g) granulated sugar (optional)
- 16 ounces (450g) full-fat cream cheese, softened to room temperature
- 1/2 cup (100g) granulated sugar
- 2 large eggs, at room temperature
- 1 teaspoon vanilla extract (pure, not imitation)
- 1/4 cup (60ml) sour cream, at room temperature
- 1/4 cup (60g) Biscoff spread (creamy), melted slightly
- 1/4 cup (60g) Biscoff spread, melted for drizzling
- 2–3 Biscoff cookies, crushed for garnish (optional)
Instructions
- Preheat your oven to 325°F (160°C). Line an 8×8-inch baking pan with parchment paper, leaving about 2 inches of overhang on two opposite sides.
- In a medium bowl, combine the Biscoff cookie crumbs and sugar (if using). Pour in the melted butter and stir with a fork until all the crumbs are moistened. Press this mixture firmly into the bottom of the prepared pan. Bake for 8 minutes, then set aside to cool slightly.
- In a large bowl, beat the softened cream cheese with an electric mixer on medium speed until smooth and creamy—about 2 minutes. Scrape down the sides and bottom of the bowl. Add the sugar and beat for another minute until well combined. Add the eggs one at a time, beating on low speed after each addition just until incorporated. Add the vanilla extract, sour cream, and the melted Biscoff spread. Mix on low speed until just combined and smooth.
- Pour the cheesecake filling over the pre-baked crust. Spread it evenly with a spatula. Bake at 325°F (160°C) for 35-40 minutes, or until the edges are set and the center is just slightly jiggly. Turn off the oven, crack the door open, and let the cheesecake cool inside the oven for 1 hour.
- After the hour in the oven, remove the pan and let it cool completely on a wire rack (about 1 hour). Then cover with plastic wrap and refrigerate for at least 4 hours, but overnight is best.
- Once the bars are fully chilled, melt the remaining 1/4 cup of Biscoff spread in the microwave in 15-second bursts, stirring between each. Drizzle it over the top of the cheesecake. Sprinkle with crushed Biscoff cookies if desired. Use the parchment paper overhang to lift the entire block out of the pan. Place it on a cutting board and slice into 16 squares.
Notes
Make sure cream cheese, eggs, and sour cream are at room temperature for a smooth filling. Do not overmix the filling to avoid cracks. Let the cheesecake cool gradually in the oven to prevent cracking. For clean slices, run a knife under hot water and wipe dry between cuts.
Nutrition
- Serving Size: 1 bar
- Calories: 285
- Sugar: 18
- Sodium: 190
- Fat: 18
- Saturated Fat: 10
- Carbohydrates: 27
- Protein: 4
Keywords: Biscoff cheesecake bars, easy cheesecake bars, Biscoff dessert, no-fuss cheesecake, weeknight dessert


