My roommate Jenna asked why I couldn’t just throw the ground beef and rice in one pan and call it dinner. I started to explain why that wouldn’t work—something about cooking times and liquid ratios and the general chaos that would ensue. Then I stopped. I mean, honestly, I had no good reason. I’d just been doing it the complicated way for years because that’s how my mom did it, and that’s how her mom did it, and somewhere along the line nobody thought to question the extra dishes.
So I tried it. And let me tell you, the first batch was a little soupy. The second batch was a little dry. But the third batch? That Wednesday night when I was too tired to care about perfection and just wanted something warm and filling? That batch was magic. The rice soaked up all that savory beef broth and tomato goodness, and the whole thing came together in a way that made me wonder why I’d been dirtying three separate pans for the last decade.
This quick one-pan ground beef and rice recipe has become my weeknight hero. It’s the kind of meal you make when you have zero energy but still want something that tastes like you actually tried. Maybe you’ve been there—standing in front of the fridge at 6 PM wondering how to turn a pound of ground beef and a handful of pantry staples into something your family will actually eat without complaint. This is that recipe.
I keep coming back to it because it works every single time. No complicated techniques, no special equipment, just honest food that fills you up and makes you feel good about what you’re eating. The rice gets perfectly tender, the beef stays juicy, and every bite has that deep, savory flavor that makes you close your eyes for just a second.
Why You’ll Love This Recipe
Let me be honest with you—I’ve tested this recipe at least a dozen times to get it just right. I’ve burned batches, undercooked batches, and made some that were so salty they were practically inedible. But through all those failures, I figured out exactly what works. Here’s why this version is the one you’ll come back to:
- One-Pan Wonder: Everything cooks in a single skillet. That means less time washing dishes and more time actually enjoying your evening. I’m all about that.
- Quick & Easy: From start to finish, this comes together in about 30 minutes. No marinating, no complicated steps, just straightforward cooking that anyone can handle.
- Simple Ingredients: You probably have most of these in your kitchen right now. Ground beef, rice, some aromatics, and a few pantry staples. No fancy grocery trips required.
- Perfect for Busy Weeknights: This is the kind of meal you make on a Tuesday when you’ve got soccer practice and a million other things to do. It’s forgiving, it’s filling, and it makes leftovers that taste even better the next day.
- Crowd-Pleaser: I’ve served this to picky kids, hungry teenagers, and grown adults with sophisticated palates. Everyone goes back for seconds. I mean it—there’s something about that savory beef and tender rice combination that just works.
- Budget-Friendly: Ground beef and rice are about as affordable as dinner gets. You can feed a family of four for under ten dollars, and that’s something we can all get behind.
What makes this recipe different from all the other ground beef and rice recipes out there? It’s the technique. Most recipes have you cook everything separately and combine at the end. But by layering the flavors in the right order and using just the right amount of liquid, the rice absorbs all that beefy, oniony, garlicky goodness as it cooks. The result is a cohesive dish where every grain of rice tastes like it was meant to be there.
This isn’t just another version—it’s the version I’d serve to my own family without hesitation. It’s comfort food that’s faster, simpler, and somehow more satisfying than the complicated version I used to make.
What Ingredients You Will Need
This recipe uses simple, wholesome ingredients to deliver bold flavor and satisfying texture without the fuss. Most of these are pantry staples, which means you can make this dinner happen even when you haven’t been to the grocery store in a week.
For the Base
- 1 pound ground beef (80/20 works best for flavor, but lean ground beef works too—just add a tablespoon of oil if using very lean meat)
- 1 medium yellow onion, diced (about 1 cup—this forms the aromatic foundation of the dish)
- 3 cloves garlic, minced (fresh is best, but jarred minced garlic works in a pinch)
- 1 cup long-grain white rice, uncooked (I recommend Jasmine or Basmati for the best texture—avoid minute rice or instant varieties)
- 2 cups beef broth (low-sodium is ideal so you can control the salt level—I prefer Kitchen Basics brand)
- 1 can (14.5 oz) diced tomatoes, undrained (fire-roasted adds a lovely depth of flavor if you can find them)
- 1 tablespoon tomato paste (this little addition makes a big difference in richness)
- 1 teaspoon paprika (smoked paprika is amazing here if you have it)
- 1 teaspoon dried oregano
- ½ teaspoon salt (plus more to taste at the end)
- ½ teaspoon black pepper
- 2 tablespoons olive oil (for browning the beef and sautéing the vegetables)
For Garnish (Optional but Recommended)
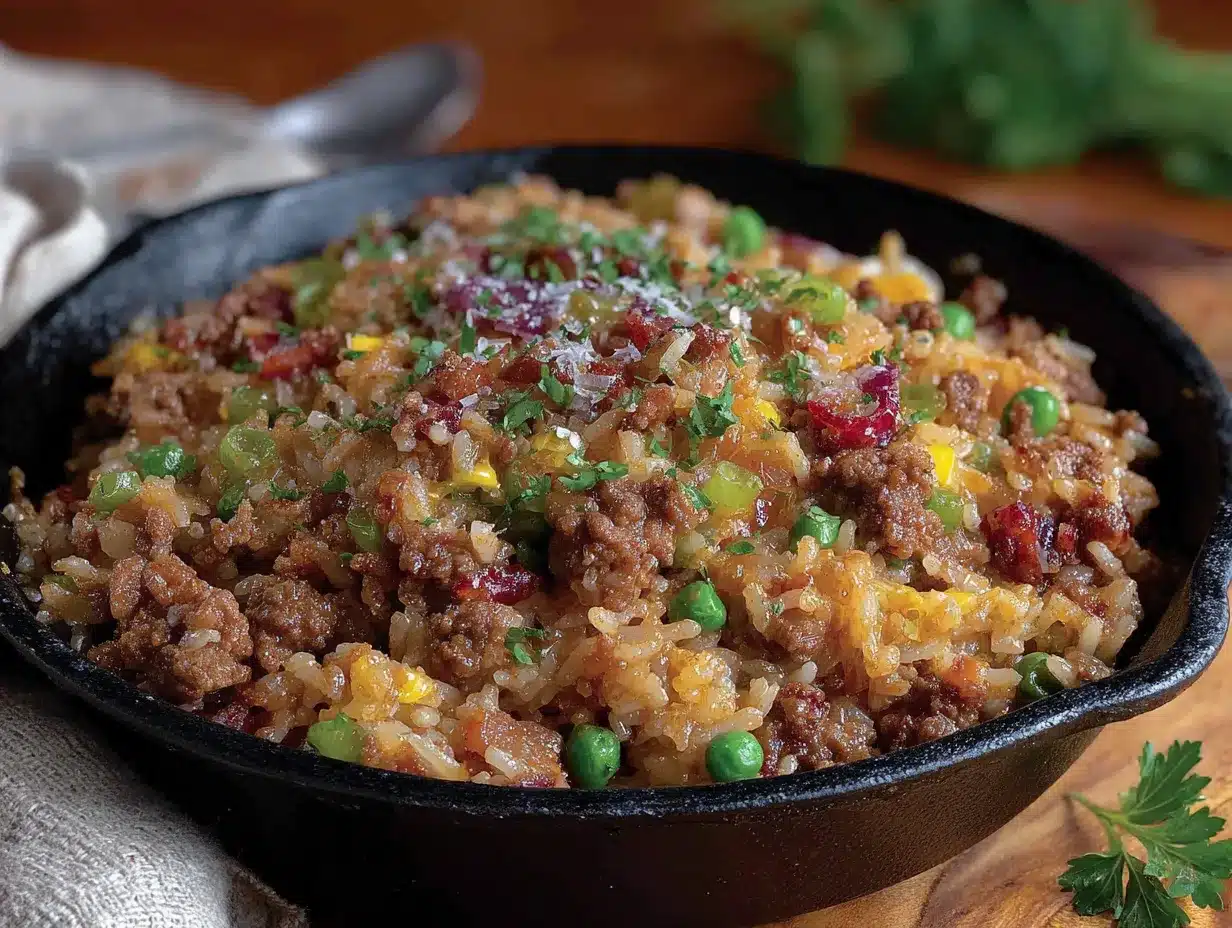
- Fresh parsley, chopped (adds brightness and color)
- Shredded cheddar cheese (because everything is better with cheese)
- Green onions, sliced (for a mild onion kick and pretty presentation)
A few notes on ingredients: If you’re using a different type of rice, you’ll need to adjust the liquid and cooking time. Brown rice, for example, needs about 45 minutes and more liquid. I’ve tested this with long-grain white rice and it works perfectly every time. The diced tomatoes add acidity and moisture, while the tomato paste gives that deep, concentrated tomato flavor that makes the dish feel like it’s been simmering for hours.
For substitutions, you can use ground turkey or chicken instead of beef—just add a little extra oil since they’re leaner. If you’re watching your sodium, use no-salt-added broth and tomatoes. And if you want to add vegetables, throw in some frozen peas or corn during the last five minutes of cooking. I’ve done it plenty of times and it works beautifully.
Equipment Needed
One of the best things about this recipe is how little equipment you need. Here’s what you’ll want to have on hand:
- A large skillet or sauté pan with a lid (12-inch is ideal—you need enough surface area for the rice to cook evenly, and the lid is crucial for trapping steam)
- A wooden spoon or spatula (for breaking up the ground beef and stirring)
- A sharp knife (for dicing the onion and mincing the garlic)
- A cutting board
- Measuring cups and spoons
If you don’t have a lid for your skillet, you can use a baking sheet or aluminum foil to cover it. I’ve done this more times than I’d like to admit, and it works just fine. The key is to trap that steam so the rice cooks properly.
For the skillet itself, I prefer a heavy-bottomed stainless steel or cast iron pan. They distribute heat evenly and hold temperature well. Non-stick works too, but you might need to adjust the heat slightly since they tend to run hotter. I’ve used my trusty 12-inch cast iron skillet for years—it’s seasoned perfectly and adds a little extra flavor to everything I cook in it.
If you’re on a budget, a basic non-stick skillet from the grocery store will work perfectly. You don’t need fancy equipment for this recipe—just something that can hold heat and has a lid.
Preparation Method
Let me walk you through this step by step. I’ve made this recipe so many times that I could do it in my sleep, but I’ll share all the little tips I’ve learned along the way.
- Heat the oil over medium-high heat. Add the olive oil to your skillet and let it get hot—about 30 seconds. You want it shimmering but not smoking. This is important because you need high heat to get a good sear on the beef.
- Brown the ground beef. Add the ground beef to the hot skillet. Break it up with your wooden spoon as it cooks. Let it sit for about 2 minutes without stirring so it develops a nice brown crust—that’s where all the flavor lives. Then stir and continue cooking until it’s no longer pink, about 5-6 minutes total. Don’t drain the fat unless there’s an excessive amount—that fat carries flavor and helps cook the rice later.
- Sauté the aromatics. Push the beef to one side of the skillet. Add the diced onion to the empty side and cook for 2-3 minutes until it starts to soften and turn translucent. Stir it into the beef, then add the minced garlic. Cook for another 30 seconds until fragrant. Garlic burns fast, so keep an eye on it.
- Add the tomato paste and spices. Make a little well in the center of the pan and add the tomato paste. Let it cook for about a minute, stirring constantly. This step deepens the flavor and removes the raw tomato taste. Then sprinkle the paprika, oregano, salt, and pepper over everything and stir to combine. Your kitchen should smell amazing right about now.
- Add the rice, broth, and tomatoes. Pour in the uncooked rice and stir it around so it gets coated in all those beefy, tomatoey flavors. Then add the beef broth and the can of diced tomatoes (undrained). Stir everything together, scraping up any brown bits from the bottom of the pan—that’s pure flavor gold right there.
- Bring to a boil, then simmer. Turn the heat up to high and bring the liquid to a rolling boil. This takes about 2-3 minutes. Once it’s boiling, reduce the heat to low, cover the skillet with the lid, and let it simmer. Set a timer for 18 minutes. Do not peek! I know it’s tempting, but lifting the lid lets out steam and messes with the cooking time.
- Check for doneness. After 18 minutes, remove the lid carefully (steam is hot!). The rice should be tender and most of the liquid should be absorbed. If there’s still liquid, let it cook uncovered for another 2-3 minutes. If the rice is still firm, add a splash of broth or water, cover, and cook for another 3-5 minutes.
- Fluff and rest. Remove the skillet from the heat. Let it sit, covered, for 5 minutes. This resting time allows the rice to finish absorbing any remaining liquid and the flavors to meld together. After 5 minutes, fluff the rice with a fork—not a spoon, because a fork separates the grains without mashing them.
- Taste and adjust. Give it a taste. Does it need more salt? A little more pepper? Maybe a squeeze of lemon juice for brightness? This is your chance to make it perfect. I usually add a little more salt and a pinch of red pepper flakes for heat.
- Serve and garnish. Spoon the ground beef and rice into bowls. Top with fresh parsley, shredded cheddar cheese, and sliced green onions if you’re using them. The cheese melts into the hot rice and creates this creamy, savory situation that’s absolutely irresistible.
Cooking Tips & Techniques
After making this recipe more times than I can count, I’ve learned a few things the hard way. Let me save you some trouble.
Don’t rush the browning. I know it’s tempting to stir the beef constantly, but letting it sit undisturbed for a couple of minutes creates that beautiful brown crust. That crust is where the deep, meaty flavor comes from. I learned this after years of making gray, sad ground beef—it works, but it’s not the same.
Use the right rice. Long-grain white rice is your best friend here. It cooks in about 18 minutes and absorbs liquid without turning mushy. I tried this with jasmine rice once and it was lovely. I tried it with brown rice and ended up with crunchy rice and burnt bottom. Learn from my mistakes.
Resist the urge to peek. Every time you lift that lid, steam escapes and your cooking time gets thrown off. I know it’s hard—I’ve definitely peeked more times than I’d like to admit. But trust the process. Set the timer and walk away.
Toast the rice if you have time. Before adding the liquid, let the rice cook in the pan with the beef and aromatics for about a minute. It gives the rice a slightly nutty flavor that makes the whole dish more interesting. It’s a small step that makes a big difference.
Adjust the heat as needed. Every stovetop is different. If you notice the liquid bubbling too vigorously after you’ve covered the pan, turn the heat down a little more. You want a gentle simmer, not a rolling boil. Too much heat and you’ll burn the bottom before the rice is cooked through.
One more thing—if your rice turns out a little sticky, don’t panic. Let it rest uncovered for a few minutes and fluff it with a fork. Sometimes it just needs a little air to separate the grains. And honestly, even sticky rice in this dish is still delicious, so don’t stress about perfection.
Variations & Adaptations
This recipe is incredibly flexible, which is one of the reasons I love it so much. Here are some ways to make it your own:
Mexican-Inspired Version
Swap the oregano for cumin and chili powder. Add a can of drained black beans and some corn kernels. Top with fresh cilantro, salsa, and a dollop of sour cream. This version is my go-to when I’m craving taco flavors but don’t want to deal with assembling actual tacos.
Greek-Inspired Version
Use ground lamb instead of beef. Add cinnamon, allspice, and a pinch of nutmeg to the spice mix. Stir in some chopped spinach at the end and serve with crumbled feta cheese and a squeeze of lemon. It’s like a deconstructed moussaka and it’s absolutely incredible.
Vegetable-Packed Version
Add diced bell peppers, zucchini, or mushrooms along with the onion. Throw in a handful of frozen peas or spinach during the last five minutes of cooking. You can easily sneak in a cup or two of vegetables without changing the flavor profile too much. I’ve done this to use up leftover vegetables and it’s always worked out.
Low-Carb Option
Swap the rice for cauliflower rice. You’ll need to adjust the liquid significantly—about ¼ cup of broth instead of 2 cups—and cook for only 5-7 minutes. It’s not the same texture, but it’s a solid option if you’re watching your carbs.
Spicy Version
Add a diced jalapeño along with the onion. Stir in a teaspoon of chipotle powder or a tablespoon of your favorite hot sauce. Top with sliced fresh jalapeños and a drizzle of hot honey. The heat cuts through the richness beautifully.
I’ve tried most of these variations myself, and honestly, they’re all good. My personal favorite is the Mexican-inspired version—it’s what I make when I want something familiar but a little different.
Serving & Storage Suggestions
This dish is incredibly versatile when it comes to serving. Here’s how I like to do it:
Serving Temperature: Serve it hot, straight from the skillet. The cheese should be melty and the rice should be steaming. That’s when it’s at its best.
Side Dishes: A simple green salad with a tangy vinaigrette balances the richness of the beef and rice. Roasted vegetables like broccoli or asparagus work well too. If you want something carb-heavy, warm tortillas or crusty bread are perfect for sopping up any leftover sauce.
Beverage Pairings: A cold beer—something light and crisp like a lager or pilsner—is my go-to. For wine drinkers, a medium-bodied red like Merlot or Zinfandel works nicely. And honestly, a glass of cold milk is pretty great too.
Storage: Let the dish cool completely, then transfer it to an airtight container. It will keep in the refrigerator for up to 4 days. The flavors actually meld and deepen overnight, so leftovers taste even better than the first serving.
Freezing: This freezes beautifully for up to 3 months. Portion it into individual containers for easy lunches. Thaw overnight in the refrigerator before reheating.
Reheating: The best way to reheat is in a skillet with a splash of broth or water. Cover and heat over medium-low for about 5 minutes, stirring occasionally. You can also microwave it in 30-second bursts, stirring between each. Add a little water if it seems dry.
One thing I’ve noticed—the rice absorbs more liquid as it sits, so leftovers might be a little drier than the original. That’s normal. Just add a splash of broth or water when you reheat and it’ll be just as good as the first time.
Nutritional Information & Benefits
This recipe is surprisingly balanced for a comfort food dish. Here’s what you’re getting in each serving (based on 4 servings):
| Nutrient | Amount per Serving |
|---|---|
| Calories | 420 |
| Protein | 28g |
| Carbohydrates | 45g |
| Fat | 15g |
| Fiber | 3g |
| Sodium | 680mg |
The ground beef provides high-quality protein and essential nutrients like iron and B vitamins. The tomatoes are packed with lycopene, an antioxidant that supports heart health. And the rice offers energy in the form of complex carbohydrates that keep you feeling full and satisfied.
If you’re looking to make this dish even healthier, use lean ground beef (93/7) and brown rice. You’ll increase the fiber content and reduce the saturated fat. I’ve done this plenty of times and it still tastes fantastic.
This recipe is naturally gluten-free as written, which is great if you’re cooking for someone with celiac disease or gluten sensitivity. Just double-check your broth to make sure it’s certified gluten-free.
I like that this meal feels indulgent but isn’t actually that heavy. It’s the kind of food that makes you feel good while you’re eating it and doesn’t leave you feeling sluggish afterward.
Conclusion
This quick one-pan ground beef and rice skillet has earned a permanent spot in my weeknight dinner rotation. It’s the recipe I turn to when I need something reliable, something that works every time without a lot of fuss or fancy ingredients.
What I love most about it is how adaptable it is. You can dress it up with different spices and toppings, or keep it simple with just the basics. It works for busy weeknights, lazy Sundays, and everything in between. And honestly, any recipe that gets dinner on the table in 30 minutes with only one pan to wash is a winner in my book.
I’d love to hear how this recipe turns out for you. Did you try any of the variations? Add your own twist? Drop a comment below and let me know—I read every single one and I’m always looking for new ideas to try. And if you loved it, share it with a friend who could use a quick, easy dinner in their life.
Until next time, happy cooking. And remember—sometimes the simplest recipes are the ones that become your favorites.
Frequently Asked Questions
Can I use ground turkey instead of beef?
Absolutely. Ground turkey works great in this recipe. Just add a tablespoon of olive oil since turkey is leaner than beef, and make sure to season it well. Turkey can be a little bland on its own, so don’t skimp on the spices.
Can I make this in a slow cooker or Instant Pot?
You can adapt this for an Instant Pot by using the sauté function for the beef and aromatics, then pressure cooking on high for 5 minutes with a natural release. For a slow cooker, brown the beef first, then cook on low for 2-3 hours—but add the rice during the last 30 minutes so it doesn’t get mushy.
How do I prevent the rice from burning on the bottom?
Make sure your heat is low enough once you’ve covered the pan. You want a gentle simmer, not a vigorous boil. Also, don’t skip the step of scraping up the brown bits from the bottom before adding the liquid—those bits add flavor but can burn if left unchecked.
Can I double this recipe?
Yes, but you’ll need a very large skillet or Dutch oven. A 14-inch pan or larger will work. The cooking time stays about the same, but you might need to add an extra 3-5 minutes for the rice to cook through. Just keep an eye on it.
What if I only have brown rice?
Brown rice needs more liquid and a longer cooking time. Use 2½ cups of broth instead of 2 cups, and cook for about 40-45 minutes instead of 18. You’ll also want to check periodically to make sure there’s enough liquid. It’s doable, but it takes more patience.
Pin This Recipe!
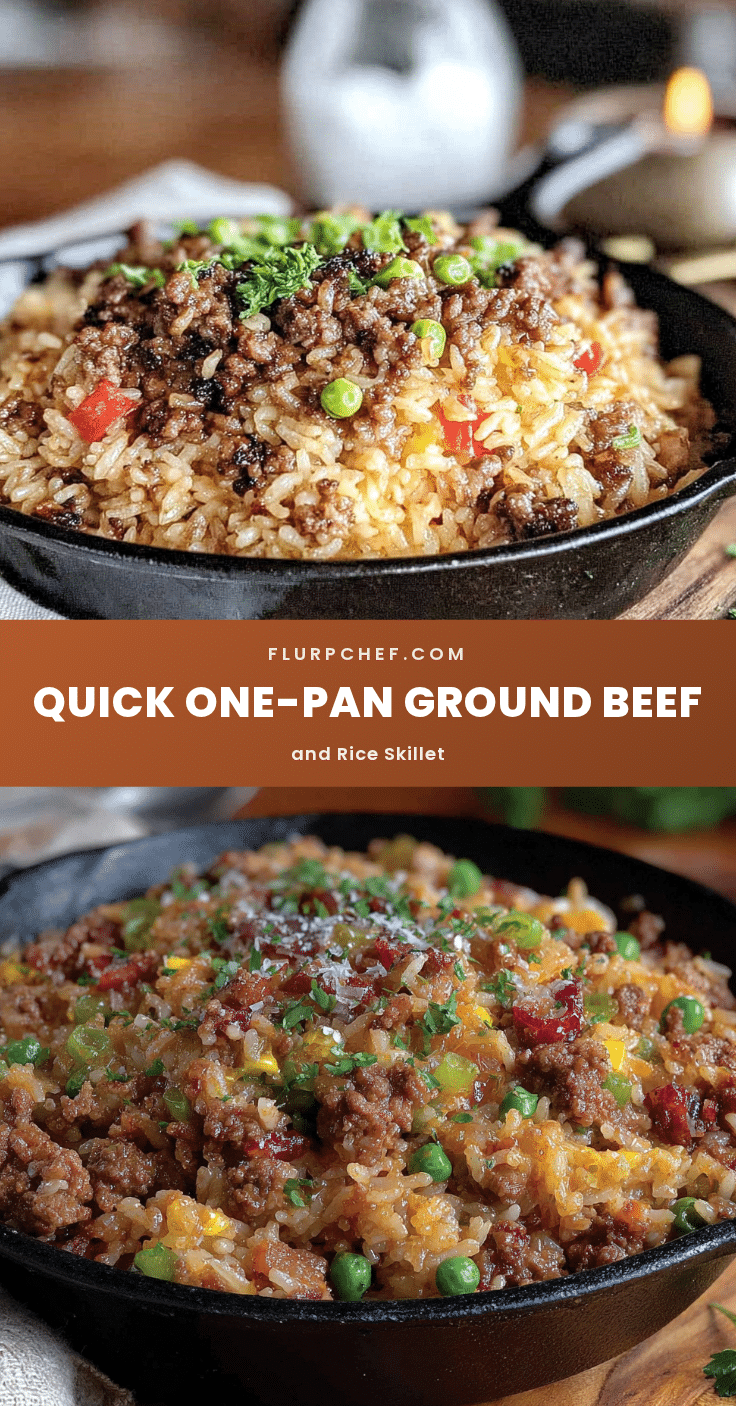
Easy One-Pan Ground Beef and Rice Recipe
A quick and easy one-pan ground beef and rice recipe that comes together in about 30 minutes. Perfect for busy weeknights, this comforting dish uses simple pantry staples and requires minimal cleanup.
- Prep Time: 10 minutes
- Cook Time: 25 minutes
- Total Time: 35 minutes
- Yield: 4 servings 1x
- Category: Main Course
- Cuisine: American
Ingredients
- 1 pound ground beef (80/20 works best)
- 1 medium yellow onion, diced (about 1 cup)
- 3 cloves garlic, minced
- 1 cup long-grain white rice, uncooked (Jasmine or Basmati recommended)
- 2 cups beef broth (low-sodium preferred)
- 1 can (14.5 oz) diced tomatoes, undrained (fire-roasted recommended)
- 1 tablespoon tomato paste
- 1 teaspoon paprika (smoked paprika recommended)
- 1 teaspoon dried oregano
- ½ teaspoon salt (plus more to taste)
- ½ teaspoon black pepper
- 2 tablespoons olive oil
- Fresh parsley, chopped (optional, for garnish)
- Shredded cheddar cheese (optional, for garnish)
- Green onions, sliced (optional, for garnish)
Instructions
- Heat the olive oil in a large skillet over medium-high heat until shimmering, about 30 seconds.
- Add the ground beef to the hot skillet. Let it sit undisturbed for 2 minutes to develop a brown crust, then break it up and cook until no longer pink, about 5-6 minutes total.
- Push the beef to one side of the skillet. Add the diced onion to the empty side and cook for 2-3 minutes until softened. Stir into the beef, then add the minced garlic and cook for 30 seconds until fragrant.
- Make a well in the center of the pan and add the tomato paste. Cook for 1 minute, stirring constantly. Sprinkle paprika, oregano, salt, and pepper over everything and stir to combine.
- Add the uncooked rice and stir to coat in the beef mixture. Pour in the beef broth and diced tomatoes (undrained). Stir everything together, scraping up any brown bits from the bottom of the pan.
- Turn the heat to high and bring the liquid to a rolling boil, about 2-3 minutes. Reduce heat to low, cover the skillet, and let simmer for 18 minutes. Do not lift the lid.
- After 18 minutes, remove the lid carefully. The rice should be tender and most liquid absorbed. If there’s still liquid, cook uncovered for 2-3 more minutes. If rice is still firm, add a splash of broth, cover, and cook for 3-5 more minutes.
- Remove the skillet from heat. Let it sit, covered, for 5 minutes to allow the rice to finish absorbing liquid and flavors to meld.
- Fluff the rice with a fork. Taste and adjust seasoning with more salt, pepper, or a squeeze of lemon juice if desired.
- Spoon into bowls and garnish with fresh parsley, shredded cheddar cheese, and sliced green onions if using.
Notes
For best results, use long-grain white rice like Jasmine or Basmati. Avoid instant rice. If using lean ground beef, add 1 tablespoon of oil. To prevent burning, ensure heat is low enough for a gentle simmer after covering. Leftovers can be stored in an airtight container in the refrigerator for up to 4 days or frozen for up to 3 months. Reheat with a splash of broth or water.
Nutrition
- Serving Size: 1 serving (about 1.5
- Calories: 420
- Sugar: 6
- Sodium: 680
- Fat: 15
- Saturated Fat: 5
- Carbohydrates: 45
- Fiber: 3
- Protein: 28
Keywords: one-pan ground beef and rice, easy ground beef recipe, quick weeknight dinner, one skillet meal, ground beef and rice skillet


