It was 10:47 PM on a random Wednesday in October, and I had an undeniable, almost primal craving for pumpkin pie. The only problem? I was in my pajamas, the grocery store was closed, and the thought of making a pie crust—rolling it out, chilling it, dealing with the inevitable cracks—felt like a task for a much more motivated version of myself. I didn’t have the energy for all that, but I did have a can of pumpkin puree in the pantry, some eggs, and a half-empty carton of milk that was about to turn.
The idea just sort of arrived, fully formed, like a little gift from my sleep-deprived brain. What if I just skipped the crust entirely? What if I took all the warm, spiced filling I actually wanted and baked it in little ramekins? It felt almost rebellious, you know? Like I was breaking a rule. I whisked everything together in one bowl—no mixer, no fuss—and poured the silky mixture into a few mismatched cups. Thirty minutes later, I was sitting on the couch, spoon in hand, eating the most perfect, creamy, guilt-free pumpkin custard. Honestly, it was a revelation.
That late-night experiment turned into my most-requested fall dessert. These Light & Creamy Crustless Pumpkin Pie Custard Cups are everything you love about the classic pie, minus the stress of making a crust. They’re rich, spiced, and incredibly smooth, but somehow feel light and not overly heavy. If you’ve ever wanted a quick, single-serving pumpkin fix that comes together in about 20 minutes of hands-on time, this is it. Maybe you’ve been there, staring into your fridge, hoping for a dessert that doesn’t require a whole production. Well, this is that dessert.
Why You’ll Love This Recipe
Let me tell you why these little custard cups have become a staple in my kitchen and why they’re about to become one in yours. It’s not just another pumpkin recipe—it’s the one you’ll turn to again and again.
- Quick & Easy: From pantry to oven in under 10 minutes. Seriously. No stand mixer, no rolling pin, no fuss. Just whisk, pour, and bake.
- Simple Ingredients: You probably have everything you need right now. Canned pumpkin, eggs, milk, sugar, and a few spices. No trips to a specialty store required.
- Perfect for Fall Gatherings: These are a lifesaver for Thanksgiving or Friendsgiving. They’re individual portions, so there’s no slicing or serving drama. Plus, they look adorable on a dessert table.
- Crowd-Pleaser: I’ve served these to kids, adults, and even my picky uncle who “doesn’t do healthy desserts.” Everyone goes back for seconds. The texture is so silky and satisfying that no one misses the crust.
- Unbelievably Delicious: This isn’t a compromise recipe. It’s a better version. By skipping the crust, you get to focus entirely on the star of the show: the creamy, spiced, velvety pumpkin filling. It’s pure comfort in a cup.
What makes this recipe different from the rest? It’s the technique. We’re using a water bath (bain-marie) to ensure the custard bakes evenly and stays silky smooth, without any cracks or rubbery edges. It’s a pro-level trick that makes a world of difference. This isn’t just another pumpkin pie filling baked in a dish—it’s a carefully crafted custard that’s been tested and perfected. It’s the kind of dessert that makes you close your eyes after the first bite. It’s comfort food reimagined—lighter, faster, but with all the soul-soothing satisfaction of the original.
What Ingredients You Will Need
This recipe uses simple, wholesome ingredients to deliver that rich, pumpkin pie flavor without the heavy feeling. Most are pantry staples, making this an easy last-minute treat.
- Pumpkin Puree (1 can / 15 oz): Make sure you grab 100% pure pumpkin puree, not pumpkin pie filling. I prefer Libby’s for its consistent texture and deep flavor. It’s thick and not watery, which is key for a good custard.
- Large Eggs (2): These are the backbone of the custard, providing structure and richness. Let them come to room temperature for a smoother, more uniform batter.
- Evaporated Milk (1 can / 12 oz): This is my secret weapon. It’s creamier than regular milk but not as heavy as heavy cream. It gives the custard a luscious mouthfeel without making it feel greasy. You can substitute with half-and-half if needed.
- Granulated Sugar (1/2 cup): Adds just the right amount of sweetness to balance the earthy pumpkin and warm spices. You can reduce this to 1/3 cup if you prefer a less sweet dessert.
- Brown Sugar (1/4 cup, packed): This adds a touch of molasses flavor and depth that granulated sugar alone can’t provide. It’s what gives the custard that classic, cozy pumpkin pie taste.
- Pumpkin Pie Spice (2 teaspoons): A convenient blend of cinnamon, nutmeg, ginger, and cloves. If you don’t have it, mix 1 teaspoon cinnamon, 1/2 teaspoon ginger, 1/4 teaspoon nutmeg, and a pinch of cloves.
- Vanilla Extract (1 teaspoon): A must for rounding out the flavors. Use pure vanilla extract if you have it—it makes a subtle but noticeable difference.
- Salt (1/4 teaspoon): Don’t skip this! Salt doesn’t make it salty; it enhances all the other flavors and balances the sweetness.
- Optional Toppings: A dollop of lightly sweetened whipped cream, a sprinkle of cinnamon, or a few toasted pecans take these over the top.
Equipment Needed
You don’t need a fancy kitchen to make these custard cups. Here’s what you’ll need:
- 6-8 Oven-Safe Ramekins (6 oz each): These are the perfect single-serving size. If you don’t have ramekins, you can use a standard 9-inch pie plate or an 8×8 baking dish and adjust the baking time slightly.
- Large Mixing Bowl: For whisking everything together.
- Whisk: A good whisk is essential for getting a smooth, lump-free custard base.
- Measuring Cups and Spoons: For accuracy.
- Deep Baking Dish or Roasting Pan: This will hold the ramekins for the water bath. It needs to be deep enough to allow water to come halfway up the sides of the ramekins.
- Kettle or Pot: For boiling water. I use my electric kettle for speed.
- Fine-Mesh Strainer (Optional): For straining the custard mixture to ensure an ultra-smooth texture. It’s a small extra step that makes a big difference.
Preparation Method
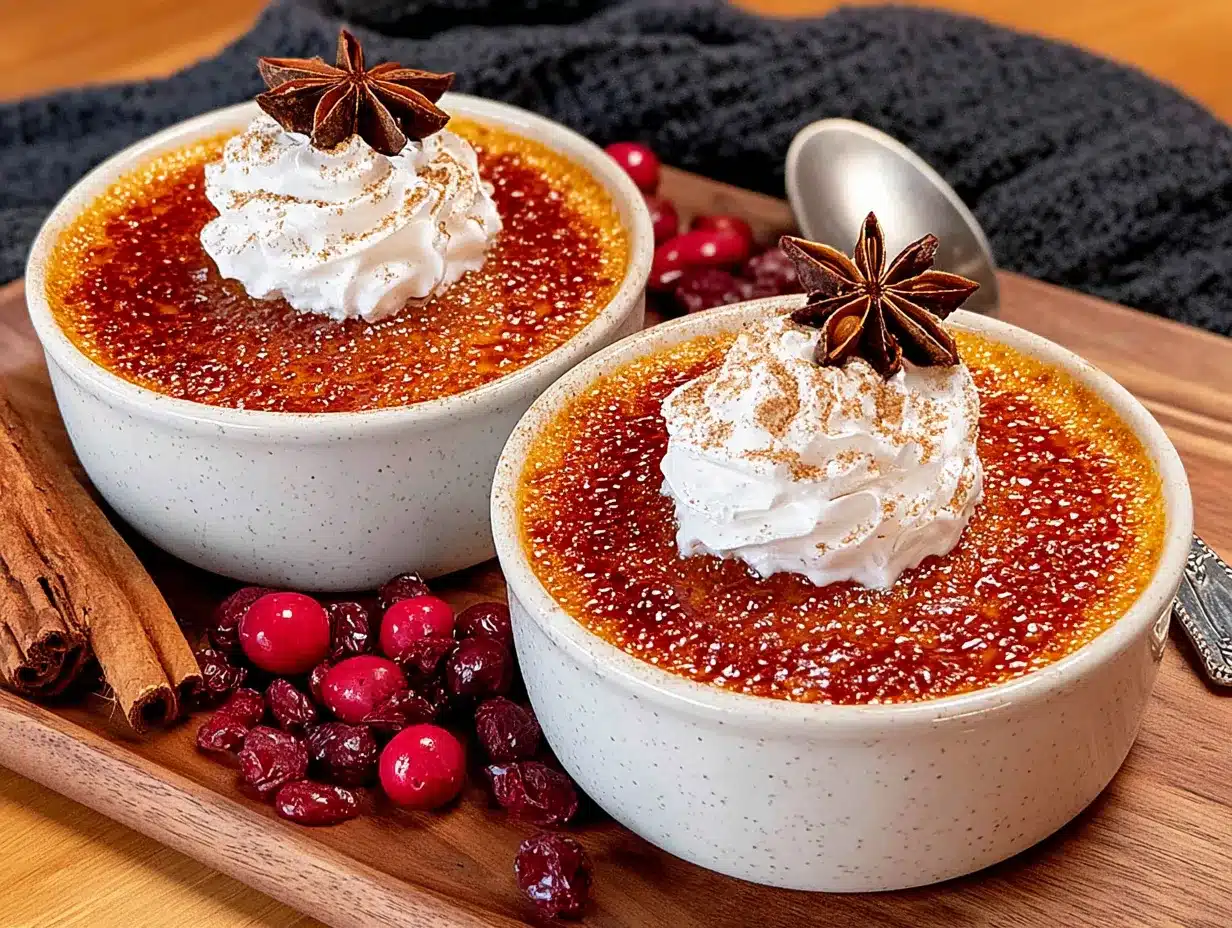
Follow these steps carefully, and you’ll have perfect, creamy custard cups every single time. I’ve included all my little tricks and sensory cues so you know exactly what to look for.
- Preheat and Prep: Preheat your oven to 350°F (175°C). Place your ramekins inside a large, deep baking dish or roasting pan. Set a kettle of water to boil—you’ll need it later.
- Whisk the Wet Ingredients: In your large mixing bowl, crack the 2 large eggs and give them a good whisk until they’re frothy and light yellow, about 30 seconds. This incorporates air and helps create a lighter custard. Add the can of pumpkin puree, the can of evaporated milk, and the teaspoon of vanilla extract. Whisk until everything is completely combined and smooth. The mixture should be a uniform, rich orange color with no streaks of egg white.
- Add the Dry Ingredients: Add the 1/2 cup granulated sugar, 1/4 cup packed brown sugar, 2 teaspoons pumpkin pie spice, and 1/4 teaspoon salt to the bowl. Whisk vigorously for at least one minute until the sugars are mostly dissolved and the spices are evenly distributed. You shouldn’t feel any gritty sugar at the bottom of the bowl. Take a moment to smell it—that warm, intoxicating pumpkin spice aroma means you’re on the right track.
- Strain for Silkiness (My Pro Tip): Here’s the step that separates good custard from great custard. Pour the entire mixture through a fine-mesh strainer into a clean bowl or a large liquid measuring cup with a spout. Use a spatula to push it through. This catches any bits of unmixed egg white or undissolved sugar, guaranteeing a velvety smooth texture. It takes an extra 30 seconds and is so worth it.
- Fill the Ramekins: Carefully pour the strained custard into your ramekins, filling them about 3/4 of the way full. A spouted measuring cup makes this mess-free. You should get about 6 to 8 custards, depending on the size of your ramekins.
- Create the Water Bath: Place the baking dish with the filled ramekins on the middle rack of your oven. Very carefully, pour the hot water from your kettle into the baking dish, not onto the custards. Fill the water until it reaches about halfway up the sides of the ramekins. This gentle, moist heat is the secret to a silky, crack-free custard.
- Bake to Perfection: Bake for 35-45 minutes, but start checking at the 30-minute mark. The custards are done when the edges are set and slightly puffed, but the centers still have a slight jiggle—like firm Jell-O. A knife inserted about an inch from the center should come out clean. Don’t overbake! The residual heat will continue to cook them as they cool.
- Cool and Serve: Carefully remove the baking dish from the oven. Use tongs to lift the hot ramekins out of the water bath and place them on a wire rack to cool completely, about 1 hour. The custards will continue to set as they cool. You can serve them warm, at room temperature, or chilled. I actually prefer them cold from the fridge—the flavors meld together beautifully overnight.
Cooking Tips & Techniques
I’ve made these custard cups more times than I can count, and I’ve learned a few things the hard way. Here are my best tips to ensure your success.
- Don’t Skip the Water Bath: I know it seems like an extra step, but it’s non-negotiable for a creamy texture. The water bath insulates the custard, preventing the edges from cooking faster than the center. Without it, you’ll end up with a rubbery, over-baked mess. Trust me, I learned this on a rushed Tuesday night.
- Room Temperature Ingredients Matter: Cold eggs and cold milk can cause the melted butter (if you were using it) to seize, but more importantly, they don’t emulsify as well. Room temperature ingredients blend together more smoothly, creating a homogenous custard that bakes evenly. Take them out of the fridge 30 minutes before you start.
- The Jiggle Test is Your Friend: Don’t rely solely on a timer. Ovens vary wildly. The best way to check for doneness is the jiggle test. Gently shake the ramekin. The center should wobble slightly, but the edges should be firm. If the whole thing is liquid, it needs more time. If it’s completely solid and starting to crack, it’s overdone.
- Patience is a Virtue: Let the custards cool completely before serving, especially if you want clean, neat slices. The custard is very fragile when hot. Cooling allows the proteins to fully set. I once tried to eat one straight from the oven and ended up with a soupy mess. Learn from my impatience!
- Strain, Strain, Strain: I cannot overstate the importance of straining the custard mixture. It removes any little bits of cooked egg that might have formed or any lumps of spice. It’s the single easiest way to guarantee a restaurant-quality, silky texture.
Variations & Adaptations
One of the best things about this recipe is how easily it adapts to different tastes and dietary needs. Here are a few of my favorite variations.
- Dairy-Free Version: Swap the evaporated milk for a can of full-fat coconut milk. It adds a subtle coconut flavor that pairs beautifully with the pumpkin and spices. The texture remains just as rich and creamy. I’ve made this for my lactose-intolerant friend, and she says it’s even better than the original.
- Maple Pumpkin Custard: Replace the granulated sugar with 1/2 cup of pure maple syrup. Reduce the evaporated milk by 2 tablespoons to account for the extra liquid. The maple flavor adds a wonderful, woodsy sweetness that’s perfect for fall. It’s my go-to for a more sophisticated dessert.
- Pumpkin Chai Custard: Steep two chai tea bags in the evaporated milk while you’re prepping the other ingredients. Let it sit for 10 minutes, then remove the bags. The chai spices (cardamom, ginger, clove) add a complex, aromatic layer that’s absolutely divine.
- Gluten-Free Note: This recipe is naturally gluten-free! Just double-check your pumpkin pie spice blend to make sure it doesn’t contain any hidden gluten. You’re good to go.
- Spice It Up: Feel free to adjust the spice blend to your liking. Add an extra 1/2 teaspoon of cinnamon for warmth, a pinch of cayenne for a little heat, or some fresh grated ginger for a zing.
Serving & Storage Suggestions
These custard cups are incredibly versatile. Here’s how to serve and store them for the best experience.
Serving: These are delicious at any temperature. I love them warm with a scoop of vanilla ice cream melting over the top. For a classic touch, serve them chilled with a generous dollop of lightly sweetened whipped cream and a dusting of cinnamon or nutmeg. For a little crunch, top with some toasted pecans or a crumble of gingersnap cookies.
Storage: Once the custards have cooled completely, cover each ramekin tightly with plastic wrap or transfer the custard to an airtight container. They will keep in the refrigerator for up to 5 days. The flavors actually get better after a day or two as the spices meld together.
Freezing: You can freeze these custard cups for up to 3 months. Wrap each cooled ramekin tightly in plastic wrap, then in a layer of aluminum foil. To thaw, place them in the refrigerator overnight. The texture may be slightly less silky after freezing, but they’re still delicious.
Reheating: To reheat, place a ramekin in a 300°F oven for 10-15 minutes, or microwave on 50% power for 30-60 seconds. Be careful not to overheat, or the custard can become rubbery.
Nutritional Information & Benefits
While I’m not a nutritionist, I can tell you that these little custard cups are a lighter take on a classic indulgence. Here’s a rough estimate per serving (based on 6 servings).
- Calories: ~220
- Fat: 8g
- Carbohydrates: 32g
- Protein: 7g
- Fiber: 3g
- Sugar: 26g
The star ingredient, pumpkin, is packed with Vitamin A (great for your eyes and immune system) and fiber. The eggs provide high-quality protein. By skipping the buttery crust, you’re saving a significant amount of fat and calories, making this a dessert you can feel good about enjoying. It’s a fantastic option for anyone watching their weight or looking for a healthier fall treat. It’s also naturally gluten-free.
Conclusion
These Light & Creamy Crustless Pumpkin Pie Custard Cups are more than just a recipe—they’re a solution. They solve the problem of wanting a special, comforting dessert without the hours of work. They solve the dilemma of wanting something indulgent that doesn’t leave you feeling weighed down. And they solve the question of what to make when you need a quick, impressive dessert for a crowd.
I love this recipe because it feels like a little secret. It’s so simple, yet it delivers a result that feels truly special. It’s the kind of dessert that makes people say, “Wait, there’s no crust? It’s this good without a crust?” And then they ask for the recipe.
I encourage you to make these your own. Play with the spices, try a different milk, or pile on your favorite toppings. The beauty of a simple recipe is that it’s a perfect canvas for your creativity. So go ahead, preheat your oven, and give yourself the gift of a perfect, creamy, pumpkin-spiced moment.
I’d love to hear how yours turn out! Drop a comment below telling me what toppings you used or if you tried one of the variations. Don’t forget to share this recipe with a fellow pumpkin lover and save it for later. Happy baking!
Frequently Asked Questions
Can I use a different type of milk?
Absolutely! While evaporated milk gives the best creamy texture, you can use whole milk, half-and-half, or even oat milk. The custard will be slightly less rich, but still delicious. For a dairy-free option, full-fat coconut milk is my top recommendation.
Why did my custard turn out watery?
This usually happens for one of two reasons: underbaking or using a pumpkin puree that was too watery. Make sure you use 100% pure pumpkin puree (not pumpkin pie filling) and that you bake the custard until the edges are set but the center is just slightly jiggly. The water bath also helps prevent this.
Can I make this in a large dish instead of ramekins?
Yes! You can pour the custard into a greased 9-inch pie plate or an 8×8 baking dish. The baking time will increase significantly—start checking at 45 minutes. The custard is done when a knife inserted near the center comes out clean.
Can I add a crust to this recipe?
If you really want a crust, you can! Prepare a standard graham cracker or shortbread crust in your pie plate. Par-bake it for 10 minutes, then pour the custard in and bake as directed. The baking time might be slightly longer.
How do I know if my custard is overbaked?
An overbaked custard will have cracks on the surface and a rubbery, sponge-like texture instead of a silky, creamy one. It might also have a layer of watery liquid (weeping) on top. To avoid this, always use the jiggle test and pull the custards out of the oven when the centers are still a little wobbly.
PrintLight & Creamy Crustless Pumpkin Pie Custard Cups
These Light & Creamy Crustless Pumpkin Pie Custard Cups are everything you love about the classic pie, minus the stress of making a crust. They’re rich, spiced, and incredibly smooth, but somehow feel light and not overly heavy.
- Prep Time: 10 minutes
- Cook Time: 35-45 minutes
- Total Time: 45-55 minutes
- Yield: 6-8 servings 1x
- Category: Dessert
- Cuisine: American
Ingredients
- 1 can (15 oz) pumpkin puree (100% pure, not pumpkin pie filling)
- 2 large eggs, room temperature
- 1 can (12 oz) evaporated milk
- 1/2 cup granulated sugar
- 1/4 cup packed brown sugar
- 2 teaspoons pumpkin pie spice
- 1 teaspoon vanilla extract
- 1/4 teaspoon salt
- Optional toppings: lightly sweetened whipped cream, cinnamon, toasted pecans
Instructions
- Preheat your oven to 350°F (175°C). Place your ramekins inside a large, deep baking dish or roasting pan. Set a kettle of water to boil.
- In a large mixing bowl, whisk the 2 large eggs until frothy and light yellow, about 30 seconds. Add the pumpkin puree, evaporated milk, and vanilla extract. Whisk until completely combined and smooth.
- Add the granulated sugar, packed brown sugar, pumpkin pie spice, and salt. Whisk vigorously for at least one minute until the sugars are mostly dissolved and the spices are evenly distributed.
- Pour the entire mixture through a fine-mesh strainer into a clean bowl or a large liquid measuring cup with a spout. Use a spatula to push it through.
- Carefully pour the strained custard into your ramekins, filling them about 3/4 of the way full.
- Place the baking dish with the filled ramekins on the middle rack of your oven. Very carefully, pour the hot water from your kettle into the baking dish, not onto the custards. Fill the water until it reaches about halfway up the sides of the ramekins.
- Bake for 35-45 minutes, but start checking at the 30-minute mark. The custards are done when the edges are set and slightly puffed, but the centers still have a slight jiggle—like firm Jell-O. A knife inserted about an inch from the center should come out clean.
- Carefully remove the baking dish from the oven. Use tongs to lift the hot ramekins out of the water bath and place them on a wire rack to cool completely, about 1 hour. Serve warm, at room temperature, or chilled.
Notes
Don’t skip the water bath—it ensures a silky, crack-free texture. Room temperature ingredients blend more smoothly. Use the jiggle test to check doneness; the centers should wobble slightly. Strain the custard mixture for an ultra-smooth texture. Let custards cool completely before serving for clean slices.
Nutrition
- Serving Size: 1 custard cup
- Calories: 220
- Sugar: 26
- Sodium: 200
- Fat: 8
- Saturated Fat: 4
- Carbohydrates: 32
- Fiber: 3
- Protein: 7
Keywords: pumpkin pie, crustless, custard cups, easy dessert, fall dessert, Thanksgiving, gluten-free, quick recipe


