This was supposed to be a simple cheese board for a Halloween party. I had everything planned out—a classic wooden board, some nice cheeses, crackers arranged in neat little rows. But then I realized I forgot to buy a proper board, and my cat decided the kitchen counter was the perfect place to nap right where I was working. I was already running late, the guests were due in an hour, and honestly, I was this close to just ordering pizza.
I looked around my kitchen in a panic and spotted a big, beautiful pumpkin sitting on the counter. I had bought it for decoration, but in that moment of desperation, I grabbed a knife and carved out the top. The idea just hit me—why not use the pumpkin itself as the board? I scooped out the seeds, lined the inside with parchment paper, and started loading it up with cheese, meats, and little treats. What came out was nothing like the plan—and better.
That pumpkin charcuterie board was the star of the party. Everyone kept circling back to it, grabbing handfuls of crackers and pointing at the way the cheese sat nestled inside the pumpkin. I mean, I could not believe how good it looked. It was like the pumpkin was made for this. And honestly, that happy accident turned into my go-to party trick. Maybe you have been there—scrambling at the last minute, thinking everything is ruined, only to stumble onto something amazing. That is exactly how this Halloween pumpkin charcuterie board was born.
Why You’ll Love This Recipe
Let me tell you why this board is different from every other appetizer you have tried. I have tested this setup at least a dozen times now, tweaking the ingredients and the layout until it was just right. It is the kind of dish that makes you look like a total pro without breaking a sweat.
- Stunning Centerpiece: The pumpkin itself becomes the serving vessel. It is a conversation starter that doubles as decor. Your guests will be snapping photos before they even take a bite.
- Easy to Assemble: No complicated cooking required. You are just arranging ingredients inside a hollowed-out pumpkin. It comes together in under 20 minutes if you prep ahead.
- Perfect for Halloween Parties: This board fits right in with spooky decorations and festive vibes. It is great for potlucks, dinner parties, or even a casual get-together with friends.
- Crowd-Pleaser: With a mix of sweet, savory, and salty flavors, there is something for everyone. Kids love the candy and fruit, while adults go for the cheese and cured meats.
- Customizable: You can swap out ingredients based on what you like or what you have on hand. It is forgiving and flexible.
What makes this recipe stand out is the presentation. Instead of a boring platter, you get a rustic, seasonal vessel that keeps everything chilled and accessible. It is not just another charcuterie board—it is your best version, designed to impress without stress. Honestly, it is the kind of recipe that makes you close your eyes after the first bite because everything just works together perfectly.
What Ingredients You Will Need
This recipe uses simple, crowd-friendly ingredients that come together to create a balanced and beautiful spread. You can find most of these at your local grocery store, and many are pantry staples or seasonal favorites.
For the Pumpkin Base
- 1 medium pumpkin (about 6-8 inches wide, preferably a sugar pumpkin or pie pumpkin for a sweeter flavor and firmer texture)
- Parchment paper (to line the inside and keep everything clean)
For the Cheeses
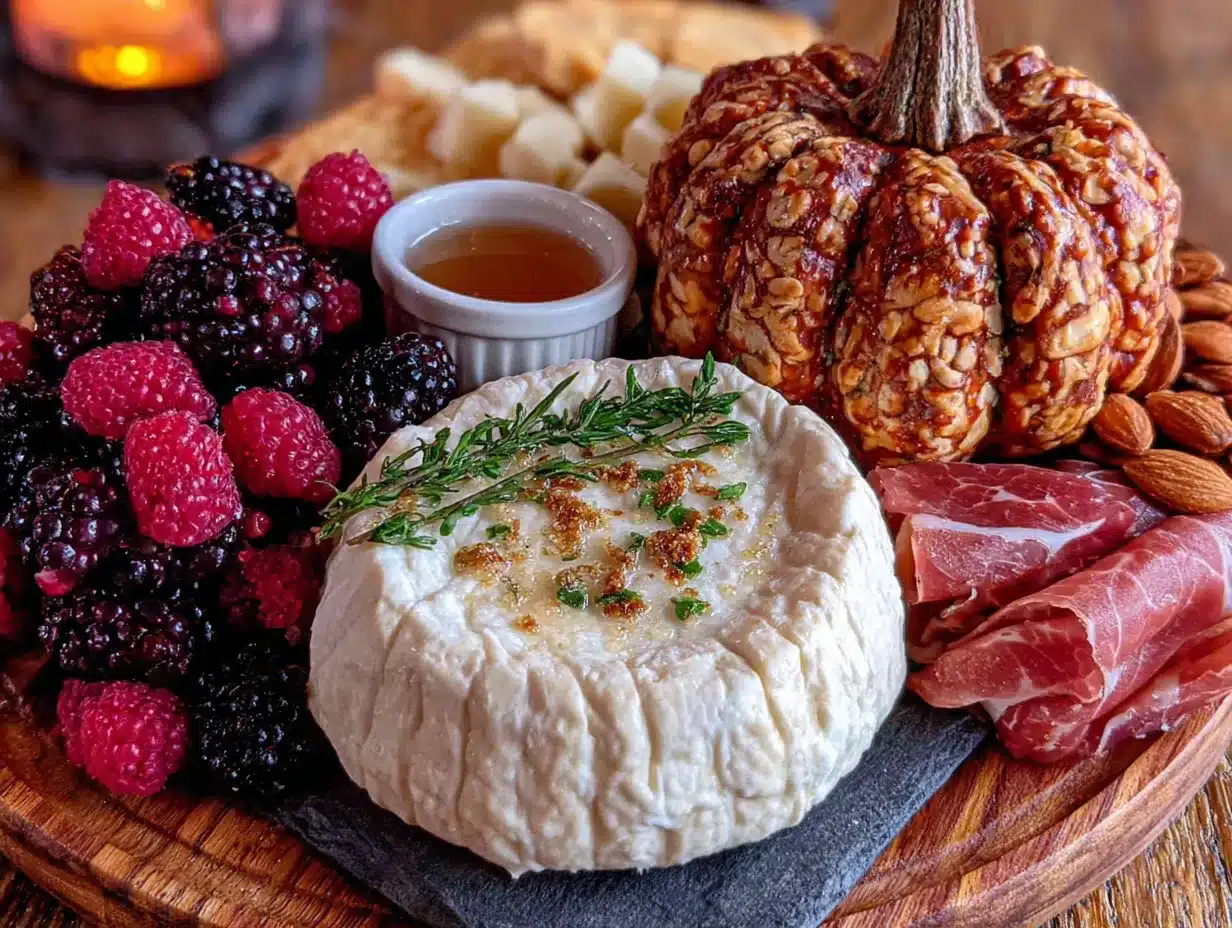
- 8 ounces sharp cheddar cheese, cut into cubes (I recommend Tillamook or Cabot for a rich, nutty flavor)
- 6 ounces brie cheese, sliced into wedges (adds a creamy, buttery texture)
- 4 ounces gouda cheese, sliced (smoked gouda works great for a deeper flavor)
- 4 ounces goat cheese, crumbled or in a small log (adds tanginess and a soft spreadable option)
For the Meats
- 6 ounces prosciutto, thinly sliced (look for a brand like Boar’s Head for quality)
- 4 ounces salami, sliced (genoa salami or hard salami both work well)
- 4 ounces pepperoni, sliced (adds a little spice and a familiar flavor)
For the Accompaniments
- 1 cup mixed crackers (I like a mix of water crackers, wheat crackers, and bagel chips for variety)
- 1 cup grapes, red or green, washed and dried
- 1 cup dried apricots or figs (adds natural sweetness)
- 1/2 cup almonds or pecans (toasted for extra crunch)
- 1/4 cup honey (for drizzling over brie or goat cheese)
- 1/4 cup dark chocolate chips or a chopped chocolate bar (for a sweet touch)
- 1/4 cup pumpkin seeds (optional, for a seasonal garnish)
For the Spooky Decorations (Optional but Fun)
- 1/4 cup candy corn or other Halloween candy (adds a playful element)
- Edible eyeballs or small gummy spiders (for a creepy-cute vibe)
- Fresh rosemary sprigs or bay leaves (for garnish and color contrast)
You can easily swap out ingredients based on dietary needs. For a vegetarian version, skip the meats and add more cheese or roasted vegetables. For a dairy-free option, use vegan cheese alternatives and nut-based crackers. The key is to balance flavors and textures—creamy, crunchy, sweet, and salty all in one board.
Equipment Needed
You do not need fancy tools for this recipe. Here is what you will need to pull it off:
- A sharp knife (a chef’s knife or a sturdy serrated knife works best for cutting the pumpkin)
- A large spoon (for scooping out the seeds and stringy pulp)
- Parchment paper (to line the pumpkin and keep it clean)
- A small bowl or plate (to place under the pumpkin for stability)
- A cutting board (for prepping the ingredients)
- Small tongs or toothpicks (for serving, optional but helpful)
If you do not have a pumpkin, you can use a large bell pepper or a hollowed-out loaf of bread as an alternative. But honestly, the pumpkin is what makes it special. I have tried using a carving pumpkin before, and it was tougher to cut and not as sweet. Stick with a sugar pumpkin if you can find one—they are easier to work with and taste better if you decide to eat the roasted flesh later.
Preparation Method
Follow these steps to build your Halloween pumpkin charcuterie board. It is easier than you think, and the results are stunning.
- Prepare the pumpkin: Wash the pumpkin thoroughly and pat it dry. Using a sharp knife, cut a circle around the stem to create a lid, just like you would for a jack-o-lantern. Make sure the opening is wide enough to fit your hand inside. Scoop out all the seeds and stringy pulp with a large spoon. Discard the seeds or save them for roasting later. Rinse the inside of the pumpkin with cold water and dry it with a paper towel.
- Line the pumpkin: Cut a piece of parchment paper large enough to line the inside of the pumpkin. Press it gently against the walls and the bottom. This keeps the pumpkin clean and makes cleanup a breeze. It also prevents any moisture from the pumpkin from seeping into your ingredients.
- Arrange the cheeses: Start with the largest items first. Place the brie wedges and cheddar cubes at the bottom of the pumpkin, spreading them out evenly. Add the gouda slices and crumbled goat cheese in between. Think about color contrast—the white brie against the orange cheddar looks great.
- Add the meats: Fold the prosciutto slices into loose ribbons or roll them up and nestle them among the cheeses. Arrange the salami and pepperoni slices in small piles or fan them out for visual interest. Do not overcrowd—leave some space for the other ingredients.
- Fill in with accompaniments: Tuck the crackers around the edges of the pumpkin, standing them up slightly so they are easy to grab. Scatter the grapes, dried apricots, and almonds in the gaps. Drizzle the honey over the brie or goat cheese for a sweet touch. Sprinkle the dark chocolate chips and pumpkin seeds on top for a finishing flourish.
- Add spooky decorations: If you are going for a Halloween theme, place the candy corn, edible eyeballs, or gummy spiders on top of the ingredients. Tuck a few rosemary sprigs or bay leaves around the edges for a pop of green that contrasts with the orange pumpkin.
- Serve immediately: Place the pumpkin on a small plate or wooden board to catch any drips. Set it out at room temperature for up to two hours. If you are prepping ahead, keep the pumpkin refrigerated and add the crackers and honey just before serving to keep them crisp.
A few notes from my own trials: Do not overfill the pumpkin, or it will be hard to close the lid. Also, if your pumpkin wobbles, slice a thin piece off the bottom to create a flat surface. And if you are short on time, you can pre-scoop the pumpkin a day in advance and store it in the fridge wrapped in plastic wrap.
Cooking Tips & Techniques
Over the years, I have learned a few tricks that make this board even better. Here is what I wish someone had told me the first time I tried it.
Choose the right pumpkin: Not all pumpkins are created equal. Sugar pumpkins, also called pie pumpkins, are smaller, sweeter, and have a firmer texture. They hold up better as a vessel. Carving pumpkins are larger and more watery, which can make your ingredients soggy. Stick with sugar pumpkins for the best results.
Prep ahead to save time: You can hollow out the pumpkin and cut your cheeses and meats the night before. Store them separately in the fridge. On the day of your party, just assemble everything in the pumpkin. This cuts your prep time down to about 10 minutes.
Keep it chilled: If you are serving the board outdoors or in a warm room, place the pumpkin on a bed of ice or a chilled platter. The pumpkin itself provides some insulation, but the cheese can soften quickly. I once left the board out for three hours, and the brie turned into a puddle. Learn from my mistake!
Balance flavors and textures: Aim for a mix of soft and hard cheeses, mild and sharp flavors, and crunchy and chewy accompaniments. The honey and chocolate add sweetness that cuts through the saltiness of the meats. The grapes and apricots provide a fresh, fruity contrast.
Don’t forget the lid: After you cut the top off the pumpkin, set the lid aside. You can place it next to the board as a decoration or use it to cover the pumpkin if you need to store leftovers. It also makes for a great photo prop.
Variations & Adaptations
This pumpkin charcuterie board is endlessly customizable. Here are a few ways to switch it up based on your preferences or dietary needs.
Vegetarian version: Skip the prosciutto, salami, and pepperoni. Replace them with roasted chickpeas, marinated artichoke hearts, or grilled halloumi cheese. The halloumi adds a salty, chewy texture that mimics meat nicely.
Gluten-free option: Use gluten-free crackers or swap the crackers entirely for vegetable sticks like cucumber rounds, bell pepper strips, or celery. You can also add gluten-free pretzels for a crunchy alternative.
Dairy-free adaptation: Use vegan cheese alternatives made from nuts or coconut. Look for brands like Miyoko’s or Violife for creamy, melty options. Pair them with nut-based crackers and add extra fruits and vegetables for bulk.
Sweet tooth twist: Turn this into a dessert board by filling the pumpkin with chocolate-covered strawberries, mini brownies, marshmallows, and caramel dip. Replace the cheeses with chocolate truffles or cheesecake bites. It is a hit at kids’ parties.
Spicy addition: Add pickled jalapeños, spicy chorizo slices, or a drizzle of hot honey for a kick of heat. The sweetness of the pumpkin and dried fruits balances the spice beautifully.
I once tried a Mediterranean-inspired version with feta cheese, olives, sun-dried tomatoes, and pita chips. It was a completely different flavor profile but just as good. Do not be afraid to experiment—the pumpkin is just a vessel, and the possibilities are endless.
Serving & Storage Suggestions
This board is best served at room temperature, so take it out of the fridge about 30 minutes before your guests arrive. The flavors of the cheese and meats really open up when they are not ice-cold. Place the pumpkin on a large wooden board or a decorative plate to catch any stray crumbs or drips.
For presentation, arrange the ingredients in a way that is visually appealing. Group similar items together, and leave some space between clusters so guests can easily grab what they want. I like to place the crackers on one side and the fruits on the other, with the cheeses and meats in the middle. The spooky decorations should be scattered on top for that Halloween touch.
When it comes to storage, the pumpkin will keep in the fridge for up to 24 hours after assembly. Cover the top with plastic wrap or place the lid back on to keep everything fresh. The crackers and honey are best added just before serving, as they can get soggy or sticky if left inside the pumpkin too long.
Leftovers can be stored in an airtight container in the fridge for up to three days. The pumpkin itself is not really edible after being hollowed out and used as a vessel, but you can roast the flesh separately if you want. The cheeses and meats will keep well, and you can repurpose them for sandwiches or salads.
Reheating is not necessary for this board, but if you have leftover brie, you can pop it in the oven for a few minutes to make it warm and gooey. Serve it with fresh crackers or bread for a quick snack the next day.
Nutritional Information & Benefits
This pumpkin charcuterie board is a balanced appetizer that offers a mix of protein, healthy fats, and carbohydrates. Here is a rough estimate per serving (based on 8 servings):
- Calories: 350-400 per serving
- Protein: 15-20 grams
- Fat: 25-30 grams
- Carbohydrates: 20-25 grams
- Fiber: 3-5 grams
The cheeses provide calcium and protein, while the nuts and seeds offer healthy fats and vitamin E. Grapes and dried apricots add natural sweetness along with fiber and antioxidants. The pumpkin itself is rich in beta-carotene, which supports eye health and immune function.
If you are watching your sodium intake, opt for low-sodium cheeses and skip the cured meats. For a lower-calorie version, load up on vegetables and fresh fruits instead of crackers and chocolate. This board is naturally gluten-free if you choose gluten-free crackers, and it can be made dairy-free with vegan alternatives.
From a personal perspective, I love that this board feels indulgent without being overly heavy. It is perfect for grazing while you socialize, and the portion sizes are easy to control. Plus, the pumpkin adds a seasonal boost of nutrients that makes you feel a little better about all that cheese.
Conclusion
This Halloween pumpkin charcuterie board is proof that the best ideas often come from happy accidents. What started as a frantic, last-minute scramble turned into a party staple that I look forward to making every year. It is simple, stunning, and completely customizable—everything you want in a crowd-pleasing appetizer.
I encourage you to make this board your own. Swap in your favorite cheeses, add your go-to snacks, and go wild with the spooky decorations. The pumpkin is just a canvas, and you are the artist. Whether you are hosting a big Halloween bash or a small gathering with close friends, this board will steal the show.
I would love to hear how yours turns out. Drop a comment below with your favorite ingredient combinations or tag me in your photos on social media. And if you have a friend who loves hosting parties, share this recipe with them—they will thank you later. Until next time, happy snacking and Happy Halloween!
Frequently Asked Questions
Can I use a different type of squash instead of a pumpkin?
Absolutely! Butternut squash, acorn squash, or even a large bell pepper can work as a vessel. Just make sure it is sturdy enough to hold the ingredients without collapsing. Sugar pumpkins are ideal because of their size and firmness.
How far in advance can I assemble the board?
You can prep the pumpkin and cut the cheeses and meats up to 24 hours in advance. Store them separately in the fridge. Assemble the board no more than 2 hours before serving to keep the crackers crisp and the ingredients fresh.
Can I eat the pumpkin after using it as a board?
The pumpkin itself is not typically eaten after being hollowed out and used as a vessel, as it can become soft and absorb flavors from the ingredients. However, you can roast the flesh separately with olive oil and spices for a tasty side dish.
What if I don’t have parchment paper?
You can use aluminum foil or a large cabbage leaf to line the pumpkin instead. The lining helps keep the pumpkin clean and prevents moisture from seeping into your ingredients. It also makes cleanup much easier.
How do I keep the pumpkin from tipping over?
If your pumpkin wobbles, slice a thin, flat piece off the bottom to create a stable base. Place the pumpkin on a small plate or wooden board for extra stability. You can also use a small bowl or ring mold to hold it in place.
PrintBest Halloween Pumpkin Charcuterie Board for Your Party
A stunning and easy-to-assemble Halloween appetizer where a hollowed-out pumpkin serves as the vessel for a delicious spread of cheeses, meats, crackers, fruits, and spooky decorations. Perfect for parties, this customizable board is a crowd-pleaser that doubles as a festive centerpiece.
- Prep Time: 20 minutes
- Cook Time: 0 minutes
- Total Time: 20 minutes
- Yield: 8 servings 1x
- Category: Appetizer
- Cuisine: American
Ingredients
- 1 medium pumpkin (about 6–8 inches wide, preferably a sugar pumpkin or pie pumpkin)
- Parchment paper (to line the inside)
- 8 ounces sharp cheddar cheese, cut into cubes
- 6 ounces brie cheese, sliced into wedges
- 4 ounces gouda cheese, sliced (smoked gouda recommended)
- 4 ounces goat cheese, crumbled or in a small log
- 6 ounces prosciutto, thinly sliced
- 4 ounces salami, sliced (genoa or hard salami)
- 4 ounces pepperoni, sliced
- 1 cup mixed crackers (water crackers, wheat crackers, bagel chips)
- 1 cup grapes (red or green), washed and dried
- 1 cup dried apricots or figs
- 1/2 cup almonds or pecans, toasted
- 1/4 cup honey
- 1/4 cup dark chocolate chips or chopped chocolate bar
- 1/4 cup pumpkin seeds (optional)
- 1/4 cup candy corn or other Halloween candy (optional)
- Edible eyeballs or small gummy spiders (optional)
- Fresh rosemary sprigs or bay leaves (for garnish)
Instructions
- Prepare the pumpkin: Wash the pumpkin thoroughly and pat it dry. Using a sharp knife, cut a circle around the stem to create a lid. Make sure the opening is wide enough to fit your hand inside. Scoop out all the seeds and stringy pulp with a large spoon. Rinse the inside with cold water and dry it with a paper towel.
- Line the pumpkin: Cut a piece of parchment paper large enough to line the inside of the pumpkin. Press it gently against the walls and the bottom.
- Arrange the cheeses: Place the brie wedges and cheddar cubes at the bottom of the pumpkin, spreading them out evenly. Add the gouda slices and crumbled goat cheese in between.
- Add the meats: Fold the prosciutto slices into loose ribbons or roll them up and nestle them among the cheeses. Arrange the salami and pepperoni slices in small piles or fan them out.
- Fill in with accompaniments: Tuck the crackers around the edges of the pumpkin, standing them up slightly. Scatter the grapes, dried apricots, and almonds in the gaps. Drizzle the honey over the brie or goat cheese. Sprinkle the dark chocolate chips and pumpkin seeds on top.
- Add spooky decorations: Place the candy corn, edible eyeballs, or gummy spiders on top of the ingredients. Tuck a few rosemary sprigs or bay leaves around the edges.
- Serve immediately: Place the pumpkin on a small plate or wooden board to catch any drips. Set it out at room temperature for up to two hours.
Notes
Choose a sugar pumpkin for best results. Prep the pumpkin and cut cheeses/meats up to 24 hours in advance. Add crackers and honey just before serving to keep them crisp. If the pumpkin wobbles, slice a thin piece off the bottom to create a flat surface. Do not overfill the pumpkin.
Nutrition
- Serving Size: 1 serving (approxima
- Calories: 375
- Sugar: 14
- Sodium: 680
- Fat: 28
- Saturated Fat: 12
- Carbohydrates: 22
- Fiber: 4
- Protein: 18
Keywords: Halloween charcuterie board, pumpkin charcuterie, Halloween appetizer, cheese board, party snack, fall entertaining


