The Halloween potluck was in six hours and I’d completely forgotten. Everyone else would be bringing elaborate, Pinterest-perfect creations—I’d seen the group chat. There were promises of homemade caramel apples dipped in chocolate, graveyard dirt cakes with gummy worms, and a punch bowl that fogged with dry ice. I had a bag of baby carrots, a head of broccoli, and about two brain cells left to work with after a week that had absolutely wrecked me.
I stood in my kitchen, staring into the crisper drawer like it might offer some kind of apology. Let me tell you, that drawer was not apologizing. It was just sitting there, full of vegetables, looking sad and orange. I’d already RSVP’d. Backing out wasn’t an option—these neighbors were the kind who’d notice. So I grabbed the cream cheese, the ranch seasoning packet I always keep on hand, and a weirdly specific urge to make something that looked like it tried.
That’s when the spider web idea hit me. Honestly, it was less of a lightning bolt and more of a desperate shrug. I had a round platter, some cream cheese, and a piping bag I’d used once for a failed cupcake project. I started arranging the veggies in concentric circles, drizzled the ranch dip in a web pattern, and popped a few olives on top for spiders. It took twenty minutes. Twenty. And I was still in my sweatpants.
The tray was the first thing to disappear at the party. People took photos before they even touched the cupcakes. A mom named Jen asked if I’d “planned it for weeks.” I just smiled and said it was a family recipe. Maybe you’ve been there—that moment when something you threw together out of panic becomes the thing everyone talks about. That’s this veggie tray. It’s the underdog story in snack form.
Why You’ll Love This Recipe
This isn’t just another veggie tray. It’s the one that makes you look like you have your life together when you definitely don’t. Here’s why it works:
- Quick & Easy: From fridge to table in under 25 minutes. No cooking, no baking, no stress.
- Simple Ingredients: You probably have everything already—veggies, cream cheese, ranch seasoning, olives. That’s it.
- Perfect for Halloween: Whether it’s a school party, office potluck, or family gathering, this tray fits right in without being over-the-top.
- Crowd-Pleaser: Kids eat vegetables off this tray. I’ve seen it happen. It’s like the web pattern hypnotizes them into healthy choices.
- Unbelievably Delicious: The ranch dip is homemade, creamy, and way better than anything from a bottle. Plus, the veggies stay cold and crunchy.
What makes this recipe different from every other veggie tray out there? It’s the presentation. The spider web design isn’t just cute—it’s functional. The dip is spread across the entire platter, so every single veggie has something to grab onto. No more double-dipping or awkward scooping. And the homemade ranch? It’s tangier, creamier, and more flavorful than the packaged stuff. I’ve tested this with three different ranch seasoning brands, and I’ve got a favorite that I’ll share below.
This recipe isn’t just good—it’s the kind that makes you close your eyes after the first bite. Or at least smile when someone asks where you bought it. It’s comfort food disguised as a vegetable platter. Healthier, faster, and way more fun than anything you’d buy pre-made. Perfect for impressing guests without stress, or turning a simple snack into something memorable.
What Ingredients You Will Need
This recipe uses simple, wholesome ingredients that come together to create a stunning and delicious appetizer. Most of these are pantry staples or easy to find at any grocery store. The key is in the dip and the arrangement.
For the Ranch Dip
- 8 oz cream cheese, softened (full-fat works best for creaminess, but reduced-fat is fine)
- 1/2 cup sour cream (adds tanginess; Greek yogurt works as a substitute)
- 1 packet (1 oz) ranch seasoning mix (I recommend Hidden Valley for the classic flavor, but store brands work too)
- 1/4 cup buttermilk (adds that signature ranch thinness; regular milk with a splash of lemon juice works in a pinch)
- 1 clove garlic, minced (optional, but I love the extra kick)
- 1 tablespoon fresh chives or dill, chopped (for color and freshness)
For the Veggie Tray
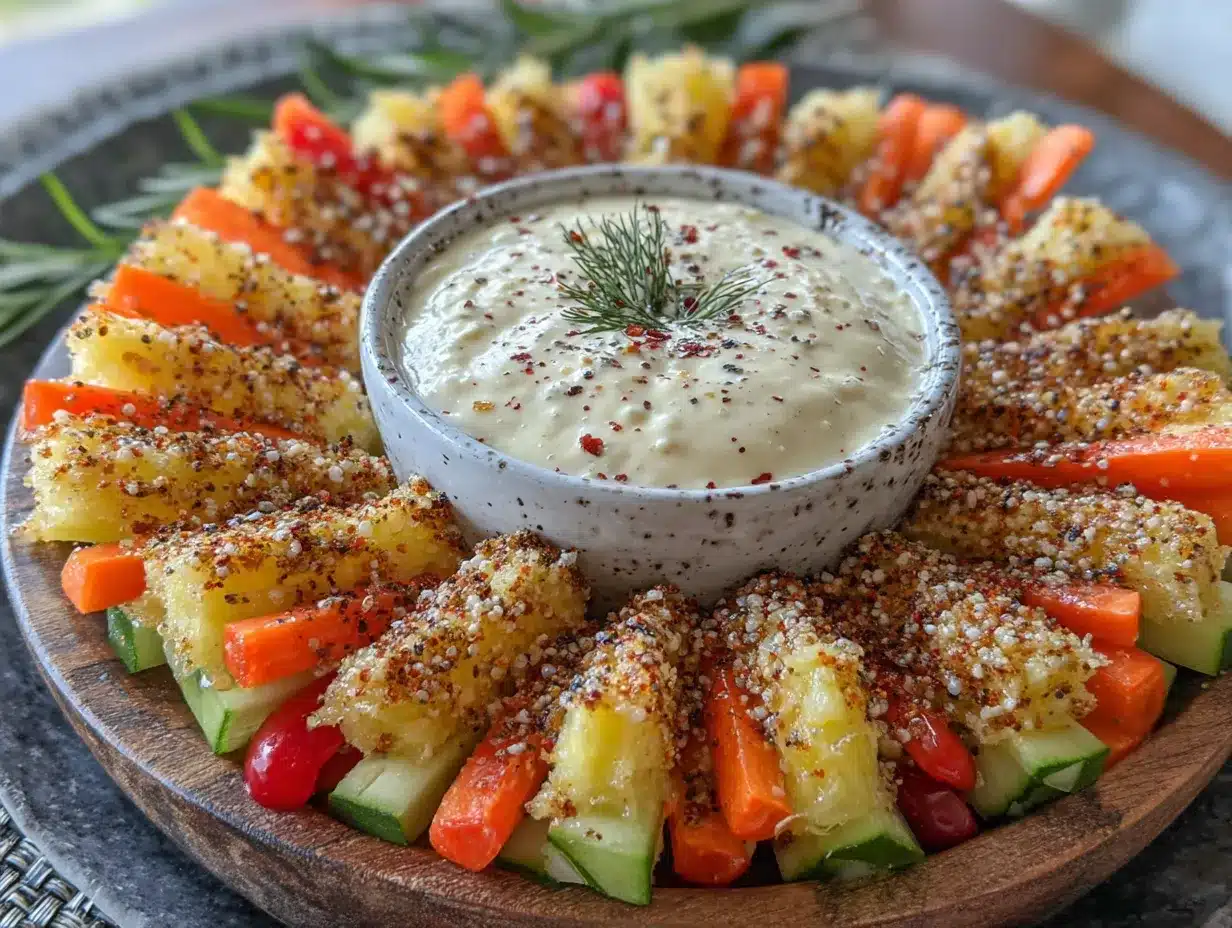
- 1 large head of broccoli, cut into florets (look for tight, dark green clusters)
- 1 large head of cauliflower, cut into florets (white and firm is best)
- 1 bag (16 oz) baby carrots (or regular carrots, peeled and cut into sticks)
- 1 English cucumber, sliced into rounds (no need to peel, the dark green edges look great)
- 1 pint cherry tomatoes (red or mixed colors for visual interest)
- 1 red bell pepper, sliced into strips (adds a pop of color)
- 1 yellow bell pepper, sliced into strips (for contrast)
- 1 cup sugar snap peas or snow peas (adds crunch and a different shape)
For the Spider Web Decoration
- 1/4 cup ranch dip (reserved from above)
- 1/4 cup cream cheese, softened (to make the web lines more visible)
- 6-8 pitted black olives (for the spiders—use whole olives for the body, sliced olives for legs)
Ingredient Tips: For the best texture, make sure your cream cheese is truly softened—leave it out for 30 minutes before starting. I’ve tried this with dairy-free cream cheese and it works, but the consistency is slightly thinner. If you’re making this ahead, keep the veggies and dip separate until serving, or the vegetables will release water and make the dip runny. For a gluten-free option, check your ranch seasoning label—most are gluten-free, but some brands add wheat starch.
Equipment Needed
You don’t need much for this recipe, which is part of its charm. Here’s what you’ll want:
- Large round platter or serving board (12-14 inches in diameter works best for the web design; a wooden cutting board or white platter looks great)
- Electric hand mixer or stand mixer (for whipping the cream cheese smooth; a whisk and some elbow grease works too)
- Piping bag or zip-top bag (for the spider web design; a zip-top bag with the corner snipped off is perfectly fine)
- Small offset spatula or butter knife (for spreading the base layer of dip)
- Cutting board and sharp knife (for prepping veggies)
- Small bowl (for mixing the ranch dip)
If you don’t have a piping bag, don’t stress. I’ve used a zip-top bag for years and it works just as well. Just fill it, snip a tiny corner, and you’re in business. For the platter, I actually picked up a cheap wooden board from a dollar store, and it’s become my go-to for everything. No need to invest in fancy equipment—this recipe is about creativity, not cost.
Preparation Method
Here’s how to put this together. I’ve broken it down into simple steps so you can follow along without feeling overwhelmed.
- Make the ranch dip: In a large bowl, combine the softened cream cheese, sour cream, ranch seasoning mix, buttermilk, and minced garlic (if using). Beat with an electric mixer on medium speed until smooth and creamy, about 2-3 minutes. Scrape down the sides once or twice. Fold in the fresh chives or dill. Taste and adjust seasoning—add a pinch of salt or pepper if needed. Set aside 1/4 cup of the dip for the spider web design. Cover and refrigerate the rest until ready to use.
- Prep the vegetables: Wash and dry all vegetables thoroughly. Cut the broccoli and cauliflower into bite-sized florets. Slice the cucumber into rounds about 1/4-inch thick. Slice the bell peppers into strips about 1/2-inch wide. Leave the cherry tomatoes whole. If using sugar snap peas, trim the ends. Pat everything dry with paper towels—wet veggies will make the dip watery.
- Prepare the platter: Take your large round platter or serving board. Using the offset spatula or a butter knife, spread the reserved 1/4 cup of ranch dip in a thin, even layer over the entire surface of the platter. This base layer helps the veggies stick and adds flavor to every bite. Don’t go too thick—you want a thin coat, like buttering toast.
- Arrange the veggies: Start from the outer edge and work your way in. Create concentric circles using different vegetables. For example: outer circle of broccoli florets, next circle of carrot sticks, then cucumber rounds, then bell pepper strips, then cauliflower florets, and finally cherry tomatoes in the center. Leave a small gap in the very center for the dip web. Try to keep the circles even, but don’t stress about perfection—it’s supposed to look organic.
- Create the spider web: Take the remaining ranch dip and transfer it to a piping bag or zip-top bag with a small corner snipped off. Pipe a small circle of dip in the center of the platter (about 2 inches wide). Then pipe a larger circle around it (about 4 inches wide), then another (6 inches wide), and so on until you reach the outer edge. Now, starting from the center, pipe a straight line outward through all the circles. Repeat this every 45 degrees (like slicing a pizza into 8 slices). You should have a web pattern. If the lines aren’t perfect, use a toothpick to gently drag the dip from the circles toward the center—it creates a more realistic web effect.
- Make the spiders: Take the black olives. For each spider, use a whole olive for the body. Slice another olive lengthwise into thin strips for the legs. Place the whole olive in the center of the web or on the edge of the dip. Arrange 4 leg strips on each side of the body. You can make 2-3 spiders scattered around the web.
- Final touches: Sprinkle a few fresh chives or dill over the veggies for color. If you want extra drama, you can add a few edible flowers or a light dusting of paprika on the dip web for a spooky effect. Serve immediately or refrigerate until ready.
Time estimate: Prep time is about 20-25 minutes. No cooking time needed. Total time from start to finish is under 30 minutes, depending on how fast you chop.
Sensory cues: The dip should be smooth and creamy, not lumpy. The veggies should be crisp and cold—you should hear a satisfying crunch when you bite into them. The finished tray should look like a colorful wheel with white web lines radiating from the center. The black olives add a nice contrast against the white dip.
Cooking Tips & Techniques
I’ve made this tray about a dozen times now, and I’ve learned a few things the hard way. Here are my best tips:
- Dry your veggies thoroughly. This is the number one mistake I made the first time. Wet vegetables release moisture onto the platter, which makes the dip runny and the web pattern disappear. Pat everything dry with paper towels after washing.
- Soften the cream cheese properly. Cold cream cheese creates lumps that won’t smooth out. Leave it on the counter for 30 minutes before mixing. If you’re in a rush, microwave it for 10-15 seconds on low power, but watch it carefully—you don’t want it melted.
- Don’t overmix the dip. Once the cream cheese and sour cream are combined, stop. Overmixing can make the dip thin and watery. You want it thick enough to hold its shape when piped.
- Use a toothpick for web details. If your piped lines aren’t perfect, use a toothpick to gently drag the dip from the circles toward the center. This creates a more realistic spider web effect and hides any messy piping.
- Chill before serving. If you have time, let the assembled tray sit in the fridge for 15-20 minutes before serving. This helps the dip firm up and the veggies stay extra cold. Just cover it with plastic wrap first.
- Prep veggies the night before. You can wash and cut all the vegetables up to 24 hours in advance. Store them in separate zip-top bags with a paper towel to absorb moisture. Then assembly takes just 10 minutes on party day.
I once forgot to soften the cream cheese and ended up with lumpy dip. I tried to fix it by adding more buttermilk, which made it runny. The web pattern looked like a melted snowflake. Learn from my mistakes—soften that cream cheese!
Variations & Adaptations
This recipe is incredibly flexible. Here are some ways to make it your own:
Dietary Variations
- Dairy-Free: Use dairy-free cream cheese and sour cream. I’ve tried Kite Hill and it works well. The texture is slightly thinner, so add a bit less buttermilk.
- Gluten-Free: Most ranch seasoning is gluten-free, but double-check the label. Serve with gluten-free crackers or additional veggies.
- Low-Carb/Keto: This is already low-carb! Just skip the carrots (they’re higher in sugar) and add more cucumber, bell peppers, and celery.
- Vegan: Use vegan cream cheese and sour cream. Add a tablespoon of lemon juice for tanginess. The veggies are naturally vegan.
Flavor Twists
- Spicy Ranch: Add 1/2 teaspoon of cayenne pepper or a diced jalapeño to the dip for a kick.
- Herb Garden: Mix in fresh basil, parsley, and oregano instead of chives and dill.
- Buffalo Style: Stir in 2 tablespoons of hot sauce to the dip and serve with celery sticks and carrot sticks.
- Smoky Ranch: Add 1/2 teaspoon of smoked paprika to the dip for a deeper flavor.
Other Vegetable Ideas
- Roasted Veggies: For a warmer version, roast broccoli, cauliflower, and bell peppers at 400°F for 15 minutes, then let cool before arranging. The dip can be served warm or cold.
- Seasonal Swaps: In summer, add grilled zucchini slices or fresh corn kernels. In winter, use roasted root vegetables like parsnips and sweet potatoes.
- Fruit Additions: Add apple slices or grapes for a sweet contrast. Just toss them in lemon juice to prevent browning.
My personal favorite variation is the spicy ranch—I add a diced jalapeño and a pinch of cayenne. It gives the dip a subtle heat that pairs perfectly with the cool, crunchy veggies. I’ve also made a “monster” version by using green bell pepper strips for the web lines instead of white dip. It looked like a swamp web. Not my finest moment, but the kids loved it.
Serving & Storage Suggestions
This tray is best served cold, straight from the fridge. The contrast between the cold, crunchy vegetables and the creamy, tangy dip is what makes it so satisfying. Here’s how to serve and store it:
- Serving temperature: Serve chilled, but not ice-cold. Let it sit at room temperature for 10 minutes before serving so the dip softens slightly. This makes it easier to scoop.
- Presentation: Place the platter on a larger board or tablecloth to catch any stray veggies. Add a small sign that says “Spider Web Veggie Tray” for a fun touch. I like to scatter a few fake plastic spiders around the board for extra Halloween flair.
- Complementary dishes: This tray pairs beautifully with a cheese board, a bowl of warm soup, or a platter of mini sandwiches. For drinks, serve with apple cider, pumpkin beer, or a crisp white wine like Sauvignon Blanc.
- Storage: Leftover veggies and dip can be stored separately in airtight containers in the refrigerator for up to 3 days. The dip will thicken as it chills—just stir it before serving. The vegetables will lose some crunch over time, so they’re best eaten within 24 hours.
- Reheating: This is a cold appetizer, so no reheating needed. If you made the roasted veggie variation, you can reheat the veggies in a 350°F oven for 5-7 minutes, but the dip should stay cold.
- Flavor development: The dip actually tastes better after a few hours in the fridge—the flavors meld together and deepen. If you’re making this a day ahead, prepare the dip and cut the veggies, but don’t assemble until just before serving. The web pattern will start to blur after a few hours.
Nutritional Information & Benefits
This veggie tray is a healthy option for any gathering. Here’s a rough estimate per serving (based on 8 servings):
- Calories: 180-220 per serving
- Fat: 14g (mostly from cream cheese and sour cream)
- Carbohydrates: 12g (from vegetables)
- Fiber: 4g
- Protein: 5g
- Sugar: 6g (natural sugars from vegetables)
Health benefits: This tray is packed with vitamins and antioxidants. Broccoli and cauliflower are rich in vitamin C and fiber. Bell peppers provide vitamin A and beta-carotene. Carrots are excellent for eye health due to their high vitamin A content. The ranch dip, while indulgent, offers calcium and protein from the dairy. If you use Greek yogurt instead of sour cream, you’ll add probiotics for gut health.
Dietary considerations: This recipe is naturally low-carb and can be made gluten-free, dairy-free, or vegan with simple substitutions. It contains dairy (cream cheese, sour cream) and may contain gluten (check ranch seasoning label). It’s nut-free and egg-free as written.
I personally love that this tray lets people indulge in a creamy, satisfying dip while still eating a ton of vegetables. It’s the kind of snack that makes you feel good about yourself—like you’re being healthy, but you’re also having fun. That’s a win in my book.
Conclusion
This Cozy Spider Web Veggie Tray with Ranch Dip is more than just a Halloween appetizer—it’s a lifesaver for anyone who’s ever forgotten about a party, run out of time, or needed a crowd-pleaser that doesn’t require an oven. It’s quick, easy, and looks like you spent hours on it when you really spent twenty minutes and a lot of hope.
I love this recipe because it reminds me that sometimes the best things come from panic and a half-empty fridge. It’s proof that you don’t need fancy ingredients or elaborate techniques to create something memorable. Just a little creativity, a good dip, and the willingness to arrange vegetables in a circle.
I’d love to hear how yours turns out! Did you add your own twist? Did the kids actually eat the broccoli? Let me know in the comments below. And if you’re looking for more easy, fun appetizers, check out my Halloween party snacks collection for more ideas. Happy Halloween, and happy snacking!
Frequently Asked Questions
Can I make this veggie tray a day ahead?
Yes, but with a caveat. You can prepare the dip and cut the vegetables up to 24 hours in advance. Store them separately in the fridge. Assemble the tray no more than 2-3 hours before serving, or the web pattern will start to blur and the vegetables may release moisture.
What if I don’t have a round platter?
No problem! You can use a rectangular or square serving board. Just arrange the veggies in concentric oval shapes instead of circles. The web pattern can be adjusted to fit. A large cutting board or even a clean baking sheet works in a pinch.
Can I use store-bought ranch dip instead of making my own?
Absolutely. If you’re short on time, use your favorite store-bought ranch dip. Just make sure it’s thick enough to pipe—if it’s too thin, it won’t hold the web pattern. You can thicken it by adding a little extra cream cheese or sour cream.
How do I keep the veggies from getting soggy?
The key is to dry them thoroughly after washing. Use a salad spinner or pat them dry with paper towels. Also, don’t assemble the tray too far in advance—the moisture from the veggies will eventually seep into the dip. If you’re serving over several hours, you can refresh the tray by replacing any wilted veggies.
Can I use different vegetables?
Of course! Feel free to swap in any vegetables you like. Celery sticks, radishes, jicama sticks, asparagus spears, and snap peas all work great. Just make sure to cut them into similar-sized pieces so the tray looks balanced. For a colorful tray, aim for a mix of green, orange, red, and white vegetables.
PrintCozy Spider Web Veggie Tray with Ranch Dip

A quick and easy Halloween appetizer that looks like you spent hours on it. This veggie tray features a creamy homemade ranch dip arranged in a spider web pattern, surrounded by fresh, crunchy vegetables.
- Prep Time: 20 minutes
- Cook Time: 0 minutes
- Total Time: 25 minutes
- Yield: 8 servings 1x
- Category: Appetizer
- Cuisine: American
Ingredients
- 8 oz cream cheese, softened
- 1/2 cup sour cream
- 1 packet (1 oz) ranch seasoning mix
- 1/4 cup buttermilk
- 1 clove garlic, minced (optional)
- 1 tablespoon fresh chives or dill, chopped
- 1 large head of broccoli, cut into florets
- 1 large head of cauliflower, cut into florets
- 1 bag (16 oz) baby carrots
- 1 English cucumber, sliced into rounds
- 1 pint cherry tomatoes
- 1 red bell pepper, sliced into strips
- 1 yellow bell pepper, sliced into strips
- 1 cup sugar snap peas or snow peas
- 1/4 cup ranch dip (reserved from above)
- 1/4 cup cream cheese, softened
- 6–8 pitted black olives
Instructions
- Make the ranch dip: In a large bowl, combine the softened cream cheese, sour cream, ranch seasoning mix, buttermilk, and minced garlic (if using). Beat with an electric mixer on medium speed until smooth and creamy, about 2-3 minutes. Scrape down the sides once or twice. Fold in the fresh chives or dill. Taste and adjust seasoning—add a pinch of salt or pepper if needed. Set aside 1/4 cup of the dip for the spider web design. Cover and refrigerate the rest until ready to use.
- Prep the vegetables: Wash and dry all vegetables thoroughly. Cut the broccoli and cauliflower into bite-sized florets. Slice the cucumber into rounds about 1/4-inch thick. Slice the bell peppers into strips about 1/2-inch wide. Leave the cherry tomatoes whole. If using sugar snap peas, trim the ends. Pat everything dry with paper towels—wet veggies will make the dip watery.
- Prepare the platter: Take your large round platter or serving board. Using the offset spatula or a butter knife, spread the reserved 1/4 cup of ranch dip in a thin, even layer over the entire surface of the platter. This base layer helps the veggies stick and adds flavor to every bite. Don’t go too thick—you want a thin coat, like buttering toast.
- Arrange the veggies: Start from the outer edge and work your way in. Create concentric circles using different vegetables. For example: outer circle of broccoli florets, next circle of carrot sticks, then cucumber rounds, then bell pepper strips, then cauliflower florets, and finally cherry tomatoes in the center. Leave a small gap in the very center for the dip web. Try to keep the circles even, but don’t stress about perfection—it’s supposed to look organic.
- Create the spider web: Take the remaining ranch dip and transfer it to a piping bag or zip-top bag with a small corner snipped off. Pipe a small circle of dip in the center of the platter (about 2 inches wide). Then pipe a larger circle around it (about 4 inches wide), then another (6 inches wide), and so on until you reach the outer edge. Now, starting from the center, pipe a straight line outward through all the circles. Repeat this every 45 degrees (like slicing a pizza into 8 slices). You sh…
- Make the spiders: Take the black olives. For each spider, use a whole olive for the body. Slice another olive lengthwise into thin strips for the legs. Place the whole olive in the center of the web or on the edge of the dip. Arrange 4 leg strips on each side of the body. You can make 2-3 spiders scattered around the web.
- Final touches: Sprinkle a few fresh chives or dill over the veggies for color. If you want extra drama, you can add a few edible flowers or a light dusting of paprika on the dip web for a spooky effect. Serve immediately or refrigerate until ready.
Notes
For best results, soften cream cheese properly and dry vegetables thoroughly. The dip can be made a day ahead; assemble the tray no more than 2-3 hours before serving to maintain the web pattern. For a dairy-free version, use dairy-free cream cheese and sour cream. For a vegan version, use vegan cream cheese and sour cream and add lemon juice for tanginess.
Nutrition
- Serving Size: 1 serving (about 1 c
- Calories: 200
- Sugar: 6
- Sodium: 350
- Fat: 14
- Saturated Fat: 8
- Carbohydrates: 12
- Fiber: 4
- Protein: 5
Keywords: Halloween, veggie tray, spider web, ranch dip, appetizer, party snack, easy, no-cook


