Someone asked me why I couldn’t just use regular flour to thicken the green bean casserole. It was my sister-in-law, Maria, standing in my kitchen two days before Thanksgiving, watching me stress over a gluten-free version of a classic dish. I started to explain why that wouldn’t work — then stopped. Honestly, I had no good reason. I’d been so focused on making it “authentically gluten-free” that I’d completely overthought the whole thing. She was right. Why not just skip the thickener altogether and let the creamy mushroom soup do its job?
That moment, I’m not gonna lie, humbled me a bit. Here I was, the self-proclaimed “gluten-free expert” of the family, and Maria — who doesn’t even eat gluten-free — had just solved my biggest hurdle in under ten seconds. I laughed, handed her a spoon, and said, “Okay, you’re in charge of taste-testing.” And honestly, that was the best decision I made all holiday season.
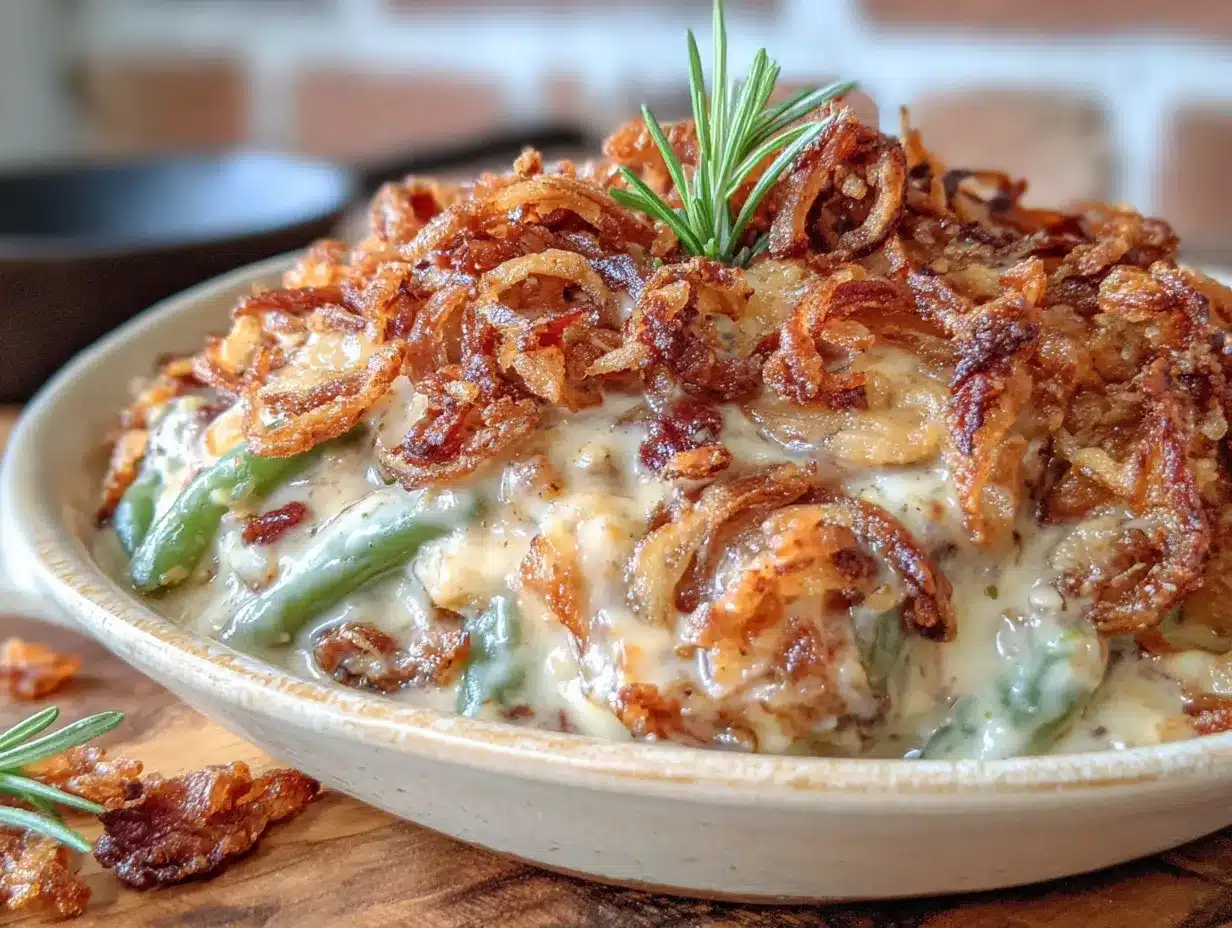
The result? A Crowd-Pleasing Gluten-Free Green Bean Casserole that didn’t just survive the dinner table — it stole the show. My dad, who claims he can “always tell” when something is gluten-free, went back for seconds. My cousin Dave, who’s been known to skip the green bean casserole entirely, asked for the recipe. And me? I learned that sometimes the best cooking advice comes from the person who isn’t trying to be a chef. They’re just trying to help you make dinner.
Maybe you’ve been there — stuck in your own head about a recipe, convinced there’s only one “right” way to do it. Let me tell you, this is the dish that taught me to loosen up. And it’s the one I keep coming back to, year after year, because it’s reliable, it’s forgiving, and it makes everyone at the table happy. Even the gluten-eaters.
Why You’ll Love This Recipe
This isn’t just another green bean casserole. This is the one that makes people forget it’s gluten-free. I’ve tested this recipe more times than I can count — at family dinners, potlucks, and even a neighborhood block party where I was definitely being judged by a woman named Karen with a famous mac and cheese. It passed every single test.
- Quick & Easy: Comes together in under 45 minutes, with only 15 minutes of active prep. Perfect for busy holiday mornings or last-minute dinner invites.
- Simple Ingredients: No fancy grocery trips needed. You likely already have most of these in your pantry — just swap in gluten-free pantry staples.
- Perfect for Hosting: Great for Thanksgiving, Christmas, Easter, or any potluck where you need a dish that disappears fast. It scales beautifully for crowds.
- Crowd-Pleaser: Always gets rave reviews from kids and adults alike. I’ve served it to gluten-free guests and gluten-loving relatives — everyone goes back for seconds.
- Unbelievably Delicious: The texture is creamy, the topping is crispy, and the flavor is pure comfort. No one will miss the traditional version.
What makes this recipe different from the rest? It’s the technique. Most gluten-free versions rely on canned cream of mushroom soup that’s labeled gluten-free, which can be hit or miss. I use a homemade creamy sauce that’s naturally thick, rich, and absolutely foolproof. The secret is a simple roux made with gluten-free all-purpose flour — it works perfectly, I promise. Plus, the crispy fried onion topping? It’s homemade, too. And it stays crispy even after sitting out on the buffet table for an hour.
This recipe isn’t just good — it’s the kind that makes you close your eyes after the first bite. It’s comfort food reimagined: healthier, faster, but with the same soul-soothing satisfaction. Perfect for impressing guests without stress, or turning a simple side dish into something memorable.
What Ingredients You Will Need
This recipe uses simple, wholesome ingredients to deliver bold flavor and satisfying texture without the fuss. Most of these are pantry staples, and I’ve included substitution notes where they matter most.
For the Green Bean Casserole Base
- 1 ½ pounds fresh green beans, trimmed and halved (about 6 cups) — Fresh is best here for texture and color. Frozen works in a pinch, but thaw and pat them dry first to avoid watery casserole.
- 2 tablespoons unsalted butter (or dairy-free butter for a dairy-free option) — Adds richness to the sauce. I prefer Kerrygold for its creamy flavor.
- 8 ounces cremini mushrooms, sliced — Baby bella or white mushrooms both work. Cremini give a deeper, earthier flavor.
- 1 medium yellow onion, diced — About 1 cup. Sweet onion works too if that’s what you have.
- 3 cloves garlic, minced — Fresh garlic is non-negotiable here. It adds that savory backbone.
- ¼ cup gluten-free all-purpose flour — I recommend Bob’s Red Mill 1-to-1 Baking Flour or King Arthur Measure for Measure. These have xanthan gum already added, which helps the sauce thicken properly.
- 2 cups whole milk (or unsweetened oat milk for dairy-free) — Whole milk gives the creamiest result. Oat milk is my go-to dairy-free option because it’s naturally thick.
- 1 cup low-sodium chicken or vegetable broth — Low-sodium is key so you can control the salt level. I use Better Than Bouillon in gluten-free vegetable base.
- 1 teaspoon salt — Plus more to taste. I use fine sea salt.
- ½ teaspoon black pepper — Freshly ground is best.
- ¼ teaspoon smoked paprika — Optional but adds a lovely subtle smokiness.
- ¼ teaspoon ground nutmeg — Trust me on this one. It’s a classic pairing with creamy mushroom sauces.
For the Crispy Fried Onion Topping
- 2 medium yellow onions, thinly sliced into rings — About 2 cups. Slice them as evenly as possible for even frying.
- 1 cup buttermilk (or 1 cup milk + 1 tablespoon lemon juice, let sit 5 minutes) — This helps the coating stick and adds tang.
- 1 cup gluten-free all-purpose flour — Same brand recommendation as above.
- 1 teaspoon salt
- ½ teaspoon black pepper
- ½ teaspoon garlic powder
- ½ teaspoon paprika
- Vegetable or canola oil, for frying — About 2 cups, enough for shallow frying.
Ingredient Selection Tip: Look for firm, bright green beans with no brown spots. If using frozen green beans, choose the “harvest” or “whole” variety rather than cut — they hold up better during cooking.
Substitution Guidance: For a gluten-free and dairy-free version, use dairy-free butter and unsweetened oat milk. The sauce will still be creamy and delicious. For the fried onions, you can use store-bought gluten-free fried onions if you’re short on time — just check the label for certified gluten-free. I like the ones from Whole Foods’ 365 brand.
Equipment Needed
You don’t need a professional kitchen to pull this off. Here’s what I use every time I make this casserole:
- Large pot for blanching the green beans — A 6-quart pot works perfectly. If you don’t have one, a large Dutch oven works too.
- Large skillet or sauté pan for the sauce and mushrooms — A 12-inch skillet is ideal. I use a stainless steel one for even browning.
- 9×13-inch baking dish — Standard size for a crowd. An 11×7-inch dish works for a smaller batch.
- Medium bowl for the buttermilk soak — Any mixing bowl works.
- Shallow dish or pie plate for the flour coating — Makes dredging easier.
- Deep skillet or heavy-bottomed pot for frying onions — A cast-iron skillet is my favorite for even heat distribution.
- Slotted spoon or spider strainer — For removing fried onions from oil. Tongs work in a pinch.
- Paper towels — For draining the fried onions.
- Whisk — For making the sauce smooth and lump-free.
Budget-Friendly Tip: If you don’t have a deep skillet for frying, a regular saucepan works fine. Just use less oil and fry in batches. And if you’re short on time, skip the homemade fried onions and use a store-bought gluten-free version. No judgment here!
Preparation Method
Let’s get cooking. This recipe has a few steps, but I promise it’s straightforward. I’ve included timing estimates and sensory cues so you know exactly what to look for.
Step 1: Blanch the Green Beans
Bring a large pot of salted water to a rolling boil. Add the trimmed green beans and cook for exactly 3 minutes. You want them bright green and still crisp-tender — not mushy. Immediately transfer them to a bowl of ice water to stop the cooking process. This is called “shocking” and it locks in that gorgeous color. Drain well and set aside. (Pro tip: Do this step up to 2 days ahead and store the blanched beans in the fridge.)
Step 2: Make the Creamy Mushroom Sauce
In a large skillet over medium heat, melt the butter. Add the sliced mushrooms and cook for 5-7 minutes, stirring occasionally, until they release their liquid and start to brown. You’ll hear a gentle sizzle — that’s the sound of flavor developing. Add the diced onion and cook for another 3-4 minutes until softened and translucent. Stir in the minced garlic and cook for 30 seconds until fragrant. (Don’t skip this — raw garlic is harsh, but cooked garlic is magic.)
Sprinkle the gluten-free flour over the mushroom mixture and stir constantly for 1-2 minutes. This cooks out the raw flour taste. The mixture will look thick and pasty — that’s fine. Slowly pour in the milk and broth while whisking continuously. Keep whisking until the sauce thickens, about 3-4 minutes. It should coat the back of a spoon. Season with salt, pepper, smoked paprika, and nutmeg. Taste and adjust seasoning. (I always add a pinch more salt at this stage — the green beans will absorb some of it later.)
Step 3: Make the Crispy Fried Onions
While the sauce simmers, prepare the onions. Place the sliced onions in a bowl with the buttermilk and let them soak for 10 minutes. This tenderizes them and helps the coating stick. In a shallow dish, whisk together the gluten-free flour, salt, pepper, garlic powder, and paprika.
Heat about ½ inch of oil in a deep skillet over medium-high heat. To test if it’s ready, drop a tiny bit of flour in the oil — if it sizzles immediately, you’re good. Working in batches, dredge the soaked onion rings in the seasoned flour, shaking off excess. Carefully place them in the hot oil. Fry for 2-3 minutes per side until golden brown and crispy. Transfer to a paper towel-lined plate and sprinkle with a little salt while still hot. (Resist the urge to eat them all before the casserole is assembled — I speak from experience.)
Step 4: Assemble the Casserole
Preheat your oven to 375°F (190°C). In a large bowl, combine the blanched green beans with the creamy mushroom sauce. Stir gently until every bean is coated. Transfer the mixture to a greased 9×13-inch baking dish and spread it into an even layer.
Bake uncovered for 20 minutes, until the sauce is bubbly around the edges. Remove from the oven and top with the crispy fried onions. Return to the oven and bake for another 8-10 minutes, until the onions are deep golden and the casserole is hot all the way through. (The onions will soften slightly on top, but they’ll still have that satisfying crunch.)
Step 5: Rest and Serve
Let the casserole rest for 5-10 minutes before serving. This allows the sauce to set slightly, making it easier to scoop. Garnish with fresh parsley if you’re feeling fancy — it adds a nice pop of color.
Cooking Tips & Techniques
I’ve made this casserole at least a dozen times, and I’ve learned a few things the hard way. Here are my best tips for success:
- Don’t skip the blanching step. I once tried to save time by using raw green beans, thinking they’d cook enough in the oven. They didn’t. The beans were tough and the casserole was watery. Blanching ensures tender beans and prevents a soggy dish.
- Use a good gluten-free flour blend. Not all gluten-free flours are created equal. Blends with xanthan gum (like Bob’s Red Mill 1-to-1) thicken sauces beautifully. Rice flour alone will leave you with a gritty sauce. Trust me on this one — I learned the hard way.
- Toast the flour in the pan. When you add the flour to the mushroom mixture, cook it for a full 2 minutes while stirring. This removes the raw, pasty taste and gives the sauce a nutty depth. You’ll notice the color deepen slightly.
- Season in layers. Add salt at every stage — when blanching the beans, when cooking the mushrooms, and when finishing the sauce. This builds flavor from the ground up. Just be careful not to over-salt at the end.
- Fry the onions in batches. Crowding the pan lowers the oil temperature and gives you soggy onions. Fry in small batches and let the oil come back up to temperature between batches. Patience pays off here.
- Make ahead tip: You can assemble the casserole (without the topping) up to 2 days in advance. Just cover and refrigerate. When ready to bake, add 10 minutes to the initial baking time, then top with onions and finish baking.
Variations & Adaptations
This recipe is incredibly flexible. Here are some of my favorite variations:
Dairy-Free Version
Swap the butter for dairy-free butter (I like Miyoko’s or Country Crock Plant Butter) and use unsweetened oat milk instead of whole milk. The sauce will still be creamy and delicious. For the fried onions, use a dairy-free buttermilk alternative — just add a tablespoon of lemon juice to oat milk and let it sit for 5 minutes.
Vegan Version
Follow the dairy-free version above, and use vegetable broth instead of chicken broth. For the fried onions, the buttermilk soak can be made with plant milk and lemon juice. The result is just as crispy and satisfying.
Add Protein
For a main dish version, add 2 cups of shredded rotisserie chicken or cooked bacon crumbles to the sauce before baking. I’ve done this for a weeknight dinner and it’s a hit. Just reduce the salt slightly since the chicken adds its own seasoning.
Spicy Kick
Add ½ teaspoon of red pepper flakes to the mushroom mixture when cooking. Or stir in a diced jalapeño (seeds removed) for a subtle heat that builds as you eat. My brother-in-law loves this version.
Roasted Mushroom Variation
Instead of sautéing the mushrooms, roast them at 400°F for 15 minutes before adding to the sauce. This concentrates their flavor and adds a deeper, almost meaty richness. It’s a game-changer if you have the extra time.
Serving & Storage Suggestions
This casserole is designed to be the star of your holiday table, but it’s versatile enough for any gathering.
Serving Suggestions
Serve this casserole hot, right out of the oven. It pairs beautifully with roasted turkey, honey-glazed ham, or even a simple roast chicken. For a complete holiday spread, serve it alongside mashed potatoes, cranberry sauce, and dinner rolls. If you’re hosting a potluck, keep it warm in a slow cooker on the “keep warm” setting — just add the fried onions right before serving to keep them crispy.
Storage Instructions
Store leftovers in an airtight container in the refrigerator for up to 4 days. The fried onions will soften over time, but the flavor will still be delicious. To reheat, place individual portions in the microwave for 1-2 minutes, or reheat the entire casserole in a 350°F oven for 15-20 minutes. If you want to restore some crunch, add a fresh sprinkle of fried onions after reheating.
Freezer Instructions
This casserole freezes beautifully. Assemble the casserole (without the fried onion topping) in a freezer-safe dish. Cover tightly with plastic wrap and foil. Freeze for up to 3 months. To bake, thaw overnight in the refrigerator, then bake as directed, adding 10 minutes to the initial baking time. Top with fresh fried onions before the final bake.
Flavor Development
Like many casseroles, this one tastes even better the next day. The flavors meld together overnight, and the sauce thickens slightly. I actually prefer leftovers over the fresh version — the mushrooms seem to deepen in flavor. Don’t be afraid to make it a day ahead.
Nutritional Information & Benefits
This recipe serves 8 as a side dish. Nutritional values are estimates and will vary based on specific ingredients used.
| Nutrient | Per Serving |
|---|---|
| Calories | 285 |
| Total Fat | 14g |
| Saturated Fat | 5g |
| Cholesterol | 25mg |
| Sodium | 520mg |
| Total Carbohydrates | 32g |
| Dietary Fiber | 4g |
| Sugars | 8g |
| Protein | 7g |
Health Benefits: Green beans are an excellent source of vitamin C, vitamin K, and fiber. Mushrooms provide B vitamins and selenium, which supports immune function. This dish is also naturally free of soy and nuts, making it suitable for many dietary needs. The gluten-free flour blend ensures it’s safe for those with celiac disease or gluten sensitivity.
Dietary Considerations: This recipe is gluten-free and can easily be made dairy-free or vegan with simple substitutions. It contains dairy in the butter and milk, and eggs are not used in this version. Always check labels on store-bought ingredients to ensure they are certified gluten-free.
Conclusion
This Crowd-Pleasing Gluten-Free Green Bean Casserole has become my go-to dish for every holiday gathering. It’s the one that gets requested, the one that disappears first, and the one that makes people ask, “Wait, this is gluten-free?” Honestly, I love that moment. It’s a reminder that good food doesn’t need to be complicated or restrictive. It just needs to be made with care and a little bit of love.
I hope you give this recipe a try — and I hope it becomes a tradition in your home, too. Don’t be afraid to make it your own. Add extra mushrooms, skip the nutmeg, or double the fried onions (I won’t tell). The best recipes are the ones that adapt to you.
If you make this casserole, I’d love to hear about it! Leave a comment below and let me know how it turned out. Did you try a variation? Did your gluten-eating guests go back for seconds? Share your story — I read every single comment. And if you loved it, please share this recipe with a friend who needs a reliable gluten-free side dish. Happy cooking, friends!
Frequently Asked Questions
Can I use frozen green beans instead of fresh?
Yes, you can use frozen green beans. Thaw them completely and pat them dry with paper towels to remove excess moisture. Blanch them for 2 minutes instead of 3, since they’re already partially cooked. The texture will be slightly softer than fresh, but still delicious.
How do I keep the fried onions crispy?
The key is to add them during the last 10 minutes of baking. If you add them too early, they’ll absorb moisture from the sauce and become soggy. For extra crunch, you can also broil the casserole for 1-2 minutes after adding the onions — just watch closely so they don’t burn.
Can I make this casserole ahead of time?
Absolutely! Assemble the casserole (without the fried onion topping) up to 2 days in advance. Cover and refrigerate. When ready to bake, add 10 minutes to the initial baking time, then top with fresh fried onions and finish baking. This is a lifesaver for holiday hosting.
What gluten-free flour blend do you recommend?
I recommend Bob’s Red Mill 1-to-1 Baking Flour or King Arthur Measure for Measure. Both contain xanthan gum, which helps the sauce thicken properly. Avoid single-ingredient flours like rice flour or almond flour — they won’t create the same creamy texture.
Can I use store-bought gluten-free fried onions?
Yes, if you’re short on time. Look for certified gluten-free fried onions at your grocery store. Whole Foods’ 365 brand makes a good option. Just keep in mind that homemade ones are crispier and have a more intense flavor. If using store-bought, add them during the last 5 minutes of baking to prevent them from burning.
PrintCrowd-Pleasing Gluten-Free Green Bean Casserole
A creamy, crispy green bean casserole that’s completely gluten-free and so delicious even gluten-eaters go back for seconds. Perfect for Thanksgiving, Christmas, or any potluck.
- Prep Time: 15 minutes
- Cook Time: 30 minutes
- Total Time: 45 minutes
- Yield: 8 servings 1x
- Category: Side Dish
- Cuisine: American
Ingredients
- 1 ½ pounds fresh green beans, trimmed and halved (about 6 cups)
- 2 tablespoons unsalted butter (or dairy-free butter)
- 8 ounces cremini mushrooms, sliced
- 1 medium yellow onion, diced
- 3 cloves garlic, minced
- ¼ cup gluten-free all-purpose flour
- 2 cups whole milk (or unsweetened oat milk)
- 1 cup low-sodium chicken or vegetable broth
- 1 teaspoon salt
- ½ teaspoon black pepper
- ¼ teaspoon smoked paprika
- ¼ teaspoon ground nutmeg
- 2 medium yellow onions, thinly sliced into rings (for topping)
- 1 cup buttermilk (or 1 cup milk + 1 tablespoon lemon juice)
- 1 cup gluten-free all-purpose flour (for topping)
- 1 teaspoon salt (for topping)
- ½ teaspoon black pepper (for topping)
- ½ teaspoon garlic powder (for topping)
- ½ teaspoon paprika (for topping)
- Vegetable or canola oil, for frying
Instructions
- Bring a large pot of salted water to a rolling boil. Add the trimmed green beans and cook for exactly 3 minutes. Immediately transfer to a bowl of ice water to stop the cooking process. Drain well and set aside.
- In a large skillet over medium heat, melt the butter. Add the sliced mushrooms and cook for 5-7 minutes until they release their liquid and start to brown. Add the diced onion and cook for 3-4 minutes until softened. Stir in the minced garlic and cook for 30 seconds until fragrant.
- Sprinkle the gluten-free flour over the mushroom mixture and stir constantly for 1-2 minutes. Slowly pour in the milk and broth while whisking continuously. Keep whisking until the sauce thickens, about 3-4 minutes. Season with salt, pepper, smoked paprika, and nutmeg. Taste and adjust seasoning.
- For the crispy fried onions: Place the sliced onions in a bowl with the buttermilk and let them soak for 10 minutes. In a shallow dish, whisk together the gluten-free flour, salt, pepper, garlic powder, and paprika.
- Heat about ½ inch of oil in a deep skillet over medium-high heat. Working in batches, dredge the soaked onion rings in the seasoned flour, shaking off excess. Fry for 2-3 minutes per side until golden brown and crispy. Transfer to a paper towel-lined plate and sprinkle with salt.
- Preheat oven to 375°F (190°C). In a large bowl, combine the blanched green beans with the creamy mushroom sauce. Stir gently until every bean is coated. Transfer to a greased 9×13-inch baking dish and spread into an even layer.
- Bake uncovered for 20 minutes, until the sauce is bubbly around the edges. Remove from the oven and top with the crispy fried onions. Return to the oven and bake for another 8-10 minutes, until the onions are deep golden and the casserole is hot all the way through.
- Let the casserole rest for 5-10 minutes before serving. Garnish with fresh parsley if desired.
Notes
For a dairy-free version, use dairy-free butter and unsweetened oat milk. For a vegan version, use vegetable broth and plant-based milk. The casserole can be assembled (without topping) up to 2 days ahead. Store leftovers in an airtight container in the refrigerator for up to 4 days. Freezes well for up to 3 months.
Nutrition
- Serving Size: 1 serving (about 1 c
- Calories: 285
- Sugar: 8
- Sodium: 520
- Fat: 14
- Saturated Fat: 5
- Carbohydrates: 32
- Fiber: 4
- Protein: 7
Keywords: gluten-free green bean casserole, green bean casserole, gluten-free side dish, Thanksgiving side dish, holiday casserole, gluten-free recipe


